Love this? Save it for later!
Share the inspiration with your friends
That deep, inky blackness — the kind that swallows the kitchen light whole — still takes me straight to a frosty October evening in 2014. I was twenty-two, living in a drafty apartment with windows that rattled every time the wind picked up. It wasn’t just any Halloween; it was the night I decided to bake something that didn’t look like pumpkin or apple, but something truly ominous. The batter was thick, almost heavy, and smelled of bitter cocoa and rich buttermilk. I remember staring at the bowl, wondering if I had added too much black food coloring, or if this was just how magic looked before it happened.
I pulled the cake from the oven, and the scent of vanilla and dark chocolate drifted through the hallway, chasing away the chill. When I finally frosted it with that bright, zesty orange buttercream, the contrast was shocking. It looked like a moon rising over a midnight forest. My friends arrived an hour later, shivering in their costumes, and when they saw it sitting on the counter, they didn’t even ask for a slice immediately. They just stared. It was eerie, beautiful, and completely irresistible. That first bite was soft, tender, and packed with a flavor that felt like autumn wrapped in a blanket. I knew right then that this wasn’t just a cake; it was a centerpiece that demanded attention.
I’ve made this spooky black velvet Halloween cake with orange buttercream dozens of times since then, in bigger houses and with larger crowds, but that first version holds a special place in my heart. It taught me that baking isn’t just about following instructions; it’s about creating a mood. The darkness of the cake balances the sweetness of the frosting, creating a taste profile that is both sophisticated and playful. You don’t need to be a professional pastry chef to pull this off. You just need to be willing to embrace the weirdness of it all. This recipe stuck with me because it turned a simple weekend baking session into a memory I still talk about. Let’s face it, Halloween is the one time of year we get to be a little dramatic with our food, and this cake is the perfect way to do it.
Why You’ll Love This Recipe
This isn’t just another dessert you whip up on a whim. This spooky black velvet Halloween cake with orange buttercream is the result of years of testing, tweaking, and perfecting the balance between a truly dark crumb and a frosting that doesn’t taste like pure sugar. I’ve spent countless hours in my kitchen trying to get the black color right without making the cake taste like ash or dirt. The secret lies in using high-quality cocoa powder and buttermilk, which adds a tangy depth that keeps the flavor from being one-dimensional. It’s the kind of cake that makes you close your eyes after the first bite because the texture is so impossibly soft.
Here is why this recipe stands out from the crowd:
- Quick & Easy: Despite its dramatic appearance, this cake comes together in under an hour of active time. It’s perfect for busy weeknights or last-minute Halloween parties where you need to impress without spending all day in the kitchen.
- Simple Ingredients: You likely already have most of these items in your pantry. Flour, sugar, cocoa, buttermilk, and food coloring are staples. No fancy grocery trips needed for obscure ingredients.
- Perfect for Halloween: The striking black-and-orange color scheme is iconic for the holiday. It’s great for potlucks, spooky dinner parties, or just treating yourself to something festive.
- Crowd-Pleaser: Kids love the spooky look, and adults appreciate the rich chocolate flavor. It always gets rave reviews because it looks way more complicated than it actually is.
- Unbelievably Delicious: The orange buttercream cuts through the richness of the dark cake, creating a flavor combo that is next-level comfort food. It’s like eating a piece of autumn.
What makes this different from other chocolate cakes is the specific technique used to achieve that jet-black hue. Many recipes rely on excessive food coloring, which can sometimes leave a metallic aftertaste. My method uses a generous amount of Dutch-processed cocoa powder, which is naturally darker and less acidic. This ensures the color is deep and matte, not glossy or artificial. It’s a small detail that makes a huge difference in the final presentation. Plus, the orange buttercream isn’t just for show; the citrus notes brighten up the heavy chocolate, making each slice feel lighter than it is.
What Ingredients You Will Need
This recipe uses simple, wholesome ingredients to deliver bold flavor and satisfying texture without the fuss. The beauty of this cake is that it relies on standard baking staples, but the proportions and types matter more than you might think. For the cake, we need ingredients that provide moisture and structure, while the buttercream relies on fat and sugar for that smooth, pipeable consistency. I’ve included notes on specific brands and types where they truly impact the outcome, based on my own kitchen trials.
- All-Purpose Flour (2 cups): The base of the cake. Don’t use self-rising flour, as the leavening agents will throw off the balance. If you need a gluten-free option, a 1:1 gluten-free flour blend works well here.
- Dutch-Processed Cocoa Powder (3/4 cup): This is non-negotiable for that deep black color. Regular natural cocoa powder is lighter and more acidic. I recommend Rodelle or Hershey’s Special Dark for the best results. It adds a rich, earthy chocolate flavor.
- Granulated Sugar (2 cups): Provides sweetness and helps tenderize the crumb. Brown sugar can be substituted for a moister cake, but it may affect the color slightly.
- Unsalted Butter (1 cup): Softened to room temperature. This adds richness and helps emulsify the batter. Use high-quality butter for the best flavor.
- Eggs (3 large): Room temperature eggs incorporate better into the batter, creating a smoother mixture. This helps avoid lumps in the final cake.
- Buttermilk (1 1/2 cups): The acidity in buttermilk reacts with the baking soda to create lift. It also keeps the cake moist. If you don’t have buttermilk, mix 1 tablespoon of vinegar or lemon juice with milk and let it sit for 10 minutes.
- Black Food Coloring Gel (1-2 tablespoons): Gel coloring is essential here. Liquid food coloring will add too much water to the batter, potentially ruining the texture. Look for a concentrated gel like Wilton or Sugarology.
- Heavy Cream (1 cup): For the orange buttercream, heavy cream is whipped with butter to create a light, airy frosting. Use cold cream for best whipping results.
- Orange Extract (1 teaspoon): Provides a strong citrus flavor that pairs perfectly with chocolate. You can use fresh orange zest for a more natural taste, but extract is more potent.
- Orange Food Coloring Gel (yellow and red): To get that vibrant Halloween orange, mix yellow and red gel colors. Avoid liquid dyes here as well.
Equipment Needed
You don’t need a fancy kitchen to bake this cake, but having the right tools makes the process much smoother. A reliable stand mixer or a sturdy hand mixer is helpful for creaming the butter and sugar, though you can do it by hand if you have strong arms. I personally prefer a stand mixer because it allows me to focus on adding ingredients gradually without worrying about splatter.
- Two 9-inch Round Cake Pans: Grease and flour these thoroughly, or line the bottoms with parchment paper. This prevents sticking and ensures easy removal.
- Mixing Bowls: You’ll need a large bowl for the dry ingredients and another for the wet. Having separate bowls keeps the process organized.
- Whisk and Spatula: A whisk is great for combining dry ingredients, while a rubber spatula is essential for folding in the batter and scraping down the sides of the bowl.
- Measuring Cups and Spoons: Accuracy is key in baking. Use metal measuring cups for dry ingredients and liquid measuring cups for wet ones.
- Cooling Rack: Essential for cooling the cakes evenly. Letting the cake cool in the pan can cause it to steam and become soggy.
- Piping Bags and Tips: Optional, but if you want to create spooky designs like spiderwebs or jack-o’-lantern faces, a piping bag with a star tip is very useful. A simple butter knife works for a rustic finish.
If you don’t have a stand mixer, a hand mixer works fine, but you’ll need to spend a few extra minutes beating the butter and sugar until it’s light and fluffy. For budget-friendly options, any basic hand mixer from a hardware store will do the job. Just ensure the beaters are clean and dry before starting.
Preparation Method
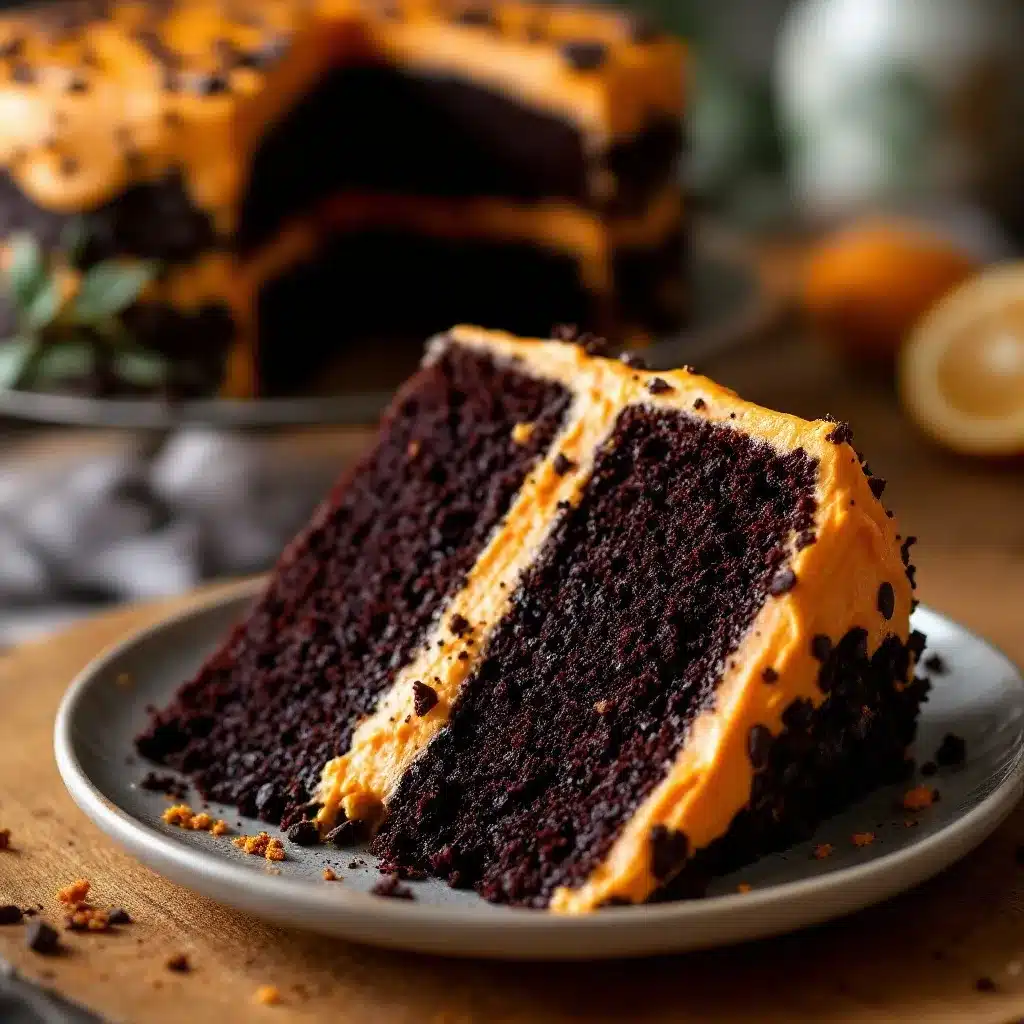
Let’s get into the nitty-gritty of baking this spooky black velvet Halloween cake with orange buttercream. This process is straightforward, but attention to detail will ensure your cake turns out moist, dark, and delicious. Follow these steps carefully for the best results.
- Prep Your Pans and Oven: Preheat your oven to 350°F (175°C). Grease two 9-inch round cake pans with butter or non-stick spray. Dust them with flour, tapping out the excess. Line the bottoms with parchment paper for extra insurance against sticking. This step takes about 5 minutes.
- Combine Dry Ingredients: In a large mixing bowl, whisk together the all-purpose flour, Dutch-processed cocoa powder, baking soda, baking powder, and salt. Whisking these together ensures even distribution of leavening agents and prevents clumps of cocoa powder in your final cake. Set aside.
- Cream Butter and Sugar: In a separate large bowl, beat the softened unsalted butter and granulated sugar together on medium-high speed for about 3-4 minutes. The mixture should become light, fluffy, and pale in color. This step incorporates air into the batter, which helps the cake rise. If you’re short on time, you can mix this by hand, but it will take longer.
- Add Eggs and Vanilla: Add the eggs one at a time, beating well after each addition. Mix in the vanilla extract. Scrape down the sides of the bowl with a spatula to ensure everything is evenly combined. The mixture should look creamy and smooth.
- Alternate Wet and Dry Ingredients: Reduce the mixer speed to low. Add the dry ingredients in three parts, alternating with the buttermilk in two parts, beginning and ending with the dry ingredients. Mix just until combined. Overmixing at this stage can make the cake tough. This takes about 2-3 minutes.
- Add Black Food Coloring: Add the black gel food coloring to the batter. Mix on low speed until the color is uniform. The batter should be a deep, inky black. If it’s not dark enough, add a bit more gel coloring. Be careful not to overmix.
- Bake the Cakes: Divide the batter evenly between the two prepared cake pans. Bake for 30-35 minutes, or until a toothpick inserted into the center comes out clean or with a few moist crumbs. Do not overbake, or the cake will be dry. The cakes are done when they spring back lightly to the touch.
- Cool the Cakes: Let the cakes cool in the pans for 10 minutes, then remove them from the pans and place them on a cooling rack to cool completely. This step is crucial; if you try to frost warm cake, the frosting will melt and slide off.
- Make the Orange Buttercream: While the cakes cool, prepare the frosting. Beat the softened butter until creamy. Add powdered sugar gradually, then mix in the heavy cream, orange extract, and orange gel food coloring. Beat on high speed for 3-4 minutes until light and fluffy. The frosting should be bright orange and smooth.
- Assemble the Cake: Place one cake layer on a serving plate. Spread a layer of orange buttercream on top. Place the second cake layer on top and frost the top and sides of the cake with the remaining buttercream. Use a spatula to create swirls or a smooth finish. Decorate with candy or edible decorations if desired.
Cooking Tips & Techniques
Baking a black velvet cake might seem intimidating, but there are a few tricks I’ve learned over the years that make all the difference. First, don’t skimp on the cocoa powder. The darkness of the cake comes from the cocoa, not just the food coloring. Using a high-quality Dutch-processed cocoa ensures a rich flavor and a deep color. I’ve made this cake with natural cocoa before, and the result was a dull brown, not the striking black I was aiming for.
Another common mistake is overmixing the batter after adding the flour. This develops gluten, which can make the cake dense and chewy instead of tender. Mix just until the ingredients are incorporated. Also, make sure your ingredients are at room temperature. Cold eggs and buttermilk can cause the butter to seize up, leading to a lumpy batter. If you forget to take them out, you can warm the eggs in a bowl of warm water for a few minutes.
When adding the black gel coloring, remember that a little goes a long way. Start with a tablespoon and add more if needed. Too much liquid coloring can throw off the batter’s consistency. Gel coloring is concentrated, so you only need a small amount to achieve that midnight hue. If you’re using liquid coloring, you’ll need to add a lot, which can make the cake watery. Trust me on this one; gel is worth the extra cost.
Finally, don’t rush the cooling process. I know it’s tempting to frost the cake as soon as it’s out of the oven, but warm cake will melt the buttercream. Use this time to prepare your decorations or clean up the kitchen. Patience pays off when you’re dealing with delicate frosting. If you’re in a hurry, you can place the cakes in the freezer for 15-20 minutes to speed up the cooling, but don’t leave them too long or they’ll freeze solid.
Variations & Adaptations
While the classic black velvet cake with orange buttercream is a Halloween staple, there are plenty of ways to tweak this recipe to suit your taste or dietary needs. Here are a few variations I’ve tried and loved.
- Gluten-Free Option: Swap the all-purpose flour for a 1:1 gluten-free baking blend. This works beautifully in this recipe, and you won’t notice any difference in texture. Just ensure your baking powder and cocoa powder are certified gluten-free.
- Dairy-Free Version: Use dairy-free butter and buttermilk alternatives, such as almond milk mixed with vinegar. The frosting can be made with coconut cream or dairy-free butter substitutes. The flavor remains rich and chocolatey.
- Spiced Variation: Add a teaspoon of pumpkin pie spice or cinnamon to the dry ingredients for a warmer, autumnal flavor. This pairs wonderfully with the orange buttercream.
- White Chocolate Twist: For a different color contrast, try making the frosting with white chocolate and orange zest. The white frosting will look like a full moon against the black cake.
- Mini Cupcakes: Divide the batter into cupcake liners and bake for 18-20 minutes. These are perfect for parties and easy to serve. Decorate each cupcake with a small orange fondant spider or bat.
One personal variation I love is adding a layer of orange marmalade between the cake layers. The tartness of the marmalade cuts through the sweetness of the buttercream and adds a burst of flavor. It’s a simple addition that elevates the cake from good to great. If you’re feeling adventurous, you can also add a splash of bourbon to the buttercream for a mature twist.
Serving & Storage Suggestions
This spooky black velvet Halloween cake with orange buttercream is best served at room temperature. Cold cake can taste denser, and the buttercream is smoother and more flavorful when it’s not chilled. Let the cake sit out for about 20-30 minutes before serving to allow the flavors to bloom.
For storage, cover the cake tightly with plastic wrap or place it in a cake carrier. It can be kept at room temperature for up to two days. If your kitchen is warm, you may need to refrigerate it, but bring it back to room temperature before serving. The cake can also be frozen. Wrap the layers individually in plastic wrap and foil, and freeze for up to three months. Thaw overnight in the refrigerator before frosting.
This cake pairs well with a cup of hot coffee or tea, which complements the chocolate flavor. For a festive touch, serve with a glass of orange juice or a spiced cider. Leftover cake makes for a great breakfast treat if you top it with a dollop of whipped cream. The flavors develop over time, so it often tastes even better the next day.
Nutritional Information & Benefits
While this cake is definitely a treat, it’s made with real ingredients that offer some nutritional benefits. Cocoa powder is rich in antioxidants, which can help protect your cells from damage. Butter and eggs provide protein and healthy fats, which help keep you full. The buttermilk adds calcium and probiotics, which are good for gut health.
Each slice contains approximately 450 calories, with 25g of fat, 55g of carbohydrates, and 6g of protein. This is a rich dessert, so a small slice is usually sufficient. If you’re watching your sugar intake, you can reduce the amount of powdered sugar in the frosting by half and use a sugar substitute. The cake is not naturally gluten-free or dairy-free, but adaptations are easy to make as noted in the variations section.
Conclusion
Making this spooky black velvet Halloween cake with orange buttercream is a fun and rewarding experience. It’s a dessert that looks impressive but is surprisingly easy to make. The combination of dark, moist cake and bright, citrusy frosting is a match made in heaven. I love this recipe because it brings a sense of whimsy to the holiday, and it always sparks conversation at parties. Whether you’re a seasoned baker or a beginner, this recipe is worth trying. Customize it with your own decorations and flavors to make it truly yours.
I’d love to hear how your cake turns out! Share your photos and experiences in the comments below. If you try any variations, let me know what worked for you. Happy baking, and happy Halloween!
Frequently Asked Questions
Can I use liquid food coloring instead of gel?
It’s not recommended. Liquid food coloring adds too much water to the batter, which can affect the texture and rise of the cake. Gel coloring is concentrated and doesn’t alter the consistency of the batter, ensuring a moist and tender crumb.
How do I get the cake to be jet black?
The key is using Dutch-processed cocoa powder, which is darker than natural cocoa. Combine this with a generous amount of black gel food coloring. Let the batter sit for 10 minutes after mixing; the color often deepens over time.
Can I make this cake ahead of time?
Yes! You can bake the cake layers up to two days in advance. Store them wrapped tightly in plastic wrap at room temperature. Make the frosting the day before and refrigerate. Bring the frosting to room temperature and re-whip before using.
What kind of cocoa powder should I use?
Use Dutch-processed cocoa powder. It has a darker color and a milder flavor compared to natural cocoa powder. This is essential for achieving the black velvet look and rich taste.
How long does the cake stay fresh?
The cake stays fresh for up to three days when stored in an airtight container at room temperature. If refrigerated, it can last up to five days, but bring it to room temperature before serving for the best flavor.
Pin This Recipe!
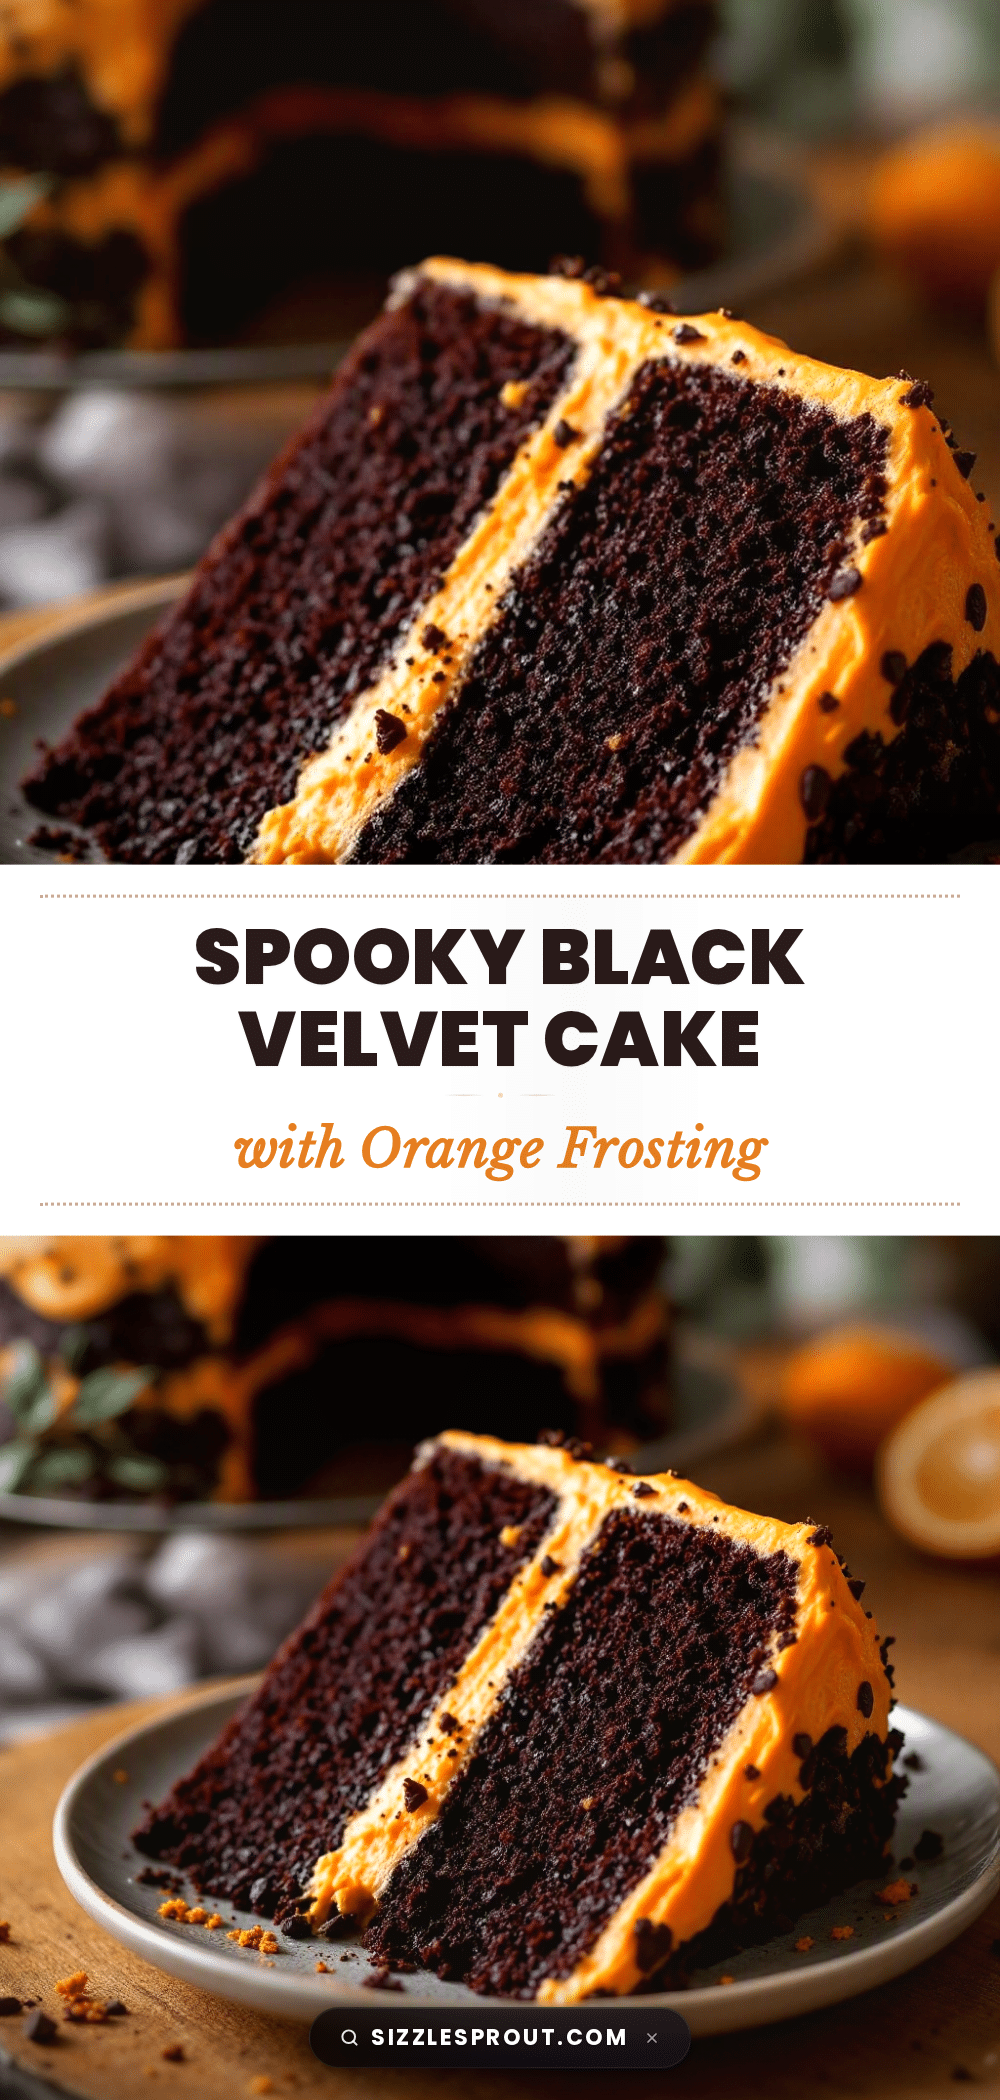
Spooky Black Velvet Cake: Best Halloween Dessert
A dramatic, deep black chocolate cake with a tangy buttermilk crumb, paired with bright, zesty orange buttercream. This Halloween centerpiece is easy to make, uses simple pantry staples, and delivers a sophisticated flavor profile that balances rich chocolate with citrus notes.
- Prep Time: 20 minutes
- Cook Time: 35 minutes
- Total Time: 55 minutes
- Yield: 12 servings 1x
- Category: Dessert
- Cuisine: American
Ingredients
- 2 cups All-Purpose Flour
- 3/4 cup Dutch-Processed Cocoa Powder
- 2 cups Granulated Sugar
- 1 cup Unsalted Butter (softened)
- 3 large Eggs (room temperature)
- 1 1/2 cups Buttermilk
- 1–2 tablespoons Black Food Coloring Gel
- 1 cup Heavy Cream (for frosting)
- 1 teaspoon Orange Extract
- Orange Food Coloring Gel (yellow and red mix)
- Powdered Sugar (for frosting)
- Baking Soda
- Baking Powder
- Salt
- Vanilla Extract
Instructions
- Preheat oven to 350°F (175°C). Grease and flour two 9-inch round cake pans, lining bottoms with parchment paper.
- In a large bowl, whisk together flour, cocoa powder, baking soda, baking powder, and salt.
- In a separate bowl, beat softened butter and granulated sugar on medium-high speed for 3-4 minutes until light and fluffy.
- Add eggs one at a time, beating well after each addition, then mix in vanilla extract.
- Reduce mixer speed to low. Add dry ingredients in three parts, alternating with buttermilk in two parts, beginning and ending with dry ingredients. Mix just until combined.
- Add black gel food coloring and mix on low until the batter is a uniform deep black.
- Divide batter evenly between prepared pans. Bake for 30-35 minutes or until a toothpick inserted comes out clean.
- Cool cakes in pans for 10 minutes, then transfer to a cooling rack to cool completely.
- While cakes cool, make the orange buttercream: Beat softened butter until creamy, gradually add powdered sugar, then mix in heavy cream, orange extract, and orange gel coloring. Beat on high for 3-4 minutes until light and fluffy.
- Assemble the cake: Place one layer on a plate, spread with buttercream, top with second layer, and frost top and sides with remaining buttercream.
Notes
Use Dutch-processed cocoa powder for the deepest black color. Gel food coloring is essential to avoid altering the batter’s texture. Ensure all ingredients are at room temperature for a smooth batter. Do not overmix the batter after adding flour to prevent a dense cake. Cool cakes completely before frosting to prevent melting.
Nutrition
- Serving Size: 1 slice
- Calories: 450
- Sugar: 40
- Sodium: 350
- Fat: 25
- Saturated Fat: 15
- Carbohydrates: 55
- Fiber: 3
- Protein: 6
Keywords: Halloween cake, black velvet cake, orange buttercream, chocolate cake, Halloween dessert, spooky baking, easy cake recipe


