Love this? Save it for later!
Share the inspiration with your friends
My daughter looked up from the kitchen table, a smear of royal icing on her cheek, and said, “Mom, can we make the cookies that look like they have magic webs on them?” She was holding a picture from a Halloween book, pointing at a spiderweb cookie that honestly looked way more complicated than anything I’d ever attempted. I almost said no. But the way she said it, like it was the most exciting thing in the world, made me grab the butter from the fridge before I could talk myself out of it.
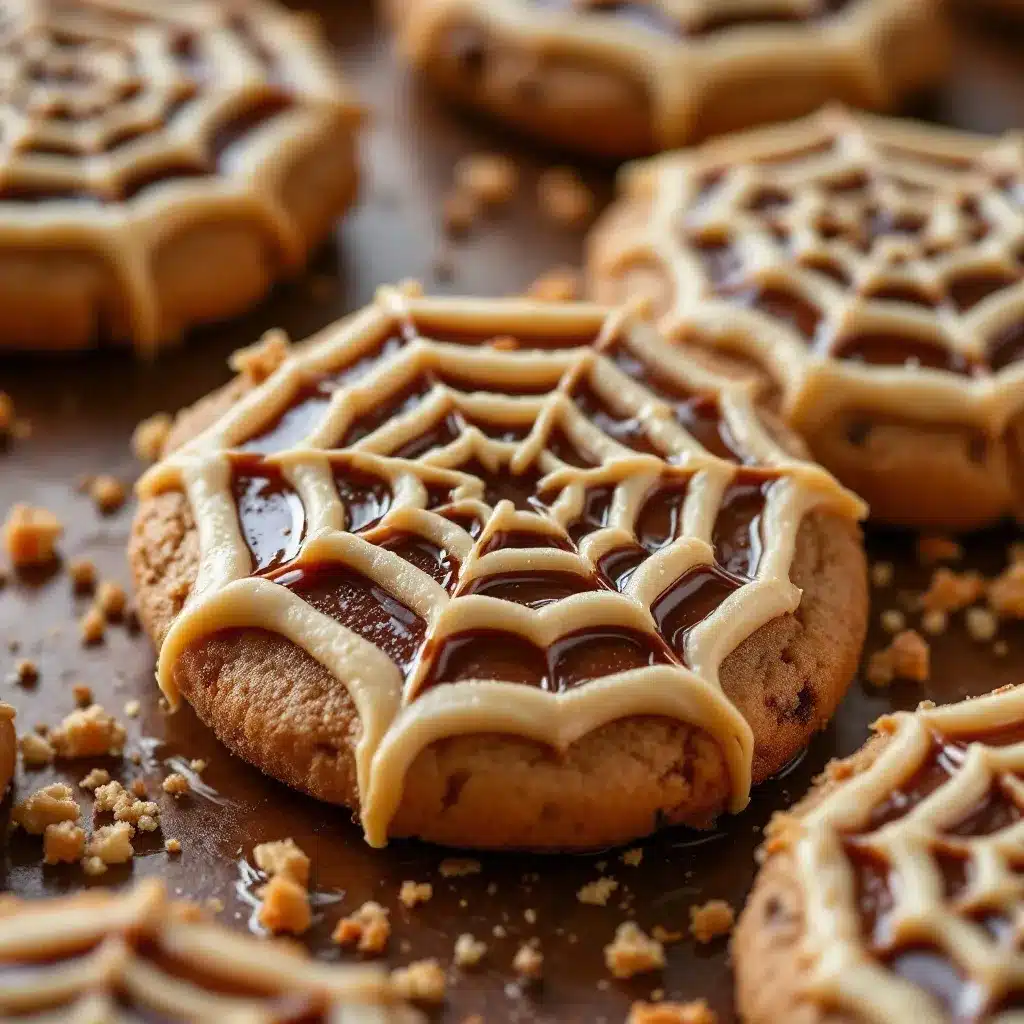
These Perfect Spiderweb Halloween Sugar Cookies weren’t born from a fancy baking class or a viral video. They came from a slightly chaotic Tuesday afternoon in October, with flour on the floor and a four-year-old “helping” me separate eggs. I wanted something that looked impressive enough to bring to the school Halloween party but simple enough that I wouldn’t lose my mind making them. After a few tries (and more than a few cracked cookies), I figured out a method that actually works. The trick is all in the icing consistency and the toothpick drag technique—which sounds fancy but is honestly just a lot of fun.
The first batch disappeared before the icing even set. My husband grabbed one, took a bite, and just nodded. That’s his version of a standing ovation. These cookies have that perfect balance—crisp edges, soft centers, and a vanilla flavor that isn’t too sweet. The spiderweb design feels like a little magic trick. You drag a toothpick through concentric circles of icing and suddenly, you’ve got webs. It’s the kind of recipe that makes you feel like a baking genius, even if you’re just a regular person with a cookie sheet and some food coloring.
Why You’ll Love This Recipe
Let me tell you why these cookies have become my go-to for Halloween baking. First off, they look way harder than they actually are. People will think you spent hours on them, but the secret is a simple icing technique that takes maybe two minutes per cookie. I’ve tested this recipe with my kids, with my neighbor who claims she can’t bake, and even at a Halloween cookie swap where they vanished first.
- Simple Ingredients : You probably already have everything in your pantry. Butter, sugar, eggs, flour, vanilla—nothing weird or hard to find.
- No Special Tools Required : You don’t need a piping bag or fancy tips. A zip-top bag with a tiny corner snipped off works perfectly. Or just use a toothpick for the web design.
- Perfect for Halloween Parties : These cookies are showstoppers on any dessert table. They fit right in with other spooky treats like my Poison Apple Black Velvet Halloween Bundt Cake or Crispy Mummy Hot Dog Appetizers.
- Kid-Friendly Activity : My kids love helping with the icing part. It’s messy but so worth it for the giggles and the proud faces when they see their webs.
- Make-Ahead Friendly : The cookie dough freezes beautifully, and the decorated cookies stay fresh for days. Perfect for busy Halloween week.
I’ve tried so many sugar cookie recipes over the years. Some spread too much, some are too hard, and some just don’t taste like anything. This one hits that sweet spot—literally. The cookies hold their shape perfectly during baking, so your circles stay circles. And the flavor? Real butter and vanilla, no shortcuts. These aren’t just pretty cookies. They’re the kind you reach for again and again.
What Ingredients You Will Need
This recipe uses simple, honest ingredients that work together to create a cookie that’s both sturdy enough for decorating and tender enough to enjoy. I’ve tested these proportions over several batches, and this combination gives you the best texture and flavor.
For the Sugar Cookie Dough
- 1 cup (226g) unsalted butter, softened to room temperature (I prefer using European-style butter like Kerrygold for richer flavor, but any unsalted butter works)
- 1 cup (200g) granulated sugar (adds sweetness and helps create that perfect edge)
- 1 large egg, room temperature (cold eggs can make the dough seize up)
- 1 teaspoon vanilla extract (use pure vanilla, not imitation, if you can—it makes a real difference)
- ½ teaspoon almond extract (optional, but adds that bakery-style flavor I love)
- 2 ½ cups (312g) all-purpose flour (spoon and level it, don’t scoop directly from the bag)
- ½ teaspoon baking powder (helps the cookies puff just slightly without spreading)
- ½ teaspoon salt (balances the sweetness and enhances the vanilla)
For the Royal Icing
- 3 cups (360g) powdered sugar, sifted (sifting prevents lumps in your icing)
- 2 tablespoons meringue powder (this gives the icing that smooth, hard finish—you can substitute with 2 pasteurized egg whites if needed)
- 4-5 tablespoons water, room temperature (add slowly, you might need slightly more or less)
- ½ teaspoon vanilla extract (or clear vanilla if you want a pure white base)
- Black gel food coloring (I like AmeriColor or Wilton—liquid coloring will thin the icing too much)
- Orange gel food coloring (for the accent webs, optional but fun)
For the Spiderweb Effect
- Toothpicks (the secret weapon for creating those perfect webs)
- Small piping bags or zip-top bags (sandwich bags work great in a pinch)
One thing I learned the hard way—don’t skip sifting the powdered sugar for the icing. Lumps will clog your piping bag and ruin your web lines. Trust me on this one. I also recommend using gel food coloring instead of liquid. Liquid coloring changes the icing consistency and can make it too runny for the web technique to work properly.
Equipment Needed
You don’t need a professional bakery setup for these cookies. Here’s what I use and some alternatives that work just as well.
- Stand mixer or hand mixer : A stand mixer makes creaming butter and sugar effortless, but a hand mixer works perfectly. You can even do it by hand with a wooden spoon if you need a workout.
- Baking sheets : I use light-colored aluminum sheets. Dark sheets can cause the bottoms to brown too quickly.
- Parchment paper or silicone baking mats : Parchment paper is my preference because the cookies slide right off. Silicone mats work too, but the cookies might spread slightly more.
- Rolling pin : A standard rolling pin is fine. If you have adjustable rings, they help get even thickness every time.
- Round cookie cutters : I use a 3-inch round cutter for standard cookies. You can use any size, just adjust baking time slightly.
- Piping bags or zip-top bags : I actually prefer zip-top bags for this recipe because I can snip a tiny corner and control the flow easily.
- Toothpicks : Regular wooden toothpicks are perfect. Don’t use the flavored ones (learned that mistake).
- Cooling rack : Essential for letting the cookies cool completely before icing. If you ice warm cookies, the icing will melt and slide right off.
I bought a fancy piping tip set once, thinking I needed it for decorated cookies. Honestly? For these spiderweb cookies, a toothpick and a snipped bag corner do a better job. Save your money for extra butter.
Preparation Method
Let me walk you through this step by step. I’ve included all the little details I wish someone had told me the first time I made these.
Step 1: Make the Cookie Dough
In a large bowl, cream together the softened butter and granulated sugar until light and fluffy. This takes about 3 minutes with a stand mixer on medium speed. You want it to look pale and almost doubled in volume. Scrape down the sides of the bowl halfway through. Add the egg, vanilla extract, and almond extract (if using). Beat until combined, about 30 seconds. The mixture might look slightly curdled at this point—that’s normal, don’t panic.
In a separate bowl, whisk together the flour, baking powder, and salt. Gradually add the dry ingredients to the wet mixture, mixing on low speed. Stop as soon as the dough comes together. Overmixing will make the cookies tough. The dough should be soft but not sticky. If it feels too sticky, add a tablespoon more flour. If it’s too dry, add a teaspoon of milk.
Step 2: Chill the Dough
Divide the dough into two discs, wrap each tightly in plastic wrap, and refrigerate for at least 1 hour. I’ve skipped this step in a rush before, and the cookies spread into blobs instead of circles. Chilling is non-negotiable. The dough can stay in the fridge for up to 3 days, or freeze for up to 3 months.
Step 3: Roll and Cut
Preheat your oven to 350°F (175°C). Line your baking sheets with parchment paper. On a lightly floured surface, roll one disc of dough to about ¼-inch thickness. I like to roll between two sheets of parchment paper—no mess, no extra flour needed. Use your round cookie cutter to cut out shapes. Re-roll the scraps once, then discard or bake as chef’s treats. Re-rolling too many times makes the cookies tough.
Place the cut cookies about 2 inches apart on the prepared baking sheets. Bake for 8-10 minutes, or until the edges are just barely golden. The centers should look set but not brown. I rotate the pan halfway through for even baking. Let the cookies cool on the baking sheet for 5 minutes, then transfer to a cooling rack to cool completely. Do not ice warm cookies—the icing will become a runny mess.
Step 4: Prepare the Royal Icing
In a medium bowl, combine the sifted powdered sugar and meringue powder. Add 4 tablespoons of water and the vanilla extract. Beat on low speed until combined, then increase to medium-high and beat for 3-4 minutes. The icing should be smooth and glossy. Add the remaining water, one teaspoon at a time, until the icing reaches a “15-second consistency”—when you lift the beater, the ribbon of icing should settle back into the bowl within 15 seconds.
Divide the icing into two bowls. Leave one bowl white (or add a tiny drop of orange coloring for a subtle web). Color the other bowl with black gel food coloring. I use quite a bit to get a true black. Transfer each color to separate piping bags or zip-top bags with a tiny corner snipped off.
Step 5: Create the Spiderweb Design
This is where the magic happens. Start by outlining each cookie with the white (or orange) icing. Let this outline dry for about 10 minutes—this creates a dam so the flood icing doesn’t spill over the edges. Then, fill in the center of the cookie with the same white icing. Use a toothpick to spread the icing into the corners if needed.
While the white icing is still wet, pipe a small dot of black icing in the very center of the cookie. Then, pipe concentric circles of black icing around the center dot—about 3 to 4 circles, spaced evenly apart. Working quickly (before the icing starts to set), take a toothpick and drag it from the center dot outward through all the circles. Wipe the toothpick clean, then drag from the outer edge toward the center, slightly offset from the first line. Repeat this all the way around the cookie, creating 6-8 lines radiating from the center. Watch as the black icing pulls into perfect web lines. It’s honestly mesmerizing.
Step 6: Let the Icing Set
Allow the decorated cookies to sit at room temperature for at least 2 hours, or overnight, until the icing is completely hard. The icing should be firm to the touch and not sticky. Once set, you can stack the cookies between layers of parchment paper for storage.
Cooking Tips & Techniques
I’ve made plenty of mistakes with these cookies so you don’t have to. Here are the things I wish I’d known from the start.
The icing consistency is everything. If your icing is too thick, it won’t spread smoothly for the flood layer. If it’s too thin, it will run off the edges and your webs will look like blobs. The 15-second consistency test is your best friend. When you lift the spoon, the icing should fall back into the bowl in a smooth ribbon that disappears within 15 seconds. Practice this once or twice before you start decorating.
Don’t rush the chilling step. I tried making these cookies on a hot summer day without chilling the dough long enough. The cookies spread so much that my spiderwebs looked more like spider pancakes. Give the dough a full hour in the fridge, or even longer if your kitchen is warm.
Work in batches when decorating. Only ice 3-4 cookies at a time. The icing starts to set within a few minutes, and you need it wet for the toothpick drag to work properly. If you try to do too many at once, the icing on the first cookie will be too set by the time you get to the toothpick step. I learned this the hard way and ended up with half-decorated cookies that looked sad.
Use fresh toothpicks. Don’t reuse a toothpick for multiple cookies. The icing builds up on the tip and creates messy lines. I keep a little cup of toothpicks next to my decorating station and grab a new one for each cookie.
If the icing cracks when you drag through it, it means the icing has started to set too much. Next time, work faster or do fewer cookies per batch. You can also add a tiny drop of water to the icing to thin it slightly.
Variations & Adaptations
One of the best things about this recipe is how easy it is to change up. Here are some variations I’ve tried and loved.
Gluten-Free Version : Substitute the all-purpose flour with a 1:1 gluten-free baking flour blend. I like Bob’s Red Mill or King Arthur Measure for Measure. The texture will be slightly more delicate, so handle the dough gently. Add an extra tablespoon of flour if the dough feels too sticky.
Different Web Colors : Instead of black and white, try orange and black, purple and green, or even neon colors for a glow-in-the-dark party vibe. I made a batch with neon green webs for a monster-themed party and they were a huge hit.
Spider Add-Ons : After the icing sets, add a small candy spider on top of each cookie. Wilton makes candy eyes that you can attach with a dot of icing. My kids love helping with this part—they place the spiders and giggle at how “scary” the cookies look.
Chocolate Base : Replace ¼ cup of the flour with unsweetened cocoa powder for a chocolate sugar cookie. The dark base makes the white webs pop beautifully. Reduce the vanilla to ½ teaspoon since chocolate has its own flavor.
Spiced Version : Add 1 teaspoon of pumpkin pie spice to the dry ingredients for a fall-inspired twist. This pairs wonderfully with the Creamy Pumpkin Spice Cold Foam for a full Halloween treat spread.
Serving & Storage Suggestions
These cookies are best served at room temperature. The icing should be completely set and hard to the touch. I like to arrange them on a platter lined with black or orange tissue paper for Halloween parties. Add a few fake spider rings around the edges for extra spooky effect.
Storage Instructions : Place the decorated cookies in an airtight container, layered between sheets of parchment paper. They will stay fresh at room temperature for up to 5 days. Do not refrigerate them—the moisture in the fridge can make the icing sticky and the cookies soft.
Freezing : You can freeze the undecorated baked cookies for up to 3 months. Thaw at room temperature, then decorate as directed. I also freeze the raw cookie dough discs for up to 3 months. Just thaw in the refrigerator overnight before rolling and cutting.
Reheating : These cookies are meant to be eaten at room temperature, not warm. If you want a warm cookie experience, bake a fresh batch and enjoy them plain before decorating. The decorated cookies don’t reheat well because the icing melts.
These cookies actually taste better the day after decorating. The flavors meld together, and the icing sets completely. I’ve made them up to three days before a party with no issues. Just keep them in a cool, dry place away from direct sunlight.
If you’re making these for a Halloween party, consider pairing them with other spooky treats like Spider Web Pumpkin Sugar Cookies for a themed dessert table that will impress everyone.
Nutritional Information & Benefits
Let’s be honest—these are decorated sugar cookies, so they’re a treat. But here’s the breakdown per cookie (based on a 3-inch cookie with royal icing):
- Calories : Approximately 180-200 calories per cookie
- Fat : 8g (mostly from butter)
- Carbohydrates : 28g
- Sugar : 18g
- Protein : 2g
- Sodium : 95mg
Dietary Considerations : This recipe contains dairy (butter), eggs, and gluten. For a dairy-free version, substitute the butter with a high-quality vegan butter stick (not spread). For egg-free royal icing, use meringue powder with water or aquafaba (chickpea water) as a substitute.
Health Perspective : I believe in balance. These cookies are a special occasion treat, perfect for Halloween celebrations. They’re not an everyday snack, and that’s okay. The joy of making them with family and sharing them at parties is part of the experience. If you’re looking for healthier options, try my Healthy 5-Ingredient Dinner Bowl for your regular meals and save these cookies for the fun moments.
Conclusion
These Perfect Spiderweb Halloween Sugar Cookies have become a tradition in our house. Every October, my daughter asks when we’re making “the web cookies,” and we spend an afternoon covered in flour and icing, creating something that feels a little bit magical. The best part isn’t how they look (though they do look amazing)—it’s the process. The way a simple toothpick drag transforms plain icing into intricate webs. The way kids’ eyes light up when they see the design appear. The way these cookies bring people together around a Halloween table.
I hope you give this recipe a try. Don’t worry if your first few webs aren’t perfect. Mine weren’t either. The beauty of these cookies is that even the imperfect ones taste delicious. And honestly, the slightly messy ones have more character. They look like real spiderwebs—a little wild, a little unpredictable, and totally unique.
If you make these, I’d love to hear about it. Leave a comment below and tell me how your webs turned out. Share a photo if you’re brave enough. And if you have kids helping, definitely share those photos—the flour-covered faces are the best part. Happy Halloween baking, friends. May your cookies be crisp, your webs be perfect, and your kitchen be full of laughter.
Frequently Asked Questions
Can I make these cookies ahead of time?
Absolutely. You can make the dough up to 3 days ahead and keep it refrigerated. You can also bake the cookies up to a week in advance and store them in an airtight container before decorating. The decorated cookies stay fresh for up to 5 days at room temperature.
Why did my cookies spread too much?
This usually happens when the dough isn’t chilled enough. Make sure you chill the dough for at least 1 hour before rolling and cutting. Also, check that your butter was softened but not melted—if it’s too warm, the cookies will spread. Using parchment paper instead of greased baking sheets helps too.
Can I use a different icing for the spiderweb design?
Royal icing works best because it sets hard and creates clean lines. Buttercream is too soft and won’t hold the web design. You can try a glaze icing, but it won’t be as crisp. Royal icing is worth the extra step for the best results.
How do I get the icing to be pure black?
Use gel food coloring, not liquid. Start with a small amount and add more until you reach the desired shade. If the icing gets too thick from adding coloring, thin it with a drop of water. I find that AmeriColor Super Black gives the best results with just a few drops.
Can I freeze the decorated cookies?
I don’t recommend freezing decorated cookies because the condensation when thawing can make the icing sticky. However, you can freeze the undecorated baked cookies for up to 3 months. Just thaw them at room temperature, then decorate as directed.
Pin This Recipe!

Perfect Spiderweb Halloween Sugar Cookies: Easy Recipe

These Perfect Spiderweb Halloween Sugar Cookies are a fun and easy Halloween treat that looks impressive but is simple to make. With a simple icing technique and a toothpick drag, you can create beautiful spiderweb designs that will wow everyone at your Halloween party.
- Prep Time: 1 hour 30 minutes
- Cook Time: 10 minutes
- Total Time: 2 hours 40 minutes
- Yield: 24 servings 1x
- Category: Dessert
- Cuisine: American
Ingredients
- 1 cup (226g) unsalted butter, softened
- 1 cup (200g) granulated sugar
- 1 large egg, room temperature
- 1 teaspoon vanilla extract
- ½ teaspoon almond extract (optional)
- 2 ½ cups (312g) all-purpose flour
- ½ teaspoon baking powder
- ½ teaspoon salt
- 3 cups (360g) powdered sugar, sifted
- 2 tablespoons meringue powder
- 4–5 tablespoons water, room temperature
- ½ teaspoon vanilla extract (for icing)
- Black gel food coloring
- Orange gel food coloring (optional)
- Toothpicks
- Small piping bags or zip-top bags
Instructions
- Make the Cookie Dough: In a large bowl, cream together the softened butter and granulated sugar until light and fluffy (about 3 minutes). Add the egg, vanilla extract, and almond extract (if using). Beat until combined.
- In a separate bowl, whisk together the flour, baking powder, and salt. Gradually add the dry ingredients to the wet mixture, mixing on low speed until just combined. Do not overmix.
- Chill the Dough: Divide the dough into two discs, wrap each tightly in plastic wrap, and refrigerate for at least 1 hour (up to 3 days).
- Roll and Cut: Preheat oven to 350°F (175°C). Line baking sheets with parchment paper. On a lightly floured surface, roll one disc of dough to ¼-inch thickness. Use a round cookie cutter to cut out shapes. Place cookies 2 inches apart on prepared sheets.
- Bake for 8-10 minutes, or until edges are just barely golden. Cool on baking sheet for 5 minutes, then transfer to a cooling rack to cool completely.
- Prepare the Royal Icing: In a medium bowl, combine sifted powdered sugar and meringue powder. Add 4 tablespoons water and vanilla extract. Beat on low until combined, then increase to medium-high and beat for 3-4 minutes. Add remaining water, one teaspoon at a time, until icing reaches a ’15-second consistency’.
- Divide icing into two bowls. Leave one bowl white (or add a tiny drop of orange coloring). Color the other bowl with black gel food coloring. Transfer each color to separate piping bags or zip-top bags with a tiny corner snipped off.
- Create the Spiderweb Design: Outline each cookie with white icing and let dry for 10 minutes. Fill in the center with white icing. While still wet, pipe a small dot of black icing in the center, then pipe concentric circles of black icing around it. Working quickly, drag a toothpick from the center outward through all circles. Wipe toothpick clean, then drag from outer edge toward center, slightly offset. Repeat to create 6-8 radiating lines.
- Let the Icing Set: Allow decorated cookies to sit at room temperature for at least 2 hours (or overnight) until icing is completely hard.
Notes
The icing consistency is crucial—use the 15-second consistency test. Chill the dough for at least 1 hour to prevent spreading. Work in batches when decorating (3-4 cookies at a time) to keep icing wet for the toothpick drag. Use fresh toothpicks for each cookie. If icing cracks when dragging, it has set too much—work faster or thin icing slightly.
Nutrition
- Serving Size: 1 cookie
- Calories: 190
- Sugar: 18
- Sodium: 95
- Fat: 8
- Saturated Fat: 5
- Carbohydrates: 28
- Protein: 2
Keywords: Halloween cookies, spiderweb cookies, sugar cookies, royal icing, Halloween baking, easy cookie recipe


