Love this? Save it for later!
Share the inspiration with your friends
For a while, I just accepted that store-bought pan de muerto wasn’t going to taste like the ones my abuela used to make. You know that specific, soft, brioche-like texture that dissolves on your tongue? The one that smells like orange zest and anise? I stopped buying it years ago because the commercial versions were always too dry, too sweet, or just… hollow. They missed the soul of it. Honestly, it felt like giving up on a tradition before I even really understood it.
Then came that Tuesday in October. I was feeling nostalgic for Dia de los Muertos, even though it was weeks away. I decided to try making it from scratch, not because I was a master baker, but because I was tired of the compromise. I wanted something that felt like a warm hug. The kitchen smelled incredible after an hour, a mix of butter and citrus that actually pulled people in from the other room.
It wasn’t magic. It was just patience. Letting the dough rise twice. Brushing it with that bright orange blossom glaze while it was still warm. When I finally broke off a piece of the “bone” cross on top, the steam rose up, and it tasted right. It tasted like memory.
That was the moment I stopped looking for a recipe and started perfecting one. This version isn’t about being fancy. It’s about being honest. It’s the kind of bread that sits on your counter all day, getting stale just enough to be perfect for dipping in coffee the next morning. And once you taste it, you won’t go back to the box either.
Why You’ll Love This Recipe
There is a reason pan de muerto is the star of the altar and the centerpiece of the breakfast table. It’s not just bread; it’s a flavor profile that is distinctly Mexican, deeply comforting, and surprisingly easy to master if you know a few tricks. Here is why this specific version of pan de muerto with orange blossom glaze stands out from the rest.
- Authentic Texture: Most homemade attempts turn out dense, like a roll. This recipe uses a slight choux-pastry technique (yes, really) in the initial mixing to create an airy, brioche-like crumb that is soft enough to tear apart with your hands.
- No Fancy Equipment Needed: You don’t need a stand mixer. A sturdy wooden spoon and a little elbow grease are all you need. If you’re used to making sourdough discard pumpkin bread, you’ll appreciate how forgiving this dough is.
- The Glaze Factor: The orange blossom water glaze isn’t just for show. It adds a floral brightness that cuts through the richness of the butter and sugar, preventing the bread from feeling too heavy.
- Make-Ahead Friendly: Unlike many yeasted breads that demand your attention at 6 AM, this dough can be shaped and left to rise in the fridge overnight. This develops a deeper, more complex flavor and makes your morning much less stressful.
- Perfect for Gifting: Wrapped in cellophane with a ribbon, this bread is a beautiful gift for friends and family, especially during the fall season. It pairs wonderfully with other warm treats, similar to how you might serve maple pumpkin scones with coffee.
It’s that balance of tradition and convenience that makes this recipe a keeper. It respects the culture while fitting into a modern, busy lifestyle. You get the pride of baking something complex without the headache.
What Ingredients You Will Need
This recipe relies on a few key components to achieve that signature softness and aroma. You don’t need exotic spices if you don’t have them, but the orange blossom water is non-negotiable for the authentic taste. Here is what you’ll need to gather.
- Warm Milk (1 cup / 240ml): Must be lukewarm, not hot. If it’s too hot, it kills the yeast. I usually test it on my wrist—it should feel like baby bath water.
- Active Dry Yeast (2 packets / 14g): Standard packets work fine. If you use instant yeast, you can skip the blooming step, but I prefer blooming to ensure it’s alive.
- Granulated Sugar (1/2 cup / 100g): Divided. Some goes into the dough, some into the glaze. Sugar feeds the yeast and helps with browning.
- Unsalted Butter (1/2 cup / 115g): Softened to room temperature. This adds the richness and tenderness. Don’t use margarine; you’ll taste the difference.
- Eggs (2 large): Room temperature eggs incorporate better into the dough. I like to beat them lightly before adding.
- All-Purpose Flour (4 to 4.5 cups / 500-560g): Start with 4 cups. Add more only if needed. The humidity in your kitchen affects how much flour the dough absorbs.
- Orange Zest (1 large orange): Fresh zest is crucial. It provides the essential oils that give the bread its fresh aroma. Use a microplane for the finest zest.
- Anise Seeds (1 tsp): This is the traditional “licorice” flavor note. If you hate anise, you can skip it, but it won’t be authentic pan de muerto without it. Crush them slightly with your fingers to release the oils.
- Salt (1 tsp): To balance the sweetness and strengthen the gluten structure.
- Orange Blossom Water (2 tbsp): Find this in the international aisle or online. It’s different from orange extract; it’s floral and delicate. This goes in the glaze.
- Confectioners’ Sugar (1 cup / 120g): For the glaze. Sift it to avoid lumps.
- Additional Milk (2 tbsp): For brushing the top before baking to help the glaze stick and promote browning.
For the “bones” and “tears” of the bread, you’ll need extra flour for rolling and perhaps a little more butter to bind the strips. Keep it simple. The beauty is in the shape, not the complexity of ingredients.
Equipment Needed
You don’t need a fancy kitchen to make this bread. Here is the basic toolkit required.
- Large Mixing Bowl: Glass or stainless steel works best so you can see the dough consistency.
- Measuring Cups and Spoons: Accuracy matters with yeast breads. A kitchen scale is even better for the flour, but cups work if you spoon and level.
- Clean Kitchen Towel or Plastic Wrap: To cover the bowl during rising. It needs to be breathable but not drying.
- Baking Sheets: Line them with parchment paper for easy cleanup. The glaze can drip and burn if it hits the pan directly.
- Pastry Brush: Essential for applying the milk wash and the orange glaze evenly.
- Rolling Pin: For shaping the strips and the round loaf. A French-style rolling pin is nice, but a standard one works.
- Cooling Rack: To let the bread cool completely before glazing. If you glaze it warm, the sugar will melt into a sticky mess.
If you don’t have a pastry brush, a silicone basting brush works too. Just make sure it’s clean. No special equipment needed beyond standard home baking tools.
Preparation Method
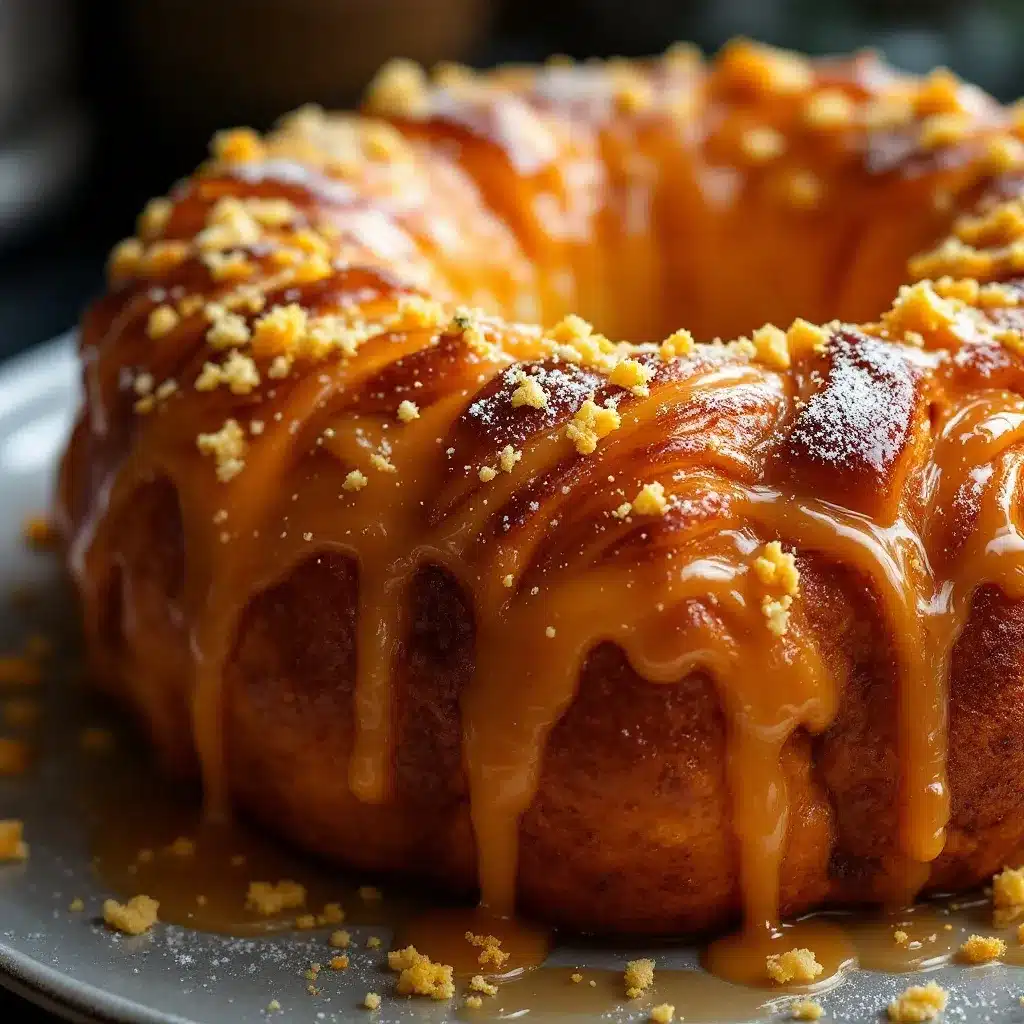
Let’s get into the dough. This process is rhythmic and satisfying. Take your time with the rising steps; rushing is the enemy of soft bread.
- Bloom the Yeast: In the bowl of a stand mixer (or a large mixing bowl), combine the warm milk, 1 tablespoon of sugar, and the yeast. Stir gently and let it sit for 5-10 minutes until it becomes foamy and bubbly. If it doesn’t foam, your yeast is dead. Start over with fresh yeast. (Time: 10 mins)
- Mix Wet Ingredients: To the yeast mixture, add the softened butter, remaining sugar, eggs, orange zest, and anise seeds. Mix on low speed (or with a wooden spoon) until combined. The mixture will look curdled at first; that’s normal. (Time: 3 mins)
- Add Flour: Add the salt and 4 cups of flour. Mix on low until a shaggy dough forms. If using a stand mixer, switch to the dough hook. If mixing by hand, this is where you start kneading. (Time: 5 mins)
- Knead the Dough: Turn the dough onto a floured surface. Knead for 8-10 minutes, adding the remaining 1/2 cup of flour a little at a time if the dough is too sticky. You want a soft, slightly tacky dough that pulls away from the sides but still sticks a little to your fingers. It should pass the “windowpane test”—stretch a small piece thin enough to see light through it without tearing. (Time: 10 mins)
- First Rise: Place the dough in a lightly oiled bowl, turning once to coat. Cover with a towel or plastic wrap. Let it rise in a warm, draft-free place for 1.5 to 2 hours, or until doubled in size. (Time: 1.5-2 hours)
- Shape the Loaf: Punch down the dough gently to release air. Divide it into two parts: one large piece for the main round loaf (about 60% of the dough) and a smaller piece for the decorations (40%). Roll the large piece into a smooth ball. Place it on a parchment-lined baking sheet. (Time: 5 mins)
- Make the “Bones” and “Tears”: Roll the smaller piece of dough into long ropes. Cut them into strips. Cross two strips over the top of the round loaf to form the traditional cross/bone shape. Pinch the ends securely. Take smaller strips and wrap them around the base of the cross to mimic “tears” or petals. Tuck the ends under the loaf so they don’t burn. (Time: 10 mins)
- Second Rise: Cover the shaped bread loosely and let it rise again for 45-60 minutes. It should look puffy and jiggly. Preheat your oven to 350°F (175°C) during the last 15 minutes of rising. (Time: 45-60 mins)
- Bake: Brush the risen bread gently with milk. Bake for 25-30 minutes, or until the top is golden brown. If it browns too quickly, cover loosely with foil. The bread is done when the internal temperature reaches 190°F (88°C) or when it sounds hollow when tapped on the bottom. (Time: 30 mins)
- Cool and Glaze: Let the bread cool on a wire rack for at least 30 minutes. While it cools, whisk the confectioners’ sugar and orange blossom water to make a smooth glaze. Drizzle over the cooled bread. (Time: 30 mins)
Cooking Tips & Techniques
Even with a good recipe, things can go wrong. Here is how to avoid common pitfalls.
Don’t Over-Flour: This is the most common mistake. Yeast doughs should be tacky. If you add too much flour, the bread will be dense and dry. Trust your hands more than the cup measurements.
Watch the Oven: Ovens vary. Check your bread at the 25-minute mark. If the top is getting dark but the center is still raw, tent it with foil. You can also rotate the pan halfway through for even browning.
Patience with Rising: Don’t rush the first rise. If the dough isn’t doubled, the texture will be tight. A cool kitchen might take longer; a warm kitchen might take less time. Look at the dough, not the clock.
Glaze Consistency: If your glaze is too thick, add a few drops more orange blossom water. If it’s too thin, add a teaspoon more sugar. You want it to coat the back of a spoon but still drip slowly.
Storage Tip: Store leftovers in an airtight container at room temperature for up to 3 days. The bread actually gets better on day two as the flavors meld. If you need to keep it longer, freeze it (un-glazed) for up to a month.
Variations & Adaptations
This recipe is flexible. Here are a few ways to make it your own.
- Lemon Variation: Swap the orange blossom water in the glaze for lemon juice and zest. Add lemon zest to the dough as well. It’s brighter and less floral.
- Chocolate Chip: Fold 1/2 cup of chocolate chips into the dough after the first rise. It turns it into a sweet, indulgent treat.
- Cinnamon Sugar: Instead of the glaze, brush the warm bread with melted butter and roll it in a mixture of cinnamon and sugar. Similar to snickerdoodle vibes.
- Gluten-Free: Use a 1:1 gluten-free flour blend with xanthan gum. Note that the texture will be slightly different, more cake-like, but still delicious.
- Vanilla Bean: Add the seeds of one vanilla bean to the dough for a classic, aromatic twist.
I’ve tried adding a splash of rum to the glaze for an adult version, and it’s fantastic. Just be careful not to make the glaze too runny.
Serving & Storage Suggestions
Pan de muerto is best served at room temperature. It’s perfect for breakfast with a hot cup of coffee or atole. It also pairs well with tea or hot chocolate. For presentation, place it on a wooden board with fresh marigolds (cempasúchil) around it for a traditional Dia de los Muertos altar setup.
Storage: Keep it in an airtight container or wrapped tightly in plastic wrap at room temperature for up to 3 days. Do not refrigerate, as it will dry out the bread. For longer storage, freeze the un-glazed bread in a freezer-safe bag for up to 3 months. Thaw at room temperature and glaze before serving.
Reheating: If the bread has gone stale, warm it in the oven at 300°F for 5-10 minutes. This restores the softness. You can also microwave individual slices for 10-15 seconds.
The flavors develop over time. The orange and anise meld together, making the bread taste more complex on the second or third day.
Nutritional Information & Benefits
While pan de muerto is a treat, it’s not devoid of nutrition. Butter and eggs provide fat and protein. The flour offers carbohydrates for energy. Anise seeds have digestive properties, which is helpful after a rich meal. Orange zest contains vitamin C and antioxidants.
Each slice (approx. 1/12 of the loaf) contains roughly 220 calories, 6g of fat, 38g of carbs, and 4g of protein. It is not gluten-free or dairy-free unless you use substitutes. Enjoy it in moderation as part of a balanced diet. It’s a celebratory bread, meant to be shared and savored, not consumed in large quantities.
Conclusion
Making pan de muerto with orange blossom glaze is more than just baking; it’s a connection to tradition, family, and memory. It’s a bread that invites you to slow down, to notice the smells, and to share a moment with those you love. I hope this recipe brings that same warmth to your kitchen.
Feel free to experiment with the glazes and shapes. Make it your own. And if you do, I’d love to hear about it. Leave a comment below with your results, or share a photo on social media. Tag me so I can see your beautiful creations.
Happy baking, and remember: the best bread is the one made with love. Or at least, made with patience.
FAQs
Can I make pan de muerto ahead of time?
Yes! Shape the bread after the first rise, cover it, and refrigerate it overnight. Let it come to room temperature and rise for the second rise the next morning before baking. This actually improves the flavor.
What is orange blossom water?
It’s a fragrant water made from distilling the blossoms of the bitter orange tree. It’s commonly used in Middle Eastern and Mexican desserts. You can find it in the international aisle of most grocery stores or online. Do not substitute with orange extract, as it is much stronger and tastes different.
Why did my bread turn out dense?
This usually happens if you added too much flour during kneading or if the yeast was dead. Make sure your milk was warm, not hot, when blooming the yeast. Also, avoid adding extra flour unless the dough is extremely sticky; a slightly tacky dough yields a softer bread.
Can I use instant yeast?
Yes, you can use instant yeast. You can mix it directly with the dry ingredients. You may not need to bloom it first, but checking that it’s fresh is still important. The rising times might be slightly faster.
How do I store leftover pan de muerto?
Store it in an airtight container at room temperature for up to 3 days. Do not refrigerate. For longer storage, freeze the un-glazed bread in a freezer-safe bag for up to 3 months. Thaw at room temperature and glaze before serving.
Pin This Recipe!
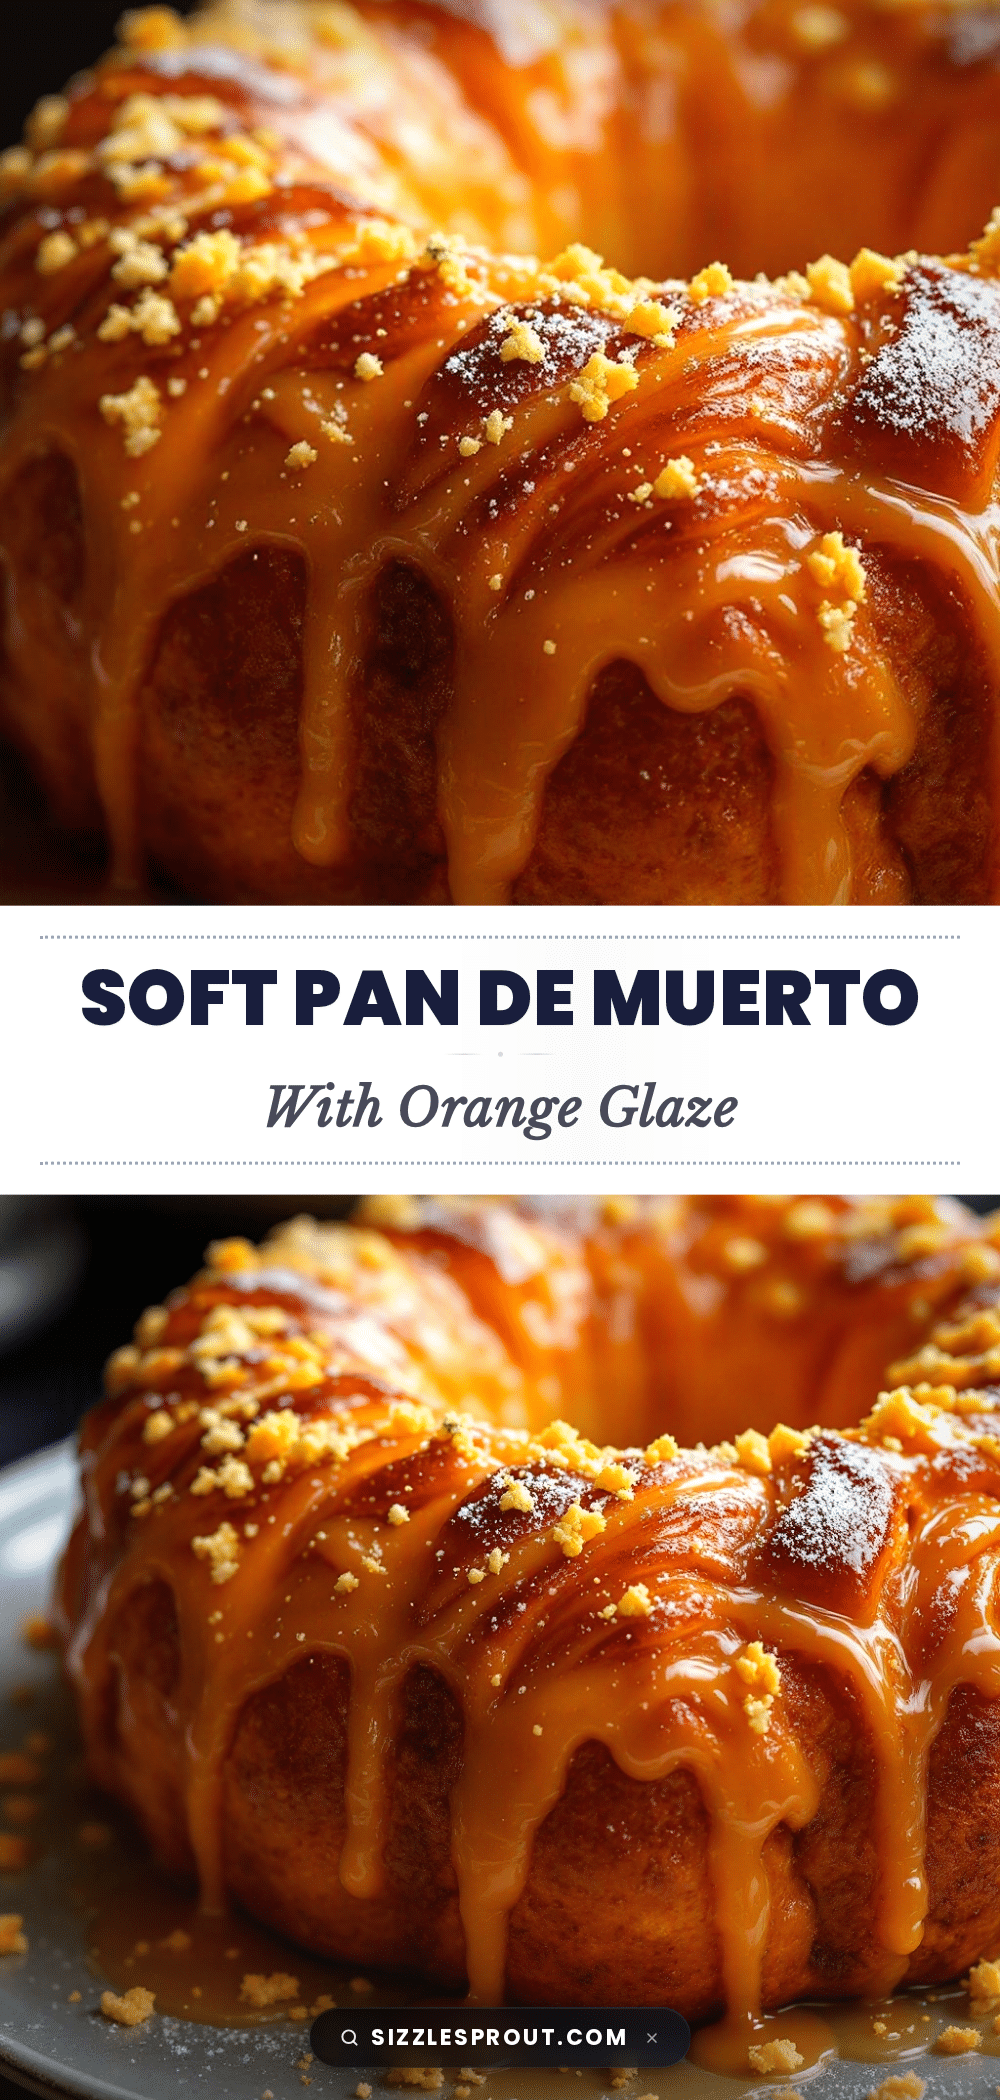
Best Pan De Muerto with Orange Blossom Glaze

A soft, brioche-like Mexican sweet bread flavored with orange zest and anise, topped with a delicate orange blossom glaze. This recipe captures the authentic taste and texture of traditional Pan de Muerto.
- Prep Time: 45 minutes
- Cook Time: 30 minutes
- Total Time: 3 hours 15 minutes
- Yield: 12 servings 1x
- Category: Dessert
- Cuisine: Mexican
Ingredients
- 1 cup warm milk (lukewarm)
- 2 packets active dry yeast (14g)
- 1/2 cup granulated sugar (divided)
- 1/2 cup unsalted butter (softened)
- 2 large eggs (room temperature)
- 4 to 4.5 cups all-purpose flour
- 1 large orange (zested)
- 1 tsp anise seeds (crushed)
- 1 tsp salt
- 2 tbsp orange blossom water
- 1 cup confectioners’ sugar
- 2 tbsp additional milk (for brushing)
Instructions
- Bloom the yeast: Combine warm milk, 1 tablespoon of sugar, and yeast in a bowl. Let sit for 5-10 minutes until foamy.
- Mix wet ingredients: Add softened butter, remaining sugar, eggs, orange zest, and anise seeds to the yeast mixture. Mix until combined.
- Add flour: Add salt and 4 cups of flour. Mix until a shaggy dough forms.
- Knead the dough: Knead on a floured surface for 8-10 minutes, adding remaining flour if needed, until the dough is soft, slightly tacky, and passes the windowpane test.
- First rise: Place dough in an oiled bowl, cover, and let rise in a warm place for 1.5 to 2 hours until doubled.
- Shape the loaf: Punch down dough. Divide into two parts (60% for loaf, 40% for decorations). Roll the large part into a ball and place on a parchment-lined baking sheet.
- Make decorations: Roll the smaller dough into ropes. Cross two strips over the loaf for the ‘bones’ and wrap smaller strips around the base for ‘tears’. Tuck ends under.
- Second rise: Cover and let rise for 45-60 minutes until puffy. Preheat oven to 350°F (175°C) during the last 15 minutes.
- Bake: Brush bread with milk. Bake for 25-30 minutes until golden brown and internal temperature reaches 190°F.
- Cool and glaze: Cool on a wire rack for 30 minutes. Whisk confectioners’ sugar and orange blossom water to make glaze. Drizzle over cooled bread.
Notes
Do not over-flour the dough; it should be slightly tacky. Ensure milk is lukewarm, not hot, to avoid killing the yeast. The bread is best stored at room temperature in an airtight container for up to 3 days. Do not refrigerate as it dries out the bread. For longer storage, freeze un-glazed bread for up to 3 months.
Nutrition
- Serving Size: 1 slice (approx. 1/1
- Calories: 220
- Sugar: 18
- Sodium: 250
- Fat: 6
- Saturated Fat: 3
- Carbohydrates: 38
- Fiber: 1
- Protein: 4
Keywords: pan de muerto, orange blossom glaze, mexican bread, dia de los muertos, sweet bread, anise bread, brioche bread


