Love this? Save it for later!
Share the inspiration with your friends
My sister did not trust pumpkin in scones. That was her stance, and she held it firmly for years. She argued that pumpkin made baked goods gummy, that the flavor got lost, and that scones were meant to be simple—butter, flour, a little sugar, nothing fancy. Every fall, I would try to convince her otherwise, and every fall, she would politely decline my offerings. Honestly, I started to wonder if she had a point. I had made plenty of dry, dense pumpkin scones in my own kitchen, the kind that crumble into sad little pieces the second you try to add butter. So when I set out to create a maple pumpkin scone that would actually change her mind, I knew I had to get it right. No room for error.
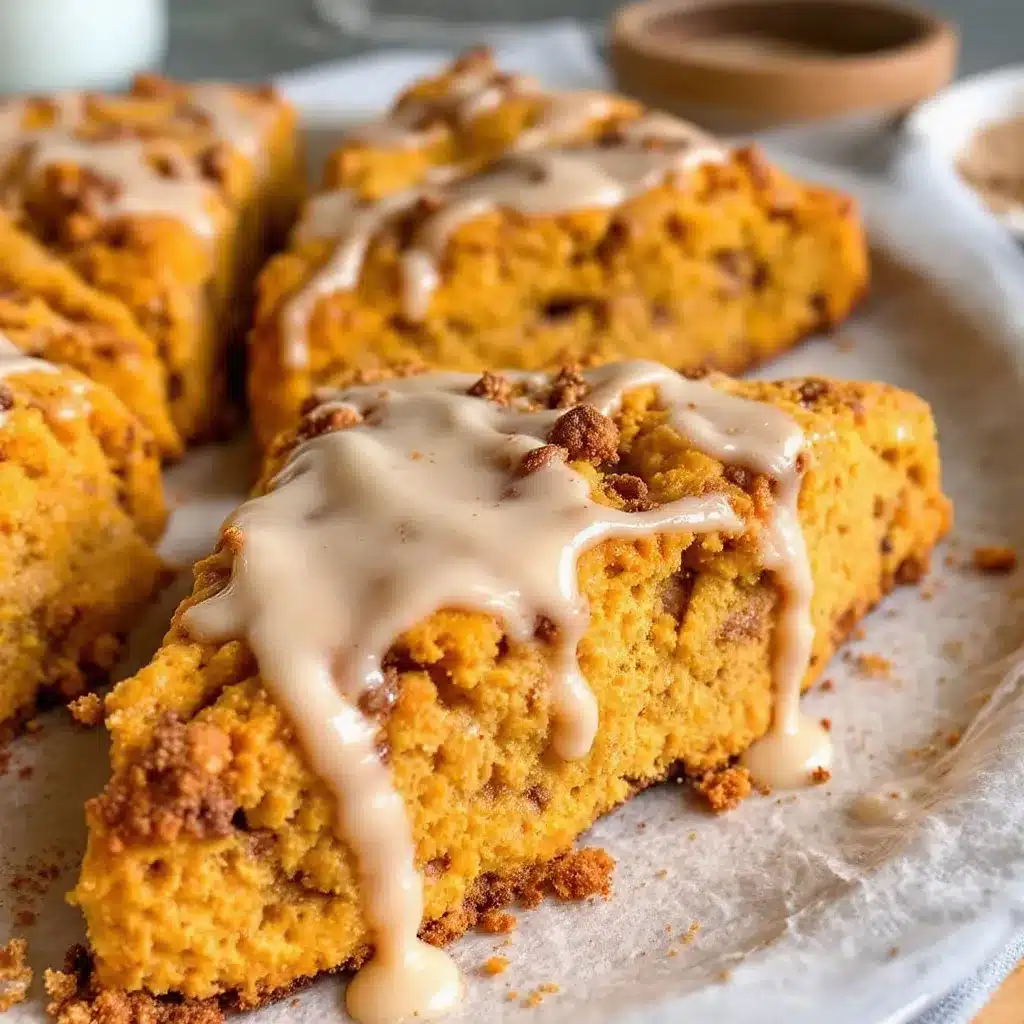
The first batch was okay. The second was better. The third—the one with the cinnamon glaze that pooled into all the cracks and crevices—that was the one. I dropped a still-warm scone off at her house with a note that said, “Just try it.” She texted me an hour later asking for the recipe. That, right there, is how I knew this recipe was a keeper. These cozy maple pumpkin scones with cinnamon glaze are not just another fall baking project. They are the scone that converts the skeptics. The texture is tender but sturdy, the maple flavor is warm without being cloying, and that glaze? It sets up into a crackly, sweet shell that makes every bite feel special. If you have ever been let down by a dry pumpkin scone, I promise you, this one is different.
Why You’ll Love This Recipe
I have tested this recipe more times than I care to admit, and I can tell you with confidence that it solves every problem a pumpkin scone usually has. Here is why this one works so well:
- Tender, Not Dry: The trick is a combination of cold butter and a bit of heavy cream. It creates a flaky, almost biscuit-like interior that stays moist for days.
- Real Maple Flavor: We are using actual maple syrup here, not just maple extract. It adds a deep, woodsy sweetness that pairs perfectly with the pumpkin.
- Simple Ingredients: You probably have most of these in your pantry right now. No weird stabilizers or hard-to-find flours.
- Perfect for Fall Mornings: These scones are made for a slow Saturday with a hot cup of coffee. They also freeze beautifully, so you can pull one out whenever the craving hits.
- That Cinnamon Glaze: Let’s be honest—the glaze is the star. It is thick, creamy, and spiced just right. It hardens slightly on top, giving the scone a lovely crunch.
This is not just a recipe I threw together. It is the result of trial, error, and a whole lot of butter. I wanted a scone that felt special enough for a holiday brunch but simple enough for a Tuesday. A scone that would make you close your eyes after the first bite. And honestly? I think I nailed it.
What Ingredients You Will Need
This recipe uses straightforward ingredients, but each one plays a specific role. Here is what you will need to gather before you start.
For the Scones
- All-purpose flour (2 ½ cups / 300g): Provides structure. I use Gold Medal or King Arthur for consistent results.
- Granulated sugar (⅓ cup / 65g): Adds just enough sweetness without overpowering the maple.
- Baking powder (1 tablespoon): This is non-negotiable for lift. Make sure it is fresh.
- Salt (½ teaspoon): Balances the sweetness and enhances the pumpkin flavor.
- Ground cinnamon (1 teaspoon): Warmth and depth.
- Ground ginger (½ teaspoon): Adds a little zing that cuts through the richness.
- Ground nutmeg (¼ teaspoon): Classic pumpkin spice flavor. Freshly grated is best if you have it.
- Ground cloves (⅛ teaspoon): Just a pinch. It goes a long way.
- Unsalted butter (½ cup / 113g), cold and cubed: This is the key to flaky layers. Keep it in the fridge until the last second.
- Pumpkin purée (½ cup / 120g): Not pumpkin pie filling. Make sure you grab 100% pumpkin purée. I like Libby’s.
- Maple syrup (¼ cup / 60ml): Use the real stuff. The fake syrup has a different consistency and will throw off the liquid ratio.
- Heavy cream (¼ cup / 60ml): Adds richness and helps create a tender crumb. You can substitute whole milk, but the scones will be slightly less tender.
- Vanilla extract (1 teaspoon): Rounds out the flavors.
For the Cinnamon Glaze
- Powdered sugar (1 ½ cups / 180g), sifted: Sifting prevents lumps. Trust me on this one.
- Maple syrup (2 tablespoons): Reinforces the maple flavor in the glaze.
- Ground cinnamon (½ teaspoon): The namesake spice. Do not skip it.
- Milk or heavy cream (2-3 tablespoons): Adjust the amount to get your desired consistency. Heavy cream makes the glaze richer.
- Vanilla extract (½ teaspoon): A little extra flavor boost.
Equipment Needed
You do not need a ton of fancy tools for this recipe, but having the right ones makes the process smoother.
- Large mixing bowl: For combining dry ingredients.
- Pastry cutter or two forks: To cut the cold butter into the flour. You can also use your fingertips if you work fast, but a pastry cutter is easier.
- Small bowl: For mixing the wet ingredients.
- Whisk: For the glaze and for mixing dry ingredients.
- Sharp knife or bench scraper: To cut the scone dough into triangles. A bench scraper is my favorite tool for this—it makes clean cuts without squishing the dough.
- Baking sheet: Line it with parchment paper or a silicone baking mat.
- Parchment paper: Non-stick and easy cleanup.
- Cooling rack: Essential for letting the glaze set properly.
- Pastry brush (optional): For brushing the tops with cream before baking, if you want a golden crust.
If you do not have a pastry cutter, do not worry. I have used two forks to cut butter into flour more times than I can count. It takes a little longer, but it works just fine. A food processor also works in a pinch, but be careful not to over-process the butter.
Preparation Method
Let us walk through this step by step. I will include all the little details that make the difference between a good scone and a great one.
- Preheat the oven to 400°F (200°C). Line a large baking sheet with parchment paper. This is important—the parchment prevents the bottoms from getting too dark.
- Whisk the dry ingredients together. In a large bowl, combine the all-purpose flour, granulated sugar, baking powder, salt, cinnamon, ginger, nutmeg, and cloves. Whisk until everything is evenly distributed. This ensures you do not get a pocket of baking powder in one bite.
- Cut in the cold butter. Add the cold, cubed butter to the flour mixture. Using a pastry cutter or two forks, cut the butter into the flour until the mixture resembles coarse meal with pea-sized butter pieces. Some larger chunks are okay—they create flaky layers. Work quickly so the butter does not warm up.
- Mix the wet ingredients. In a separate small bowl, whisk together the pumpkin purée, maple syrup, heavy cream, and vanilla extract until smooth. The mixture will be thick and a little sticky.
- Combine wet and dry ingredients. Pour the wet mixture into the flour-butter mixture. Use a rubber spatula or your hands to gently fold everything together. Stop as soon as a shaggy dough forms. Do not overmix—overworking the dough will make the scones tough. It is okay if there are a few dry spots.
- Shape the dough. Turn the dough out onto a lightly floured surface. Gently bring it together into a rectangle about ¾ inch (2 cm) thick. Use your hands to shape it—do not use a rolling pin, which can compress the dough too much. The rectangle should be roughly 8 inches by 6 inches (20 cm by 15 cm).
- Cut the scones. Using a sharp knife or bench scraper, cut the rectangle into 6 even triangles. You can also cut it into 8 smaller scones if you prefer. Dip the knife in flour between cuts to prevent sticking. Transfer the scones to the prepared baking sheet, spacing them about 2 inches (5 cm) apart.
- Chill the scones. Pop the baking sheet into the refrigerator for 15 minutes. This step is crucial—chilling the scones solidifies the butter, which prevents them from spreading too much in the oven and keeps them tall and flaky.
- Bake the scones. Brush the tops of the chilled scones with a little extra heavy cream (this helps them brown beautifully). Bake for 16-18 minutes, or until the edges are lightly golden and the tops are firm to the touch. The centers should still be pale. Do not overbake, or they will dry out.
- Cool completely. Transfer the scones to a wire rack and let them cool completely before glazing. If you glaze them while they are warm, the glaze will melt and slide right off.
- Make the cinnamon glaze. While the scones cool, sift the powdered sugar into a medium bowl. Add the maple syrup, ground cinnamon, vanilla extract, and 2 tablespoons of milk or heavy cream. Whisk until smooth. The glaze should be thick but pourable. If it is too thick, add another tablespoon of liquid. If it is too thin, add a little more powdered sugar.
- Glaze the scones. Once the scones are completely cool, drizzle the glaze over the tops using a spoon or a whisk. Let the glaze set for about 10-15 minutes before serving. The glaze will harden slightly, creating that signature crackly top.
Cooking Tips & Techniques
I have made a lot of mistakes in the kitchen so you do not have to. Here are the most important lessons I learned while perfecting these maple pumpkin scones.
Keep everything cold. This is the number one rule of scone making. If your butter warms up, your scones will spread into flat, greasy pucks. I cube the butter and put it back in the fridge while I measure out the flour. If your kitchen is warm, you can even chill the flour and bowl for a few minutes.
Do not overmix the dough. I know it is tempting to keep mixing until everything looks perfectly smooth, but stop as soon as the dough comes together. Overmixing develops gluten, which makes scones tough and chewy instead of tender and flaky. A few dry patches are totally fine.
Use a bench scraper. This tool is a game-changer for scones. It helps you cut through the dough cleanly without squishing the layers. If you do not have one, a sharp knife works, but use a sawing motion rather than pressing straight down.
Chill before baking. I cannot stress this enough. That 15-minute chill in the fridge is not optional. It firms up the butter so the scones hold their shape in the oven. I once skipped this step when I was in a hurry, and the scones spread into weird, flat blobs. They still tasted good, but they were not pretty.
Let the glaze set properly. Patience is hard, I know. But if you glaze the scones while they are even slightly warm, the glaze will slide right off and pool on the cooling rack. Wait until they are completely cool to the touch. The glaze will set into a beautiful, crackly shell that makes the scones look bakery-worthy.
Variations & Adaptations
One of the best things about this recipe is how flexible it is. Here are some ways to make it your own.
- Add mix-ins: Fold in ½ cup of chopped pecans, walnuts, or white chocolate chips along with the wet ingredients. The nuts add a lovely crunch, and the white chocolate complements the maple flavor beautifully.
- Make it dairy-free: Substitute the butter with a high-quality vegan butter (I like Miyoko’s) and use coconut cream or oat milk in place of the heavy cream. The texture will be slightly different, but still delicious.
- Try a different glaze: Swap the cinnamon in the glaze for pumpkin pie spice or a pinch of cardamom. A maple-brown butter glaze would also be incredible—just brown 2 tablespoons of butter, let it cool slightly, and whisk it into the powdered sugar with a little maple syrup.
- Go gluten-free: Use a 1:1 gluten-free baking flour blend that contains xanthan gum. I have tested this with King Arthur Measure for Measure, and it works well. The scones will be a little more delicate, so handle them gently.
- Make scone wedges instead of triangles: If you prefer round scones, shape the dough into a circle about ¾ inch thick and cut it into 6 or 8 wedges like a pizza. The baking time stays the same.
I have personally tried the version with chopped pecans, and it is my absolute favorite. The nutty crunch against the tender scone and the sweet glaze is a textural dream. If you are a fan of banana bread with walnut streusel, you will love this variation.
Serving & Storage Suggestions
These scones are best served slightly warm or at room temperature. The glaze is at its best when it has fully set but the scone itself is still soft. They are perfect alongside a hot cup of coffee, a pumpkin spice latte, or a warm mug of chai tea. For a more indulgent breakfast, serve them with a dollop of clotted cream or a pat of salted butter.
At room temperature: Store the glazed scones in an airtight container at room temperature for up to 3 days. Place a paper towel in the bottom of the container to absorb any excess moisture, which can make the glaze sticky.
In the refrigerator: If you live in a warm climate, you can store them in the fridge for up to 5 days. Let them come to room temperature before serving, or warm them in a 300°F (150°C) oven for 5 minutes.
In the freezer: These scones freeze beautifully. Freeze them unglazed on a baking sheet until solid, then transfer them to a freezer-safe bag or container. They will keep for up to 3 months. When you are ready to eat them, thaw them at room temperature, then warm them in the oven and glaze them fresh. The glaze does not freeze well, so always add it after thawing.
Reheating: The best way to reheat a scone is in a 350°F (175°C) oven for 5-7 minutes. The microwave will make them soft and a little soggy, but it works in a pinch if you are short on time.
One thing I love about these scones is that the flavors actually develop and deepen after a day. The maple and pumpkin spices meld together, making the scone taste even better on day two. That is, if they last that long.
Nutritional Information & Benefits
While these scones are definitely a treat, they do offer some nutritional perks thanks to the pumpkin and maple syrup.
Estimated nutritional values per scone (based on 6 scones):
- Calories: 410
- Fat: 18g
- Saturated Fat: 11g
- Carbohydrates: 58g
- Sugar: 32g
- Fiber: 2g
- Protein: 5g
Health highlights:
- Pumpkin purée is packed with Vitamin A (in the form of beta-carotene), which supports eye health and immune function. It also adds moisture to the scones without requiring extra fat.
- Maple syrup contains antioxidants and minerals like zinc and manganese, though it is still a sugar and should be enjoyed in moderation.
- Cinnamon has anti-inflammatory properties and can help regulate blood sugar levels.
Dietary considerations: This recipe contains gluten, dairy, and eggs (if you use the cream wash). It can be made dairy-free and gluten-free using the substitutions listed above. It is vegetarian-friendly as written.
I personally love that these scones feel indulgent but are made with real, whole-food ingredients. No artificial flavors, no preservatives—just butter, flour, pumpkin, and a little bit of maple magic.
Conclusion
These cozy maple pumpkin scones with cinnamon glaze are everything I want in a fall baking project. They are simple enough for a weekday morning but special enough to serve at a holiday brunch. The texture is tender and flaky, the maple flavor is warm and comforting, and that cinnamon glaze? It is the kind of topping that makes you want to lick the bowl clean.
I hope you give these scones a try and make them your own. Maybe you will add pecans, or swap the glaze for a brown butter version, or double the cinnamon because you love it as much as I do. Whatever you do, I would love to hear about it. Leave a comment below and tell me how your scones turned out, or share a photo on Pinterest and tag me. Your feedback and adaptations are what make this community so special.
So go ahead, preheat that oven, and get ready to fill your kitchen with the smell of maple and cinnamon. It is the coziest way to spend a fall morning, and honestly, you deserve it.
Frequently Asked Questions
Can I use pumpkin pie filling instead of pumpkin purée?
No, please do not. Pumpkin pie filling is pre-sweetened and spiced, which will throw off the sugar and spice balance in this recipe. Stick with 100% pumpkin purée for the best results.
Why did my scones turn out dry?
Dry scones are usually the result of overmixing the dough or overbaking them. Make sure you stop mixing as soon as the dough comes together, and pull the scones out of the oven when the edges are just barely golden. The centers should still look pale and soft.
Can I make the dough ahead of time?
Absolutely. You can prepare the scone dough, cut it into triangles, and freeze them on a baking sheet. Once frozen, transfer the unbaked scones to a freezer bag. Bake them straight from the freezer, adding 2-3 minutes to the baking time.
How do I get a thicker glaze?
If your glaze is too thin, add more sifted powdered sugar, one tablespoon at a time, until it reaches your desired consistency. If it is too thick, add a splash of milk or cream. The glaze should be thick but still pourable—think of the consistency of honey.
Can I double this recipe?
Yes, this recipe doubles beautifully. Just make sure you do not overcrowd the baking sheet. Bake the scones in two batches, keeping the second batch in the fridge while the first one bakes.
Pin This Recipe!
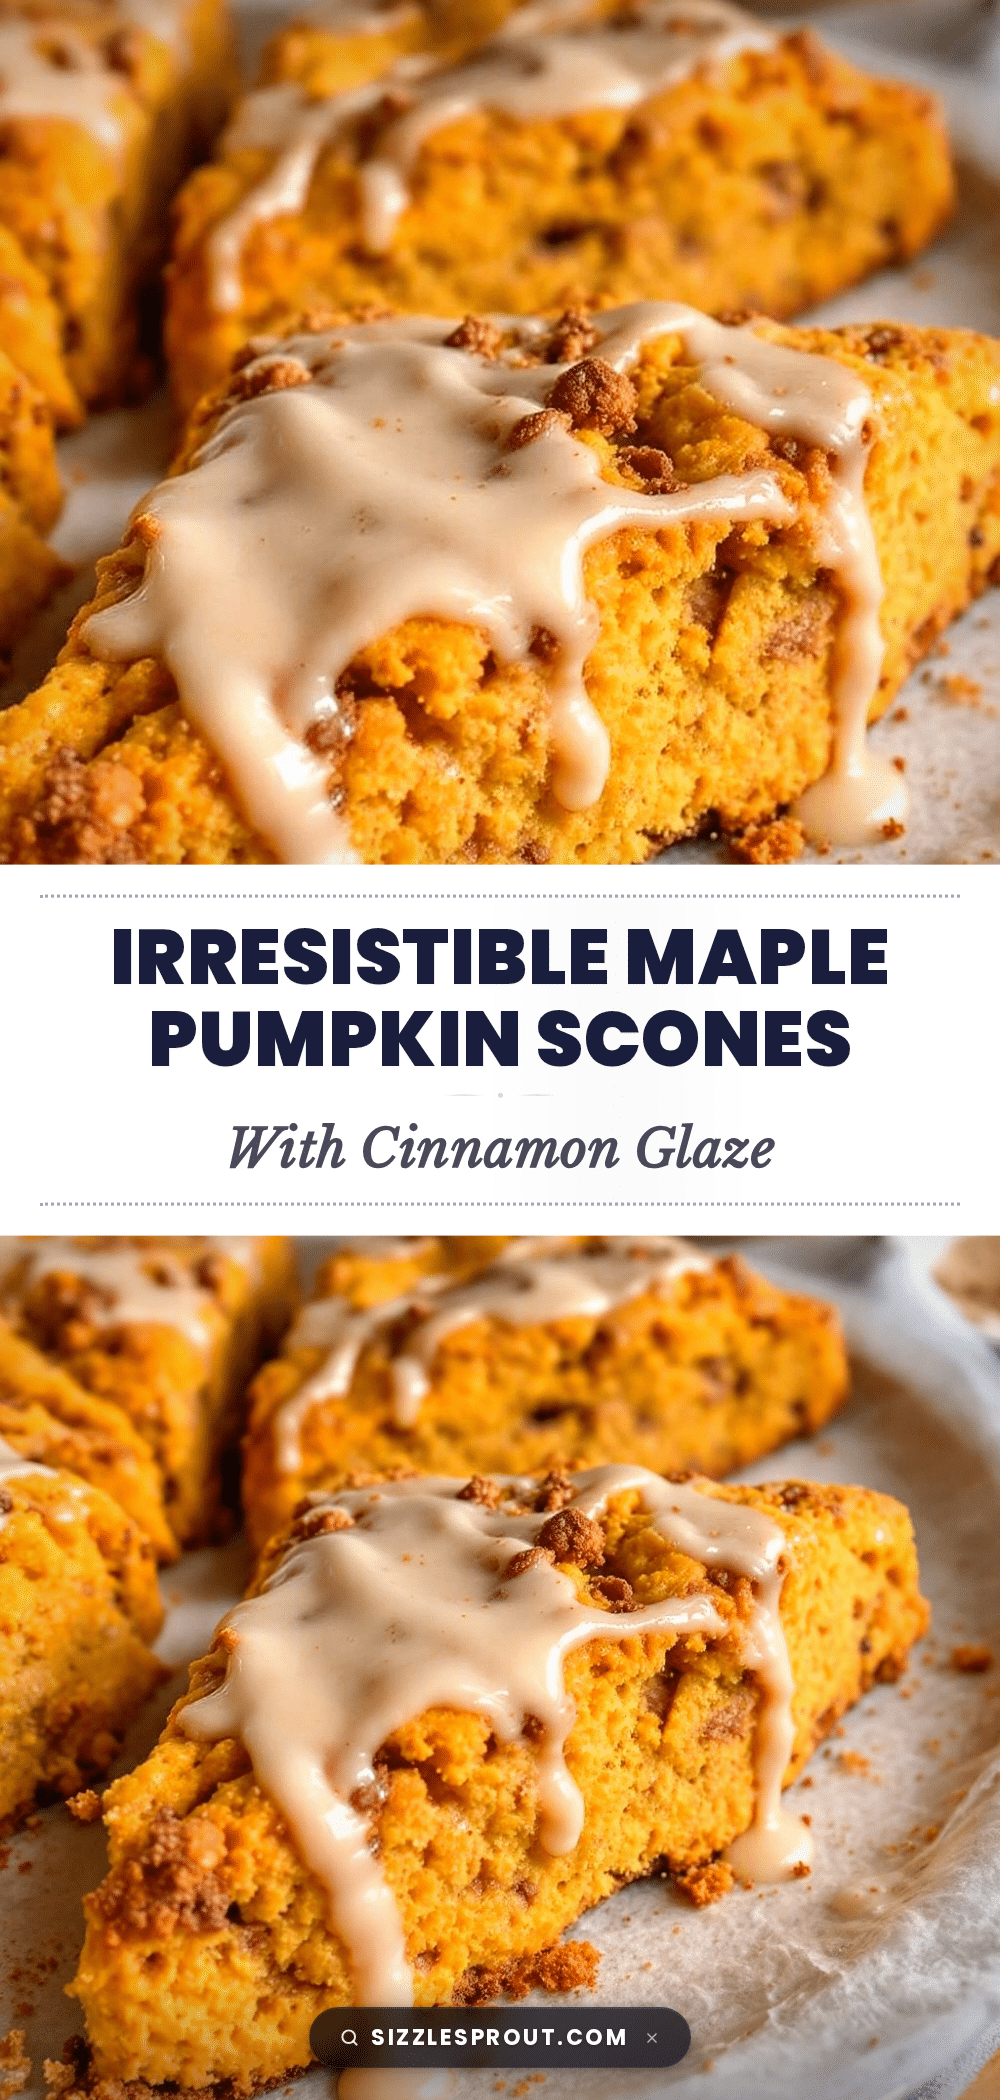
Cozy Maple Pumpkin Scones with Easy Cinnamon Glaze
Tender, flaky maple pumpkin scones with a crackly cinnamon glaze that converts even the skeptics. Perfect for fall mornings with a hot cup of coffee.
- Prep Time: 20 minutes
- Cook Time: 18 minutes
- Total Time: 53 minutes
- Yield: 6 scones 1x
- Category: Breakfast
- Cuisine: American
Ingredients
- 2 ½ cups (300g) all-purpose flour
- ⅓ cup (65g) granulated sugar
- 1 tablespoon baking powder
- ½ teaspoon salt
- 1 teaspoon ground cinnamon
- ½ teaspoon ground ginger
- ¼ teaspoon ground nutmeg
- ⅛ teaspoon ground cloves
- ½ cup (113g) unsalted butter, cold and cubed
- ½ cup (120g) pumpkin purée (not pumpkin pie filling)
- ¼ cup (60ml) maple syrup
- ¼ cup (60ml) heavy cream
- 1 teaspoon vanilla extract
- 1 ½ cups (180g) powdered sugar, sifted
- 2 tablespoons maple syrup
- ½ teaspoon ground cinnamon
- 2–3 tablespoons milk or heavy cream
- ½ teaspoon vanilla extract
Instructions
- Preheat the oven to 400°F (200°C). Line a large baking sheet with parchment paper.
- In a large bowl, whisk together the all-purpose flour, granulated sugar, baking powder, salt, cinnamon, ginger, nutmeg, and cloves until evenly distributed.
- Add the cold, cubed butter to the flour mixture. Using a pastry cutter or two forks, cut the butter into the flour until the mixture resembles coarse meal with pea-sized butter pieces.
- In a separate small bowl, whisk together the pumpkin purée, maple syrup, heavy cream, and vanilla extract until smooth.
- Pour the wet mixture into the flour-butter mixture. Gently fold together with a rubber spatula or your hands until a shaggy dough forms. Do not overmix.
- Turn the dough out onto a lightly floured surface. Gently shape into a rectangle about ¾ inch (2 cm) thick, roughly 8 inches by 6 inches (20 cm by 15 cm).
- Using a sharp knife or bench scraper, cut the rectangle into 6 even triangles. Transfer to the prepared baking sheet, spacing them about 2 inches (5 cm) apart.
- Refrigerate the baking sheet for 15 minutes to chill the scones.
- Brush the tops of the chilled scones with a little extra heavy cream. Bake for 16-18 minutes, until the edges are lightly golden and the tops are firm to the touch.
- Transfer the scones to a wire rack and let them cool completely before glazing.
- While the scones cool, sift the powdered sugar into a medium bowl. Add the maple syrup, ground cinnamon, vanilla extract, and 2 tablespoons of milk or heavy cream. Whisk until smooth. Adjust consistency with additional liquid or powdered sugar as needed.
- Once the scones are completely cool, drizzle the glaze over the tops. Let the glaze set for 10-15 minutes before serving.
Notes
Keep all ingredients cold for flaky scones. Do not overmix the dough. Chilling the scones before baking is crucial to prevent spreading. Let scones cool completely before glazing to ensure the glaze sets properly.
Nutrition
- Serving Size: 1 scone
- Calories: 410
- Sugar: 32
- Sodium: 320
- Fat: 18
- Saturated Fat: 11
- Carbohydrates: 58
- Fiber: 2
- Protein: 5
Keywords: maple pumpkin scones, cinnamon glaze, fall baking, pumpkin scones, easy scone recipe


