Love this? Save it for later!
Share the inspiration with your friends
The sprinkles were stuck to my sleeve, the cocoa powder had somehow migrated to my forehead, and my four-year-old was wearing more black frosting than the actual cake. My sister had texted at 3 PM—surprise, we’re coming over for Halloween movie night, bringing the kids—and I had approximately one hour and a pantry that was decidedly not ready for a party. No candy apples, no pre-made treats, and definitely no time for a trip to the store.
But I did have butter. And sugar. And a bag of black gel food coloring I’d impulse-bought last October and shoved behind the vanilla extract. That’s when this black cat Halloween cookie cake happened—born from panic, a little bit of desperation, and the stubborn refusal to show up to a Halloween gathering empty-handed, even if that gathering was my own living room.
I wanted something that looked impressive but didn’t require piping bags or chill times or the kind of patience I simply didn’t have that afternoon. A giant cookie cake seemed right—easy to throw together, forgiving if you overmix (which I definitely did), and the perfect canvas for turning into something vaguely cat-shaped. I shaped it freehand, added some candy corn ears, and by the time my sister walked in, I had a black cat cookie cake cooling on the counter that looked like it had taken hours. It hadn’t. That’s the kind of magic I can get behind.
Now this recipe has become our official Halloween tradition—the thing we make every October, sometimes twice. It’s the dessert that doesn’t take itself too seriously, which is exactly the energy Halloween should have.
Why You’ll Love This Recipe
Let me tell you why this black cat Halloween cookie cake has earned a permanent spot in my recipe binder. I’ve tested it at least seven times (my coworkers have been very patient taste-testers), and every single batch has disappeared within hours.
- No Chill Time Required : You read that right. No waiting, no overnight rests, no “pop it in the fridge for two hours.” Mix, shape, bake. That’s it. Perfect for when Halloween sneaks up on you (which it always does).
- Simple Pantry Ingredients : Butter, sugar, flour, eggs, vanilla, cocoa powder—you probably have everything already. The only special item is black gel food coloring, and you can find it at most grocery stores or online for a few bucks.
- Perfect for Halloween Parties : This cookie cake is a showstopper on any dessert table. It’s fun enough for kids’ parties but stylish enough for adult gatherings. I brought it to our neighborhood Halloween potluck last year and got asked for the recipe four times.
- Customizable and Forgiving : Mess up the shape? Just call it an abstract black cat. Want to add sprinkles or candy eyes? Go for it. This recipe doesn’t judge.
- Crowd-Pleaser Texture : The edges get slightly crisp while the center stays soft and chewy—exactly what a good cookie cake should be. It’s like a giant chocolate cookie but with a fun Halloween twist that makes everyone smile.
What really sets this recipe apart is the color. I spent three batches figuring out how to get that deep, true black without the batter tasting like chemicals. The trick is using a combination of black cocoa powder (which has a darker, more intense color than regular cocoa) and gel food coloring. The result is a cookie cake that’s jet black, tender, and tastes like a rich chocolate cookie—not like a science experiment.
This isn’t just another Halloween dessert. It’s the one you’ll actually want to make again next year because it’s genuinely delicious, not just cute. And honestly? That’s the highest compliment I can give a holiday recipe.
What Ingredients You Will Need
This black cat Halloween cookie cake uses straightforward ingredients, but a few key choices make all the difference in the final result. Here’s what you’ll need and why each one matters.
For the Cookie Cake Base:
- 1 cup (2 sticks) unsalted butter, softened to room temperature. I use Land O’Lakes because it has a consistent fat content that gives reliable results. Let it sit out for about an hour before starting—you want it soft enough that your finger leaves an indent when you press it, but not melty.
- 1 cup granulated sugar. Regular white sugar works best here. Brown sugar would add moisture and change the texture, making the cookie cake more cake-like than cookie-like.
- 1 large egg, room temperature. Cold eggs can seize the butter mixture, so let yours sit out alongside the butter. If you forgot to plan ahead, place the egg in a bowl of warm water for 5 minutes.
- 2 teaspoons vanilla extract. Pure vanilla extract gives the best flavor, but imitation works fine too. I’ve used both and honestly can’t tell the difference once the black cocoa is in there.
- 2 cups all-purpose flour. Spoon and level your flour rather than scooping directly from the bag—scooping packs the flour down and you’ll end up with a dry, crumbly dough.
- 1/2 cup black cocoa powder. This is different from regular cocoa powder. Black cocoa has been processed with alkali (Dutch-processed) and has a much darker color and milder, almost Oreo-like flavor. I order mine from King Arthur Flour, but you can also find it at specialty baking stores or on Amazon. Regular dark cocoa powder will work in a pinch, but the color won’t be as deep.
- 1/2 teaspoon baking soda. This helps the cookie cake spread and rise slightly. Don’t skip it, or you’ll end up with a dense hockey puck.
- 1/2 teaspoon salt. Salt balances the sweetness and enhances the chocolate flavor. I use fine sea salt for baking.
- 1-2 teaspoons black gel food coloring. Liquid food coloring won’t give you the same intensity—you need gel or paste. Americolor Super Black is my go-to, but Wilton also makes a good one. Start with 1 teaspoon and add more if needed.
For the Decoration:
- 1/2 cup candy corn (for ears). Orange candy corn creates the perfect cat ear shape. If you can find the black and white candy corn mix, that’s even more Halloween-y.
- Yellow and black M&Ms or candy eyes (for eyes). I use yellow M&Ms for the eyes and black gel icing to draw the pupils. Candy eyes from the baking aisle work great too.
- Black licorice strings or black gel icing (for whiskers). Black gel icing in a tube is easiest and most precise. I like the Wilton brand.
- Optional: White chocolate chips or white candy melts for adding highlights or small details.
Ingredient Tips from My Kitchen:
If you can’t find black cocoa powder, you can use regular Dutch-process cocoa powder and increase the black gel food coloring to 2-3 teaspoons. The flavor will be more intensely chocolate, but the color won’t be quite as dramatic. I’ve made it both ways, and honestly, my family didn’t complain about either version.
For a dairy-free option, substitute the butter with a high-quality vegan butter stick (not margarine from a tub—the water content is too high). I’ve had good results with Miyoko’s European Style Cultured Vegan Butter.
And here’s something I learned the hard way: don’t substitute the black cocoa with regular unsweetened cocoa powder and expect the same result. Regular cocoa is lighter and more acidic, so you’d need to adjust the leavening and add more coloring. It’s doable, but the texture and taste will be different. Stick with black cocoa if you can find it.
Equipment Needed
You don’t need fancy equipment for this black cat Halloween cookie cake, which is part of its charm. Here’s what you’ll need:
- Large mixing bowl and hand mixer or stand mixer. A hand mixer works perfectly fine—I used one for years before upgrading to a KitchenAid. You can also mix by hand with a wooden spoon, but your arm will get a workout.
- Baking sheet. A standard half-sheet pan (18×13 inches) works great. Line it with parchment paper for easy cleanup. I recommend using a lighter-colored baking sheet—dark pans can cause the bottom of the cookie cake to brown too quickly.
- Parchment paper. Don’t skip this. The cookie cake will spread slightly, and parchment prevents sticking without adding extra grease.
- Measuring cups and spoons. For accurate measurements. I use metal measuring cups for dry ingredients and glass ones for liquids.
- Spatula. A flexible silicone spatula is perfect for scraping down the bowl and smoothing the dough.
- Small offset spatula or butter knife. For shaping the dough into the cat shape and smoothing edges.
- Cooling rack. A wire rack allows air to circulate under the cookie cake, preventing a soggy bottom. If you don’t have one, you can carefully slide the parchment onto a countertop—just watch out for steam buildup.
- Piping bag or small zip-top bag. For the black gel icing when drawing whiskers and facial details. A zip-top bag with a tiny corner snipped off works just as well as a piping bag.
Budget-Friendly Alternatives:
No stand mixer? No problem. A hand mixer costs around $20 and does the job perfectly. If you’re mixing by hand, cream the butter and sugar together for a full 3 minutes—it takes more elbow grease but the result is the same. Just make sure your butter is properly softened.
Don’t have a cooling rack? Invert a second baking sheet and place the parchment on top. The slight elevation allows enough airflow to prevent condensation.
And if you don’t have an offset spatula, a regular butter knife works fine for shaping. I’ve shaped plenty of cookie cakes with the back of a spoon in a pinch.
Preparation Method
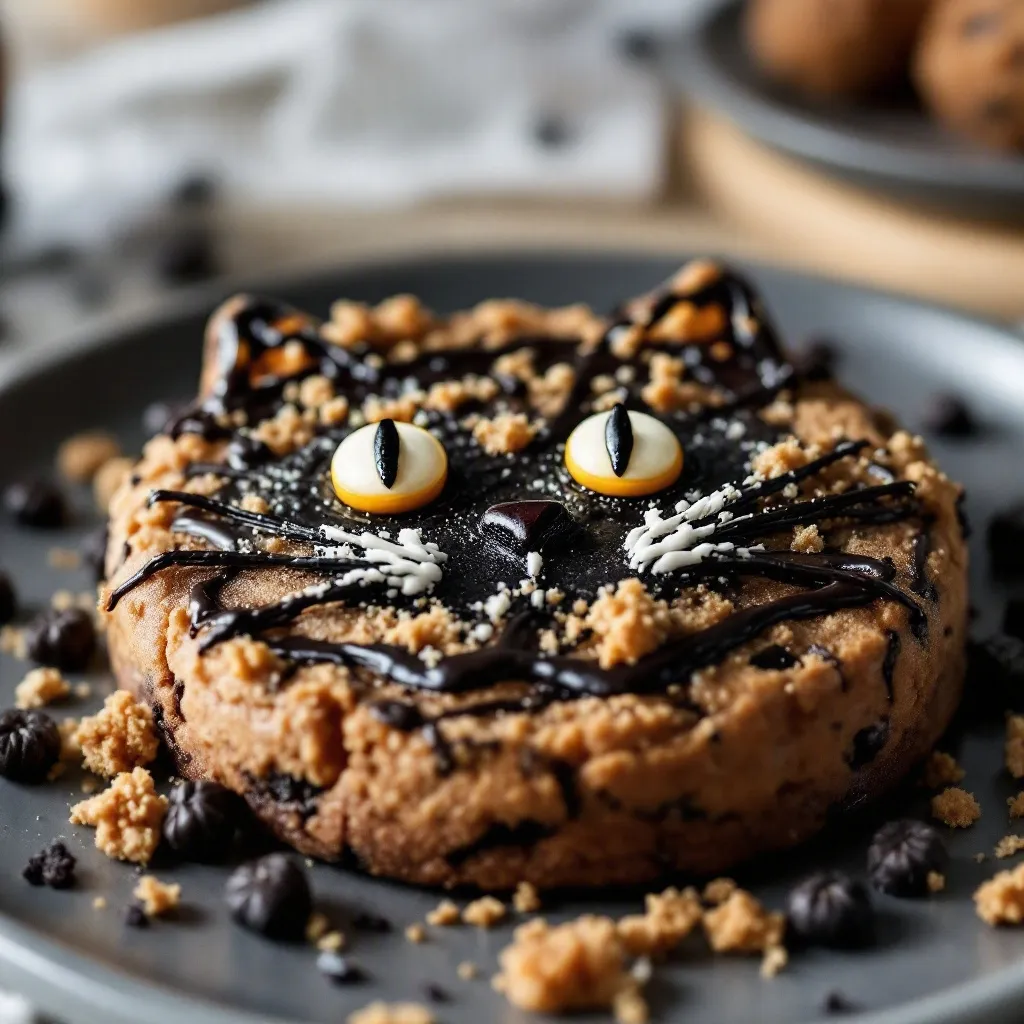
Ready to make your black cat Halloween cookie cake? Follow these steps, and you’ll have a spooky, delicious dessert in under an hour.
- Preheat your oven to 350°F (175°C). Line a baking sheet with parchment paper. I like to use a sheet that’s at least 13×18 inches so I have plenty of room to shape the cat.
- Cream the butter and sugar. In a large mixing bowl, beat the softened butter and granulated sugar together on medium speed until light and fluffy, about 2-3 minutes. Scrape down the sides of the bowl with a spatula halfway through. The mixture should look pale and airy—this is where the texture starts.
- Add the egg and vanilla. Crack the egg into the butter mixture, add the vanilla extract, and beat on medium speed until fully combined, about 30 seconds. The mixture might look slightly curdled at this point—that’s normal, especially if your egg was a bit cold.
- Mix the dry ingredients. In a separate bowl, whisk together the all-purpose flour, black cocoa powder, baking soda, and salt. Whisking aerates the flour and ensures the leavening agents are evenly distributed. I use a fork for this—no need to dirty another whisk.
- Combine wet and dry ingredients. Gradually add the dry ingredients to the wet mixture, mixing on low speed until just combined. Stop as soon as you don’t see any more streaks of flour. Overmixing at this stage develops gluten, which can make the cookie cake tough instead of tender. I’ve made that mistake—trust me, stop mixing early.
- Add the black gel food coloring. Squeeze in 1 teaspoon of black gel food coloring and mix on low until the color is evenly distributed. The dough should be a deep, dark gray at this point. If you want a true black, add another 1/2 to 1 teaspoon and mix again. The color will darken slightly as the cookie cake bakes, so don’t worry if it’s not jet black in the bowl.
- Shape the cat. Transfer the dough onto the prepared baking sheet. Using your hands or an offset spatula, shape it into a rough cat head shape—think of a large circle with two pointed ears on top. Aim for the shape to be about 1/2-inch thick throughout. Don’t worry about perfection; the dough will spread slightly as it bakes, and any imperfections can be covered with frosting or candy later. I usually shape the ears by pinching the dough upward into two triangles.
- Add the candy corn ears (optional but recommended). Press 3-4 candy corn pieces into each ear area, pointed side up, to create textured ears. This step is purely decorative but adds a nice pop of orange against the black cookie.
- Bake. Place the baking sheet in the preheated oven and bake for 12-15 minutes. The edges should look set and slightly cracked, and the center should still look slightly soft and underdone. A toothpick inserted into the center should come out with a few moist crumbs—not wet batter. I start checking at 12 minutes because ovens vary, and I’d rather underbake than overbake.
- Cool completely. Remove the baking sheet from the oven and let the cookie cake cool on the sheet for 5 minutes. Then carefully transfer the parchment paper to a wire cooling rack and let it cool completely, about 30 minutes. Don’t try to decorate while it’s warm—the icing will melt and the candy will slide right off. I learned this one the messy way.
- Decorate. Once the cookie cake is completely cool, it’s time to make it look like a cat. Use the black gel icing to draw two eyes, a small nose, and a mouth. Add yellow M&Ms or candy eyes for the eyeballs, then use the gel icing to draw pupils. Pipe whiskers extending from each side of the nose—I do three on each side. You can also add a small pink or black nose using a candy melt or a dot of frosting. Get creative with it!
- Serve or store. Slice the cookie cake into wedges like a pizza and serve immediately. Or store it in an airtight container at room temperature for up to 3 days (if it lasts that long).
Cooking Tips & Techniques
After making this black cat Halloween cookie cake more times than I care to admit, I’ve collected a few tips that make the process smoother and the results more reliable.
Getting the Perfect Black Color:
The biggest challenge with this recipe is achieving that deep, true black color without the cookie tasting bitter or artificial. Here’s what works: use black cocoa powder as the base, then add gel food coloring to intensify. Black cocoa already has a dark, almost charcoal color, so you need less food coloring than you would with regular cocoa. I’ve found that 1 to 1.5 teaspoons of black gel coloring is the sweet spot—enough to make it black without affecting the flavor.
If you accidentally add too much food coloring, don’t panic. The cookie will still taste fine, though it might have a slight aftertaste. I once added 3 teaspoons trying to chase the perfect shade, and while it looked amazing, the flavor was a bit off. Learn from my mistakes.
Avoiding a Dry Cookie Cake:
Cookie cakes are notorious for drying out if you’re not careful. The key is to underbake slightly. Remember that the cookie cake continues to cook from residual heat after it comes out of the oven, so pulling it when the center still looks a bit soft is the right call. If you wait until the center looks fully set, you’ll end up with a dry, crumbly cookie.
Shaping the Cat:
Don’t stress about making the perfect cat shape freehand. If the ears look uneven after baking, you can trim them slightly with a sharp knife while the cookie is still warm. Or embrace the imperfection—I once made a cat that looked more like a bear, and my kids loved it anyway. They called it a “spooky bear-cat” and it was a hit.
Multitasking Strategy:
This recipe comes together quickly, so I like to set up my ingredients before starting. Measure everything out, line the baking sheet, and have the candy decorations ready. That way, once the dough is mixed, I can shape and bake without scrambling for the candy corn while the dough sits.
Consistency Check:
The dough should be thick and slightly sticky but not wet. If it feels too dry and crumbly, you might have over-measured your flour. Add 1 tablespoon of milk or water and mix again. If it feels too soft and greasy, your butter might have been too soft—pop the dough in the fridge for 10 minutes before shaping.
My Biggest Failure and What I Learned:
My very first attempt at this recipe was a disaster. I used liquid food coloring instead of gel, and the dough turned a weird gray-green color that looked nothing like a black cat. I tried to salvage it by adding more coloring, but the dough became too wet and spread into a shapeless blob in the oven. It tasted fine, but it looked like a sad, gray pancake. That’s when I learned the importance of gel food coloring—it’s concentrated, so you use less, and it doesn’t add extra liquid to the dough.
Variations & Adaptations
One of the best things about this black cat Halloween cookie cake is how adaptable it is. Here are some variations I’ve tried and loved.
Gluten-Free Version:
Substitute the all-purpose flour with a 1:1 gluten-free baking flour blend that contains xanthan gum. I’ve used Bob’s Red Mill Gluten-Free 1-to-1 Baking Flour with excellent results. The texture is slightly more tender than the original, but the flavor is spot-on. Just be careful not to overmix, as gluten-free batters can become gummy.
Vegan Version:
Replace the butter with vegan butter (I like Miyoko’s), and use a flax egg (1 tablespoon ground flaxseed mixed with 3 tablespoons water, let sit for 5 minutes) instead of the regular egg. The texture will be slightly less tender, but the cookie cake will still be delicious. I made this version for a vegan friend’s Halloween party, and it disappeared just as fast as the original.
Different Shapes:
Who says it has to be a cat? You can shape the dough into a pumpkin, a ghost, a bat, or even a spider. Use orange food coloring for a pumpkin, leave the dough uncolored for a ghost, or shape it into a bat silhouette. The possibilities are endless, and it’s a great way to use up leftover dough if you have kids who want to make their own shapes.
Flavor Twists:
Add 1/2 cup of chocolate chips to the dough for extra chocolate flavor. Or fold in 1/2 cup of crushed Oreos for a cookies-and-cream version. I once added a teaspoon of orange extract along with the vanilla for a chocolate-orange flavor that was surprisingly good—like a Halloween version of a Terry’s Chocolate Orange.
Extra Spooky Decorations:
Use white chocolate to pipe spiderwebs on the cookie cake. Add candy spiders or gummy worms for a creepy-crawly effect. You can also dust the finished cookie cake with edible glitter or luster dust for a magical, witchy vibe. My kids love adding plastic spider rings (removed before eating, of course) for an extra spooky touch.
Mini Cookie Cat Version:
Instead of one large cookie cake, shape the dough into smaller cat heads (about 3 inches each) for individual servings. Reduce the baking time to 8-10 minutes. These are perfect for Halloween party favors or lunchbox surprises.
If you love Halloween baking as much as I do, you might also enjoy these other spooky treats from the blog: poison apple black velvet Halloween bundt cake for a dramatic centerpiece, or these spider web pumpkin sugar cookies that are perfect for decorating with kids.
Serving & Storage Suggestions
This black cat Halloween cookie cake is best served at room temperature, sliced into wedges like a pizza. I like to serve it on a black or orange platter for maximum Halloween effect. A dusting of powdered sugar (if you can see it against the black cookie) or a drizzle of white chocolate adds a nice contrast.
What to Serve With It:
A glass of cold milk is the classic pairing, but it’s also fantastic with a scoop of vanilla ice cream or a dollop of whipped cream. For an adult Halloween party, try serving it alongside a creamy pumpkin spice cold foam coffee for the ultimate fall dessert-and-drink combo. The warm spices in the coffee complement the rich chocolate flavor beautifully.
Storage Instructions:
Store leftover cookie cake in an airtight container at room temperature for up to 3 days. If you need to stack slices, place a piece of parchment paper between each layer to prevent sticking. The cookie cake will stay soft and chewy for the first two days, then start to dry out slightly on day three.
Freezing Instructions:
You can freeze the undecorated cookie cake for up to 3 months. Wrap it tightly in plastic wrap, then in aluminum foil, and place it in a freezer-safe bag. When you’re ready to serve, thaw it at room temperature for about 2 hours, then decorate as directed. I’ve done this for last-minute Halloween parties, and it works like a charm.
Reheating Tips:
If the cookie cake has been stored and seems a bit dry, pop a slice in the microwave for 10-15 seconds. It’ll soften up and taste almost fresh-baked. You can also warm it in a 300°F oven for 3-5 minutes, but keep an eye on it—the candy decorations might melt.
How Flavors Develop:
The black cocoa flavor actually deepens and becomes more pronounced after a day or two. If you can resist eating it immediately, the cookie cake tastes even better on day two. The texture softens slightly, and the chocolate flavor becomes richer and more complex. Not that I’ve ever managed to wait that long.
Nutritional Information & Benefits
Let’s be real—this is a Halloween treat, not a health food. But here’s the nutritional breakdown for one slice (assuming 8 slices per cookie cake):
- Calories: Approximately 320-350 per slice
- Fat: 16g (10g saturated)
- Carbohydrates: 45g (25g sugar)
- Protein: 4g
- Fiber: 2g
- Sodium: 180mg
Health Highlights:
Black cocoa powder is rich in antioxidants called flavonoids, which are compounds found in cocoa beans that can help reduce inflammation and support heart health. Of course, the amount in a single slice of cookie cake is modest, but it’s a nice thought.
Dietary Considerations:
This recipe contains dairy (butter), eggs, and gluten (flour). For a dairy-free version, use vegan butter. For a gluten-free version, use a 1:1 gluten-free flour blend. The vegan version also works with a flax egg.
Allergen Notes:
This recipe contains wheat, dairy, and eggs. The candy decorations may contain soy, corn, and artificial colors. Always check the labels on your ingredients if you’re serving someone with allergies.
My Personal Perspective:
I believe in balance. Halloween comes once a year, and a slice of this cookie cake is a celebration, not a daily habit. I make it, I enjoy it, I share it with people I love, and I don’t feel guilty about it. Life’s too short to skip dessert, especially when it’s shaped like a black cat.
Conclusion
This black cat Halloween cookie cake has become more than just a recipe in our house—it’s a tradition. It’s the thing we make on the first chilly October evening, the dessert that shows up at every Halloween gathering, the treat my kids ask for by name starting in September. And honestly? I’m not tired of it yet.
What I love most about this recipe is how it brings people together. There’s something about a giant cookie shaped like a cat that makes everyone smile, regardless of age. It’s playful without being childish, impressive without being complicated, and delicious without requiring a culinary degree.
I hope you’ll try this recipe and make it your own. Maybe you’ll shape it into a different animal, add your favorite candies, or serve it with a scoop of ice cream. Whatever you do, I’d love to hear about it. Drop a comment below and tell me how your black cat turned out—did your kids help decorate it? Did you serve it at a party? Did you eat the whole thing yourself? No judgment here.
And if you’re looking for more Halloween inspiration, don’t miss these crispy mummy hot dog Halloween appetizers for a savory option, or this cozy chocolate chip pumpkin sourdough bread for another fall baking project.
Happy Halloween, friends. May your cookie cakes be black, your candy corn plentiful, and your kitchen full of laughter.
Frequently Asked Questions
Can I make this black cat Halloween cookie cake ahead of time?
Absolutely! You can bake the cookie cake up to 2 days in advance and store it in an airtight container at room temperature. Decorate it just before serving for the best presentation. You can also freeze the undecorated cookie cake for up to 3 months.
Why did my cookie cake spread too much?
This usually happens if the butter was too soft or the dough wasn’t chilled enough. Next time, make sure your butter is softened but not melty, and if your kitchen is warm, pop the shaped dough in the fridge for 10-15 minutes before baking.
Can I use regular cocoa powder instead of black cocoa powder?
You can, but the color won’t be as dark. Use regular Dutch-process cocoa powder and increase the black gel food coloring to 2-3 teaspoons. The flavor will be more intensely chocolate, which isn’t a bad thing.
How do I get the black color without food coloring?
It’s difficult to achieve a true black color without gel food coloring. Black cocoa powder gives a very dark gray, but to get true black, you need the coloring. If you want to avoid artificial colors, you can use natural black cocoa (which is darker than regular cocoa) and accept a dark gray result.
Can I make this recipe into individual cookies instead of one large cookie cake?
Yes! Scoop the dough into 2-tablespoon portions, shape them into small cat heads or rounds, and bake for 8-10 minutes. Decorate each cookie individually for a fun party treat.
Pin This Recipe!
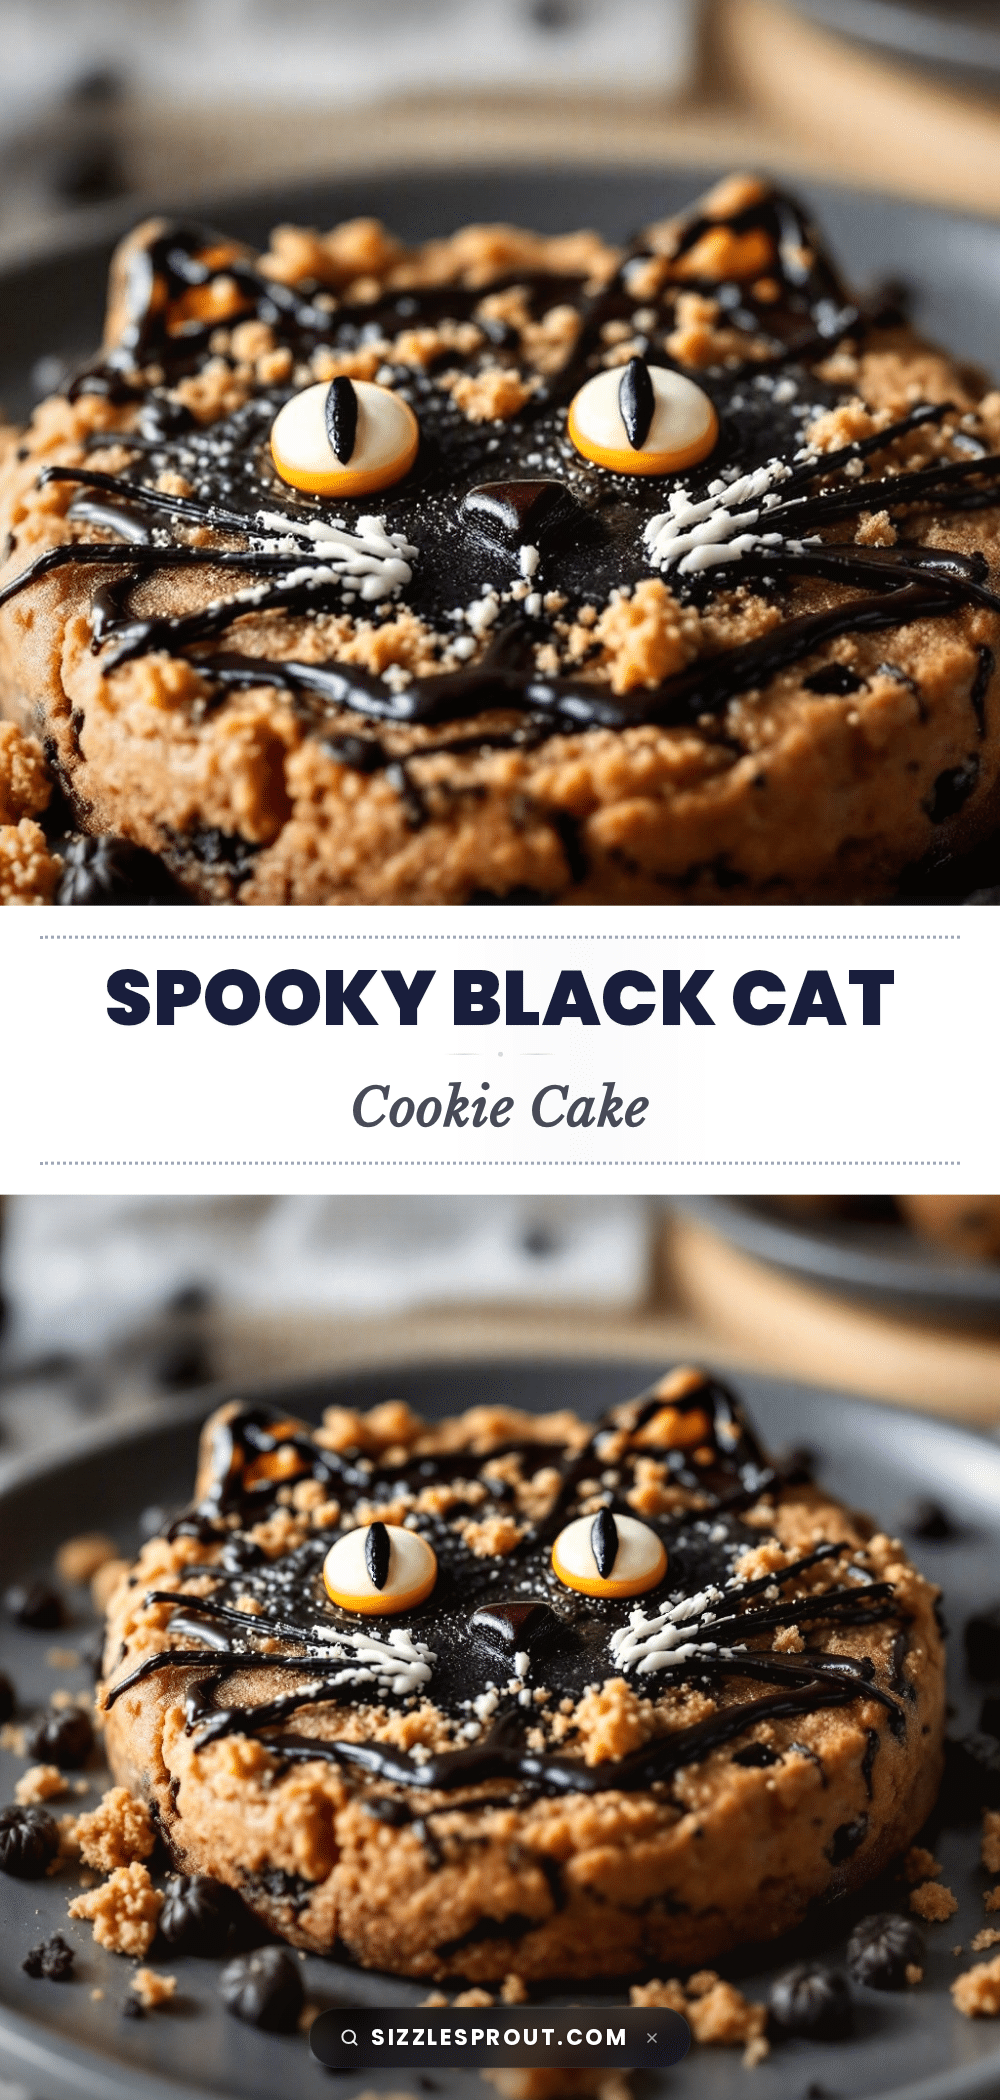
Best Black Cat Halloween Cookie Cake Recipe

A spooky and delicious black cat-shaped cookie cake made with black cocoa and gel food coloring, perfect for Halloween parties. No chill time required, and it’s a crowd-pleaser with a soft, chewy center and slightly crisp edges.
- Prep Time: 15 minutes
- Cook Time: 15 minutes
- Total Time: 30 minutes
- Yield: 8 servings 1x
- Category: Dessert
- Cuisine: American
Ingredients
- 1 cup (2 sticks) unsalted butter, softened
- 1 cup granulated sugar
- 1 large egg, room temperature
- 2 teaspoons vanilla extract
- 2 cups all-purpose flour
- 1/2 cup black cocoa powder
- 1/2 teaspoon baking soda
- 1/2 teaspoon salt
- 1–2 teaspoons black gel food coloring
- 1/2 cup candy corn (for ears)
- Yellow and black M&Ms or candy eyes (for eyes)
- Black licorice strings or black gel icing (for whiskers)
- Optional: white chocolate chips or white candy melts
Instructions
- Preheat oven to 350°F (175°C). Line a baking sheet with parchment paper.
- In a large bowl, cream the softened butter and granulated sugar together on medium speed until light and fluffy, about 2-3 minutes.
- Add the egg and vanilla extract, beating on medium speed until fully combined, about 30 seconds.
- In a separate bowl, whisk together the flour, black cocoa powder, baking soda, and salt.
- Gradually add the dry ingredients to the wet mixture, mixing on low speed until just combined. Do not overmix.
- Add 1 teaspoon of black gel food coloring and mix on low until evenly distributed. Add more coloring if needed to achieve a deep black color.
- Transfer the dough to the prepared baking sheet. Shape it into a rough cat head shape (large circle with two pointed ears on top), about 1/2-inch thick.
- Press 3-4 candy corn pieces into each ear area, pointed side up, for textured ears (optional).
- Bake for 12-15 minutes, until edges are set and center is slightly soft. A toothpick inserted should come out with moist crumbs.
- Cool on the baking sheet for 5 minutes, then transfer to a wire rack to cool completely (about 30 minutes).
- Once cool, decorate with black gel icing for eyes, nose, mouth, and whiskers. Add yellow M&Ms or candy eyes for eyeballs and draw pupils with icing.
- Slice into wedges and serve, or store in an airtight container at room temperature for up to 3 days.
Notes
For a deeper black color, use black cocoa powder and gel food coloring. Avoid overmixing to keep the cookie cake tender. Underbake slightly to prevent dryness. The cookie cake can be frozen undecorated for up to 3 months.
Nutrition
- Serving Size: 1 slice (1/8 of cook
- Calories: 335
- Sugar: 25
- Sodium: 180
- Fat: 16
- Saturated Fat: 10
- Carbohydrates: 45
- Fiber: 2
- Protein: 4
Keywords: Halloween cookie cake, black cat cookie cake, Halloween dessert, chocolate cookie cake, no chill cookie cake


