Love this? Save it for later!
Share the inspiration with your friends
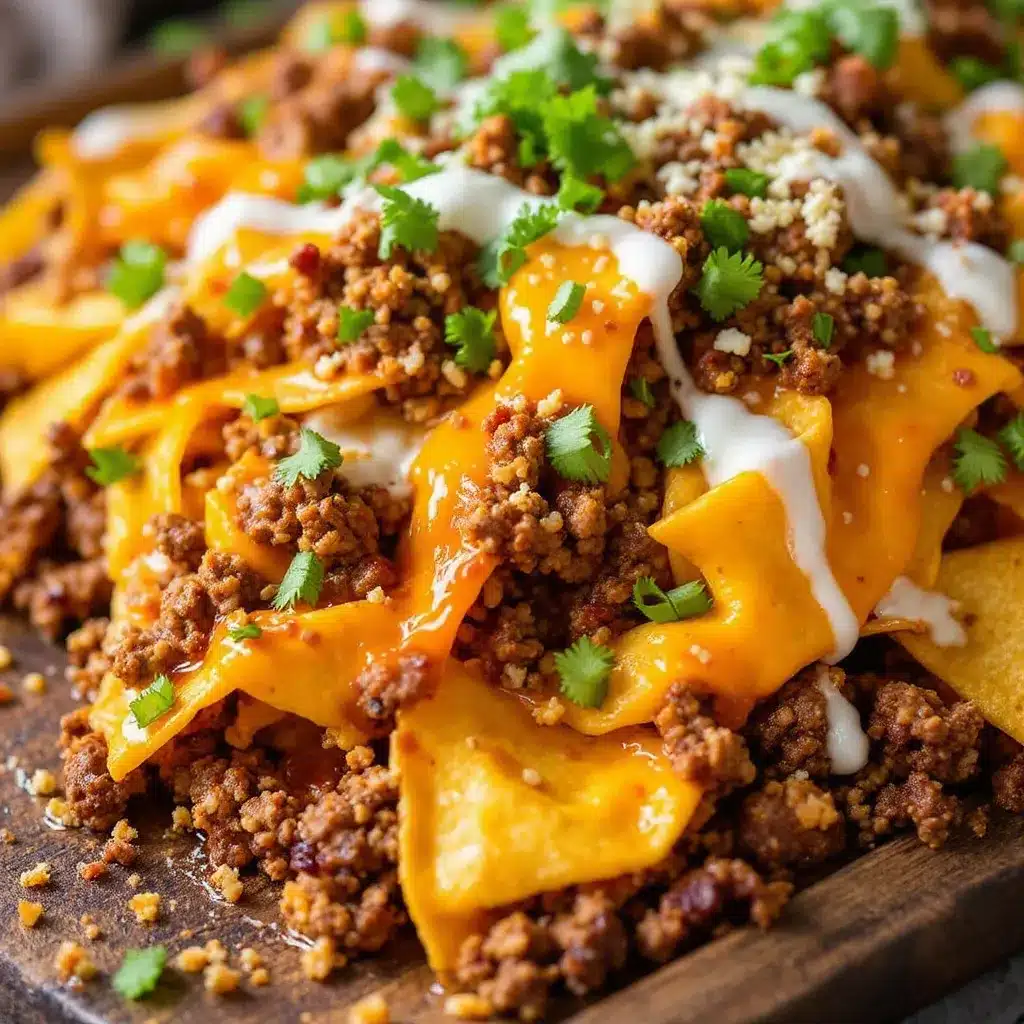
Let’s be real. My husband did not trust nachos for a big game day spread. He’d look at a pile of chips and say, “That’s not a meal, that’s a snack.” I thought he was being dramatic. But after watching him pick at a soggy, lukewarm platter at a Super Bowl party a few years back, I kind of saw his point. The cheese had congealed into a weird skin, the chips were limp, and everyone was awkwardly digging for the toppings that had slid to the bottom. It was a mess. So, I made it my mission to build a nacho bar that actually worked. One where every single chip gets its fair share of beef, cheese, and jalapeño. This isn’t a sad pile of chips. This is a proper, sit-down, winner-winner kind of meal. And honestly, it changed his mind about nachos forever.
The first time I set this up, I watched him build his plate. He layered chips, then beef, then cheese, then more chips. He was treating it like a lasagna. I knew right then we had a winner. This loaded nacho bar isn’t just about the food—it’s about the ritual. It’s about everyone getting exactly what they want. You want extra sour cream? Go for it. You think black olives are an abomination? Leave them off. This is the ultimate choose-your-own-adventure dinner, and it happens to be perfect for football, movie nights, or just a Tuesday when you need something fun.
Why You’ll Love This Recipe
I’ve tested this nacho bar setup about a dozen times, tweaking the beef seasoning, the cheese sauce consistency, and the optimal chip-to-topping ratio. It’s not just another recipe; it’s a system. Here’s why it works so well.
- Quick & Easy: The seasoned ground beef comes together in under 20 minutes. While you’re browning the meat, you can prep your toppings. It’s a perfect multitasking situation for busy game day prep.
- Simple Ingredients: No weird, fancy stuff here. You likely have the spices in your cabinet already. The cheese sauce is made from real cheddar, not that processed stuff in a jar.
- Perfect for a Crowd: This is the ultimate party food. Everyone builds their own plate, so you don’t have to worry about picky eaters. It’s always a hit at our house, and it is a total crowd-pleaser.
- Unbelievably Delicious: The secret is in the beef. I use a blend of chili powder, cumin, and a little smoked paprika that gives it a deep, savory flavor that stands up to all the other toppings. And the cheese sauce? It’s silky, smooth, and stays liquid long enough for you to pour it over your masterpiece.
- Completely Customizable: This is not a rigid recipe. It’s a framework for deliciousness. You can make it vegetarian, swap the protein, or go wild with seasonal toppings. It’s comfort food reimagined—faster, more fun, and with the same soul-soothing satisfaction.
This isn’t just another version of nachos. It’s the one that finally made my husband a believer. It’s the kind of meal that makes you close your eyes after the first bite because every single element is working in harmony. Perfect for impressing your friends without breaking a sweat.
What Ingredients You Will Need
This recipe uses simple, wholesome ingredients to deliver bold flavor and satisfying texture without any fuss. Most of these are pantry staples, so you can throw this together on a whim.
For the Seasoned Ground Beef
- 1 lb ground beef (80/20 is ideal for flavor, but you can use leaner if you prefer)
- 1 tablespoon olive oil
- 1 small yellow onion, finely diced
- 3 cloves garlic, minced
- 1 tablespoon chili powder
- 1 teaspoon ground cumin
- 1 teaspoon smoked paprika
- 1/2 teaspoon dried oregano
- 1/2 teaspoon salt
- 1/4 teaspoon black pepper
- 1/2 cup beef broth (or water, but broth adds more depth)
- 1 tablespoon tomato paste
For the Quick Cheese Sauce
- 2 tablespoons unsalted butter
- 2 tablespoons all-purpose flour
- 1 1/2 cups whole milk (warm it slightly to prevent lumps)
- 2 cups sharp cheddar cheese, freshly grated (pre-shredded has anti-caking agents that can make the sauce grainy)
- 1/4 teaspoon salt
- A pinch of cayenne pepper (optional, for a little heat)
For the Nacho Bar
- 1 large bag of sturdy tortilla chips (I prefer restaurant-style or scoop chips—they hold up better)
- 1 (15 oz) can black beans, drained and rinsed
- 1 cup cherry tomatoes, diced
- 1/2 cup pickled jalapeños
- 1/2 cup black olives, sliced
- 1 avocado, diced
- 1/2 cup sour cream
- 1/4 cup fresh cilantro, chopped
- 1 lime, cut into wedges
Ingredient Tip: For the best cheese sauce, I always recommend grating a block of cheddar yourself. It melts so much smoother. If you are in a pinch, you can use a can of store-bought nacho cheese, but trust me, this homemade version is worth the extra five minutes.
Equipment Needed
You don’t need a ton of fancy equipment for this, which is part of the beauty. Here’s what you’ll need to pull it all together.
- A large skillet or frying pan (for the beef)
- A medium saucepan (for the cheese sauce)
- A wooden spoon or spatula
- A whisk (essential for a lump-free cheese sauce)
- A cutting board and a sharp knife
- Serving bowls (for all your toppings)
- A large platter or baking sheet (for the chips)
- A small pot or slow cooker (to keep the cheese sauce warm during serving)
I’ve used a cheap non-stick skillet for years, and it works great for the beef. For the cheese sauce, a heavy-bottomed saucepan helps prevent scorching. If you don’t have a whisk, you can use a fork, but you’ll be working a little harder to get it smooth.
Preparation Method
Let’s get cooking. This method is broken down into simple steps so you can build your nacho bar like a pro. The timing works out so everything is hot and ready at the same time.
Step 1: Season the Beef
Heat the olive oil in your large skillet over medium-high heat. Add the diced onion and cook for about 3-4 minutes, until it’s soft and translucent. You want it to smell sweet, not burnt. Add the minced garlic and cook for another 30 seconds until fragrant. Then, add the ground beef. Break it up with your spoon and cook it until it’s browned all over, about 6-8 minutes. Don’t drain all the fat—leave a little in the pan for flavor. Sprinkle the chili powder, cumin, smoked paprika, oregano, salt, and pepper over the beef. Stir everything together so the spices coat the meat.
Step 2: Simmer the Beef
Push the beef to one side of the pan. Add the tomato paste to the empty space and cook it for about a minute, stirring it around until it darkens slightly. This deepens its flavor. Then, pour in the beef broth and stir everything together. Let it simmer for 5-7 minutes, until the liquid has mostly absorbed and the beef is coated in a rich, dark sauce. Taste it and adjust the salt if needed. It should be bold and savory. Turn the heat to low to keep it warm.
Step 3: Make the Cheese Sauce
While the beef is simmering, start your cheese sauce. In your medium saucepan, melt the butter over medium heat. Once it’s bubbling, whisk in the flour. Cook this mixture for about 1 minute, whisking constantly. It will smell a little nutty. This is your roux, and it’s the base for a smooth sauce. Slowly pour in the warm milk, whisking the whole time. Keep whisking until the mixture thickens and starts to bubble, about 3-4 minutes.
Step 4: Finish the Cheese Sauce
Once the milk mixture is thick enough to coat the back of a spoon, remove the pan from the heat. Add the grated cheddar cheese, a handful at a time, whisking until it’s completely melted before adding the next batch. Stir in the salt and cayenne pepper. If the sauce seems too thick, you can whisk in a splash more milk. It should be pourable. Pour it into a small bowl or a slow cooker on the “warm” setting to keep it liquid.
Step 5: Assemble the Nacho Bar
Now for the fun part. Arrange your tortilla chips on a large platter or a rimmed baking sheet. You don’t want to make one giant pile. Instead, create a single layer of chips, top with some beef and cheese sauce, then add another layer of chips, more beef, and more cheese sauce. This ensures every chip gets some love. Pop the platter into a 350°F (175°C) oven for about 5 minutes, just to get everything hot and melty. While it’s in the oven, arrange all your other toppings in small bowls: black beans, tomatoes, jalapeños, olives, avocado, sour cream, and cilantro.
Step 6: Serve Immediately
Pull the hot nacho platter out of the oven. Squeeze a little fresh lime juice over the top. Then, let everyone go wild. They can add the cold toppings themselves, which keeps everything from getting soggy. The contrast between the hot, cheesy chips and the cool, fresh toppings is what makes this so good.
Cooking Tips & Techniques
I’ve made every mistake in the book with nachos. Soggy chips, grainy cheese, bland beef. Here’s how to avoid those pitfalls and make this the best version you’ve ever had.
- The Chip Selection: This is non-negotiable. Do not use thin, delicate chips. They will break under the weight of the toppings. Go for “restaurant style” or “scoop” chips. They are sturdy and have a good surface area for holding all the good stuff.
- Don’t Overload the Platter: It’s tempting to pile everything on at once, but that leads to a sad, soggy middle. Layering is your friend. A base layer of chips, then beef and cheese, then another layer of chips. This way, even the chips at the bottom get some flavor.
- Keep the Cheese Sauce Warm: Cheese sauce starts to set as it cools. The best trick is to pour it into a small slow cooker or a thermal carafe. It stays perfectly pourable for the entire game, so people can keep coming back for more.
- Prep Everything Beforehand: This is the key to a stress-free game day. Chop your vegetables, grate your cheese, and have your spices measured out. When it’s time to cook, all you have to do is brown the beef and make the sauce. It makes the whole process feel effortless.
- The Cold Topping Rule: Never, ever bake the cold toppings. Always add things like sour cream, avocado, and fresh salsa after the nachos come out of the oven. The heat from the chips will warm them slightly, but they won’t get hot and weird.
Variations & Adaptations
This recipe is a fantastic base, but it loves to be changed up. Here are a few of my favorite ways to make it my own.
- Make it Vegetarian: Swap the ground beef for a plant-based crumble or a can of black beans and corn. Sauté them with the same spices, and you won’t miss the meat at all. I’ve done this for a friend who doesn’t eat meat, and she said it was the best nacho bar she’d ever had.
- Add Some Heat: If you like things spicy, add a diced serrano pepper to the beef while it’s cooking. You can also mix some hot sauce into the cheese sauce. For a smoky heat, use chipotle peppers in adobo sauce—just mince one up and stir it into the beef.
- Switch the Protein: Ground beef is a classic, but this works beautifully with shredded chicken, pulled pork, or even seasoned ground turkey. If you have leftover slow cooker salsa verde shredded chicken, that is a phenomenal swap. It adds a tangy, bright flavor that’s amazing with the cheese.
- Go for a BBQ Twist: Swap the chili powder and cumin for a smoky BBQ rub. Use a BBQ sauce instead of the tomato paste and broth. Top with some pickled red onions and a drizzle of ranch dressing. It’s a whole different vibe, but just as delicious.
Serving & Storage Suggestions
This is a dish best served immediately, but there are a few things you can do to manage leftovers and make sure everything is at its best.
- Serving Temperature: The beef and cheese sauce should be hot, the chips should be warm and crispy, and the cold toppings should be, well, cold. This contrast is what makes the dish so satisfying. Serve the cheese sauce in a small slow cooker or a heat-proof bowl to keep it warm.
- What to Serve With It: A simple side of smoked paprika grilled corn elote salad is a fantastic side dish. It’s cool, creamy, and has a little bit of heat that pairs perfectly with the nachos. For a drink, a cold Mexican lager or a spicy margarita is the way to go.
- Storing Leftovers: This is the tricky part. The chips will get soft overnight. The best way to store leftovers is to separate the components. Store the seasoned beef in one container, the cheese sauce in another, and the fresh toppings in their own containers. The chips are best eaten the same day, but you can store them in a ziplock bag.
- Reheating Leftovers: For the beef, reheat it in a skillet with a splash of water or broth. For the cheese sauce, reheat it gently in a saucepan over low heat, whisking in a splash of milk to bring it back to a pourable consistency. Do not microwave the cheese sauce—it can break and become oily.
Nutritional Information & Benefits
While this is definitely a treat, it’s not without its redeeming qualities. The ground beef provides a solid dose of protein and iron, which is great for keeping you full and energized during a long game. The black beans add fiber and plant-based protein, while the avocado offers healthy fats. The fresh tomatoes and cilantro give you a little vitamin boost.
Estimated per serving (based on 6 servings, including all toppings):
- Calories: ~580
- Protein: 28g
- Fat: 34g
- Carbohydrates: 42g
- Fiber: 8g
Dietary Note: This recipe is naturally gluten-free if you use a gluten-free flour blend for the cheese sauce. It can also be made dairy-free by using a plant-based butter, milk, and cheese alternative, though the texture will be slightly different.
Conclusion
This Ultimate Game Day Loaded Nacho Bar with Ground Beef is more than just a recipe—it’s a whole experience. It’s the kind of meal that brings people together, gets them talking, and leaves them completely satisfied. I love it because it’s forgiving. You can’t really mess it up, and everyone can make it their own. It’s the perfect centerpiece for a party, a fun family dinner, or a lazy Sunday when you just want something delicious.
I encourage you to make this your own. Swap in your favorite toppings, adjust the spice level, and have fun with it. When you do, I’d love to hear about it. Leave a comment below and tell me what your go-to nacho toppings are. And if you’re looking for another easy, crowd-pleasing meal, you might enjoy this easy cheesy lazy cheeseburger casserole with a crispy tater tot crust. It’s got that same fun, comforting vibe. Happy cooking, and enjoy the game!
Frequently Asked Questions
Can I make the beef and cheese sauce ahead of time?
Absolutely. You can cook the seasoned ground beef and make the cheese sauce up to two days in advance. Store them in separate airtight containers in the refrigerator. When you’re ready to serve, reheat the beef in a skillet and the cheese sauce gently on the stovetop with a splash of milk to restore its smooth texture.
What are the best chips for a nacho bar?
Sturdy chips are the key to success. Look for “restaurant style” or “scoop” tortilla chips. They are thicker and can hold a lot of weight without breaking. Avoid thin, delicate chips, as they will get soggy and fall apart under the toppings.
How do I keep the cheese sauce from getting lumpy?
The secret to a smooth cheese sauce is a good roux and low heat. Make sure you cook the flour and butter together for a minute before adding the milk. Always whisk the milk in slowly. And most importantly, use freshly grated cheese. Pre-shredded cheese has anti-caking agents that prevent it from melting smoothly.
Can I make this in a slow cooker?
Yes, you can adapt this for a slow cooker. Brown the beef and sauté the onions on the stovetop first, then transfer the beef to the slow cooker with the spices and broth. Cook on low for 2-3 hours. You can also keep the cheese sauce warm in a small slow cooker on the “warm” setting, which is perfect for a party.
What else can I serve with these nachos?
This nacho bar is a meal in itself, but you can round it out with some simple sides. A fresh side salad, some fresh harvest kale salad with roasted butternut squash, or a bowl of creamy roasted tomato basil soup would all be fantastic. For a game day spread, you can’t go wrong with a batch of crispy garlic parmesan chicken wings on the side.
Pin This Recipe!
Ultimate Game Day Loaded Nacho Bar with Ground Beef
A fully loaded nacho bar with seasoned ground beef, silky homemade cheese sauce, and all your favorite toppings. Perfect for game day, movie nights, or any fun gathering where everyone builds their own plate.
- Prep Time: 15 minutes
- Cook Time: 25 minutes
- Total Time: 40 minutes
- Yield: 6 servings 1x
- Category: Main Course
- Cuisine: Mexican-American
Ingredients
- 1 lb ground beef (80/20 is ideal)
- 1 tablespoon olive oil
- 1 small yellow onion, finely diced
- 3 cloves garlic, minced
- 1 tablespoon chili powder
- 1 teaspoon ground cumin
- 1 teaspoon smoked paprika
- 1/2 teaspoon dried oregano
- 1/2 teaspoon salt
- 1/4 teaspoon black pepper
- 1/2 cup beef broth
- 1 tablespoon tomato paste
- 2 tablespoons unsalted butter
- 2 tablespoons all-purpose flour
- 1 1/2 cups whole milk, warmed
- 2 cups sharp cheddar cheese, freshly grated
- 1/4 teaspoon salt
- A pinch of cayenne pepper (optional)
- 1 large bag sturdy tortilla chips (restaurant-style or scoop chips)
- 1 (15 oz) can black beans, drained and rinsed
- 1 cup cherry tomatoes, diced
- 1/2 cup pickled jalapeños
- 1/2 cup black olives, sliced
- 1 avocado, diced
- 1/2 cup sour cream
- 1/4 cup fresh cilantro, chopped
- 1 lime, cut into wedges
Instructions
- Heat olive oil in a large skillet over medium-high heat. Add diced onion and cook for 3-4 minutes until soft and translucent. Add minced garlic and cook for 30 seconds until fragrant.
- Add ground beef to the skillet. Break it up with a spoon and cook until browned all over, about 6-8 minutes. Do not drain all the fat.
- Sprinkle chili powder, cumin, smoked paprika, oregano, salt, and pepper over the beef. Stir to coat the meat evenly.
- Push beef to one side of the pan. Add tomato paste to the empty space and cook for 1 minute, stirring until it darkens slightly.
- Pour in beef broth and stir everything together. Let simmer for 5-7 minutes until liquid is mostly absorbed and beef is coated in a rich sauce. Adjust salt to taste. Keep warm on low heat.
- For the cheese sauce: In a medium saucepan, melt butter over medium heat. Whisk in flour and cook for 1 minute, whisking constantly, until nutty-smelling.
- Slowly pour in warm milk while whisking continuously. Continue whisking until mixture thickens and bubbles, about 3-4 minutes.
- Remove pan from heat. Add grated cheddar cheese a handful at a time, whisking until fully melted before adding more. Stir in salt and cayenne pepper. If too thick, whisk in a splash more milk. Keep warm in a small slow cooker or heat-proof bowl.
- Preheat oven to 350°F (175°C). Arrange tortilla chips on a large platter or rimmed baking sheet in a single layer. Top with some beef and cheese sauce, then add another layer of chips, more beef, and more cheese sauce.
- Bake for 5 minutes until hot and melty.
- While baking, arrange cold toppings in small bowls: black beans, tomatoes, jalapeños, olives, avocado, sour cream, and cilantro.
- Remove nacho platter from oven. Squeeze fresh lime juice over the top. Serve immediately, letting everyone add their own cold toppings.
Notes
For best results, use freshly grated cheddar cheese for the sauce—pre-shredded cheese contains anti-caking agents that can make the sauce grainy. Sturdy chips like restaurant-style or scoop chips are essential to prevent sogginess. Layer chips, beef, and cheese sauce to ensure every chip gets flavor. Always add cold toppings after baking to keep them fresh. The cheese sauce can be kept warm in a small slow cooker on the ‘warm’ setting.
Nutrition
- Serving Size: 1 serving (about 1/6
- Calories: 580
- Sugar: 6
- Sodium: 890
- Fat: 34
- Saturated Fat: 12
- Carbohydrates: 42
- Fiber: 8
- Protein: 28
Keywords: nachos, loaded nachos, game day food, ground beef nachos, nacho bar, party food, football food, Tex-Mex


