Love this? Save it for later!
Share the inspiration with your friends
I burned three dozen cake pops before I figured out why they kept cracking at the neck. It wasn’t the chocolate. It wasn’t the temperature. It was the structural integrity of the “body” itself. You know how it goes—you want to make something cute for Thanksgiving, something that says “I tried” without saying “I spent six hours decorating.” I wanted turkey cake pops. Just little birdies. Simple.
The problem? Cake crumbs are loose. They don’t hold shape. When I tried to mold them into round bodies, they’d slump. When I tried to stick the stick in, the chocolate shell would snap right at the joint. I ended up with a bowl of chocolate-dipped cake blobs that looked more like mud pies than poultry. My kids looked at them like I’d served them rocks.
Let’s face it, we’ve all been there. You buy the fancy candy melts, you buy the lollipop sticks, and then reality hits. The humidity in the kitchen, the crumb-to-frosting ratio, the sheer physics of hanging a heavy sphere on a thin stick. I almost gave up. I almost just made witch finger cookies instead because at least those hold their shape. But I kept at it. I realized the secret wasn’t in the chocolate. It was in the binding.
I started using a denser cake base. Less fluffy, more substantial. And I stopped trying to make perfect spheres. I made ovals. I made lumps. I embraced the irregularity. That’s when it clicked. The “Turkey Cake Pop” isn’t about perfection. It’s about charm. It’s about that moment when you hand it to a guest and they laugh because it looks like a confused chicken. That’s the win.
This recipe isn’t about looking like a Michelin-star dessert. It’s about feeding your family something fun that doesn’t require a sculpting degree. It’s about the smell of cinnamon cake filling the house while the turkey is in the oven. It’s about a treat that disappears faster than the stuffing. Once you get the hang of the crumb mix, you’ll never go back to plain cake pops. They’re easier than you think, and honestly, the mess is part of the fun.
Why You’ll Love This Recipe
These turkey cake pops are the unsung heroes of the Thanksgiving table. While everyone is stressing over the brine and the gravy, you can be quietly rolling these little birds in the kitchen. They are the perfect bridge between the savory main course and the heavy pies that follow. Here is why this recipe has become a staple in my holiday rotation:
- Quick & Easy: Once you have the cake base ready, these come together in under 45 minutes. That is faster than some of the side dishes you are prepping. Perfect for busy weeknights or last-minute holiday cravings when you need a sweet fix without the fuss.
- Simple Ingredients: No fancy grocery trips needed. You likely already have cake mix, frosting, and candy melts in your pantry. This is about using what you have and making magic. It’s pantry-staple cooking at its finest.
- Perfect for Thanksgiving: Great for the dessert table, the snack platter, or even as a fun activity for kids to help with. They fit the theme perfectly without being overly traditional or boring.
- Crowd-Pleaser: Always gets rave reviews from kids and adults alike. The kids love the shape, and the adults love that it’s not another pumpkin spice dessert. It’s a novelty that actually tastes good.
- Unbelievably Delicious: The texture and flavor combo is next-level comfort food. The dense cake base paired with the sweet, thin chocolate shell creates a contrast that is satisfying without being overwhelming.
What makes this recipe different from the rest? It’s the ratio. Most cake pop recipes fail because they use too much frosting, making the pops greasy and heavy. This recipe uses a specific balance of cake to frosting that creates a firm, moldable dough. It’s not just another version—it’s your best version. It’s the kind of treat that makes you close your eyes after the first bite. It’s comfort food reimagined—simpler, faster, but with the same soul-soothing satisfaction. Perfect for impressing guests without stress, or turning a simple meal into something memorable.
What Ingredients You Will Need
This recipe uses simple, wholesome ingredients to deliver bold flavor and satisfying texture without the fuss. The key here is quality over quantity. You don’t need a dozen exotic spices. You need the right balance of moisture and structure.
For the Cake Base:
- Yellow or Vanilla Cake Mix: One standard box (15.25 oz / 432g). I recommend Duncan Hines or Betty Crocker for consistent texture. Don’t skip the box mix; homemade cake is often too airy for this application.
- Water and Oil: Follow the box instructions for baking. This creates the base sponge.
- Chocolate Frosting: About 1 to 1.5 cups. Use a canned frosting like Wilton or Kraft for consistency. Homemade frosting can be too runny. You need it thick and creamy to bind the crumbs.
For the Turkey Decoration:
- White Candy Melts: 2 cups. This is the “skin” of the turkey. White chocolate chips work but can seize up. Candy melts are designed for dipping and are more forgiving. Buy the white ones, not the white chocolate chips, for easier dipping.
- Orange Candy Melts: 1 cup. For the beak and wattle. These provide the pop of color that makes the turkey look real.
- Black Candy Melts: 1/2 cup. For the eyes and the tail feathers. You can use black food coloring gel in white chocolate, but black candy melts are easier for small details.
- Lollipop Sticks:
Optional Add-ins:
- Edible Glitter: A little gold or orange dust adds a festive touch.
- Food Coloring Gel: If you want to tint the white candy melts slightly off-white for a more natural look.
Substitution guidance: If you want a denser cake, you can substitute half the cake mix with sourdough discard pumpkin bread crumbs, but be careful not to make it too wet. For a gluten-free option, use a gluten-free cake mix and ensure your frosting and candy melts are certified gluten-free.
Equipment Needed
You don’t need a fancy kitchen to make these. Here is what you actually need:
- Mixer: A hand mixer or stand mixer to combine the cake and frosting. You need to get it smooth.
- Baking Sheet: Lined with parchment paper. To bake the cake in.
- Medium Bowl: For crumbling the cake. A large bowl works too, but medium is easier to manage.
- Silicone Mat or Parchment Paper: For setting the finished cake pops. This is non-negotiable. They will stick to anything else.
- Double Boiler or Microwave-Safe Bowl: For melting the candy melts. A microwave works fine if you go in 30-second intervals.
- Piping Bags (Optional): Small ziplock bags with the corner cut off work great for drawing the eyes and beak. It’s cheaper than buying a piping kit.
Personal tip: I used to use regular plastic wrap for setting the pops, but the static electricity makes them jump around. Silicone mats are worth the investment. They are easy to clean and keep the pops steady. If you are on a budget, just use wax paper, but be prepared for a little cleanup.
Preparation Method
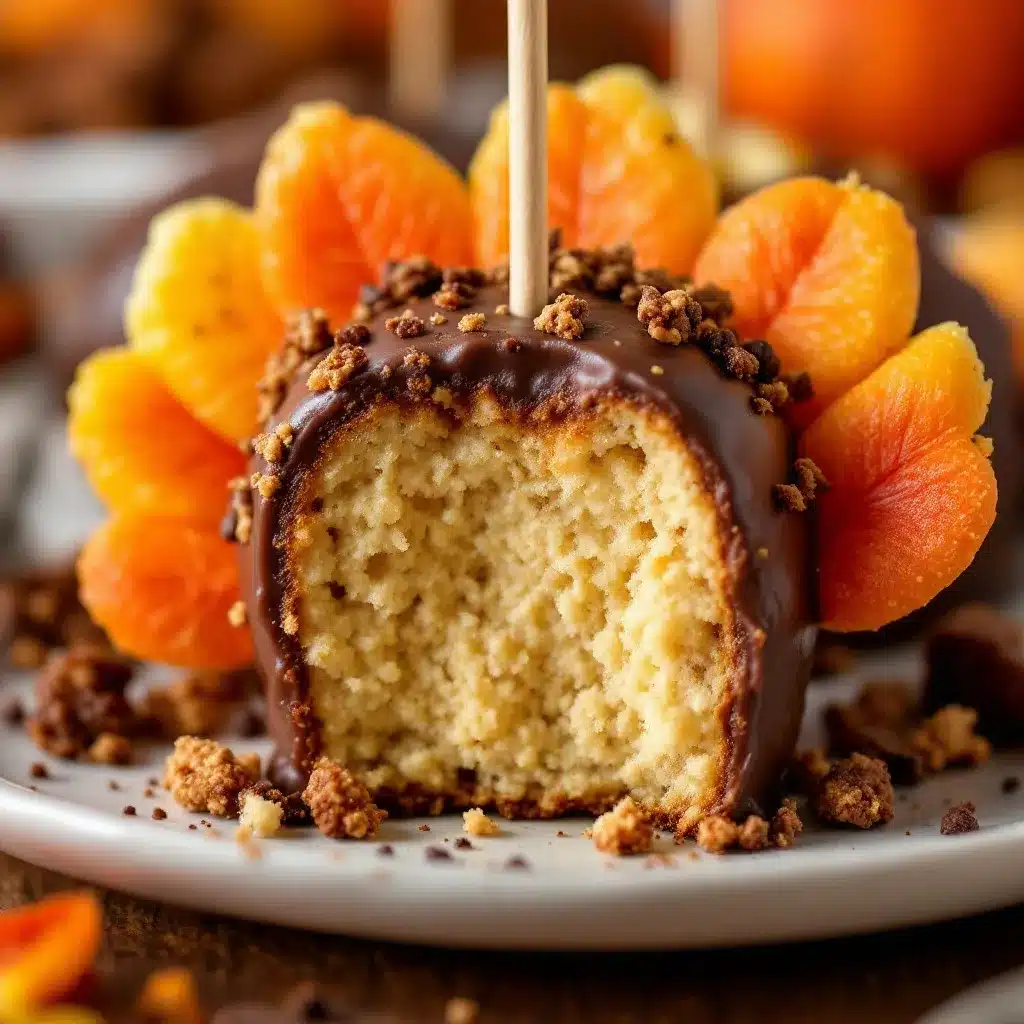
Step 1: Bake the Cake
Preheat your oven to 350°F (175°C). Bake the cake mix according to the package directions. Let it cool completely. This is crucial. If the cake is warm, it will melt the frosting and create a greasy mess. Time: 30-40 minutes.
Step 2: Crumble the Cake
Once cool, break the cake into large chunks. Put them in a medium bowl. Use your hands or a fork to crumble it into fine crumbs. You want no large chunks left. Time: 10 minutes.
Step 3: Mix the Dough
Add the frosting to the crumbs. Start with 1 cup. Mix well. If the mixture is too dry to hold together, add more frosting, one tablespoon at a time. You want a consistency like playdough. It should hold its shape when you squeeze it. Time: 5 minutes.
Step 4: Form the Balls
Roll the mixture into balls. You want about 24 balls, each roughly 1.5 inches in diameter. Keep them uniform in size for even dipping. Place them on a parchment-lined tray. Time: 15 minutes.
Step 5: Chill the Balls
Place the tray in the refrigerator for at least 30 minutes. This firms up the cake balls, making them easier to dip. Time: 30 minutes.
Step 6: Melt the Candy
Melt the white candy melts in a microwave-safe bowl. Heat in 30-second intervals, stirring between each. Do not overheat. It should be smooth and fluid. Time: 3-5 minutes.
Step 7: Dip the Pops
Take a chilled cake ball. Dip it into the white chocolate, coating it completely. Tap off the excess against the side of the bowl. Insert a lollipop stick about halfway into the ball. Place it on the silicone mat. Time: 15 minutes.
Step 8: Add Details
Melt the orange and black candy melts separately. Use a toothpick or a small piping bag to add the beak, wattle, eyes, and tail feathers. Time: 10 minutes.
Step 9: Set
Let the cake pops sit at room temperature until the chocolate is fully set. This takes about 10-15 minutes. Time: 15 minutes.
Cooking Tips & Techniques
The biggest mistake people make is using too much frosting. Start with less. You can always add more, but you can’t take it out. If the mixture is too wet, the cake pops will slide off the stick.
Another tip: chill your hands. If your hands are warm, the cake dough will stick to them. Keep a bowl of ice water nearby to dip your hands in occasionally. This keeps the dough cool and manageable.
When dipping, don’t swirl the pop. Just dip and tap. Swirling creates air bubbles that can cause the chocolate to crack as it hardens. Tap gently to remove excess chocolate. You want a thin, even coat.
If the chocolate gets too thick, add a teaspoon of vegetable oil. This thins it out without affecting the flavor. It helps the chocolate flow smoothly over the cake pop.
Variations & Adaptations
You can change the flavor of the cake base to match any holiday theme. Try using pumpkin cake mix for a fall vibe. Or spice cake for a warmer flavor.
For a gluten-free version, use a gluten-free cake mix and check your frosting and candy melts for gluten-free certification.
You can also change the decoration. Instead of a turkey, make pilgrim hats or pumpkins. The technique is the same.
For a healthier option, use a sugar-free cake mix and sugar-free frosting. The texture might be slightly different, but it still works.
I once tried using red velvet cake mix for Christmas. It worked beautifully, and the red color showed through the white chocolate slightly, creating a marbled effect. It was a hit.
Serving & Storage Suggestions
Serve these at room temperature. Cold chocolate can be hard and waxy.
Store them in an airtight container at room temperature for up to 5 days. Do not refrigerate, as the moisture can cause the chocolate to bloom.
If you need to freeze them, place them in a single layer in a freezer-safe container. Thaw at room temperature before serving.
These are great for a dessert table or a snack platter. They go well with coffee or hot cocoa.
Nutritional Information & Benefits
Each cake pop contains approximately 150-200 calories. They are a source of carbohydrates and sugar.
They are not particularly high in protein or fiber, so enjoy them in moderation.
For a lower sugar option, use sugar-free frosting and candy melts.
These treats are best enjoyed as a special occasion dessert, not a daily snack.
Conclusion
These turkey cake pops are a fun, easy, and delicious addition to any Thanksgiving celebration. They are easy to make, customizable, and sure to be a hit with kids and adults alike.
Try making them this holiday season. You might be surprised by how easy they are.
Share your creations with us! We love seeing your variations.
Enjoy the holiday!
FAQs
Can I use homemade cake instead of box mix?
Yes, but homemade cake is often too airy. You may need to add more frosting to bind it. Box mix is recommended for consistency.
Why did my chocolate crack?
This usually happens if the cake pop is too cold when dipped, or if the chocolate is overheated. Let the pops sit out for 10 minutes before dipping, and melt the chocolate gently.
How long do cake pops last?
They last up to 5 days at room temperature in an airtight container. Do not refrigerate.
Can I freeze cake pops?
Yes, freeze them in a single layer. Thaw at room temperature before serving.
What if I don’t have candy melts?
You can use white chocolate chips, but they may need to be thinned with vegetable oil to dip properly.
Pin This Recipe!

Irresistible Thanksgiving Turkey Cake Pops

Fun and easy turkey-shaped cake pops that are perfect for Thanksgiving. These treats use a dense cake base and candy melts to create charming holiday decorations that are quick to make and delicious to eat.
- Prep Time: 45 minutes
- Cook Time: 30-40 minutes
- Total Time: 1 hour 30 minutes
- Yield: 24 servings 1x
- Category: Dessert
- Cuisine: American
Ingredients
- 1 box (15.25 oz / 432g) Yellow or Vanilla Cake Mix
- Water and Oil (as required by box instructions)
- 1 to 1.5 cups Chocolate Frosting (canned, thick consistency)
- 2 cups White Candy Melts
- 1 cup Orange Candy Melts
- 1/2 cup Black Candy Melts
- 24 Wooden Lollipop Sticks
- Edible Glitter (optional)
- Food Coloring Gel (optional)
- Vegetable Oil (for thinning chocolate if needed)
Instructions
- Preheat oven to 350°F (175°C) and bake the cake mix according to package directions.
- Let the cake cool completely, then crumble it into fine crumbs in a medium bowl.
- Add 1 cup of frosting to the crumbs and mix until the consistency resembles playdough. Add more frosting if too dry.
- Roll the mixture into 24 uniform balls, approximately 1.5 inches in diameter.
- Chill the cake balls in the refrigerator for at least 30 minutes to firm them up.
- Melt the white candy melts in a microwave-safe bowl in 30-second intervals, stirring until smooth.
- Dip each chilled cake ball into the white chocolate, tap off excess, and insert a lollipop stick halfway into the ball.
- Place dipped pops on a silicone mat or parchment paper.
- Melt orange and black candy melts separately.
- Use a toothpick or piping bag to add details like beak, wattle, eyes, and tail feathers.
- Let the cake pops sit at room temperature for 10-15 minutes until the chocolate is fully set.
Notes
Ensure the cake is completely cool before crumbling to prevent a greasy mess. Use canned frosting for better binding consistency. Chill hands in ice water while rolling dough to prevent sticking. Do not swirl the pop when dipping to avoid air bubbles in the chocolate. Store in an airtight container at room temperature; do not refrigerate.
Nutrition
- Serving Size: 1 cake pop
- Calories: 175
- Sugar: 18
- Sodium: 150
- Fat: 8
- Saturated Fat: 4
- Carbohydrates: 25
- Fiber: 1
- Protein: 2
Keywords: Thanksgiving, cake pops, turkey treats, holiday desserts, easy baking, kids activities, candy melts


