Love this? Save it for later!
Share the inspiration with your friends
Late September, and the only thing my four-year-old wants is dirt. Not the kind from the garden, mind you, but the kind you can eat with a spoon while wearing a spider ring on every finger. I was standing in the kitchen aisle at the grocery store, staring at a bag of gummy worms, when it hit me—pumpkin patch dirt cups. Not just any dessert, but something that feels like a tiny garden you can hold in your hand.
The first time I made these, I didn’t tell the kids what we were doing. I just set out the ingredients—crushed cookies, pudding, a few little pumpkins—and let them figure it out. Their faces, honestly, were everything. It was one of those rare afternoons where the mess felt worth it, where the kitchen floor looked like a crime scene of cocoa powder, but nobody cared. We were too busy scooping “dirt” into cups and hiding worms under the surface.
These pumpkin patch dirt cups are more than a Halloween dessert. They are a moment. A quiet, sticky-fingered, slightly chaotic moment that somehow becomes the memory your kids bring up years later. And the best part? You don’t need to be a pastry chef or even a particularly organized person to pull them off. If you can crush a cookie and stir a pudding mix, you are already halfway there. Trust me on this.
Why You’ll Love This Recipe
I have tested this recipe about seven times now, and I am not exaggerating. The first batch was too wet. The second needed more crunch. By the third, I realized the secret was in the layering and letting the pudding set just long enough. This version has been kid-approved, neighbor-approved, and even approved by my picky mother-in-law who usually just nods politely at my cooking.
- No-Bake Magic : You don’t even have to turn on the oven. In under 20 minutes of active prep, these come together without heating up your kitchen or testing your patience.
- Simple Ingredients : Oreos, instant pudding, cream cheese, milk, and a few decorations. That is literally it. No fancy extracts or specialty flours.
- Perfect for Halloween Parties : Whether it is a classroom celebration, a trunk-or-treat event, or just a spooky movie night at home, these cups fit right in. They are portable, individual, and adorable.
- Crowd-Pleaser : I have watched adults sneak these from the back of the fridge. Kids devour them. Even the teenager who claims to hate dessert ate two.
- Unbelievably Fun : There is something about eating “dirt” that makes everyone giggle. The texture is creamy, crunchy, and totally satisfying.
What makes these different from other dirt cup recipes? The cream cheese layer. Most versions just use plain pudding, but adding a cream cheese base gives it a tangy richness that balances the sweetness. It is the kind of dessert that makes you close your eyes after the first bite—not because it is fancy, but because it is just right.
What Ingredients You Will Need
This recipe uses simple, everyday ingredients to create something that looks like it took way more effort than it actually did. Here is exactly what you need to make about 8 to 10 pumpkin patch dirt cups, depending on how generous you are with the layers.
- For the Cream Cheese Layer:
- 8 ounces cream cheese, softened (full-fat works best for texture, but reduced-fat is fine)
- 1/2 cup powdered sugar (adds sweetness without grittiness)
- 1 teaspoon vanilla extract
- 1 cup heavy whipping cream (or 2 cups Cool Whip for a shortcut)
- For the Pudding Layer:
- 1 (3.4 ounce) box instant vanilla pudding mix (I prefer Jell-O brand for consistent results)
- 1 3/4 cups cold milk (whole milk makes it creamier, but 2% works)
- Green food coloring (optional, for a grass effect—just a few drops)
- For the Dirt:
- 1 (14.3 ounce) package Oreo cookies (about 36 cookies)
- 2 tablespoons melted butter (helps the crumbs clump slightly, like real soil)
- For the Pumpkin Patch Decorations:
- Gummy worms (the classic sour kind work great)
- Mini pumpkin candies or orange candy melts shaped like pumpkins
- Green candy melts or frosting for vines (optional)
- Small cookie pumpkins or candy corn for variety
Ingredient selection matters here. I recommend using Oreos rather than generic chocolate sandwich cookies because they crush into that dark, soil-like texture perfectly. For the pudding, instant vanilla is non-negotiable unless you want to cook a stovetop version, which honestly adds unnecessary work. If you want a pumpkin spice twist, swap the vanilla pudding for pumpkin spice instant pudding—it is a seasonal game-changer.
One note on the cream cheese: let it sit out for at least 30 minutes before you start. Cold cream cheese creates lumps, and nobody wants lumpy dirt. Trust me, I learned this the hard way on my first attempt.
Equipment Needed
You do not need a fancy kitchen for these pumpkin patch dirt cups. Most of this stuff you probably already have sitting in a drawer somewhere.
- 8 to 10 clear plastic or glass cups (clear cups let you see the layers, which is half the fun)
- Electric hand mixer or stand mixer (for whipping the cream cheese layer)
- Large mixing bowls (at least two)
- Food processor or zip-top bag and rolling pin (for crushing Oreos)
- Spatula (for scraping every last bit of filling)
- Measuring cups and spoons
- Small offset spatula or butter knife (for smoothing layers)
If you do not have a food processor, do not stress. Just put the Oreos in a zip-top bag, seal it tight, and go to town with a rolling pin. It is oddly satisfying and a great way to release some pre-Halloween stress. For the cups, I like using 8-ounce clear plastic cups from the party supply store, but mason jars or even small glass bowls work beautifully.
Preparation Method
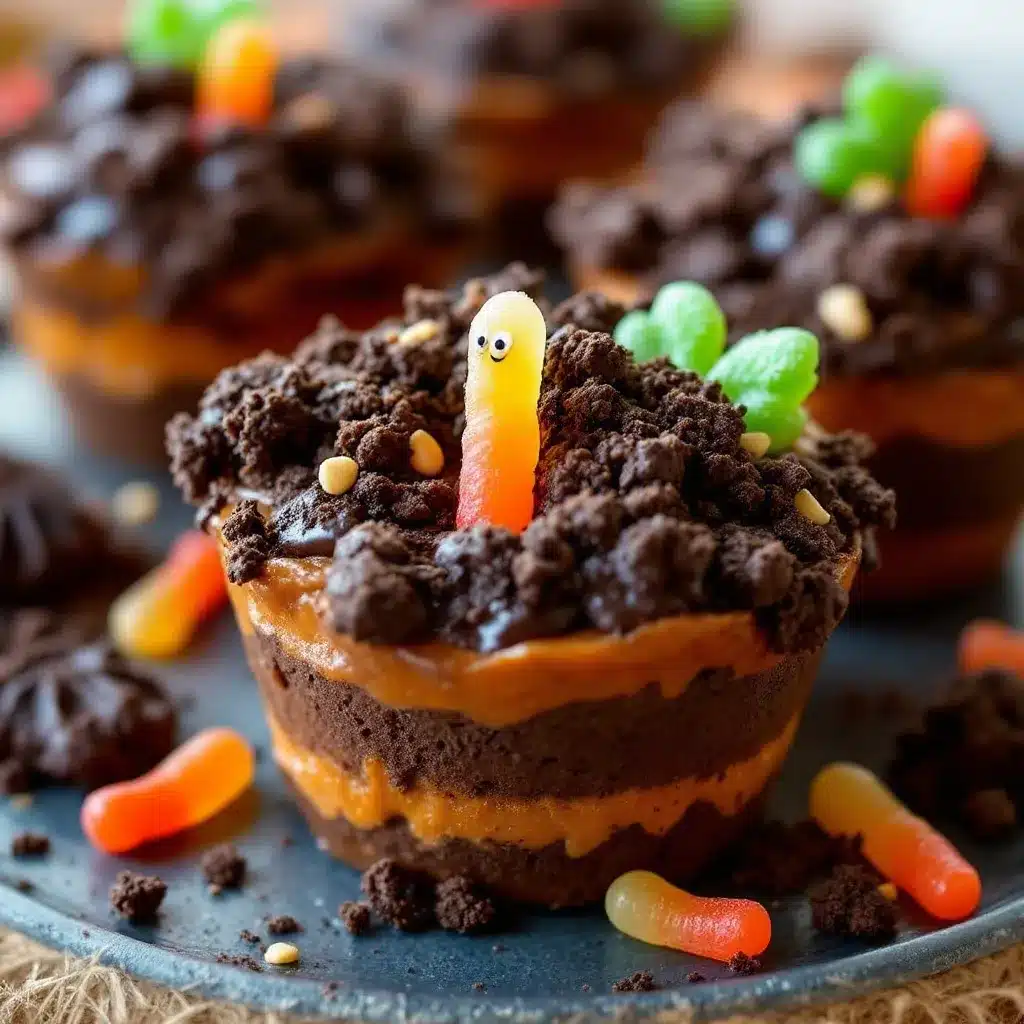
Alright, let us get our hands dirty. I mean that literally. You are going to have chocolate crumbs everywhere, and that is part of the experience. Here is how to make these pumpkin patch dirt cups step by step.
- Crush the Oreos : Place the entire package of Oreos (cream filling and all) into a food processor. Pulse until you have fine crumbs that look like dark, rich soil. If using a bag method, crush until no large pieces remain. Transfer to a bowl and stir in the melted butter until combined. Set aside.
- Make the cream cheese layer : In a large mixing bowl, beat the softened cream cheese with an electric mixer until smooth and fluffy, about 2 minutes. Add the powdered sugar and vanilla extract, and beat until fully incorporated. Scrape down the sides of the bowl.
- Whip the cream : In a separate bowl, whip the heavy cream until stiff peaks form. This takes about 3 to 4 minutes with a hand mixer. If you are using Cool Whip, skip this step and just fold it in directly.
- Fold it together : Gently fold the whipped cream into the cream cheese mixture until no white streaks remain. Be gentle here—you want it light and airy, not deflated. Set aside.
- Make the pudding : In another bowl, whisk the instant vanilla pudding mix with cold milk for about 2 minutes until it thickens. If you want a grass effect, add 3 to 4 drops of green food coloring and stir. Let it sit for 5 minutes to set up slightly.
- Layer the cups : Start with a generous spoonful of Oreo crumbs at the bottom of each cup. Press it down lightly with the back of a spoon. This is your “soil base.”
- Add the cream cheese layer : Spoon or pipe a layer of the cream cheese mixture over the crumbs. Smooth it out gently. About 1/4 cup per cup works well.
- Add the pudding layer : Spoon the green-tinted pudding (or plain) over the cream cheese layer. Spread it evenly. This represents the “grass” or the pumpkin patch ground.
- Top with more dirt : Sprinkle a generous layer of Oreo crumbs over the pudding. Leave a little patch of green visible in the center—this is where your pumpkins will sit.
- Decorate : Press gummy worms into the sides of the cups so they look like they are crawling out of the dirt. Place mini pumpkin candies on top. Add a small green candy vine if you are feeling fancy.
- Chill : Refrigerate the cups for at least 2 hours before serving. This lets the layers set and the flavors meld together. Overnight is even better.
A few things I have learned from making these more times than I care to admit: if your cream cheese layer seems too soft, pop it in the fridge for 15 minutes before layering. And do not skip the chilling step—warm dirt cups are just sad pudding with crumbs floating around.
Cooking Tips & Techniques
I have made every mistake you can imagine with these cups. The first time, I used regular pudding instead of instant, and it never set properly. The second time, I forgot to soften the cream cheese and ended up with lumpy filling that looked like cottage cheese. Not cute.
Here are the tips I wish someone had told me:
- Crush Oreos in batches : If you are making a double batch, do not overload the food processor. Work in batches for even crumbs.
- Use a piping bag for clean layers : If you want those Instagram-worthy stripes, pipe the cream cheese and pudding layers instead of spooning them. It takes an extra minute but looks professional.
- Let the pudding set before layering : Give it at least 5 minutes after whisking. Runny pudding will soak into your Oreo layer and create a muddy mess.
- Press the worms in at the last minute : If you add gummy worms too early, they will bleed color into the cream layer. Stick them in right before serving for the best look.
- Make ahead tip : These actually taste better the next day. The Oreo crumbs soften slightly and the whole thing becomes almost cake-like. Just add the gummy worms and pumpkins before serving.
One time, I made these for a classroom party and forgot the pumpkins entirely. I just used extra gummy worms and called them “worm farms.” The kids did not care. They ate every single one.
Variations & Adaptations
This recipe is endlessly adaptable, which is why I keep coming back to it. Here are some ways to switch things up.
- Gluten-Free Version : Use gluten-free chocolate sandwich cookies (Kinnikinnick makes a good one) and ensure your pudding mix is gluten-free. Everything else is naturally gluten-free.
- Pumpkin Spice Twist : Swap the vanilla pudding for pumpkin spice instant pudding. Add 1/2 teaspoon pumpkin pie spice to the cream cheese layer. It tastes like fall in a cup.
- Dairy-Free Adaptation : Use dairy-free cream cheese (Tofutti or Kite Hill), coconut whipped cream, and almond milk for the pudding. The texture will be slightly different but still delicious.
- Chocolate Lover’s Version : Use chocolate pudding instead of vanilla, and add chocolate shavings on top. Skip the green food coloring entirely for a darker, moodier look.
- Mini Cup Version : Use shot glasses or small 4-ounce cups for bite-sized treats. Perfect for parties where people want to sample multiple desserts.
My personal favorite variation is the pumpkin spice twist. I made it last October and brought it to a potluck, and someone asked if I had bought them from a bakery. That is the kind of compliment that keeps you experimenting.
Serving & Storage Suggestions
These pumpkin patch dirt cups are best served cold, straight from the fridge. The contrast between the cool, creamy layers and the crunchy Oreo topping is part of the magic. I like to set them out on a tray with a few extra gummy worms scattered around for effect.
For presentation, consider adding a small paper flag or a little sign that says “Pumpkin Patch.” It makes them feel extra special for parties. If you are serving them at a Halloween gathering, place them on a bed of fake autumn leaves or straw for a rustic look.
Storage is simple: cover each cup with plastic wrap or a lid and refrigerate for up to 3 days. The Oreo crumbs will soften over time, but honestly, that is not a bad thing. They start to taste like a chocolate cookie crust. Do not freeze these—the texture gets weird and watery when thawed.
For reheating (if you even want to), let them sit at room temperature for 10 minutes before eating. That takes the chill off without ruining the layers.
Nutritional Information & Benefits
Let us be real—these are a treat, not a health food. But knowing what is in them helps you enjoy them mindfully. Here is the approximate nutritional breakdown per serving (based on 10 servings):
| Nutrient | Amount Per Serving |
|---|---|
| Calories | 385 |
| Total Fat | 20g |
| Saturated Fat | 11g |
| Carbohydrates | 48g |
| Sugar | 33g |
| Protein | 5g |
| Calcium | 8% DV |
On the bright side, the cream cheese provides a small amount of protein and calcium, and the Oreos offer a tiny bit of iron. Mostly, this is a dessert for fun and celebration. I like to balance it out by serving these alongside something fresh, like rainbow fruit kabobs for a colorful spread. If you are watching your sugar intake, you can reduce the powdered sugar in the cream cheese layer by half without sacrificing too much flavor.
Conclusion
These pumpkin patch dirt cups are the kind of recipe that makes you feel like a hero with almost zero effort. They are fun, they are forgiving, and they bring out the kid in everyone who eats them. Whether you are making them for a Halloween party, a classroom celebration, or just a random Tuesday that needs a little magic, they deliver every single time.
I love this recipe because it reminds me that cooking does not have to be complicated to be memorable. Sometimes the best moments come from crushed cookies and gummy worms and a kitchen that looks like a disaster zone. So go ahead—make a mess, let the kids help, and watch those little faces light up when they see their own pumpkin patch in a cup.
If you try these, I would love to hear about it. Drop a comment below, tag me in your photos, or tell me what variations you came up with. And if you are looking for more fall-inspired treats, do not miss our cozy pumpkin sourdough bread or these pumpkin cream cheese muffins with streusel for more seasonal baking inspiration. Happy Halloween, friends!
Frequently Asked Questions
Can I make these pumpkin patch dirt cups ahead of time?
Absolutely. You can assemble them up to 2 days in advance. Just wait to add the gummy worms and pumpkin decorations until right before serving to keep them looking fresh.
Can I use sugar-free pudding and Cool Whip?
Yes, you can. Sugar-free pudding works fine, and Cool Whip is a great shortcut. The texture will be slightly lighter, but the taste is still fantastic.
How do I keep the gummy worms from bleeding color?
Add the gummy worms just before serving, or blot them dry with a paper towel before placing them in the cups. The moisture from the pudding can cause the colors to bleed if they sit too long.
Can I make these without cream cheese?
You can skip the cream cheese layer and just use pudding and whipped cream. The cups will be less rich but still delicious. Alternatively, use mascarpone for a similar texture.
What can I use instead of Oreos for the dirt?
Chocolate graham crackers, chocolate wafer cookies, or even crushed chocolate cereal all work. For a gluten-free option, use gluten-free chocolate sandwich cookies.
Pin This Recipe!
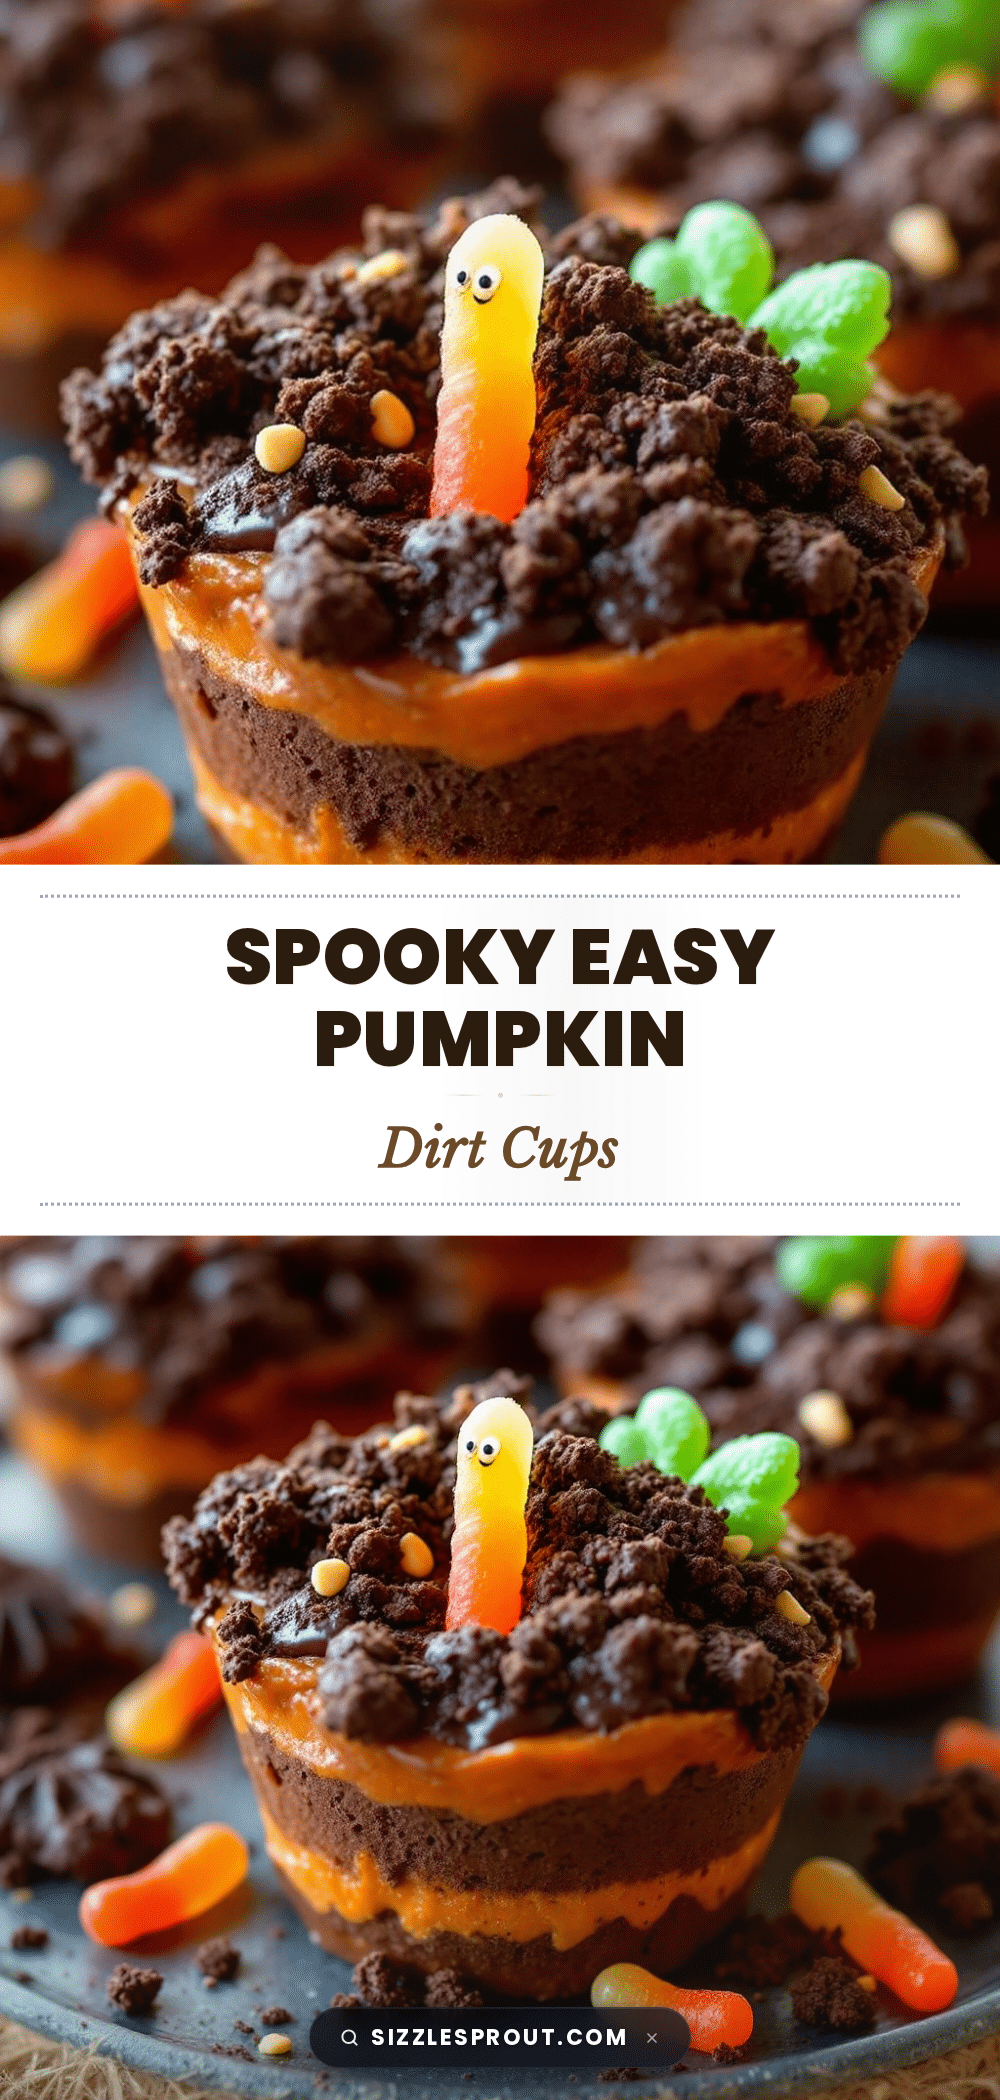
Easy Pumpkin Patch Dirt Cups with Gummy Worms: Best Halloween Dessert

These no-bake pumpkin patch dirt cups are a fun and easy Halloween dessert made with layers of creamy pudding, tangy cream cheese, and crushed Oreo ‘dirt,’ topped with gummy worms and mini pumpkins. Perfect for parties and kid-approved!
- Prep Time: 20 minutes
- Cook Time: 0 minutes
- Total Time: 2 hours 20 minutes (includes chilling)
- Yield: 8-10 servings 1x
- Category: Dessert
- Cuisine: American
Ingredients
- 8 ounces cream cheese, softened
- 1/2 cup powdered sugar
- 1 teaspoon vanilla extract
- 1 cup heavy whipping cream (or 2 cups Cool Whip)
- 1 (3.4 ounce) box instant vanilla pudding mix
- 1 3/4 cups cold milk
- Green food coloring (optional)
- 1 (14.3 ounce) package Oreo cookies (about 36 cookies)
- 2 tablespoons melted butter
- Gummy worms
- Mini pumpkin candies or orange candy melts
- Green candy melts or frosting for vines (optional)
- Small cookie pumpkins or candy corn (optional)
Instructions
- Crush the Oreos: Place the entire package of Oreos (cream filling and all) into a food processor. Pulse until you have fine crumbs that look like dark, rich soil. If using a bag method, crush until no large pieces remain. Transfer to a bowl and stir in the melted butter until combined. Set aside.
- Make the cream cheese layer: In a large mixing bowl, beat the softened cream cheese with an electric mixer until smooth and fluffy, about 2 minutes. Add the powdered sugar and vanilla extract, and beat until fully incorporated. Scrape down the sides of the bowl.
- Whip the cream: In a separate bowl, whip the heavy cream until stiff peaks form. This takes about 3 to 4 minutes with a hand mixer. If you are using Cool Whip, skip this step and just fold it in directly.
- Fold it together: Gently fold the whipped cream into the cream cheese mixture until no white streaks remain. Be gentle here—you want it light and airy, not deflated. Set aside.
- Make the pudding: In another bowl, whisk the instant vanilla pudding mix with cold milk for about 2 minutes until it thickens. If you want a grass effect, add 3 to 4 drops of green food coloring and stir. Let it sit for 5 minutes to set up slightly.
- Layer the cups: Start with a generous spoonful of Oreo crumbs at the bottom of each cup. Press it down lightly with the back of a spoon. This is your ‘soil base.’
- Add the cream cheese layer: Spoon or pipe a layer of the cream cheese mixture over the crumbs. Smooth it out gently. About 1/4 cup per cup works well.
- Add the pudding layer: Spoon the green-tinted pudding (or plain) over the cream cheese layer. Spread it evenly. This represents the ‘grass’ or the pumpkin patch ground.
- Top with more dirt: Sprinkle a generous layer of Oreo crumbs over the pudding. Leave a little patch of green visible in the center—this is where your pumpkins will sit.
- Decorate: Press gummy worms into the sides of the cups so they look like they are crawling out of the dirt. Place mini pumpkin candies on top. Add a small green candy vine if you are feeling fancy.
- Chill: Refrigerate the cups for at least 2 hours before serving. This lets the layers set and the flavors meld together. Overnight is even better.
Notes
Let cream cheese soften for at least 30 minutes before starting to avoid lumps. For clean layers, use a piping bag. Add gummy worms just before serving to prevent color bleeding. These taste even better the next day as the Oreo crumbs soften. Can be made up to 2 days ahead; add decorations before serving.
Nutrition
- Serving Size: 1 cup
- Calories: 385
- Sugar: 33
- Sodium: 320
- Fat: 20
- Saturated Fat: 11
- Carbohydrates: 48
- Fiber: 1
- Protein: 5
Keywords: Halloween dessert, dirt cups, pumpkin patch, no-bake, gummy worms, Oreo, cream cheese, pudding, kid-friendly, party treat


