Love this? Save it for later!
Share the inspiration with your friends
The loaf was gone before I even made it to the kitchen to pour myself a second cup of coffee. My husband, who usually nibbles half a slice out of politeness, had eaten three. He texted me from work later—can you make that bread again? That never happens. I mean, he likes my cooking fine, but he doesn’t request things. So I knew I had stumbled onto something good.
This easy pumpkin chocolate chip bread (no mixer) started as a total whim. It was a rainy Tuesday afternoon, the kind where you want to bake something but also don’t want to drag out the stand mixer and deal with a million dishes. I had a can of pumpkin puree sitting in the pantry from a failed attempt at pumpkin soup weeks earlier, and a half-bag of chocolate chips staring at me. Honestly, I just wanted something warm and sweet that didn’t require me to wash my KitchenAid bowl. I figured if it turned out dense or dry, I’d just call it a “rustic loaf” and move on.
But it didn’t turn out dense or dry. It turned out ridiculously moist, perfectly spiced, and studded with melty chocolate in every single bite. And the best part? I made the whole thing in one bowl with a wooden spoon. No mixer. No fuss. Just a simple, honest loaf of fall bread that tastes like you spent way more effort than you actually did.
That’s the kind of recipe I keep coming back to—the ones that work when you’re tired, when you’re short on time, or when you just want something homemade without the cleanup. This pumpkin chocolate chip bread is that recipe. And I think you’re going to love it.
Why You’ll Love This Recipe
I’ve tested this recipe four times to get it just right. The first batch was a little too wet. The second needed more spice. The third? That was the sweet spot. Here’s why this version is worth your time:
- No Mixer Required: You don’t need a stand mixer, hand mixer, or any fancy equipment. Just a bowl and a sturdy spoon. Less cleanup, more baking.
- Simple Pantry Ingredients: No weird specialty flours or obscure spices. You probably already have most of this in your kitchen right now.
- Perfect for Fall Mornings: This bread is cozy enough for a slow weekend breakfast but easy enough to throw together on a weekday. It’s also great for Thanksgiving brunch or a fall potluck.
- Crowd-Pleaser: My kids devoured it. My husband requested it. Even my neighbor, who claims she “doesn’t like pumpkin baked goods,” asked for the recipe after trying a slice.
- Unbelievably Moist: The combo of pumpkin puree and melted butter creates a texture that stays soft for days. No dry, crumbly bread here.
What makes this recipe different from all the other pumpkin breads out there? It’s the texture. Most no-mixer pumpkin breads turn out a little gummy or dense. But by using the right ratio of pumpkin to flour, and by not overmixing the batter (more on that later), you get a loaf that’s tender, moist, and light enough to eat two slices without feeling like you swallowed a brick.
And honestly? This bread makes me happy. There’s something about the smell of cinnamon and nutmeg filling up the kitchen, the sight of those dark chocolate chips peeking out from the golden crumb. It’s comfort food at its simplest—no stress, no fuss, just pure fall joy in every slice.
What Ingredients You Will Need
This recipe uses simple, wholesome ingredients to deliver bold pumpkin flavor and satisfying texture without the fuss. Most of these are pantry staples, which means you can whip up this loaf on a moment’s notice.
For the Bread Batter
- All-purpose flour, 1 ¾ cups (220g) – Spoon and level it into your measuring cup for accuracy. Too much flour will make the bread dry.
- Granulated sugar, ¾ cup (150g) – Adds sweetness and helps keep the bread tender. You can reduce to ½ cup if you prefer a less sweet loaf.
- Brown sugar, ½ cup (100g), packed – I like using dark brown sugar for deeper flavor, but light brown works too. It adds moisture and a subtle molasses note.
- Baking soda, 1 teaspoon – Helps the bread rise. Make sure it’s fresh (not expired) for best results.
- Baking powder, ½ teaspoon – Works with the baking soda to give the bread a nice lift.
- Salt, ½ teaspoon – Balances the sweetness and enhances the pumpkin flavor.
- Ground cinnamon, 2 teaspoons – The backbone of the spice blend. I use McCormick or Simply Organic.
- Ground nutmeg, ½ teaspoon – Freshly grated is amazing if you have it, but pre-ground works perfectly.
- Ground ginger, ½ teaspoon – Adds a warm, slightly peppery note. Don’t skip it.
- Ground cloves, ¼ teaspoon – A tiny amount goes a long way. Too much can overpower the bread.
- Pumpkin puree, 1 cup (245g) – Make sure you’re using pure pumpkin puree, not pumpkin pie filling. Libby’s is my go-to brand. Canned or homemade both work.
- Melted unsalted butter, ½ cup (113g or 1 stick) – Melted and slightly cooled. You can substitute with coconut oil or vegetable oil if needed.
- Large eggs, 2 – Room temperature is best. If you forgot to take them out, place them in a bowl of warm water for 5 minutes.
- Vanilla extract, 2 teaspoons – Pure vanilla extract adds a warm, aromatic sweetness. Imitation works in a pinch.
- Milk, ¼ cup (60ml) – Whole milk gives the richest texture, but 2% or even oat milk will work. You can also use buttermilk for extra tenderness.
- Semi-sweet chocolate chips, 1 cup (175g) – I prefer Guittard or Ghirardelli. Dark chocolate chips are also fantastic here. Reserve 2 tablespoons to sprinkle on top before baking.
Ingredient Selection Tips
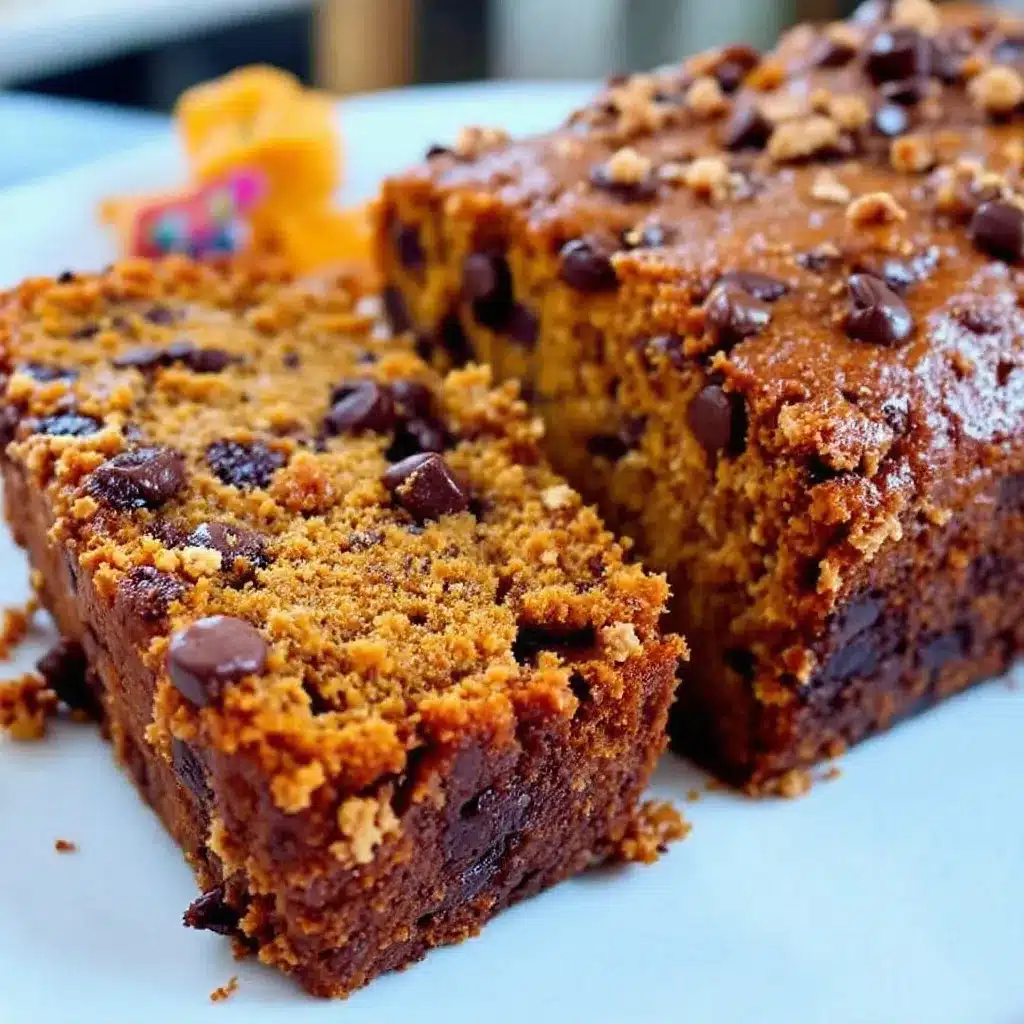
For the best texture, look for a pumpkin puree that’s thick and not watery. If your puree seems runny, you can blot it with a paper towel to remove excess moisture. I learned this the hard way after my first batch turned out a bit soggy.
If you’re using a different type of chocolate chip—like milk chocolate or white chocolate—keep in mind that the sweetness level will change. Milk chocolate chips will make the bread noticeably sweeter, while dark chocolate balances the pumpkin spice beautifully.
Equipment Needed
The beauty of this recipe is that you don’t need much. Here’s what you’ll need to have on hand:
- Large mixing bowl – Any size works, but a standard 4-quart bowl gives you enough room to stir without making a mess.
- Wooden spoon or silicone spatula – A sturdy spoon is all you need. I prefer a silicone spatula because it scrapes the sides clean.
- 9×5-inch loaf pan – A standard loaf pan works perfectly. If you’re using a dark non-stick pan, keep an eye on the bread toward the end of baking—it browns faster.
- Parchment paper – This is optional but highly recommended. It makes lifting the bread out of the pan so much easier. I always line my pan with a sling of parchment paper.
- Measuring cups and spoons – For dry and wet ingredients. A kitchen scale is even better for accuracy, but not required.
- Cooling rack – Helps the bread cool evenly and prevents the bottom from getting soggy.
- Toothpick or cake tester – For checking doneness. A wooden skewer works too.
If you don’t have a loaf pan, you can bake this in an 8×8-inch square pan—just reduce the baking time by about 10-15 minutes and check for doneness early. I’ve also made mini loaves in 5×3-inch pans for gifting, and they turn out adorable.
One tip: avoid using a glass loaf pan unless you adjust the oven temperature down by 25°F. Glass heats differently and can cause the edges to overbake before the center is done. I learned that one the hard way.
Preparation Method
This is where the magic happens. Follow these steps, and you’ll have a perfect loaf every time.
Step 1: Preheat and Prep
Preheat your oven to 350°F (175°C). Grease your 9×5-inch loaf pan with butter or non-stick spray, then line it with a strip of parchment paper that hangs over the long sides. This creates handles for easy removal later. Set the pan aside.
Step 2: Mix the Dry Ingredients
In a large mixing bowl, whisk together the all-purpose flour, granulated sugar, brown sugar, baking soda, baking powder, salt, cinnamon, nutmeg, ginger, and cloves. Whisk until everything is evenly distributed—about 30 seconds. Breaking up any clumps of brown sugar with your fingers helps ensure even sweetness.
Step 3: Combine the Wet Ingredients
In a separate medium bowl (or a large liquid measuring cup), whisk together the pumpkin puree, melted butter, eggs, vanilla extract, and milk. Whisk until the mixture is smooth and fully combined. It should look like a thick, glossy orange sauce.
Step 4: Bring It All Together
Pour the wet ingredients into the bowl with the dry ingredients. Use your wooden spoon or spatula to stir gently. Do NOT overmix. Stir just until you no longer see streaks of flour—about 10 to 12 folds. A few small lumps are okay. Overmixing develops gluten and will make your bread tough. Trust me, I’ve made that mistake before.
Step 5: Fold in the Chocolate Chips
Add ¾ cup of the chocolate chips (reserve the remaining ¼ cup for the top). Fold them in gently with 3 to 4 strokes. You want the chips evenly distributed, but you don’t want to overwork the batter.
Step 6: Fill the Pan
Pour the batter into your prepared loaf pan. Use your spatula to spread it into an even layer. Sprinkle the reserved ¼ cup of chocolate chips on top—this gives you that gorgeous, melty top layer.
Step 7: Bake
Place the pan in the center of the preheated oven. Bake for 50 to 60 minutes, or until a toothpick inserted into the center comes out clean or with just a few moist crumbs. If the top is browning too quickly (after about 40 minutes), tent the pan loosely with aluminum foil.
Step 8: Cool
Let the bread cool in the pan for 10 minutes. Then use the parchment paper sling to lift it out and transfer it to a wire rack. Cool completely before slicing—about 1 hour. I know it’s tempting to cut into it warm, but slicing too early will make the bread crumble. Patience pays off here.
Cooking Tips & Techniques
After testing this recipe multiple times, I’ve picked up a few tricks that make a real difference:
Don’t Overmix the Batter
This is the number one mistake people make with quick breads. Mix until the flour just disappears. Overmixing creates a tough, dense loaf because it overdevelops the gluten. A few lumps are totally fine.
Room Temperature Ingredients Matter
Cold eggs and cold milk can cause the melted butter to seize up, leading to a lumpy batter. Let your eggs and milk sit on the counter for 20 minutes before starting. If you’re in a hurry, place the eggs in a bowl of warm water for 5 minutes.
Check Your Oven Temperature
Ovens can be unreliable. I use an inexpensive oven thermometer to make sure my oven is actually at 350°F. If it runs hot, your bread will brown too quickly on the outside while staying raw in the middle.
The Toothpick Test
Insert a toothpick into the center of the loaf. If it comes out clean or with just a few moist crumbs, it’s done. If it’s wet with batter, give it another 5 minutes and test again.
Cool Completely Before Slicing
I know it’s hard to wait, but slicing warm bread will result in a crumbly mess. The bread continues to set as it cools. Let it rest for at least an hour on a wire rack.
Variations & Adaptations
This recipe is wonderfully flexible. Here are some of my favorite ways to change it up:
Gluten-Free Version
Substitute the all-purpose flour with a 1:1 gluten-free baking flour blend (I like Bob’s Red Mill). Add ½ teaspoon of xanthan gum if your blend doesn’t already include it. The texture will be slightly more tender, but still delicious.
Dairy-Free Version
Use melted coconut oil or vegan butter instead of regular butter. Swap the milk for oat milk or almond milk. Most dairy-free chocolate chips work well—Enjoy Life is a solid brand.
Nutty Twist
Fold in ½ cup of chopped walnuts or pecans along with the chocolate chips. Toast them first in a dry skillet for 3-4 minutes for extra flavor. I love this version for holiday gifting.
Spice It Up
Add ½ teaspoon of cardamom or allspice for a more complex spice profile. You can also use a store-bought pumpkin pie spice blend instead of the individual spices—use 2 teaspoons total.
Mini Loaves or Muffins
Divide the batter among 3 mini loaf pans (bake for 30-35 minutes) or a 12-cup muffin tin (bake for 18-22 minutes). Perfect for sharing or freezing individual portions.
Serving & Storage Suggestions
How to Serve
This pumpkin chocolate chip bread is wonderful at room temperature, but I actually prefer it slightly warm. Pop a slice in the microwave for 10 seconds, and the chocolate chips get all melty and gooey. It’s pure heaven.
For a more indulgent treat, serve it with a pat of salted butter or a drizzle of honey. A dollop of whipped cream or a scoop of vanilla ice cream turns it into a proper dessert.
What to Pair It With
This bread is perfect with a hot cup of coffee or chai tea. It also pairs beautifully with a pumpkin chai latte for the ultimate fall experience. For a breakfast spread, serve it alongside pumpkin banana walnut bread and fresh fruit.
Storage Instructions
Store the bread in an airtight container at room temperature for up to 4 days. The moisture from the pumpkin keeps it soft, but the chocolate chips help it stay fresh longer.
Freezing Instructions
This bread freezes beautifully. Wrap the cooled loaf tightly in plastic wrap, then in aluminum foil. Freeze for up to 3 months. To thaw, leave it on the counter overnight or unwrap and microwave individual slices for 20-30 seconds.
How Flavors Develop
Honestly, this bread tastes even better on day two. The spices meld together, and the pumpkin flavor becomes more pronounced. If you can resist eating it all on day one, you’ll be rewarded.
Nutritional Information & Benefits
Here’s the approximate nutritional breakdown per slice (based on 10 slices):
- Calories: 320
- Total Fat: 14g
- Saturated Fat: 8g
- Cholesterol: 55mg
- Sodium: 280mg
- Total Carbohydrates: 46g
- Dietary Fiber: 3g
- Sugars: 28g
- Protein: 5g
Health Benefits of Key Ingredients
Pumpkin is packed with vitamin A, which supports eye health and immune function. It’s also rich in fiber, which helps with digestion. Dark chocolate contains antioxidants called flavonoids, which are good for heart health. And cinnamon has anti-inflammatory properties. So while this bread is definitely a treat, it’s not entirely without nutritional merit.
Dietary Considerations
This recipe is vegetarian. For a vegan version, use flax eggs (2 tablespoons ground flaxseed mixed with 6 tablespoons water) and plant-based butter and milk. It is not gluten-free unless you use a gluten-free flour blend.
Conclusion
This easy pumpkin chocolate chip bread (no mixer) has become my go-to fall recipe for a reason. It’s simple, forgiving, and delivers incredible flavor with almost no effort. The texture is perfectly moist, the spices are warm and inviting, and those pockets of melted chocolate make every bite feel special.
I love that I can make it on a whim, without dragging out heavy equipment or stressing over technique. It’s the kind of recipe that makes you feel like a good baker without actually having to work very hard. And honestly? That’s my favorite kind of recipe.
I hope you give this bread a try. Customize it with your favorite mix-ins, play with the spices, make it your own. And when you do, I’d love to hear how it turned out. Leave a comment below, share a photo, or tag me on social media. Happy baking, friends!
Frequently Asked Questions
Can I use pumpkin pie filling instead of pumpkin puree?
No, I wouldn’t recommend it. Pumpkin pie filling is pre-sweetened and spiced, which will throw off the sugar and spice balance in this recipe. Stick with 100% pure pumpkin puree for the best results.
Why did my bread sink in the middle?
This usually happens if the bread is underbaked or if you opened the oven door too early. Make sure your oven is at the right temperature and resist the urge to peek for the first 40 minutes. A sunken middle can also happen if you overmix the batter.
Can I use whole wheat flour instead of all-purpose?
You can substitute up to half of the all-purpose flour with whole wheat flour. Using 100% whole wheat will make the bread denser and drier. If you try it, add an extra 2 tablespoons of milk to compensate for the extra absorbency of whole wheat flour.
How do I know when the bread is done baking?
Insert a toothpick or wooden skewer into the center of the loaf. If it comes out clean or with just a few moist crumbs clinging to it, the bread is done. If it’s wet with batter, bake for another 5 minutes and test again.
Can I make this recipe into muffins?
Absolutely! Divide the batter among a greased or lined 12-cup muffin tin. Bake at 350°F for 18-22 minutes, or until a toothpick inserted into the center of a muffin comes out clean. This is a great option for portion control or for packing in lunchboxes.
Pin This Recipe!
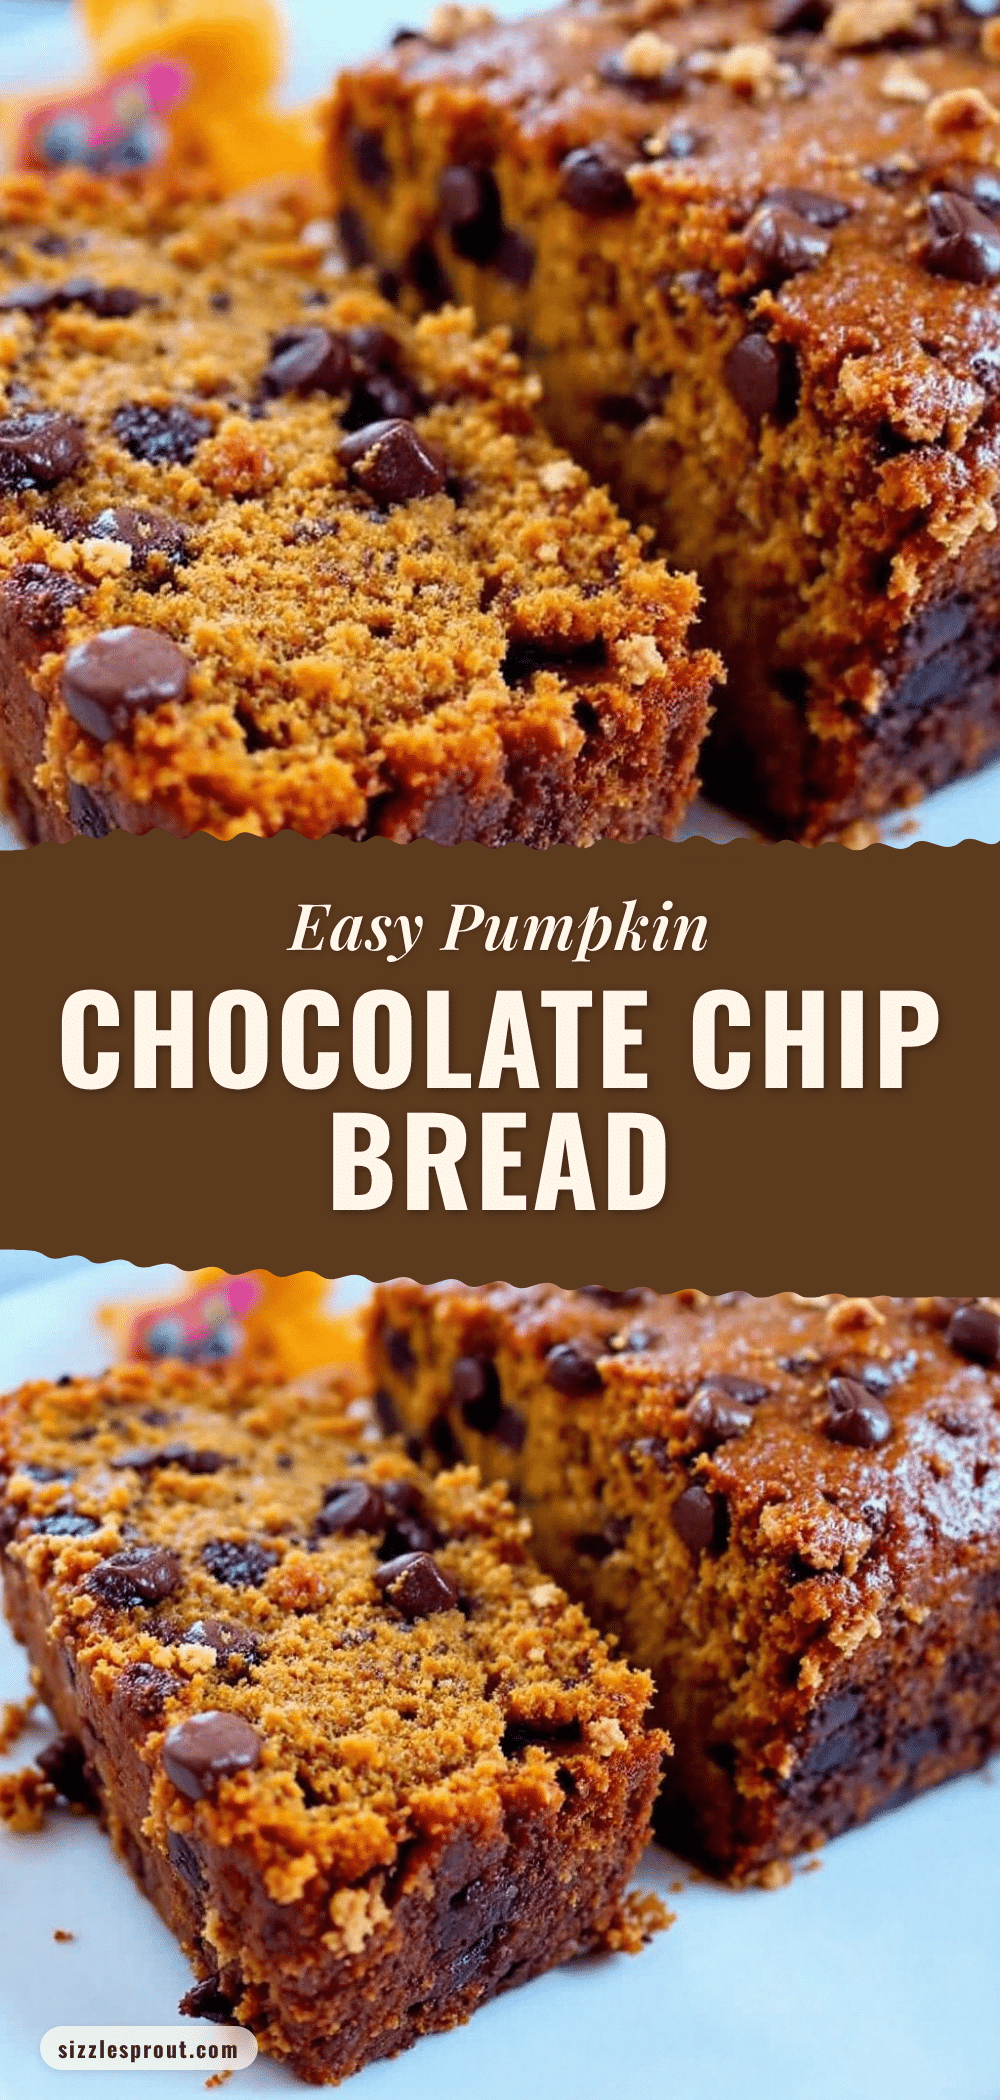
Easy Pumpkin Chocolate Chip Bread – Best No-Mixer Recipe
This easy pumpkin chocolate chip bread is ridiculously moist, perfectly spiced, and studded with melty chocolate in every bite. Made in one bowl with a wooden spoon, no mixer required, it’s the perfect fall treat for busy mornings or cozy weekends.
- Prep Time: 15 minutes
- Cook Time: 55 minutes
- Total Time: 1 hour 10 minutes
- Yield: 10 servings 1x
- Category: Dessert
- Cuisine: American
Ingredients
- 1 ¾ cups (220g) all-purpose flour
- ¾ cup (150g) granulated sugar
- ½ cup (100g) packed brown sugar (dark or light)
- 1 teaspoon baking soda
- ½ teaspoon baking powder
- ½ teaspoon salt
- 2 teaspoons ground cinnamon
- ½ teaspoon ground nutmeg
- ½ teaspoon ground ginger
- ¼ teaspoon ground cloves
- 1 cup (245g) pumpkin puree (not pumpkin pie filling)
- ½ cup (113g or 1 stick) unsalted butter, melted and slightly cooled
- 2 large eggs, room temperature
- 2 teaspoons vanilla extract
- ¼ cup (60ml) milk (whole, 2%, or oat milk)
- 1 cup (175g) semi-sweet chocolate chips, divided (¾ cup for batter, ¼ cup for topping)
Instructions
- Preheat your oven to 350°F (175°C). Grease a 9×5-inch loaf pan with butter or non-stick spray, then line it with a strip of parchment paper that hangs over the long sides for easy removal. Set aside.
- In a large mixing bowl, whisk together the all-purpose flour, granulated sugar, brown sugar, baking soda, baking powder, salt, cinnamon, nutmeg, ginger, and cloves until evenly distributed (about 30 seconds). Break up any clumps of brown sugar with your fingers.
- In a separate medium bowl or large liquid measuring cup, whisk together the pumpkin puree, melted butter, eggs, vanilla extract, and milk until smooth and fully combined.
- Pour the wet ingredients into the bowl with the dry ingredients. Use a wooden spoon or silicone spatula to stir gently just until no streaks of flour remain (about 10 to 12 folds). Do not overmix; a few small lumps are okay.
- Add ¾ cup of the chocolate chips to the batter and fold in gently with 3 to 4 strokes until evenly distributed.
- Pour the batter into the prepared loaf pan and spread it into an even layer. Sprinkle the reserved ¼ cup of chocolate chips on top.
- Bake in the center of the oven for 50 to 60 minutes, or until a toothpick inserted into the center comes out clean or with just a few moist crumbs. If the top is browning too quickly after about 40 minutes, tent the pan loosely with aluminum foil.
- Let the bread cool in the pan for 10 minutes, then use the parchment paper sling to lift it out and transfer it to a wire rack. Cool completely before slicing (about 1 hour).
Notes
Do not overmix the batter; overmixing develops gluten and makes the bread tough. Room temperature ingredients help the batter come together smoothly. For best results, cool completely before slicing to prevent crumbling. The bread tastes even better on day two as the flavors meld.
Nutrition
- Serving Size: 1 slice
- Calories: 320
- Sugar: 28
- Sodium: 280
- Fat: 14
- Saturated Fat: 8
- Carbohydrates: 46
- Fiber: 3
- Protein: 5
Keywords: pumpkin bread, chocolate chip bread, no mixer, easy pumpkin bread, fall baking, quick bread, pumpkin chocolate chip


