Love this? Save it for later!
Share the inspiration with your friends
The plastic cup was empty. Not a single crumb left, not even a smear of chocolate pudding clinging to the sides. My seven-year-old, who usually picks out the gummy worms with the precision of a forensic scientist, had licked the rim clean. Then came the text from my sister-in-law: “How did you make the dirt look so real? We need these for the office party.” Honestly, I didn’t even have time to feel proud before I was already thinking about which grocery store to hit next.
It started as a desperate scramble. The school Halloween party was in forty-five minutes, and my pantry was looking dangerously bare. I didn’t have time to bake anything. I didn’t have time to cool a cake. I just needed something that looked like a spooky garden but tasted like a dessert your kids would actually fight over. That’s when I remembered the Oreo crumbs and the chocolate pudding mix.
This Easy Halloween Dirt Cups with Gummy Worms isn’t just a snack. It’s a lifesaver for last-minute planners and a guaranteed hit for anyone who loves the thrill of digging into something that looks a little bit gross but tastes incredibly sweet. The texture is perfect—crunchy on top, creamy underneath—and the gummy worms add that fun, interactive element that keeps kids (and adults) coming back for seconds.
I’ve made these for every Halloween since, from classroom parties to neighborhood trick-or-treat drop-offs. They are the kind of treat that disappears before you can even take a photo. You know that feeling when you walk into a room and everyone is staring at the food table? That’s the vibe with these cups. It’s quiet pride, really. You didn’t spend hours in the kitchen, but you ended up with the star of the show.
There is something satisfying about turning simple ingredients into a little edible scene. You mix the crumbs, you spoon the pudding, you wiggle those worms in, and just like that, you have created a moment of joy. It’s not complicated. It’s not fancy. But it works. Every single time.
Why You’ll Love This Recipe
Let’s be real for a second. Not every dessert needs to be a masterpiece. Sometimes, you just want something that comes together faster than you can change out of your pajamas. This recipe checks every box, and then some. It’s not just about convenience, though that’s a huge plus. It’s about the experience of eating it.
- Quick & Easy: You can have these assembled in under 10 minutes. That is literally the time it takes to boil water for pasta. Perfect for those chaotic weeknights or when you need a last-minute treat for a party.
- Simple Ingredients: You probably already have everything in your kitchen. Oreos, chocolate pudding mix, milk, and gummy worms. No fancy grocery trips needed. No obscure spices you’ll use once and forget.
- Perfect for Halloween Parties: Whether it’s a school event, a costume party, or just a spooky movie night at home, these cups fit the theme perfectly. They are visually striking without being intimidating.
- Crowd-Pleaser: Kids love digging for worms. Adults love the nostalgia of eating cookie crumbs like dirt. It’s a win-win situation that gets rave reviews from all ages.
- Unbelievably Delicious: The combination of the salty-sweet cookie crumbs with the rich, creamy chocolate pudding is next-level comfort food. It’s like a chocolate cake in a cup, but easier.
What makes this recipe different from the rest? It’s the texture balance. Many “dirt” recipes use just crushed cookies, which can be too dry. By mixing the crumbs with a bit of melted butter and layering them over smooth pudding, you get that perfect moist crunch. It’s not just another version—it’s the version that actually works.
This recipe isn’t just good—it’s the kind that makes you close your eyes after the first bite. It’s comfort food reimagined for a spooky season. It’s perfect for impressing guests without stress, or turning a simple Tuesday evening into something memorable. Plus, it’s a great way to use up leftover pudding or cookies you’ve been meaning to eat.
What Ingredients You Will Need
This recipe uses simple, wholesome ingredients to deliver bold flavor and satisfying texture without the fuss. The beauty here is in the simplicity. You don’t need a mixer, you don’t need fancy tools, and you don’t need to be a professional chef. Just good-quality basics that come together to create something magical.
Here is what you will need to gather:
- Oreo Cookies (or similar chocolate sandwich cookies): You’ll need about 20-24 cookies. I recommend using standard Oreos for the classic look, but any chocolate sandwich cookie works. The dark cookie crumbs mimic the look of rich garden soil perfectly.
- Unsalted Butter: You need about 4 tablespoons (half a stick) of melted butter. This is crucial. It binds the crumbs together so they clump nicely, rather than just being loose dust. Use high-quality butter for the best flavor.
- Chocolate Pudding Mix: One box (3.4 oz) of instant chocolate pudding mix. I personally prefer the brands that have a richer chocolate taste, like Jell-O or instant versions from major grocery stores. Avoid the “light” versions if you want that authentic dessert feel.
- Milk: You’ll need 2 cups of cold milk to whisk with the pudding mix. Whole milk gives the creamiest texture, but 2% or even a dairy-free alternative like almond milk works if needed.
- Gummy Worms: A bag of gummy worms for the “dirt” reveal. You can use any brand, but look for ones that are slightly thicker so they stand up well in the pudding. This is the fun part!
- Small Plastic Cups: Clear plastic cups work best so you can see the layers. You can use small dessert cups, shot glasses, or even mason jars if you want a more rustic look. The size matters here—smaller cups make for better party portions.
If you want to get creative, you can swap the Oreos for crushed chocolate cake or even brownie bits. But let’s be honest, Oreos are the gold standard for a reason. They have the right color and the right crunch. If you are looking for something similar, you might also enjoy the texture of small batch pumpkin chocolate chip cookies, though those are baked. For this recipe, sticking to the classic cookie crumbs is the way to go.
Equipment Needed
You don’t need a fancy kitchen to make these. In fact, keeping the equipment minimal is part of the charm. Here is what you will need:
- Large Mixing Bowl: A standard 4-quart bowl is perfect for tossing the cookie crumbs with butter. If you don’t have one, a large zip-top bag works too if you want to crush the cookies in the bag.
- Whisk: Essential for mixing the pudding and milk. Make sure it’s clean and dry before starting to avoid lumps.
- Electric Mixer (Optional): While you can whisk by hand, an electric mixer makes the pudding smoother and faster. If you don’t have one, just whisk vigorously for 2-3 minutes.
- Plastic Spoons: For serving. These are essential because the “dirt” gets messy. Plastic is cheaper and less likely to break if a kid gets too excited.
- Zip-Top Bags: Great for crushing the cookies if you don’t have a food processor. It’s also a good way to store leftover crumbs.
If you don’t have a large bowl, just use two smaller ones. The key is having enough surface area to mix the crumbs evenly. Also, make sure your cups are clean and dry. Nothing ruins a good dessert like a wet cup making the crumbs soggy before you even start.
Preparation Method
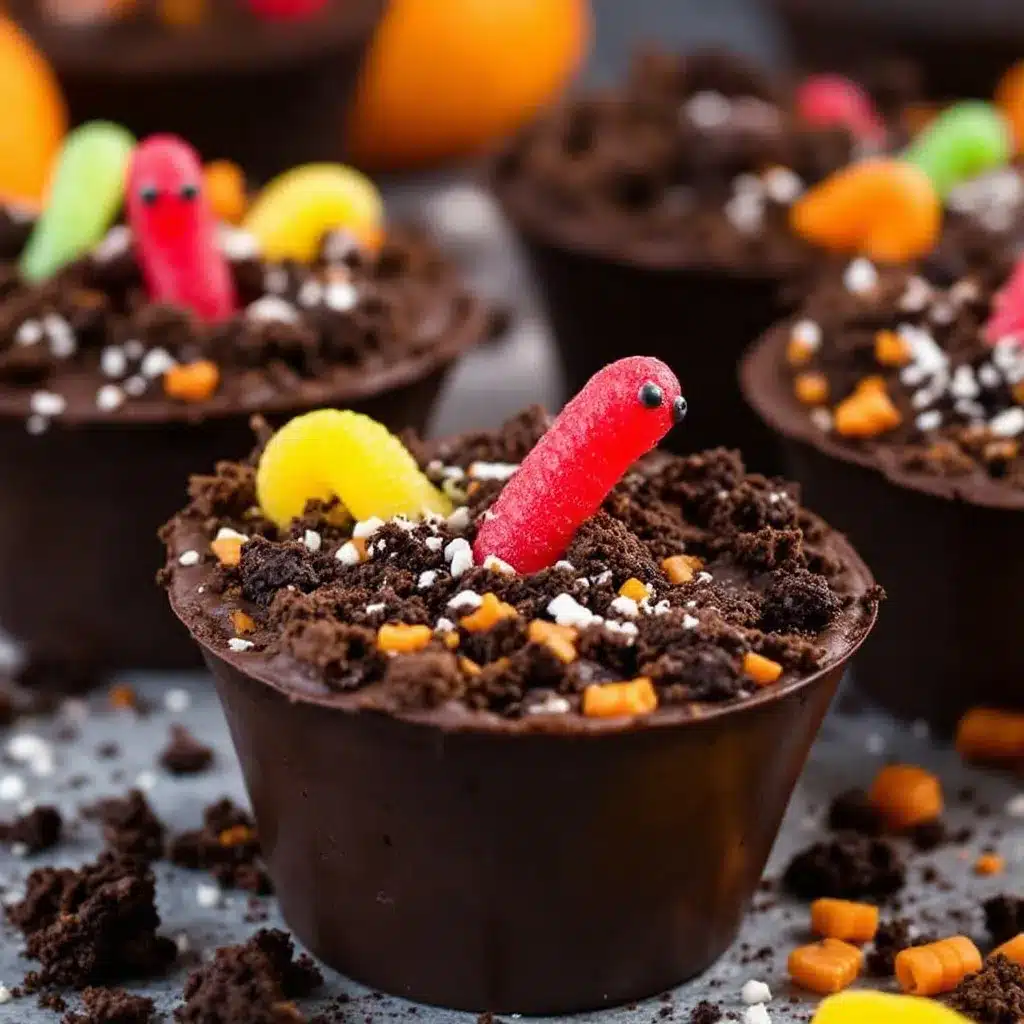
Making these dirt cups is straightforward, but there are a few tricks to get the texture just right. Follow these steps carefully, and you will have perfect cups every time.
- Crush the Cookies: Start by removing the cream filling from the Oreos if you want pure “dirt,” or leave it in if you want a creamier crumb. I usually leave it in for extra richness. Place the cookies in a large zip-top bag or a bowl. If using a bag, roll a rolling pin over them until they are finely crushed. You want small, sandy crumbs, not big chunks. This takes about 2-3 minutes. If using a bowl, use a fork or your hands to break them down. Tip: Don’t crush them too finely, or they will turn into paste when mixed with butter.
- Melt the Butter: In a small microwave-safe bowl, melt 4 tablespoons of unsalted butter. Heat in 30-second intervals, stirring in between, until fully liquid. Let it cool for a minute so it doesn’t melt the cookies instantly.
- Combine Crumbs and Butter: Pour the melted butter over the crushed cookies. Toss gently with a fork or your hands until all the crumbs are evenly coated. They should look like wet sand. If they look too dry, add a teaspoon more butter. If too wet, add a few more crumbs. This mixture should hold together when squeezed.
- Prepare the Pudding: In a large bowl, whisk together the chocolate pudding mix and 2 cups of cold milk. Whisk vigorously for 2 minutes until the mixture thickens slightly and is smooth. No lumps allowed. Note: Let it sit for 5 minutes to fully set up.
- Assemble the Cups: Take your clear plastic cups. Spoon about 2 tablespoons of the cookie crumb mixture into the bottom of each cup. Press down gently to create a base layer. This is your “bottom soil.”
- Add the Pudding: Spoon a generous layer of chocolate pudding on top of the cookie base. Fill the cup about halfway. You want a good balance of pudding to crumbs.
- Top with More Crumbs: Add another layer of cookie crumbs on top of the pudding. This is the main “dirt” layer. Make it thick and fluffy. You want to cover the pudding completely.
- Insert the Worms: Take your gummy worms and wiggle them into the top layer of crumbs. Stick them in at an angle so they look like they are burrowing. You can use one or two worms per cup, depending on the size of the cup.
- Chill and Serve: Place the cups in the refrigerator for at least 15-20 minutes. This helps the pudding set and the flavors meld. Serve cold. Warning: Do not leave out for more than 2 hours, as the pudding can spoil.
Cooking Tips & Techniques
Getting the texture right is the difference between a good dirt cup and a great one. Here are some tips from my experience to help you avoid common pitfalls.
- Crumb Consistency: The key is to have a mix of fine crumbs and small chunks. If everything is powder, it will get mushy. If it’s all chunks, it won’t hold together. Aim for a texture like wet sand.
- Butter Ratio: Don’t skimp on the butter. It binds the crumbs. But don’t overdo it, or the dirt will feel greasy. The crumbs should be moist, not soaked.
- Pudding Thickness: Make sure the pudding is thick enough to hold its shape. If it’s too runny, it will mix with the crumbs and make a soup. If your pudding seems thin, let it sit longer or add a bit more mix.
- Wiggle, Don’t Push: When adding the gummy worms, wiggle them in gently. If you push too hard, you might break the worm or make a mess. Let the crumbs hold them in place.
- Chilling Time: Don’t skip the chill time. It helps the layers set and makes the dessert easier to eat. It also makes the pudding firmer, which is nicer for serving.
I once made these without chilling them, and the pudding was too soft, causing the cups to leak. Lesson learned. Always chill. Also, if you are making these ahead of time, add the worms right before serving so they don’t get soggy.
Variations & Adaptations
While the classic chocolate version is the best, there are plenty of ways to tweak this recipe to suit different tastes or dietary needs.
- Strawberry Dirt Cups: Swap the chocolate pudding for strawberry or vanilla pudding. Use vanilla wafers or crushed red velvet cookies for the crumbs. Top with a fresh strawberry slice for a pop of color.
- Gluten-Free Option: Use gluten-free chocolate sandwich cookies and gluten-free pudding mix. Most major brands have GF options now. The process is exactly the same.
- Dairy-Free: Use dairy-free milk and dairy-free chocolate pudding mix. There are many plant-based pudding mixes that taste just as good. For the crumbs, check that your cookies are dairy-free (some Oreos are accidentally dairy-free, but not all).
- Low-Sugar: Use a sugar-free pudding mix and sugar-free cookies. It’s not as sweet, but it still has the same texture and fun factor.
- Mini Version: Use shot glasses or small dessert spoons for bite-sized versions. These are perfect for cocktail parties or as a fancy dessert at a dinner party.
I’ve tried the strawberry version with red velvet cookies, and it looks like actual mud with red clay. It’s surprisingly delicious and very festive. Don’t be afraid to experiment with different cookie flavors.
Serving & Storage Suggestions
These dirt cups are best served chilled. The cold temperature enhances the chocolate flavor and keeps the pudding firm. You can serve them as a standalone dessert or alongside other Halloween treats like pumpkin pie spice overnight oats for a spooky breakfast spread.
- Storage: Store leftover cups in the refrigerator for up to 3 days. Keep them covered with plastic wrap to prevent them from absorbing other fridge smells. The crumbs may soften slightly over time, but they will still be delicious.
- Freezing: You can freeze the cups, but the texture of the pudding may change. Thaw in the refrigerator overnight before serving. I recommend adding the gummy worms after thawing.
- Serving: Serve with plastic spoons. These are messy, and you don’t want anyone trying to eat them with a fork. Add a small sign that says “Edible Dirt” for extra fun.
The flavors develop over time, becoming richer and more integrated. If you make them the night before, they are even better the next day. Just add fresh worms right before serving.
Nutritional Information & Benefits
While these are definitely a treat, they are made with simple ingredients. Each cup contains approximately 250-300 calories, depending on the size of the cup and the amount of pudding used. The chocolate pudding provides calcium and some protein, while the cookies offer carbohydrates for energy.
- Allergens: Contains gluten, dairy, and soy. Use gluten-free and dairy-free alternatives if needed.
- Dietary Considerations: Can be made vegan and gluten-free with the right substitutions.
- Wellness Perspective: It’s a fun, interactive dessert that feels like play. For kids, it’s a great way to enjoy a sweet treat without feeling like they’re eating a heavy meal. For adults, it’s a nostalgic trip to childhood.
It’s not a health food, but it’s a joyful one. And sometimes, that’s what matters most.
Conclusion
These Easy Halloween Dirt Cups with Gummy Worms are more than just a dessert. They are a moment of fun, a way to connect with kids, and a stress-free solution for last-minute party planning. I love how simple they are, yet how much joy they bring. You don’t need to be a chef to make them. You just need a few ingredients and a willingness to have fun.
I encourage you to try this recipe and customize it to your liking. Use your favorite cookies, try different pudding flavors, or add your own twist. Share your creations with friends and family. I’d love to hear how they turned out for you. Leave a comment below with your tips or variations.
Thanks for reading, and happy Halloween!
FAQs
Can I make these dirt cups ahead of time?
Yes, you can assemble them up to 24 hours in advance. Store them in the refrigerator covered with plastic wrap. Add the gummy worms right before serving to keep them fresh.
What can I use instead of Oreos?
You can use any chocolate sandwich cookie, like Nabisco’s or store brands. For a different flavor, try vanilla wafers or even crushed graham crackers for a s’mores vibe.
How do I keep the crumbs from getting soggy?
Make sure the crumbs are coated in butter but not soaked. Also, add the crumbs on top of the pudding right before serving if you are making them ahead.
Can I use homemade pudding?
Yes, but make sure it is fully cooled and thick. Homemade pudding can be thinner, so you may need to chill it longer before assembling.
Are these cups gluten-free?
Not with standard Oreos. To make them gluten-free, use gluten-free chocolate sandwich cookies and a gluten-free pudding mix.
Pin This Recipe!
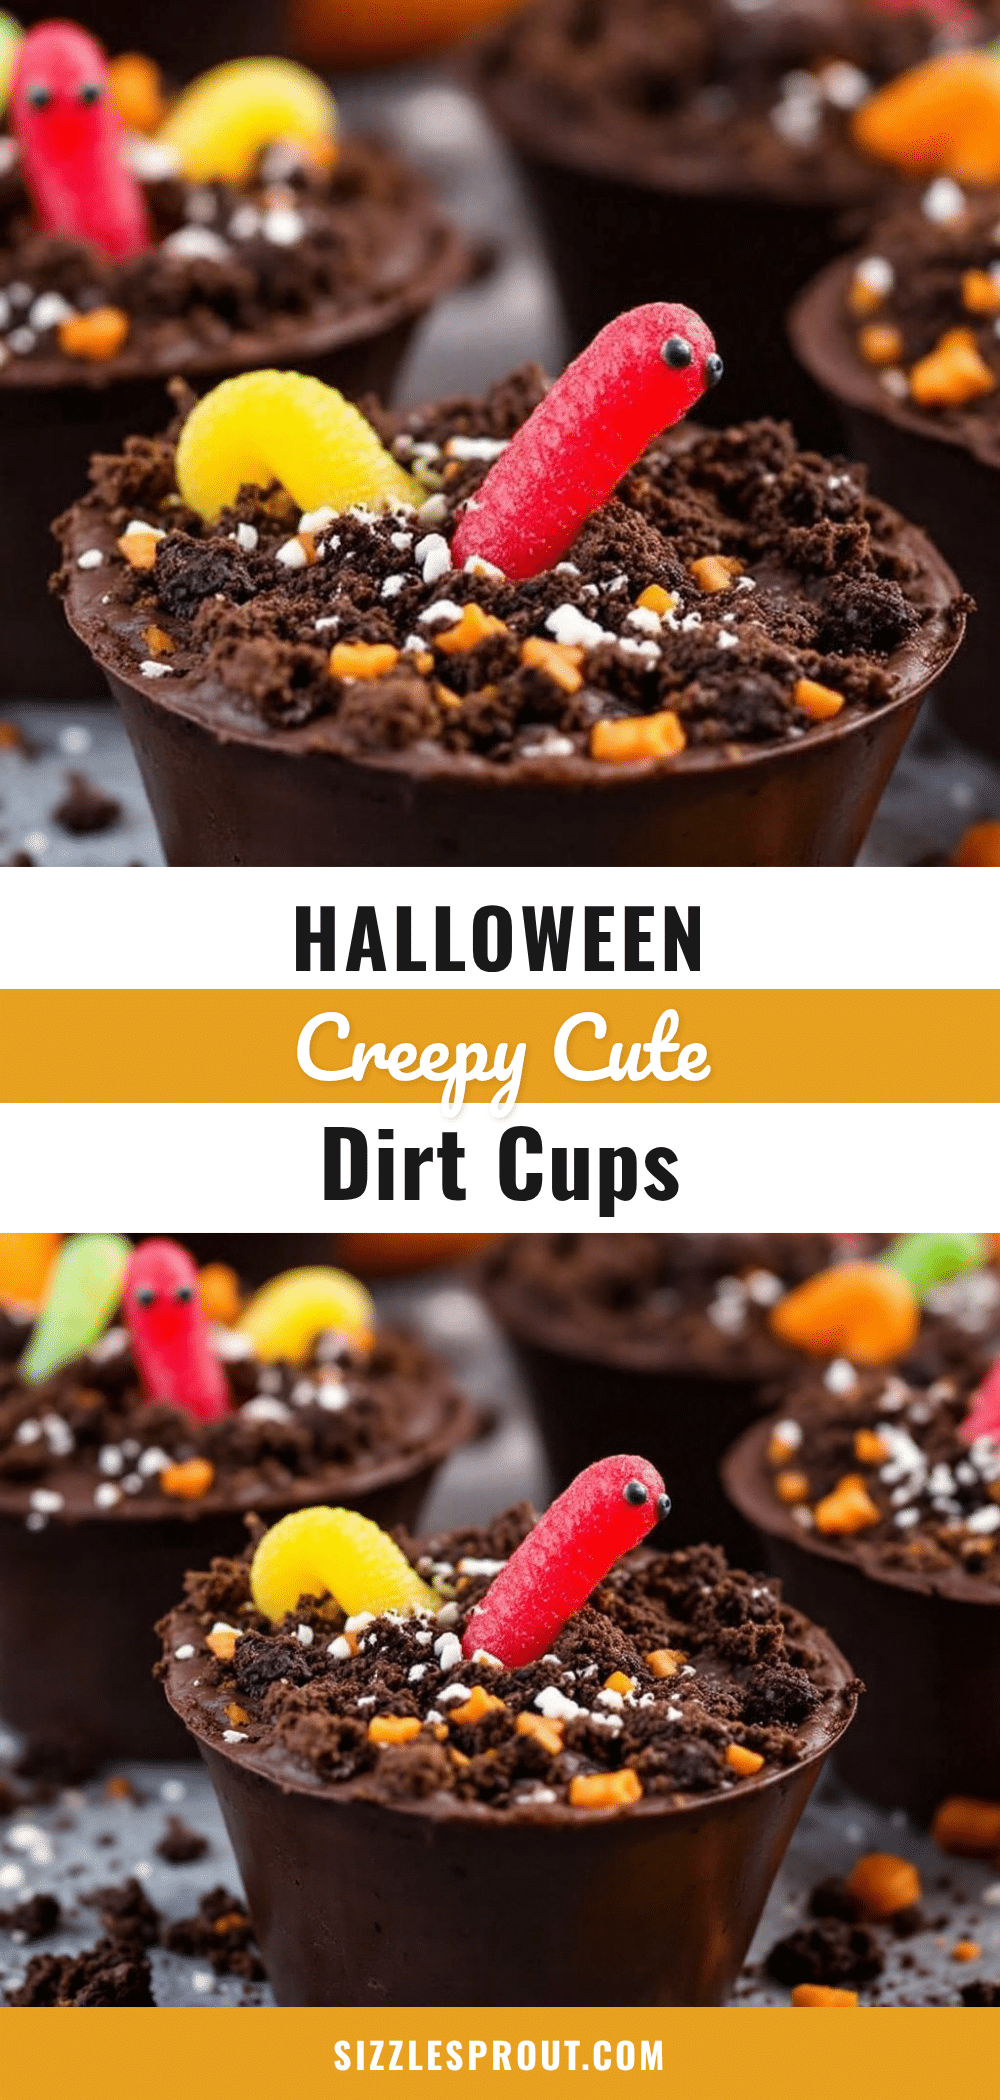
Easy Halloween Dirt Cups with Gummy Worms
A quick, no-bake Halloween dessert featuring layers of chocolate pudding and buttery Oreo crumbs topped with gummy worms. Perfect for parties and last-minute planning.
- Prep Time: 10 minutes
- Cook Time: 0 minutes
- Total Time: 15 minutes
- Yield: 8 servings 1x
- Category: Dessert
- Cuisine: American
Ingredients
- 20–24 Oreo cookies (or similar chocolate sandwich cookies)
- 4 tablespoons unsalted butter, melted
- 1 box (3.4 oz) instant chocolate pudding mix
- 2 cups cold milk
- 1 bag gummy worms
- Small clear plastic cups
Instructions
- Remove cream filling from Oreos if desired, then crush cookies into fine crumbs using a zip-top bag or food processor.
- Melt the butter in a microwave-safe bowl in 30-second intervals, stirring until liquid. Let cool slightly.
- Pour melted butter over crushed cookies and toss until crumbs resemble wet sand.
- In a large bowl, whisk pudding mix and cold milk vigorously for 2 minutes until smooth and thickened. Let sit for 5 minutes to set.
- Spoon about 2 tablespoons of cookie crumb mixture into the bottom of each cup and press down gently.
- Add a generous layer of chocolate pudding on top of the crumb base, filling the cup about halfway.
- Top with another layer of cookie crumbs to cover the pudding completely.
- Wiggle gummy worms into the top layer of crumbs at an angle.
- Refrigerate for at least 15-20 minutes before serving.
Notes
For best texture, ensure crumbs are moist but not soaked with butter. Chill cups for at least 15 minutes to help pudding set. Add gummy worms right before serving to prevent sogginess. Store leftovers in the refrigerator for up to 3 days.
Nutrition
- Serving Size: 1 cup
- Calories: 275
- Sugar: 28
- Sodium: 250
- Fat: 12
- Saturated Fat: 6
- Carbohydrates: 40
- Fiber: 2
- Protein: 4
Keywords: Halloween dessert, dirt cups, gummy worms, no-bake, easy recipe, kids treats, chocolate pudding, Oreo cookies


