Love this? Save it for later!
Share the inspiration with your friends
“You have to make the pepper look like a pumpkin though, right?” My seven-year-old niece was staring at the bell peppers I’d just set on the counter, her face completely serious. I hadn’t even told her what we were making for dinner yet. She’d just seen the orange ones and made the connection herself. And honestly? She was absolutely right.
That offhand comment turned a regular Tuesday night into something I still think about. I was planning to stuff those peppers with black beans, corn, and rice—a weeknight staple I’d been making for years. But suddenly, the idea felt boring. What if I actually carved them? What if dinner could look like a tiny jack-o-lantern grinning back at you from the plate?
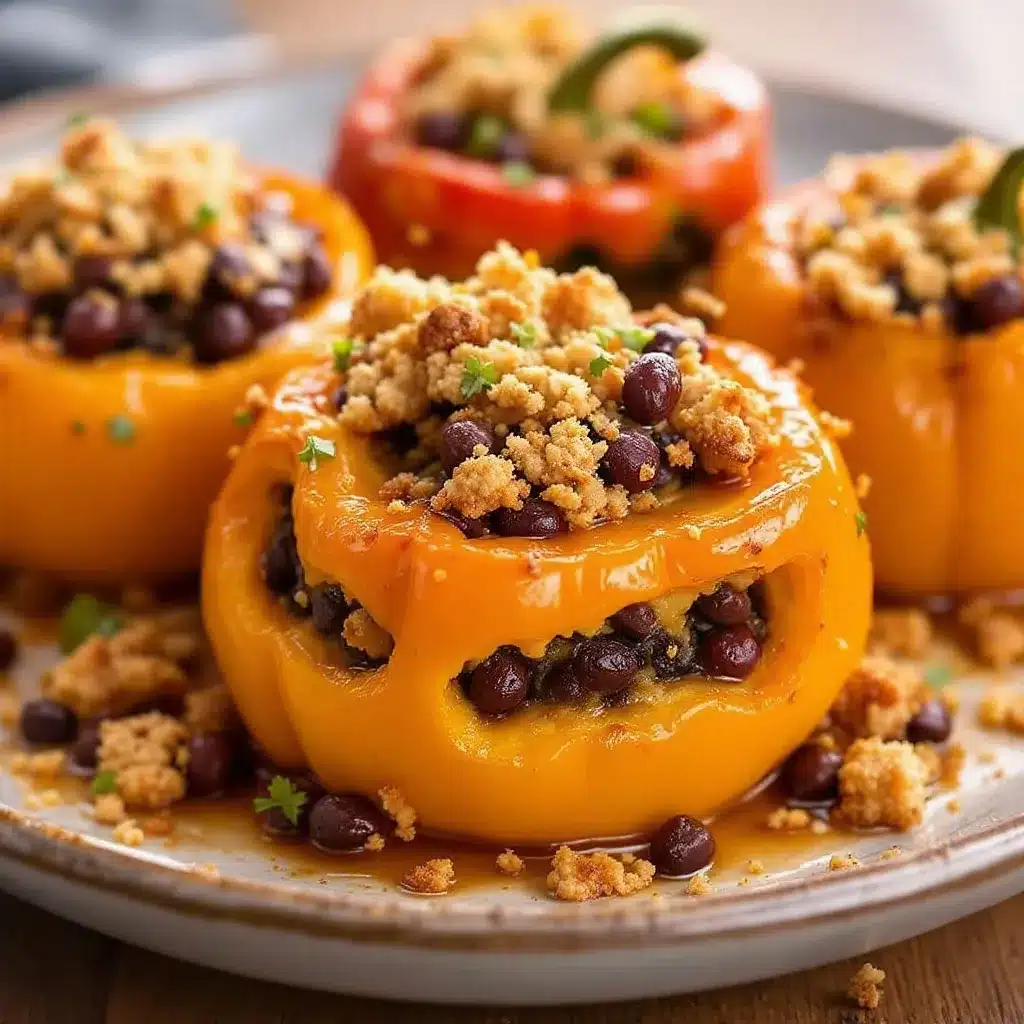
So I grabbed a paring knife, scooped out the insides a little more carefully than usual, and carved a simple face into the front of each pepper. I stuffed them, baked them, and when they came out of the oven, my niece actually gasped. They looked like little glowing pumpkins—if pumpkins were filled with melty cheese and smoky black beans. That was three Octobers ago, and these Easy Black Bean Jack-O-Lantern Stuffed Peppers have been a non-negotiable part of our fall dinner rotation ever since.
This isn’t one of those recipes that looks cute but tastes like compromise. It’s genuinely good food hiding inside a costume. The peppers soften just enough to be tender but still hold their shape. The filling is hearty, a little smoky, and perfectly cheesy. And the best part? You don’t need any special skills to carve the faces. If you can cut a triangle, you can make these.
I’ve made them for Halloween parties, for regular weeknights when we need a mood boost, and even for a friend who swore she didn’t like stuffed peppers. She ate two. There’s something about food that looks like a holiday that makes people smile before they even take a bite. And this recipe delivers on that promise every single time.
Why You’ll Love This Recipe
Let me tell you why these peppers have become my most-requested fall recipe, even over desserts. It’s not just because they’re adorable—though that definitely helps.
- Quick & Easy: These come together in about 40 minutes, start to finish. The active prep time is maybe 15 minutes. That’s faster than ordering takeout in some neighborhoods.
- Simple Ingredients: You probably have most of these in your pantry right now. Canned black beans, rice, cheese, spices, and bell peppers. No weird specialty items required.
- Perfect for Halloween: Whether you’re hosting a party, feeding hungry trick-or-treaters before they head out, or just want a festive dinner that doesn’t involve candy, these hit the mark.
- Crowd-Pleaser: I’ve served these to kids, adults, picky eaters, and vegetarians. Everyone loves them. The carving makes them approachable and fun, even for people who usually side-eye vegetables.
- Unbelievably Delicious: The smoky black bean filling with melty cheese, nestled inside a tender roasted pepper? It’s comfort food that happens to be pretty good for you.
What makes this recipe different from every other stuffed pepper out there is the presentation, sure, but also the filling. I’ve tested this combination more times than I can count. The ratio of beans to rice, the perfect amount of cumin and smoked paprika, the way the cheese melts into everything. It’s not just another version—it’s the version I’d serve to anyone who needed convincing that vegetarian dinners can be exciting.
Honestly, this is the kind of recipe that makes you feel like a kitchen wizard with minimal effort. You carve a face into a pepper, stuff it, bake it, and suddenly dinner looks like a celebration. That’s magic I can get behind on a busy Tuesday.
What Ingredients You Will Need
This recipe uses simple, pantry-friendly ingredients to create something that feels special. Here’s everything you’ll need, plus a few notes from my kitchen to yours.
For the Stuffed Peppers
- 4 large orange bell peppers – Look for ones that are squat and round, not tall and pointy. You want them to sit flat on a baking dish and look more pumpkin-shaped. Orange is non-negotiable for the jack-o-lantern effect, but you could use red or yellow in a pinch.
- 1 tablespoon olive oil – For sautéing the aromatics. Avocado oil works too.
- 1 small yellow onion, diced – About 1 cup. Sweet onion or white onion both work fine.
- 3 cloves garlic, minced – Fresh is best here. The jarred stuff gets bitter when baked.
- 1 can (15 ounces) black beans, drained and rinsed – I prefer Bush’s or Goya for consistent texture. Rinsing removes the excess sodium and that canned flavor.
- 1 cup cooked rice – White, brown, or even cauliflower rice works. Leftover rice is perfect here. If you’re starting from scratch, 1/3 cup dry rice cooked in water yields about 1 cup cooked.
- 1 cup corn kernels – Frozen (thawed), canned (drained), or fresh off the cob. I use frozen most of the time because it’s always in my freezer.
- 1 can (10 ounces) diced tomatoes with green chiles – Rotel is my go-to. Mild or original, depending on your heat preference. If you can’t find it, use 1 cup diced tomatoes plus 1 small diced jalapeño.
- 1 teaspoon ground cumin – This gives the filling that warm, earthy backbone.
- 1 teaspoon smoked paprika – Regular paprika works, but smoked adds a depth that makes this taste like it cooked for hours.
- 1/2 teaspoon chili powder – Adds a mild warmth without making it spicy for kids.
- 1/2 teaspoon salt – Plus more to taste. I use fine sea salt.
- 1/4 teaspoon black pepper – Freshly ground if you have it.
- 1 cup shredded cheese – Sharp cheddar is classic, but Monterey Jack or a Mexican blend melts beautifully. I’ve used pepper jack for extra heat too.
For Topping (Optional but Recommended)
- Fresh cilantro, chopped – For brightness and color.
- Sour cream or Greek yogurt – A cool, creamy contrast to the warm filling.
- Salsa or hot sauce – For those who want extra kick.
- Green onion, sliced – Adds a mild oniony crunch.
Ingredient Selection Tip: When choosing bell peppers, look for ones with flat, stable bottoms. This is crucial—they need to sit upright in the baking dish without wobbling. I usually buy an extra pepper just in case one is too tall or has a weird shape. Also, if you’re making these for a party, you can prep the filling a day ahead and stuff the peppers right before baking. The filling actually gets more flavorful overnight.
Equipment Needed
You don’t need much for this recipe, which is part of why I love it. Here’s what you’ll want to have on hand:
- Sharp paring knife – This is your most important tool for carving the faces. A small, sharp knife gives you control. I use a 3.5-inch paring knife and it’s perfect. Dull knives slip, and you don’t want that when you’re carving tiny triangles.
- Cutting board – Preferably one with a groove to catch pepper juices.
- Large skillet or sauté pan – For cooking the filling. A 10 or 12-inch pan works well.
- Baking dish – An 8×8 or 9×9 square dish, or a 9×13 if you’re making a double batch. The peppers should fit snugly so they don’t tip over.
- Mixing spoon – Wooden or silicone, for stirring the filling.
- Measuring cups and spoons – For accuracy, though I’ll admit I eyeball the spices most of the time now.
- Small spoon or melon baller – For scooping out the pepper insides. A regular teaspoon works fine too.
- Aluminum foil – For covering the dish during the first part of baking.
Budget-Friendly Tip: If you don’t have a paring knife, a small serrated knife (like a steak knife) works surprisingly well for carving. I’ve done it in a pinch and the results were totally fine. Also, any oven-safe dish will work—I’ve used a cast iron skillet and a ceramic pie plate with equal success. Don’t overthink the equipment.
Preparation Method
Alright, let’s make these adorable little peppers. I’ll walk you through every step so you feel confident, even if you’ve never carved a vegetable in your life.
Step 1: Preheat and Prep
Preheat your oven to 375°F (190°C). While it’s heating, rinse and drain your black beans. If you’re using frozen corn, let it thaw on the counter or run it under warm water. Cook your rice if you don’t have leftovers—1/3 cup dry rice with 2/3 cup water, simmered for about 15 minutes, will give you the 1 cup cooked you need.
Step 2: Prepare the Peppers
Wash your bell peppers and pat them dry. Using your sharp knife, cut the top off each pepper—about 1/2 inch from the stem. Don’t throw the tops away! You can chop them up and add them to the filling for extra veggies and zero waste. Gently remove the seeds and white membranes from inside each pepper. A small spoon works great for this. Rinse the inside briefly to remove any stray seeds, then pat dry again.
Here’s the fun part: carving the faces. Using your paring knife, carefully cut small triangles for eyes and a mouth. You can do a classic jack-o-lantern face or get creative—I’ve done a winking face, a surprised face, and even a tiny cat face once. The key is to make the cuts clean and not too big. Remember, the pepper will soften slightly as it bakes, so the holes will open up a tiny bit. Start smaller than you think you want.
Pro tip: Cut the face pieces out completely. Don’t leave them partially attached. You want actual holes so the filling peeks through. It looks so much better that way.
Step 3: Make the Filling
Heat the olive oil in your skillet over medium heat. Add the diced onion and cook for 3-4 minutes until it’s soft and translucent. Add the minced garlic and cook for another 30 seconds until fragrant—don’t let it burn. If you’re using the chopped pepper tops, add them now and cook for 2 minutes.
Add the drained black beans, corn, diced tomatoes with green chiles (with their liquid), cumin, smoked paprika, chili powder, salt, and pepper. Stir everything together and let it cook for 5-7 minutes, stirring occasionally. The liquid from the tomatoes should reduce slightly, and the flavors will meld together beautifully.
Remove the skillet from heat and stir in the cooked rice and 3/4 cup of the shredded cheese. Reserve the remaining 1/4 cup for topping. Taste the filling and adjust seasoning if needed—I usually add another pinch of salt and a dash more smoked paprika.
Step 4: Stuff the Peppers
Place your carved peppers upright in the baking dish. If they wobble, you can trim a tiny sliver off the bottom to make them flat—just don’t cut through the bottom. Using a spoon, carefully fill each pepper with the black bean mixture. Pack it in gently but firmly. Don’t overstuff, or the filling will spill out during baking. You want it mounded slightly at the top.
Sprinkle the reserved 1/4 cup cheese over the top of each pepper. This creates a lovely golden crust as it bakes.
Step 5: Bake
Cover the baking dish loosely with aluminum foil. Bake for 20 minutes. The foil traps steam and helps the peppers soften without drying out. After 20 minutes, remove the foil and bake for another 10-15 minutes. The peppers should be tender when pierced with a fork, and the cheese on top should be bubbly and lightly browned.
Sensory cue: You’ll know they’re done when the kitchen smells like a cozy fall evening—smoky, savory, with that roasted pepper sweetness cutting through. The peppers will look slightly wrinkled and the carved faces will have opened up a bit, revealing the filling inside.
Step 6: Rest and Serve
Let the peppers rest in the dish for 5 minutes before serving. This helps them set and makes them easier to handle. Transfer to plates, garnish with fresh cilantro, a dollop of sour cream, and maybe some salsa if you’re feeling extra. Serve warm and watch everyone’s face light up when they see the jack-o-lantern grin.
Cooking Tips & Techniques
I’ve made these peppers at least two dozen times over the past few years, and I’ve learned a few things the hard way. Here’s what I wish someone had told me the first time.
Don’t overbake. The first time I made these, I left them in the oven too long because I wanted the peppers to be really soft. They ended up collapsing and the faces looked sad and droopy. You want the peppers tender but still holding their shape. Twenty minutes covered plus 10-15 uncovered is the sweet spot.
Carve with confidence. I was so nervous the first time I carved a pepper that I made tiny, hesitant cuts. They looked messy. Just commit to the shape you want and cut cleanly. If you mess up? Eat that pepper and use another one. No big deal.
Make extra filling. I always end up with a little extra filling, which I eat straight from the skillet with a spoon. But honestly, it’s great to have leftovers. You can stuff it into another pepper, use it as a burrito filling, or serve it over rice the next day. Double the recipe if you’re feeding a crowd or want leftovers for lunch.
Timing strategy: Cook your rice and prep your peppers while the filling simmers. That way, everything comes together at the same time. If you’re making these for a party, you can assemble the stuffed peppers up to 24 hours in advance, keep them covered in the fridge, and bake them right before serving. They might need 5 extra minutes in the oven since they’re starting cold.
Consistency tip: If your filling seems too dry, add a splash of vegetable broth or water. If it’s too wet, let it simmer a few more minutes to cook off the liquid. The perfect filling should be moist but not soupy, and it should hold together when you spoon it into the peppers.
Variations & Adaptations
One of the best things about this recipe is how flexible it is. Here are some variations I’ve tried and loved.
Vegan Version
Skip the cheese or use your favorite vegan shredded cheese. The filling is naturally vegan without the cheese, and the peppers are still delicious. I’ve used Violife cheddar-style shreds and they melted beautifully. Nutritional yeast sprinkled on top adds a cheesy flavor without dairy.
Spicy Kick
If you like heat, add a diced jalapeño (seeds and all) when you cook the onion. Use pepper jack cheese instead of cheddar, and serve with a smoky chipotle hot sauce. I made this version for a Halloween party and the adults went crazy for it.
Protein-Packed
Add 1/2 pound of cooked ground turkey, beef, or chorizo to the filling. Brown the meat first, then remove it from the pan, cook the veggies, and add the meat back in with the beans. This version is heartier and perfect for meat-eaters who want extra protein.
Seasonal Swap
In the summer, I use fresh corn cut straight from the cob and add diced zucchini to the filling. In the winter, I add a handful of chopped kale or spinach for extra greens. The recipe is forgiving, so feel free to clean out your fridge.
Different Grains
Quinoa, farro, or even cauliflower rice all work beautifully instead of regular rice. Quinoa adds a nice protein boost and a slightly nutty flavor. If you’re low-carb, cauliflower rice is your best bet—just make sure to squeeze out the excess moisture before adding it to the filling.
My personal favorite variation? I add a spoonful of cream cheese to the filling along with the shredded cheddar. It makes everything extra creamy and indulgent. I tried it on a whim one night and now I can’t go back.
Serving & Storage Suggestions
These peppers are best served warm, right out of the oven, when the cheese is still melty and the peppers are tender. But they’re also pretty great at room temperature, which makes them perfect for parties.
Serving Temperature: Let them rest for 5 minutes after baking. They’ll be piping hot inside, and that resting time lets the filling set so it doesn’t fall apart when you take a bite.
Presentation: I like to serve each pepper on a small plate with a dollop of sour cream on the side and a sprinkle of fresh cilantro. If I’m feeling fancy, I arrange them on a platter with extra salsa and lime wedges. The bright orange against a white plate is very photogenic.
Complementary Dishes: These peppers pair beautifully with a simple side salad dressed with lime vinaigrette. I also love serving them alongside a bowl of hearty chili for a fall-themed dinner spread. The flavors are similar but the textures are different enough to keep things interesting. For a complete meal, add some grilled corn elote skewers on the side—the smoky corn flavor matches the peppers perfectly.
Storage: Store leftover stuffed peppers in an airtight container in the refrigerator for up to 4 days. The peppers will soften more as they sit, but the flavor actually gets better. I’ve eaten these cold straight from the fridge and they’re surprisingly good.
Reheating: The best way to reheat is in the oven at 350°F for 10-15 minutes, covered with foil. The microwave works in a pinch (2-3 minutes on high), but the peppers will be softer. If you’re reheating just one, the microwave is fine. For multiple peppers, use the oven.
Freezing: You can freeze these! Assemble the stuffed peppers completely but don’t bake them. Wrap each pepper tightly in plastic wrap, then place them in a freezer bag. They’ll keep for up to 3 months. To bake from frozen, place them in a baking dish, cover with foil, and bake at 375°F for 35-40 minutes, then uncover and bake 10 more minutes. Add a few minutes if they need it.
Flavor Development: The filling gets more flavorful after a day or two in the fridge. The spices meld together, and the peppers absorb some of that smoky goodness. I actually prefer the leftovers sometimes.
Nutritional Information & Benefits
These stuffed peppers are surprisingly healthy for how indulgent they feel. Here’s a rough breakdown per stuffed pepper (using cheddar cheese and white rice):
- Calories: Approximately 320-380
- Protein: 14-16 grams
- Carbohydrates: 38-42 grams
- Fiber: 10-12 grams
- Fat: 12-14 grams
- Sodium: 500-600 mg (depends on canned ingredients)
Health Highlights: Black beans are packed with fiber and plant-based protein, which keeps you full and supports digestive health. Bell peppers are loaded with vitamin C—actually, one orange bell pepper has more vitamin C than an orange. The antioxidants in peppers, especially the orange ones, support immune function and skin health. This is a meal that fills you up without weighing you down.
Dietary Considerations: This recipe is naturally gluten-free and vegetarian. It’s easy to make vegan by skipping the cheese or using a plant-based alternative. For a lower-carb option, use cauliflower rice instead of regular rice. The sodium can be reduced by using no-salt-added canned beans and tomatoes, and rinsing everything thoroughly.
Potential Allergens: Dairy (from the cheese). If you’re serving a crowd, it’s easy to make a couple of peppers without cheese for anyone who’s dairy-free.
I love that this recipe feels like comfort food but is actually packed with nutrients. It’s the kind of meal that makes you feel good about what you’re eating, and that’s a win in my book.
Frequently Asked Questions
Can I make these ahead of time?
Absolutely! You can assemble the stuffed peppers up to 24 hours in advance. Just keep them covered in the refrigerator and bake when you’re ready. Add 5-10 minutes to the baking time since they’re starting cold.
What if I can’t find orange bell peppers?
Orange peppers are best for the jack-o-lantern look, but red or yellow bell peppers work in a pinch. The flavor will be slightly different—red peppers are sweeter—but the recipe still works. You just won’t get that classic pumpkin color.
How do I keep the peppers from tipping over?
This is the most common issue I hear about! Make sure your peppers have flat bottoms. If they wobble, trim a thin slice off the bottom—just don’t cut through. Also, pack them snugly in your baking dish so they support each other.
Can I use a different type of bean?
Sure! Pinto beans, kidney beans, or even chickpeas all work well. The texture will be slightly different, but the flavor profile is flexible. Black beans are my favorite for their creamy texture and earthy taste.
What can I serve with these for a complete meal?
I love serving these with a simple green salad dressed with lime vinaigrette. For a heartier meal, try them alongside honey dijon chicken thighs for a protein-packed dinner that feels special. If you’re keeping it vegetarian, add some sheet pan salmon for a surf-and-turf vibe that’s surprisingly festive.
Conclusion
These Easy Black Bean Jack-O-Lantern Stuffed Peppers are more than just a cute Halloween dinner. They’re a reminder that food can be fun without being fussy, and that a little creativity in the kitchen goes a long way. My niece still asks for them every fall, and honestly, I’d probably make them even if she didn’t. There’s something deeply satisfying about pulling a tray of grinning orange peppers out of the oven, knowing you’re about to make someone’s day.
I hope you’ll try these and make them your own. Add your favorite toppings, swap in different fillings, carve silly faces—whatever makes you happy. That’s the whole point. And when you do make them, I’d love to hear about it. Drop a comment below and tell me how they turned out, or share a photo of your jack-o-lantern creations. Did your kids love them? Did you invent a new variation? Let me know!
Until next time, happy cooking—and happy Halloween!
Pin This Recipe!
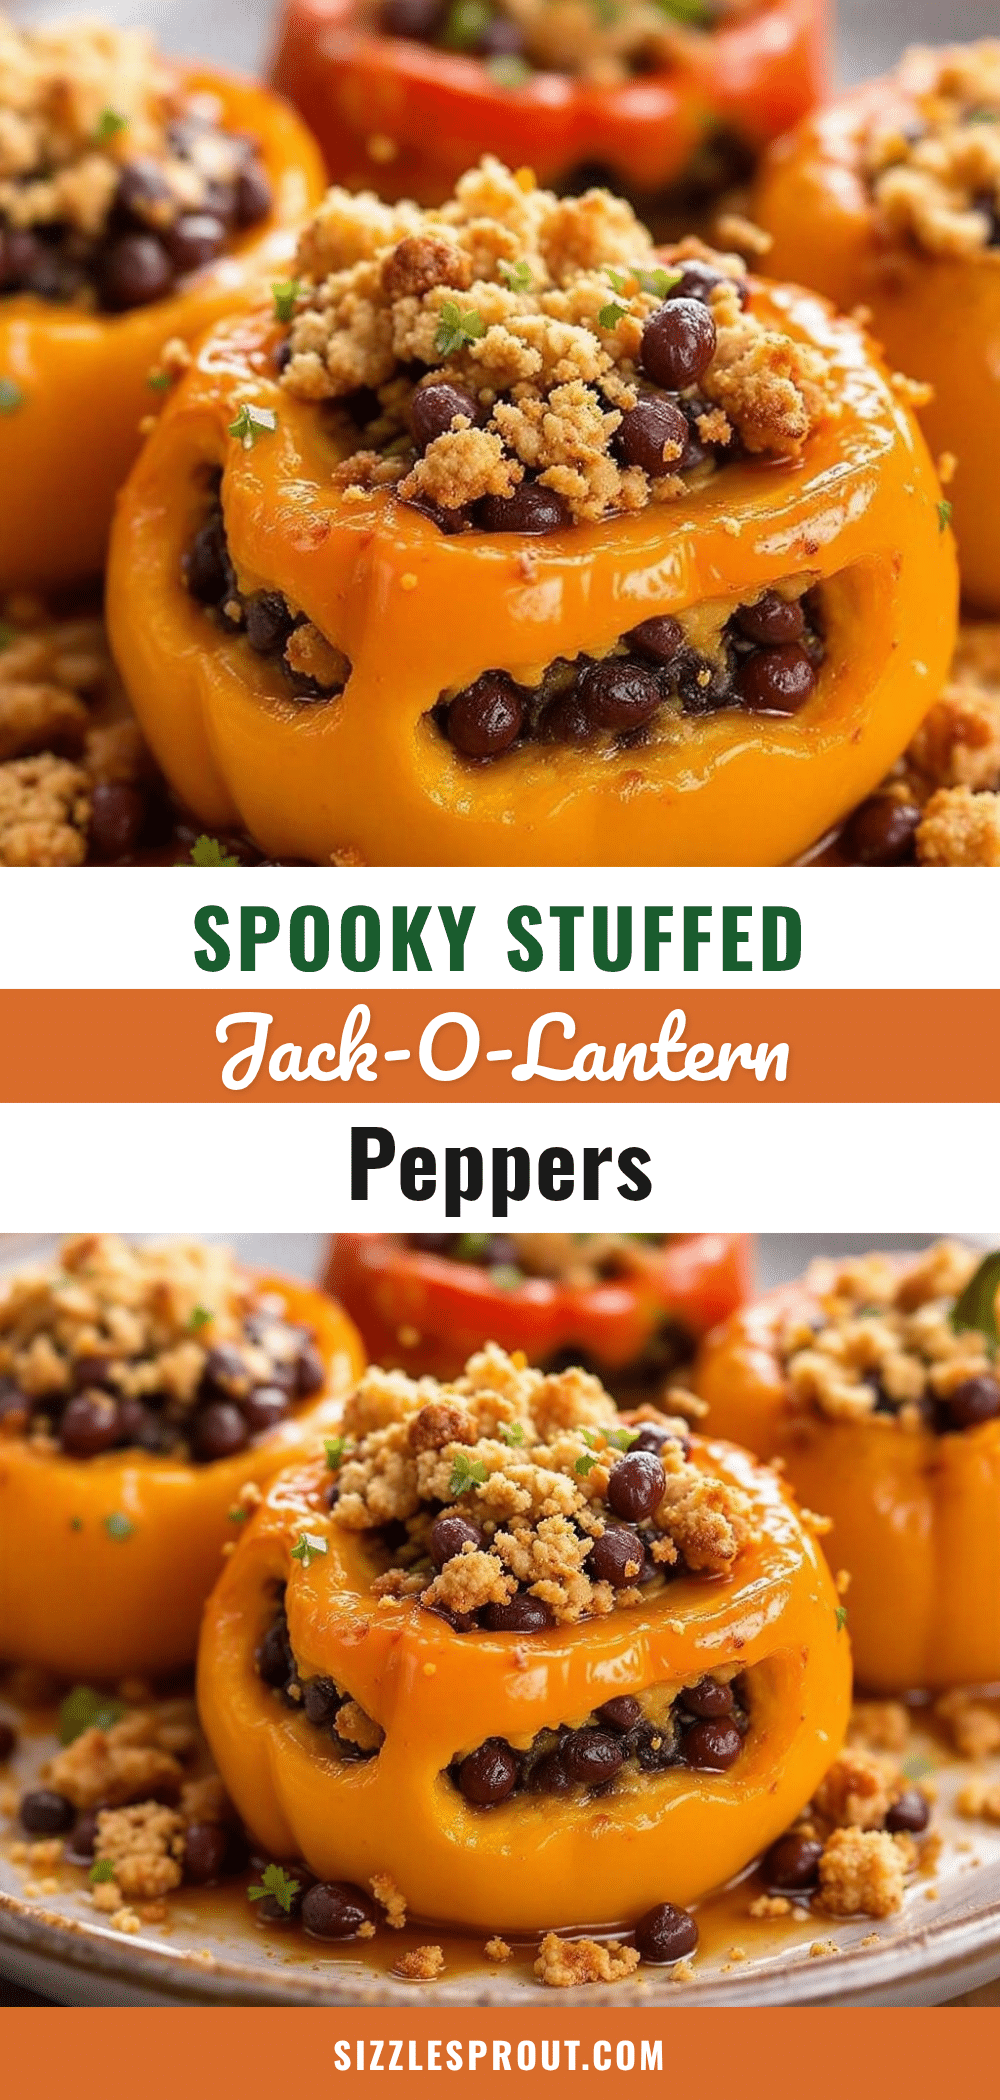
Easy Black Bean Stuffed Peppers: Best Jack-O-Lantern Dinner
These adorable jack-o-lantern stuffed peppers are filled with a smoky black bean, corn, and rice mixture, topped with melted cheese, and baked to tender perfection. A fun and delicious Halloween dinner that’s quick, easy, and packed with flavor.
- Prep Time: 15 minutes
- Cook Time: 30 minutes
- Total Time: 45 minutes
- Yield: 4 servings 1x
- Category: Main Course
- Cuisine: Mexican-American
Ingredients
- 4 large orange bell peppers
- 1 tablespoon olive oil
- 1 small yellow onion, diced (about 1 cup)
- 3 cloves garlic, minced
- 1 can (15 ounces) black beans, drained and rinsed
- 1 cup cooked rice (white, brown, or cauliflower)
- 1 cup corn kernels (frozen, canned, or fresh)
- 1 can (10 ounces) diced tomatoes with green chiles (e.g., Rotel)
- 1 teaspoon ground cumin
- 1 teaspoon smoked paprika
- 1/2 teaspoon chili powder
- 1/2 teaspoon salt
- 1/4 teaspoon black pepper
- 1 cup shredded cheese (sharp cheddar, Monterey Jack, or Mexican blend), divided
- Fresh cilantro, chopped (for garnish)
- Sour cream or Greek yogurt (for serving)
- Salsa or hot sauce (for serving)
- Green onion, sliced (for garnish)
Instructions
- Preheat oven to 375°F (190°C). Rinse and drain black beans. If using frozen corn, thaw it. Cook rice if not using leftovers (1/3 cup dry rice with 2/3 cup water, simmered 15 minutes, yields 1 cup cooked).
- Wash and dry bell peppers. Cut off the top 1/2 inch from the stem. Remove seeds and membranes. Rinse inside and pat dry. Carve small triangles for eyes and a mouth using a sharp paring knife. Cut pieces out completely to create holes.
- Heat olive oil in a large skillet over medium heat. Add diced onion and cook 3-4 minutes until soft. Add minced garlic and cook 30 seconds until fragrant. If using chopped pepper tops, add them now and cook 2 minutes.
- Add black beans, corn, diced tomatoes with green chiles (with liquid), cumin, smoked paprika, chili powder, salt, and pepper. Stir and cook 5-7 minutes until liquid reduces slightly.
- Remove skillet from heat. Stir in cooked rice and 3/4 cup shredded cheese. Reserve remaining 1/4 cup for topping. Taste and adjust seasoning if needed.
- Place carved peppers upright in a baking dish. If they wobble, trim a thin slice off the bottom. Spoon filling into each pepper, packing gently but firmly. Mound slightly at the top. Sprinkle reserved cheese over each pepper.
- Cover dish loosely with aluminum foil. Bake for 20 minutes. Remove foil and bake another 10-15 minutes until peppers are tender and cheese is bubbly and lightly browned.
- Let peppers rest in dish for 5 minutes before serving. Transfer to plates, garnish with cilantro, sour cream, salsa, and green onion as desired. Serve warm.
Notes
For best results, choose squat, round orange bell peppers with flat bottoms. Carve faces with clean cuts; start smaller than desired as holes will open slightly during baking. Filling can be made a day ahead and refrigerated. To freeze, assemble unbaked peppers, wrap tightly, and freeze up to 3 months. Bake from frozen at 375°F for 35-40 minutes covered, then 10 minutes uncovered.
Nutrition
- Serving Size: 1 stuffed pepper
- Calories: 350
- Sugar: 8
- Sodium: 550
- Fat: 13
- Saturated Fat: 6
- Carbohydrates: 40
- Fiber: 11
- Protein: 15
Keywords: stuffed peppers, black bean stuffed peppers, jack-o-lantern peppers, Halloween dinner, vegetarian stuffed peppers, easy stuffed peppers


