Love this? Save it for later!
Share the inspiration with your friends
By the third time I shaped these witch finger pretzel rods this week, my hands were moving on autopilot. The dough was sticky, the kitchen smelled like yeast and burnt sugar, and I was pretty sure I had a piece of pretzel stuck in my eyebrow. Honestly, I don’t even remember why I started making them. Maybe it was the spooky season creeping in early, or maybe I just needed something to do with my hands while watching horror movies.
I know, I know. Pretzels are usually a savory snack. But turning them into little skeletal fingers? That’s just weirdly satisfying in a way I can’t explain. The first batch came out looking more like melted candles than fingers. I laughed so hard I cried. The second batch was better, but the almond nails kept sliding off.
Now, on the third try, I finally got it right. The pretzel rods are crisp on the outside, chewy on the inside, and the almond nails look disturbingly realistic. My kids thought it was hilarious. My husband thought it was just weird. But we ate three batches in two days. There is something about the saltiness of the pretzel mixed with the sweet vanilla dough that just clicks. It’s not a fancy recipe. It’s not elegant. But it is incredibly fun to make, especially when you’re covered in flour and laughing at your own mistakes.
Why You’ll Love This Recipe
Let’s be real for a second. Most Halloween treats are just sugar bombs. You eat one cookie and you feel sick. These Crispy Spooky Witch Finger Pretzel Rods are different. They hit that sweet spot between a savory snack and a sweet dessert. It’s the kind of treat that keeps you coming back for just one more, even when you swear you’re done.
Here is why this recipe actually works:
- Quick & Easy: You don’t need to let dough rise for hours. This is a fast yeast dough that comes together in under 30 minutes. Perfect for those last-minute party plans or when the kids ask for snacks five minutes before guests arrive.
- Simple Ingredients: You likely have everything in your kitchen right now. Flour, yeast, butter, milk, and those little almonds for the nails. No trip to the specialty store needed.
- Perfect for Parties: These are finger food gold. They look spooky on a platter but taste like comfort. Great for Halloween parties, autumn gatherings, or just a Tuesday night binge-watch session.
- Crowd-Pleaser: Kids love the shape. Adults love the salt-and-sweet combo. It’s a win-win. Even the picky eaters who refuse to eat “funny shaped food” will grab one.
- Unbelievably Delicious: The texture is next-level. Crispy outside, soft inside, with a salty finish. It’s comfort food with a twist.
What makes this recipe stand out is the technique. Most people just bake pretzel bites. Here, we shape the dough into long rods and taper the ends to look like fingers. Then, we add that egg wash and coarse salt. The salt is crucial. It cuts through the sweetness and makes the pretzel taste like a real pretzel, not just a cookie. I’ve tried many versions over the years, from easy game day pretzel bites with beer cheese dip to fancy braided loaves, but this simple shape is the winner. It’s the kind of recipe that makes you close your eyes after the first bite because the flavor is just that good. It’s spooky, it’s tasty, and it’s surprisingly easy to pull off.
What Ingredients You Will Need
This recipe uses simple, wholesome ingredients to deliver bold flavor and satisfying texture without the fuss. You don’t need any weird Halloween-themed sprinkles or food coloring. The spookiness comes from the shape, not the dye.
Here is what you need to gather:
- All-Purpose Flour (3 1/2 cups / 440g): The base of the dough. I use King Arthur brand because it has a bit more protein, which gives the pretzel that chewy bite. Don’t go for whole wheat; it gets too dense.
- Warm Milk (1 cup / 240ml): Room temperature or slightly warm. Not hot! Hot milk kills the yeast. I like using whole milk for richness, but 2% works fine too.
- Active Dry Yeast (2 packets / 2 1/4 tsp): Standard packet size. Make sure it’s not expired. If it doesn’t foam up in the milk, toss it and get new yeast.
- Granulated Sugar (2 tbsp): Just a little bit to feed the yeast and add a hint of sweetness. You don’t want these to be sweet like bread rolls.
- Unsalted Butter (4 tbsp / 60g): Melted and cooled slightly. This adds flavor and helps tenderize the dough.
- Egg (1 large): Used in the dough for structure. Another egg is used for the wash.
- Salt (1 1/2 tsp): Essential for flavor. Since we are adding coarse salt later, don’t skip this.
- Baking Soda (1 tbsp): This is the secret weapon. The baking soda bath is what gives pretzels their distinctive dark brown crust and unique flavor. Do not skip this step.
- Coarse Sea Salt (for topping): Use something like Maldon salt. The big flakes look better and add a nice crunch.
- Almonds (for nails): Thin, slivered almonds work best. They look like fingernails when baked. You can use white chocolate if you want a non-nail version, but the almonds are the real deal.
- Vanilla Extract (1 tsp): Just a splash to round out the flavor.
If you are out of almonds, you can use chocolate chips, but they won’t look like fingers. For the flour, if you can’t find King Arthur, any good all-purpose flour will do. Just avoid self-rising flour unless you adjust the salt and baking powder.
Equipment Needed
You don’t need much fancy gear for this. A few basic tools will get you through.
- Large Mixing Bowl: For mixing the dough. A glass or ceramic bowl is best because it doesn’t get hot.
- Measuring Cups and Spoons: Precision matters in baking. If you eyeball the flour, the dough might be too sticky.
- Pizza Cutter or Sharp Knife: To cut the dough into strips. A pizza cutter is faster and less messy.
- Baking Sheets: Two large sheets. Line them with parchment paper for easy cleanup. Parchment is a lifesaver.
- Small Pot: For boiling the water and baking soda. You don’t need a huge pot, just one that fits a few pretzels at a time.
- Slotted Spoon: To lift the pretzels out of the boiling water. A regular spoon will let the water drip back on.
- Pastry Brush: For applying the egg wash. A silicone brush is easier to clean.
If you don’t have a pizza cutter, a sharp chef’s knife works fine. Just be careful. The baking soda pot can be tricky, so use a spoon that fits. Budget-friendly tip: parchment paper saves you from scrubbing pans. It’s worth the few extra cents.
Preparation Method
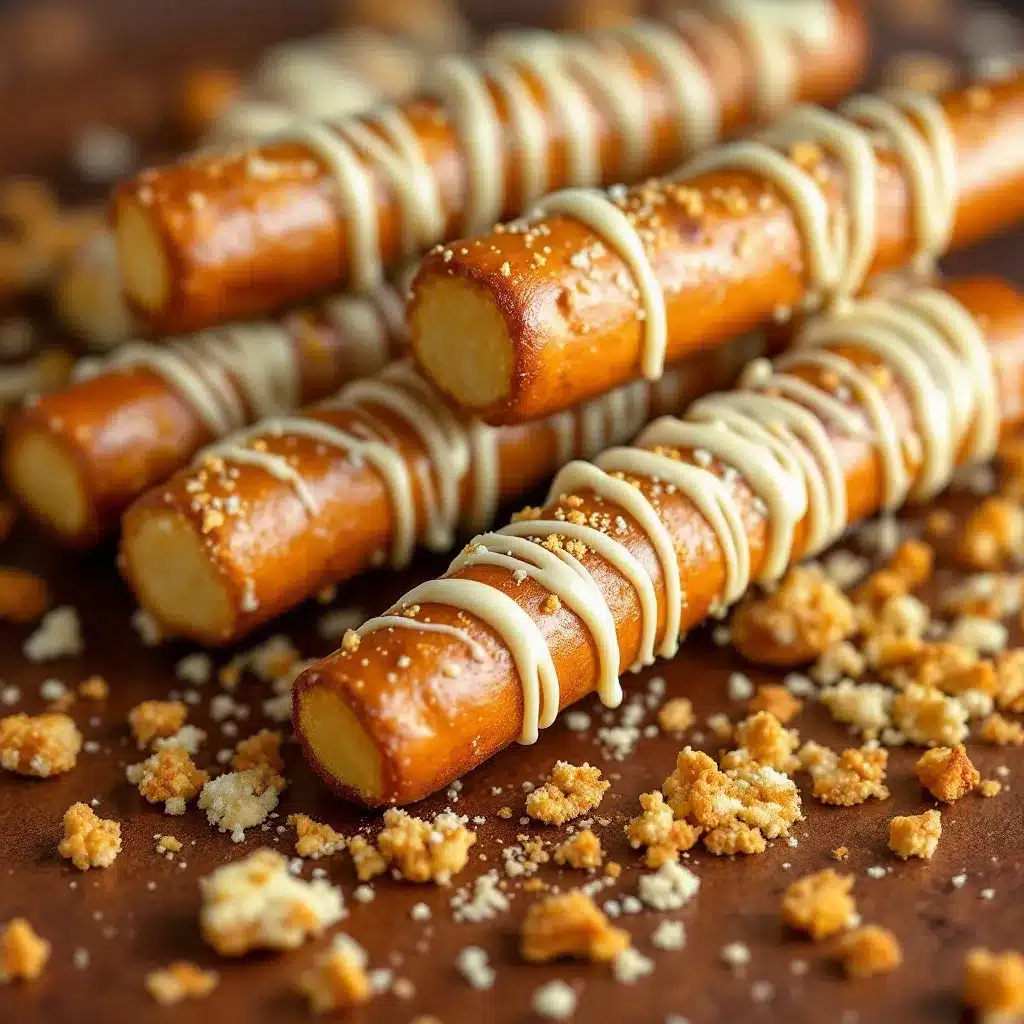
Let’s get into the nitty-gritty. This is where the magic happens. Follow these steps closely, and you’ll get perfect witch fingers every time.
- Activate the Yeast (5 minutes): In a small bowl, combine the warm milk, sugar, and yeast. Stir gently and let it sit for 5-10 minutes. It should get foamy and bubbly. If it doesn’t foam, your yeast is dead. Start over. This is the most common mistake people make.
- Mix the Dough (5 minutes): In a large bowl, combine the flour and salt. Make a well in the center. Pour in the yeast mixture, melted butter, egg, and vanilla. Mix with a wooden spoon or dough hook until it starts to come together. It will look shaggy and messy. That’s normal.
- Knead the Dough (8-10 minutes): Turn the dough onto a floured surface. Knead it by hand or with a mixer. Push the dough away with the heel of your hand, fold it back, and turn. Keep going. The dough should become smooth and elastic. If it’s too sticky, add a little more flour. If it’s too dry, add a splash of milk. It should feel like a soft earlobe.
- First Rise (1 hour): Place the dough in a greased bowl. Cover it with a damp towel or plastic wrap. Let it rise in a warm spot for about 1 hour, or until it doubles in size. Don’t rush this. If it doesn’t double, the pretzels will be dense.
- Shape the Fingers (15 minutes): Punch down the dough. Divide it into 12-15 equal pieces. Roll each piece into a long rope, about 8-10 inches long. Taper one end to look like a finger. You can even pinch the top slightly to look like a knuckle. Place them on the parchment-lined baking sheets. Leave space between them.
- Second Rise (30 minutes): Cover the shaped pretzels loosely. Let them rise again for 30 minutes. They should look puffy and airy. This step is crucial for the soft texture inside.
- Prepare the Bath (5 minutes): While the pretzels rise, bring a large pot of water to a boil. Add the baking soda. Carefully stir it in. It might foam up, so don’t fill the pot too high.
- Boil the Pretzels (1 minute per side): Gently drop 2-3 pretzels into the boiling water. Boil for 30 seconds on one side, then flip and boil for 30 seconds on the other. Remove with a slotted spoon and place back on the baking sheet. This step gives them the chewy texture and dark color.
- Add the Nails and Salt (2 minutes): While the pretzels are still wet, press a slivered almond into the tip of each “finger” to look like a nail. Sprinkle coarse sea salt over the top. The salt will stick better because the pretzels are wet.
- Bake (15-18 minutes): Preheat your oven to 425°F (220°C). Brush the pretzels with beaten egg for a shiny crust. Bake for 15-18 minutes until they are deep golden brown. They should sound hollow when tapped on the bottom.
- Cool and Serve: Let them cool on a wire rack for 10 minutes. They are best eaten warm but are good at room temperature too.
Pro Tip: If you are worried about the baking soda tasting bitter, make sure you boil them for only 30 seconds per side. Longer boiling can make them taste soapy.
Cooking Tips & Techniques
I’ve made a lot of pretzels in my time. Here are some lessons I’ve learned the hard way.
First, don’t skip the boiling step. You can bake pretzels without boiling them, but they will just look like bread rolls. The boiling sets the crust and gives that unique pretzel flavor. It’s non-negotiable if you want the real deal.
Second, watch your oven temperature. Ovens vary. If your pretzels are browning too fast, cover them loosely with foil. If they are pale, give them another 2-3 minutes. The color should be a deep, dark brown, almost mahogany. That’s where the flavor is.
Third, kneading is key. If your dough is under-kneaded, the pretzels will be tough. If it’s over-kneaded, they might be too dense. Aim for smooth and elastic. If you’re using a mixer, use the dough hook on medium-low speed.
Also, make sure your dough is puffy before baking. If you skip the second rise, the pretzels will be flat and hard. They need that airiness.
Finally, let them cool. Hot pretzels are soft and doughy. Once they cool, they crisp up on the outside and stay chewy inside. It’s the perfect texture contrast. Don’t eat them straight out of the oven if you want the best texture. Wait 10 minutes. Trust me.
Variations & Adaptations
Not a fan of almonds? No problem. Here are some ways to tweak this recipe.
- Chocolate Nail Fingers: Instead of almonds, use a white chocolate chip or a small piece of white chocolate. It melts slightly and looks like a pale fingernail. It’s sweeter and less “realistic” but still fun.
- Sweet Pretzel Rods: Add a cinnamon-sugar mix after baking. Toss the warm pretzels in cinnamon and sugar for a dessert-like treat. Great with a side of caramel dip.
- Gluten-Free Option: Use a 1:1 gluten-free flour blend. Note that GF dough is stickier and harder to shape. You might need to chill the dough before shaping to make it easier to handle.
- Vegan Version: Use plant-based milk and butter. Skip the egg wash and use a simple milk wash with a little maple syrup for browning. The almond nails are already vegan.
- Savory Twist: Skip the sugar in the dough. Add garlic powder and onion powder to the flour. Top with everything bagel seasoning instead of sea salt. These are great with cheese dip.
I tried the chocolate nail version for my kids who are allergic to nuts. They loved it. It’s less spooky but still fun. The savory version is my favorite for game day. It pairs well with cheesy spinach artichoke pretzel twists if you want a full snack board.
Serving & Storage Suggestions
Serve these warm for the best texture. They look amazing on a black platter with some fake cobwebs or plastic spiders. Add a side of caramel dip or cheese sauce for dipping. Kids love dipping their witch fingers.
For storage, keep them in an airtight container at room temperature for up to 2 days. They will stay chewy. If they get soft, pop them in the oven for 5 minutes to crisp them back up.
You can also freeze them. Bake them, let them cool completely, and store them in a freezer bag. Reheat in the oven at 350°F for 10 minutes. They taste almost as good as fresh.
Don’t store them in the fridge. The fridge makes bread stale faster than the counter. Trust me on this one.
Nutritional Information & Benefits
These pretzel rods are a moderate treat. They are higher in carbs due to the flour, but they are lower in sugar than most Halloween candies. The yeast provides some B vitamins, and the almonds add a bit of healthy fat and protein.
One pretzel finger (approx. 80g) has about 200-250 calories. It’s a decent snack if you pair it with a protein source or eat it as part of a balanced meal. They are not a health food, but they are better than a bag of chips.
If you are gluten-sensitive, use the GF flour blend. If you are vegan, use the plant-based substitutions. They are still fun and festive.
I like these because they are less processed than store-bought Halloween snacks. You control the ingredients. You know exactly what’s in them. That’s a win for me.
Conclusion
These Crispy Spooky Witch Finger Pretzel Rods are more than just a snack. They are a memory maker. I’ll probably be making them every Halloween for the rest of my life. The kids loved it. The neighbors asked for the recipe. And I finally stopped obsessing over the perfect shape.
Try this recipe. Customize it. Make it yours. Add chocolate nails. Add savory seasoning. Just make it.
Let me know how they turn out in the comments. Did you use almonds or chocolate? Did you boil them perfectly? I want to hear about your spooky baking adventures. Share your photos on social media and tag me. I love seeing your creations.
Happy Halloween, and happy baking!
FAQs
Can I use bread machine yeast?
Yes, you can. Active dry yeast and bread machine yeast are similar. Just make sure it’s active. If your yeast is old, it won’t rise the dough.
Why are my pretzels flat?
They are probably flat because they didn’t rise enough. Make sure you let them rise for the full 30 minutes after shaping. Also, check that your yeast was active in the milk.
Can I make the dough ahead of time?
Yes. You can mix the dough, let it rise, then punch it down and refrigerate it overnight. Shape them the next day. This can actually improve the flavor.
What if I don’t have baking soda?
You can’t really substitute it. Baking soda is what gives pretzels their unique taste and color. Without it, they are just bread rolls. Buy a box; it’s cheap and useful.
How do I get the almonds to stick?
Press them into the pretzel while it is still wet from the boiling water and egg wash. The moisture helps them adhere. If they fall off, they will still bake into the pretzel, but they might not look as secure.
Pin This Recipe!

Crispy Spooky Witch Finger Pretzel Rods: 5-Minute Halloween Treat

These crispy, chewy pretzel rods are shaped like spooky witch fingers with almond nails. They offer a perfect balance of savory and sweet, making them an easy and fun Halloween treat.
- Prep Time: 30 minutes
- Cook Time: 20 minutes
- Total Time: 50 minutes
- Yield: 12-15 servings 1x
- Category: Snack
- Cuisine: American
Ingredients
- 3 1/2 cups (440g) All-Purpose Flour
- 1 cup (240ml) Warm Milk
- 2 packets (2 1/4 tsp) Active Dry Yeast
- 2 tbsp Granulated Sugar
- 4 tbsp (60g) Unsalted Butter, melted and cooled
- 1 large Egg (plus 1 for wash)
- 1 1/2 tsp Salt
- 1 tbsp Baking Soda
- Coarse Sea Salt (for topping)
- Slivered Almonds (for nails)
- 1 tsp Vanilla Extract
Instructions
- Activate the yeast: In a small bowl, combine warm milk, sugar, and yeast. Let sit for 5-10 minutes until foamy.
- Mix the dough: In a large bowl, combine flour and salt. Add yeast mixture, melted butter, egg, and vanilla. Mix until shaggy.
- Knead the dough: Turn onto a floured surface and knead for 8-10 minutes until smooth and elastic.
- First rise: Place dough in a greased bowl, cover, and let rise for 1 hour until doubled.
- Shape the fingers: Punch down dough. Divide into 12-15 pieces. Roll into 8-10 inch ropes, tapering one end to look like a finger. Place on parchment-lined baking sheets.
- Second rise: Cover shaped pretzels and let rise for 30 minutes until puffy.
- Prepare the bath: Bring a large pot of water to a boil and add baking soda.
- Boil the pretzels: Drop 2-3 pretzels into boiling water. Boil for 30 seconds per side. Remove with a slotted spoon.
- Add nails and salt: While wet, press a slivered almond into the tip of each finger and sprinkle with coarse sea salt.
- Bake: Preheat oven to 425°F (220°C). Brush with beaten egg and bake for 15-18 minutes until deep golden brown.
- Cool: Let cool on a wire rack for 10 minutes before serving.
Notes
Do not skip the boiling step with baking soda, as it gives pretzels their distinctive crust and flavor. Ensure yeast is active before mixing. If dough is too sticky, add a little flour; if too dry, add a splash of milk. Almonds can be substituted with white chocolate chips for a sweeter, less realistic look.
Nutrition
- Serving Size: 1 pretzel finger (ap
- Calories: 225
- Sugar: 4
- Sodium: 450
- Fat: 5
- Saturated Fat: 2
- Carbohydrates: 40
- Fiber: 2
- Protein: 6
Keywords: Halloween, pretzels, witch fingers, spooky snacks, easy recipes, yeast dough, party food


