Love this? Save it for later!
Share the inspiration with your friends
I assumed making spider web cookies would require some kind of intricate piping bag setup and a steady hand that I simply didn’t possess. It took about ten minutes for that assumption to crumble into a pile of chocolate shards and frustration. I was staring at my oven mitts, wondering if I had accidentally started a small fire in my kitchen instead of baking a simple treat. The internet promised these would be “easy” and “scary-fun,” but my first attempt looked more like a spilled bowl of gum than a delicate arachnid design.
Honestly, I nearly threw the whole tray in the trash. The chocolate was too thick, the drizzle was a mess, and the cookies themselves were a bit too cakey for the crisp texture I was hoping for. But then I remembered that time I made spooky witch finger cookies for the neighborhood kids. That project was a disaster too, but we laughed until our sides hurt while picking icing out of the dog’s fur. That’s when I realized I was overthinking the whole process.
The secret isn’t in the technique; it’s in the patience. You have to let the base cookie cool completely, which is the hardest part for any baker, especially when you’re hungry. Once I stopped rushing and just let the chocolate do its thing, the webs started to form. They weren’t perfect, but they were delicious. There’s something oddly satisfying about breaking a crisp cookie and seeing that jagged, dark pattern against the white chocolate.
It wasn’t about impressing anyone. It was about making something fun that didn’t require a degree in pastry arts. These cookies are messy to make, but they are incredibly rewarding to eat. You know how it goes—the messier the process, the better the memory. And let’s face it, Halloween is the one time of year where slightly lopsided cookies are actually a feature, not a bug. I kept coming back to the oven because they tasted better than anything I could buy at the store.
Why You’ll Love This Recipe
Let’s be real for a second. Most Halloween cookies are just sugar cookies with green frosting and a plastic spider on top. They’re fine, but they lack soul. These crispy spider web chocolate cookies are different because they actually taste like something you’d want to eat after the party is over. I’ve tested this recipe at least five times, and every time, the result is a crisp, shatteringly thin cookie that holds its shape but melts in your mouth.
Here is why this recipe stands out from the crowd:
* **Quick & Easy**: You don’t need to bake a full batch of cookies from scratch. We use a clever hack with store-bought sugar cookie dough to save time, making this perfect for last-minute Halloween parties or quick weeknight treats.
* **Simple Ingredients**: You likely already have chocolate chips, white chocolate, and cookie dough in your pantry. No fancy grocery trips needed. It’s that simple.
* **Perfect for Halloween**: These are visually striking. The black and white contrast is classic, spooky, and instantly recognizable as a Halloween treat.
* **Crowd-Pleaser**: Kids love the “spider” look, and adults love the crisp texture. It’s a rare win-win where everyone at the table is happy.
* **Unbelievably Delicious**: The contrast between the buttery sugar cookie base and the crisp, thin chocolate web is next-level comfort food. It’s not just good—it’s the kind of cookie that makes you close your eyes after the first bite.
What makes this recipe truly special is the texture. Unlike soft chocolate chip cookies, these are designed to be crisp. The chocolate web hardens into a delicate shell that snaps when you bite it. It’s a sensory experience. I remember making a batch for a friend’s Halloween gathering, and they asked if I had bought them from a fancy bakery. I just smiled and said it was a “secret family recipe.” It’s that kind of comfort food reimagined—simpler, faster, but with the same soul-soothing satisfaction. Plus, it’s perfect for impressing guests without spending hours in the kitchen.
What Ingredients You Will Need
This recipe relies on a few key components to achieve that signature spider web look and crisp texture. The beauty here is that you don’t need exotic ingredients. It’s about how you combine simple pantry staples. The base cookie provides the structure, while the chocolates provide the visual drama.
Here is what you need to gather:
* **Sugar Cookie Dough**: You can make your own, but for speed and consistency, I recommend using a high-quality refrigerated tube of sugar cookie dough. Brands like Pillsbury or homemade versions work well. Look for dough that is firm, not too soft, to ensure the cookies hold their shape.
* **Dark Chocolate Chips**: You’ll need about one cup of semi-sweet or dark chocolate chips. I prefer dark chocolate because it has a higher cocoa butter content, which helps it melt smoothly and set with a nice shine. Brands like Ghirardelli or Lindt are reliable choices for baking.
* **White Chocolate Chips**: Half a cup of white chocolate chips is essential for the “web” effect. Make sure you use real white chocolate chips, not almond bark, for the best flavor and texture.
* **Vegetable Oil**: A small amount of vegetable oil or coconut oil is needed to thin the melted chocolate. This is crucial for the drizzling technique. If the chocolate is too thick, it won’t drizzle properly and the web won’t form.
* **Optional: Black Food Coloring Gel**: For an extra spooky touch, you can add a drop of black gel food coloring to the dark chocolate. Gel coloring is better than liquid because it doesn’t affect the consistency of the chocolate.
* **Optional: Edible Spider Decorations**: Tiny plastic spiders or fondant spiders can be added for decoration, but they are entirely optional. The chocolate web is usually enough to sell the look.
Substitution tips: If you need a gluten-free option, you can use gluten-free sugar cookie dough. For a dairy-free version, use dairy-free chocolate chips and dairy-free cookie dough. The technique remains the same. In summer, the chocolate might set slower, so you may need to refrigerate the cookies longer to ensure the web hardens completely.
Equipment Needed
You don’t need a lot of fancy tools to make these cookies. In fact, keeping it simple is part of the charm. Here is what you’ll need:
* **Baking Sheets**: Two standard baking sheets are sufficient. Line them with parchment paper or silicone baking mats. Parchment paper is my go-to because it prevents sticking and makes cleanup a breeze. Silicone mats are reusable and eco-friendly, which I appreciate.
* **Microwave-Safe Bowls**: You’ll need two small microwave-safe bowls for melting the chocolate. Glass or ceramic bowls work best. Avoid metal bowls in the microwave as they can get too hot too quickly.
* **Spatula**: A heat-resistant silicone spatula is essential for stirring the melting chocolate. It helps ensure even melting and prevents scorching.
* **Ziploc Bags**: You’ll need two small resealable bags for the “piping” part of the web design. Cut a tiny corner off the bag to create a makeshift piping tip. This is a cheap and effective alternative to buying a piping bag.
* **Toothpicks or Forks**: You’ll use these to drag through the drizzled chocolate to create the web pattern. A toothpick gives you more precision, while a fork creates a wider, more rustic pattern. I usually keep a few toothpicks handy because they are easier to maneuver.
* **Cooling Rack**: While not strictly necessary, a cooling rack helps the cookies cool evenly and prevents the bottoms from getting soggy.
Budget-friendly note: If you don’t have silicone mats, regular parchment paper is perfectly fine. And if you don’t have Ziploc bags, you can use a spoon to drizzle the chocolate, though it’s a bit messier. The key is to have your chocolate ready to go before you start the design process.
Preparation Method
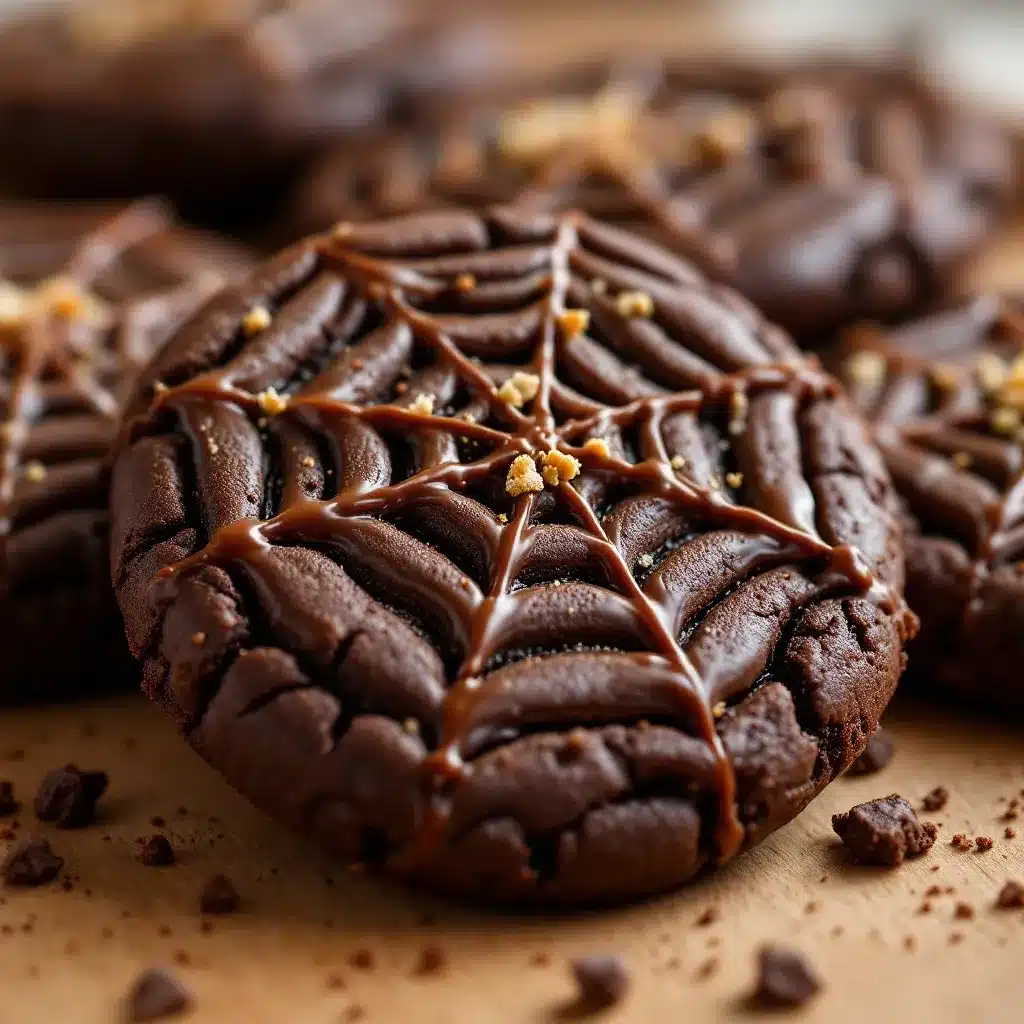
Making these cookies is straightforward, but timing is everything. Here is how to get it right:
1. **Preheat and Prep**: Preheat your oven to 350°F (175°C). Line your baking sheets with parchment paper. This step is crucial to prevent sticking.
2. **Form the Cookies**: Take your sugar cookie dough and roll it into small balls, about 1 inch in diameter. Place them on the baking sheets, spacing them about 2 inches apart. They will spread slightly, so don’t overcrowd the pan. Flatten them gently with your palm or the bottom of a glass. You want them to be slightly thinner than usual to ensure they bake up crisp.
3. **Bake the Bases**: Bake the cookies for 8-10 minutes, or until the edges are just starting to turn golden. They should still look slightly soft in the center. Do not overbake them, as they will crisp up as they cool.
4. **Cool Completely**: Remove the cookies from the oven and let them cool on the baking sheet for 5 minutes. Then, transfer them to a wire rack to cool completely. This step is non-negotiable. If the cookies are even slightly warm, the chocolate will melt and smear instead of setting into a web.
5. **Melt the Chocolate**: While the cookies cool, melt the dark chocolate and white chocolate chips separately in microwave-safe bowls. Heat in 30-second intervals, stirring between each interval, until smooth. Stir in 1/2 teaspoon of vegetable oil into each bowl. This thins the chocolate for easier drizzling.
6. **Drizzle the Web**: Place a cooled cookie on a piece of parchment paper. Using a spoon or a Ziploc bag with the corner cut off, drizzle the dark chocolate in a random, circular pattern over the cookie. Don’t worry about being neat; random is better.
7. **Create the Pattern**: Immediately, while the chocolate is still wet, use a toothpick to drag lines from the center of the cookie outward to the edges. Then, drag lines in the opposite direction to create a web-like pattern. You can also use a fork for a different texture. Work quickly before the chocolate sets.
8. **Set the Chocolate**: Let the cookies sit at room temperature for 15-20 minutes to allow the chocolate to harden. For faster setting, you can place them in the refrigerator for 5-10 minutes.
9. **Repeat**: Continue with the white chocolate for the remaining cookies, or mix colors for a multi-colored web effect.
10. **Store**: Once set, store the cookies in an airtight container at room temperature for up to one week.
Cooking Tips & Techniques
The biggest mistake people make is rushing the cooling process. I’ve learned this the hard way. If you try to put chocolate on a warm cookie, it’s a disaster. The chocolate melts into the cookie instead of sitting on top. So, patience is key. Let those cookies cool completely.
Another tip is to keep your chocolate thin. If it’s too thick, it will clump and not drizzle well. Adding that little bit of oil makes a huge difference. It helps the chocolate flow smoothly and creates a thinner, more delicate web. If you find the chocolate is getting too thick as you work, you can add a tiny bit more oil.
When dragging the toothpick through the chocolate, don’t press too hard. You just want to pull the chocolate around, not scrape it off. A light touch creates the best web pattern. If you make a mistake, you can use another toothpick to smooth it out, or just start over. These cookies are forgiving.
Also, work in small batches. Melt a little chocolate at a time so it doesn’t harden in the bowl. If you’re making a large batch, keep the unused chocolate covered with plastic wrap to prevent a skin from forming on top.
Variations & Adaptations
While the classic black and white web is iconic, you can get creative with this recipe. Here are a few variations I’ve tried:
* **Colorful Webs**: Use red and green chocolate chips for a Halloween vibe, or purple and orange for a more traditional color scheme. The technique remains the same.
* **Pumpkin Spice Twist**: Add a pinch of pumpkin pie spice to the sugar cookie dough for a fall flavor profile. This pairs well with the small batch pumpkin chocolate chip cookies vibe.
* **Gluten-Free Option**: Use gluten-free sugar cookie dough and ensure your chocolate chips are certified gluten-free. The result is just as crisp and delicious.
* **Dairy-Free**: Swap out the chocolate chips for dairy-free versions and use a dairy-free cookie dough. The oil and technique are already dairy-free, so this is an easy swap.
* **Mini Cookies**: Roll the dough into smaller balls for bite-sized treats. These are perfect for party platters and kids’ parties. They bake in 6-7 minutes.
I once tried adding crushed peppermint candies to the dark chocolate for a mint-chocolate web. It was a bit weird, but surprisingly tasty. Don’t be afraid to experiment. The base recipe is very flexible.
Serving & Storage Suggestions
These cookies are best served at room temperature. The crisp texture is at its peak when the chocolate is fully set. If you refrigerate them, let them come to room temperature before serving to avoid condensation.
They are perfect for Halloween parties, trick-or-treating baskets, or as a dessert after a spooky movie night. Pair them with a glass of cold milk or a cup of hot cocoa. The contrast between the crisp cookie and the warm drink is lovely.
For storage, keep the cookies in an airtight container at room temperature for up to one week. If you live in a humid climate, you might want to add a paper towel to the container to absorb moisture. They can also be frozen for up to three months. Just thaw them at room temperature before serving. The chocolate web might lose some of its shine after freezing, but the taste will remain excellent.
Nutritional Information & Benefits
These cookies are a treat, so enjoy them in moderation. Each cookie contains approximately 150-200 calories, depending on the size and specific chocolate used. They are primarily made of sugar and fat, so they are not a health food. However, they do provide a quick energy boost, which is nice for a busy day.
The dark chocolate contains antioxidants, which is a small plus. If you use dark chocolate with higher cocoa content, you get more of these benefits. For those with dietary restrictions, remember to check the labels of your cookie dough and chocolate chips for allergens like nuts, dairy, or gluten.
Personally, I see these as a special occasion treat. They’re fun to make and fun to eat, which adds a psychological benefit that’s worth something. They bring joy, and that’s a healthy thing in itself.
Conclusion
These crispy spider web chocolate cookies are a Halloween staple for a reason. They are easy to make, visually stunning, and absolutely delicious. I hope you try this recipe and have fun with it. Don’t worry about perfection; the charm is in the imperfections.
I love these cookies because they bring back memories of making messy treats with my family. There’s something special about baking together and laughing at the results. I encourage you to customize them with your own colors and flavors. Share your creations on social media and tag me. I’d love to see what you make.
Happy Halloween, and happy baking!
Frequently Asked Questions
Can I use homemade sugar cookie dough?
Yes, you can use homemade sugar cookie dough. Just ensure it is firm enough to hold its shape when baked. You may need to chill the dough balls for 15 minutes before baking if the dough is very soft.
Why is my chocolate web not setting?
The chocolate might be too thick or not melted properly. Ensure you add a small amount of oil to thin it. Also, make sure the cookies are completely cool before applying the chocolate. Warm cookies will melt the chocolate.
Can I make these cookies ahead of time?
Yes, you can make the cookies and the chocolate web up to a week in advance. Store them in an airtight container at room temperature. They will stay crisp and fresh.
What if I don’t have white chocolate?
You can use any color of chocolate chips you have. The web effect will still work with any color. You can also mix two colors for a multi-colored web.
Can I freeze these cookies?
Yes, you can freeze them. Place them in a single layer in an airtight container with parchment paper between layers. They will keep for up to three months. Thaw at room temperature before serving.
Pin This Recipe!
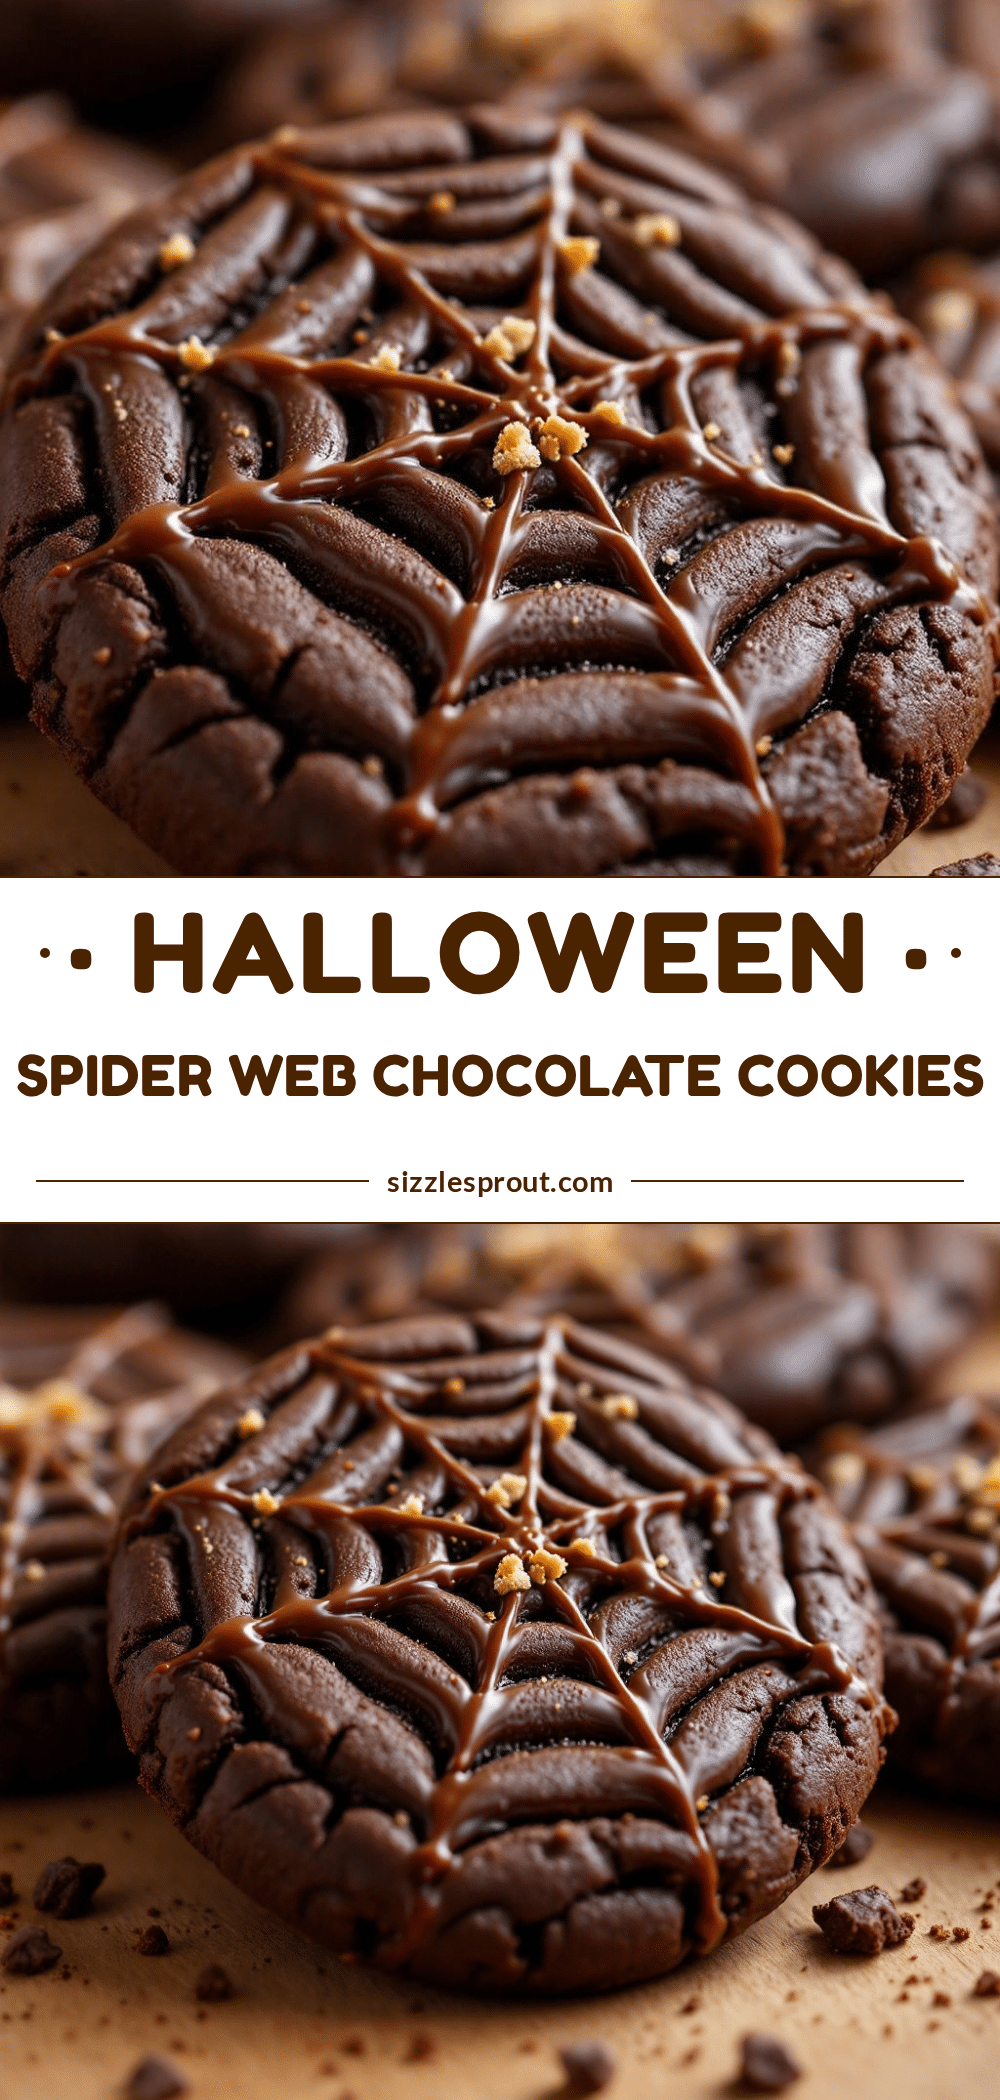
Crispy Spider Web Chocolate Cookies

These crispy spider web chocolate cookies are a fun and easy Halloween treat made with store-bought sugar cookie dough and a delicate dark and white chocolate web design.
- Prep Time: 15 minutes
- Cook Time: 10 minutes
- Total Time: 25 minutes
- Yield: 24 cookies 1x
- Category: Dessert
- Cuisine: American
Ingredients
- 1 tube (approx. 1 lb) refrigerated sugar cookie dough
- 1 cup semi-sweet or dark chocolate chips
- 1/2 cup white chocolate chips
- 1 teaspoon vegetable oil or coconut oil (divided)
- Black gel food coloring (optional)
- Edible spider decorations (optional)
Instructions
- Preheat oven to 350°F (175°C) and line two baking sheets with parchment paper.
- Roll the sugar cookie dough into 1-inch balls and place them on the baking sheets, spacing them 2 inches apart.
- Gently flatten the dough balls with your palm or the bottom of a glass to ensure they bake up crisp.
- Bake for 8-10 minutes until edges are just starting to turn golden but centers are still soft.
- Let cookies cool on the baking sheet for 5 minutes, then transfer to a wire rack to cool completely.
- While cookies cool, melt dark chocolate chips in a microwave-safe bowl in 30-second intervals, stirring until smooth. Stir in 1/2 teaspoon of oil.
- Repeat the melting process with white chocolate chips and the remaining 1/2 teaspoon of oil.
- Place a cooled cookie on parchment paper. Drizzle dark chocolate in a random circular pattern over the cookie.
- Immediately drag a toothpick from the center outward to the edges, then in the opposite direction to create a web pattern.
- Let cookies sit at room temperature for 15-20 minutes to harden, or refrigerate for 5-10 minutes.
- Repeat with white chocolate for remaining cookies.
- Store in an airtight container at room temperature for up to one week.
Notes
Patience is key; cookies must be completely cool before adding chocolate to prevent melting. If chocolate is too thick, add a tiny bit more oil. Work in small batches to keep chocolate from hardening in the bowl.
Nutrition
- Serving Size: 1 cookie
- Calories: 175
- Sugar: 14
- Sodium: 95
- Fat: 9
- Saturated Fat: 5
- Carbohydrates: 22
- Fiber: 1
- Protein: 2
Keywords: Halloween cookies, spider web cookies, chocolate cookies, easy Halloween treats, sugar cookie hacks, crispy cookies


