Love this? Save it for later!
Share the inspiration with your friends
Third time in a week, and the oven light still flickered like a haunted bulb every time I opened the door. I was staring at the cooling rack, waiting for that specific, sharp *crack* that signals a meringue has finally dried out enough to hold its shape without collapsing into a sad, wet puddle. Honestly, I should have stopped after the second batch. The first one was too glossy, like a plastic toy, and the second one… well, let’s just say the mini chocolate chips sank to the bottom like anchors in quicksand. But here I was, whisking egg whites again, fueled by caffeine and a stubborn refusal to accept defeat.
It wasn’t about the recipe anymore. It was about the physics of air trapped in sugar. I kept adjusting the cream of tartar, watching the foam transform from watery to stiff peaks, then to that glossy, marshmallow-like stage that feels almost too good to pipe. The obsession wasn’t with the taste, though the ghostly white contrast against the dark chocolate chips is pretty striking. It was about the texture. You know that sound? That crisp snap when you bite into something that’s supposed to be airy but actually has substance? That’s what I was chasing.
By the third time, I added a pinch of salt to cut the sweetness, and I chilled the piping bags for ten minutes before filling them. The result wasn’t just a cookie; it was a little edible sculpture. I left them on the counter while I made spooky witch finger cookies for the neighbor’s kids, and these ghosts sat there, looking innocent and pure amidst all the orange and brown. They don’t have the heavy, dense comfort of my usual chewy brown butter chocolate chip cookies. They’re light, almost weightless. But that snap? That was the click. The moment the obsession paid off.
I didn’t post them on Instagram right away. I just ate one while watching the sunset, listening to the crust shatter in my hands. It felt less like baking and more like magic trickery. And that’s when I knew these crispy ghost meringue cookies with mini chocolate chips were worth sharing, even if I had to make them three times to get it right.
Why You’ll Love This Recipe
Let’s be real for a second. Most meringue recipes feel like they require a degree in chemistry and a steady hand that doesn’t shake. I’ve tried them. I’ve watched the egg whites weep and turn into soup. But this version? It’s forgiving. It’s designed for the home baker who wants a spooky aesthetic without the stress of tempering chocolate or rolling out fondant. It’s the kind of recipe that makes you look like a pro, even if you’re wearing pajamas and eating the mistakes off the spatula.
- Quick & Easy Prep: The actual mixing and piping takes about 15 minutes. The rest is just waiting for the oven to do its work. It’s perfect for last-minute Halloween parties or when you need a dessert that looks impressive but doesn’t demand your full attention.
- Simple Ingredients: You don’t need a pantry full of exotic flours or rare extracts. Just egg whites, sugar, cream of tartar, and vanilla. If you can buy these, you can make this. No fancy grocery trips needed.
- Perfect for Halloween: They are naturally white, which makes them the perfect canvas for spooky shapes. Whether you’re making ghosts, pumpkins, or just little white clouds, they fit the seasonal vibe perfectly.
- Crowd-Pleaser: Kids love them because they’re sweet and crunchy. Adults love them because they aren’t cloyingly heavy like a dense cake. They melt in your mouth in the best way possible.
- Unbelievably Delicious: The texture is the star here. Crisp on the outside, slightly chewy on the inside, with bursts of chocolate flavor. It’s next-level comfort food that feels refined but tastes like a childhood treat.
What makes this recipe different is the inclusion of mini chocolate chips directly in the meringue. Usually, people pipe plain ghosts and dip them later, but that’s a mess. By folding the chips in gently, you get chocolate in every bite without the risk of them sinking. It’s a small tweak that changes everything. This isn’t just another meringue recipe; it’s the one that finally made me stop buying store-bought marshmallows.
What Ingredients You Will Need
This recipe relies on the simplicity of egg whites to create structure, but the quality of your ingredients matters more than you might think. Since there are only four main components, each one plays a huge role in the final texture. You want clean flavors and reliable reactions. I’ve tested dozens of brands, and some egg whites just don’t whip up as consistently as others, so picking the right stuff is half the battle.
- Egg Whites: You need large egg whites, room temperature. Room temperature whites whip up faster and reach a higher volume, which is crucial for that stiff peak stage. I recommend using fresh eggs from a local farm if you can find them, but standard grocery store eggs work fine. Make sure there is absolutely no yolk in the whites, or they won’t whip.
- Granulated Sugar: Standard white granulated sugar is best here. Brown sugar will make them chewy and dense, which defeats the purpose of a crispy cookie. I prefer organic cane sugar for its clean flavor, but any standard white sugar will do. The size of the crystals helps determine how smooth your meringue is.
- Cream of Tartar: This is the secret weapon. It stabilizes the egg whites and prevents them from collapsing. Without it, your ghosts might deflate in the oven. It’s cheap and lasts forever in your pantry, so keep a box on hand. It adds a tiny bit of tang that balances the sweetness.
- Vanilla Extract: Pure vanilla extract is a must. Artificial vanilla can taste chemical and harsh when mixed with plain egg whites. A good quality pure vanilla adds warmth and depth, making the ghost taste like a dessert rather than just sweet air.
- Mini Chocolate Chips: These are non-negotiable. Regular chips are too big and will weigh down the delicate meringue structure. Mini chips distribute evenly and create little pockets of chocolate in every bite. Look for high-cocoa-content chips if you want a richer flavor, but standard semi-sweet works perfectly.
- Salt: A pinch of fine sea salt. It might seem odd in a sweet cookie, but it highlights the vanilla and cuts the cloying sweetness of the sugar. It’s a professional trick that makes the flavor pop.
If you need a dairy-free option, ensure your chocolate chips are labeled dairy-free, as some standard chips contain milk solids. Also, if you don’t have cream of tartar, you can use a tiny bit of lemon juice, but the texture might be slightly less stable. Stick to the script for the best results.
Equipment Needed
You don’t need a fancy stand mixer for this, but having the right tools makes the process much smoother. A hand mixer is totally fine if you don’t own a KitchenAid, though it will take a bit more elbow grease.
- Mixing Bowl: A large glass or metal bowl is best. Plastic bowls can retain traces of oil, which kills meringue. If you’re using plastic, wash it with vinegar first to be safe.
- Electric Mixer: A hand mixer or stand mixer with a whisk attachment. You need this to incorporate air into the egg whites quickly.
- Piping Bag: A disposable or reusable piping bag. Disposable is easier for cleanup. If you don’t have one, you can use a ziplock bag with the corner snipped off, but a bag gives you more control over the shape.
- Piping Tip: A large round tip (like a Wilton 1M or similar) works well for creating the ghost shape. It creates the little “tails” at the bottom that look like flowing sheets.
- Baking Sheet: Standard half-sheet pans. Line them with parchment paper or silicone mats. Silicone mats are great because they distribute heat evenly, preventing the bottoms from burning.
- Spatula: A rubber spatula for folding in the chocolate chips. You need to be gentle here to keep the air in the meringue.
If you’re on a budget, skip the expensive silicone mats and just use parchment paper. It works just as well. And don’t worry if you don’t have a fancy piping tip; you can pipe them as simple dollops, though they won’t look quite as spooky.
Preparation Method
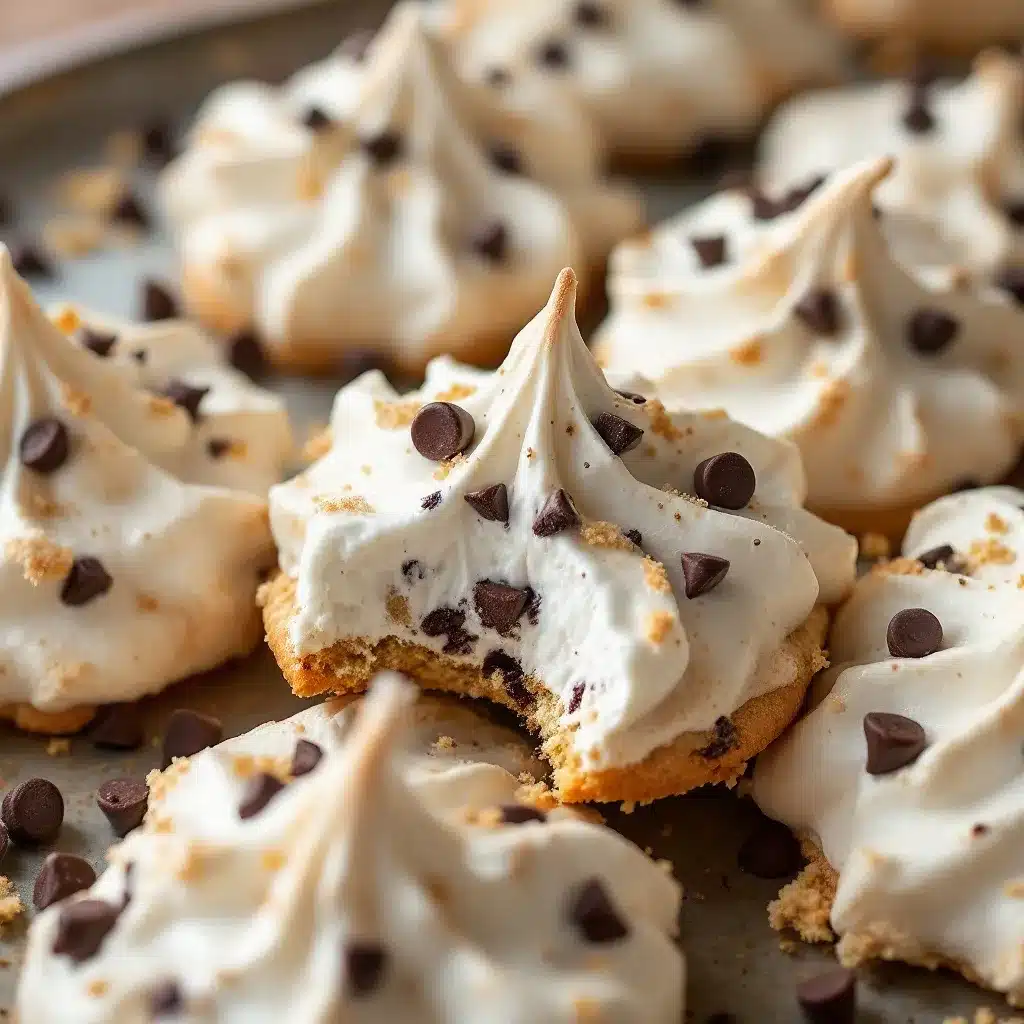
- Prep the Oven and Pans (5 minutes): Preheat your oven to 200°F (95°C). This low temperature is key. It dries out the meringues slowly without browning them. Line two baking sheets with parchment paper. Make sure the paper is flat and smooth to prevent sticking.
- Whisk the Egg Whites (3 minutes): In your clean, dry mixing bowl, beat the room temperature egg whites on medium speed until they become foamy and opaque. This should happen pretty quickly. You’re looking for a texture like wet soap suds.
- Add Cream of Tartar (1 minute): Sprinkle the cream of tartar over the foamy egg whites. Increase the mixer speed to medium-high. Continue beating until soft peaks form. This means when you lift the beater, the peaks droop over slightly. Don’t skip this step; it builds the structure.
- Incorporate the Sugar (5-7 minutes): This is the most important part. Slowly pour in the granulated sugar, one tablespoon at a time, while the mixer is running. If you dump it all in at once, you’ll deflate the eggs. Pour it down the side of the bowl, not directly onto the whisk. Keep beating on high speed. The meringue should become glossy, thick, and hold stiff peaks. When you lift the beater, the peak should stand straight up like a bird’s beak. This usually takes about 5 minutes of continuous beating.
- Add Vanilla and Salt (1 minute): Turn off the mixer. Add the vanilla extract and the pinch of salt. Fold them in gently with a rubber spatula. Use a folding motion, cutting down through the center and sweeping up the side. Do not stir in circles, or you’ll lose the air you just worked so hard to create.
- Fold in Chocolate Chips (2 minutes): Add the mini chocolate chips. Fold them in gently, just until they are distributed. You don’t need to be perfect here; a few chips left on the spatula is fine. Be careful not to overmix.
- Pipe the Ghosts (5 minutes): Transfer the meringue to a piping bag fitted with a large round tip. Pipe the ghosts onto the prepared baking sheets. Start at the top, pipe a round ball, then pipe a long tail down to the bottom. Squeeze the bag and pull up quickly to create a little point at the top, and drag the tip at the bottom to create a tail. Space them about 2 inches apart, as they won’t spread much.
- Bake (1.5 – 2 hours): Place the pans in the oven. Bake for 1.5 to 2 hours. The meringues are done when they are dry to the touch and release easily from the parchment paper. They should still be white, not tan. If your oven runs hot, check them at 1.5 hours. The door should remain closed during baking to prevent cracks.
- Cool Completely (30 minutes): Turn off the oven and crack the door open slightly. Let the meringues cool inside the oven for 30 minutes. This gradual cooling helps prevent cracking. Once they are completely cool, they will snap when you break them. Store them in an airtight container immediately.
Cooking Tips & Techniques
There are a few tricks I’ve learned the hard way to ensure your ghosts stay white and crisp. First, humidity is the enemy. If it’s a rainy day or you live in a coastal area, meringues can be tricky. They might take longer to dry or stay slightly chewy. If that happens, leave them in the turned-off oven with the door cracked for a few more hours.
Second, never rush the sugar addition. I used to dump it in fast to save time, and the result was a grainy, unstable mess. Pouring it slowly ensures it dissolves completely, giving you that smooth, glossy finish. If you rub a little meringue between your fingers and feel grit, you need to beat it longer.
Third, keep your equipment spotless. Even a tiny drop of egg yolk or grease in the bowl will stop the whites from whipping. Wipe your bowl with a little lemon juice or vinegar before you start. It sounds old-school, but it works.
Also, be gentle when folding. The goal is to keep the air bubbles intact. Overmixing at this stage deflates the meringue, leading to flat, dense cookies. You want to see streaks of white and chocolate before you stop, then give it one or two more gentle folds.
Finally, don’t open the oven door too early. The sudden drop in temperature can cause the meringues to collapse or crack. Trust the process. The low heat does all the work. If you need to check them, do it quickly and close the door right away.
Variations & Adaptations
While the classic ghost is my favorite, these meringues are a blank canvas. You can tweak them to fit different tastes or themes. Here are a few ideas:
- Spooky Eyes: After baking and cooling, use a toothpick to dot on two small chocolate chips or black icing for eyes. You can even add a little red icing for a vampire ghost. It’s a cute touch for Halloween parties.
- Matcha Ghosts: Replace the vanilla with a teaspoon of matcha powder. It gives the ghosts a subtle green tint and a lovely earthy flavor that pairs well with the chocolate. It’s less traditional but surprisingly delicious.
- Coconut Crunch: Fold in some toasted coconut flakes along with the chocolate chips. The coconut adds a nice chewiness and a tropical twist that contrasts with the crisp meringue.
- Gluten-Free: This recipe is naturally gluten-free, so no changes needed there. Just ensure your chocolate chips are certified gluten-free if you have celiac disease.
- Vegan Option: You can use aquafaba (the liquid from a can of chickpeas) instead of egg whites. Whip it up exactly the same way, but you might need a bit more cream of tartar for stability. The texture will be slightly different but still tasty.
I once tried adding food coloring to the meringue to make pink ghosts for a baby shower, but it turned out looking a bit like raw meat, so I stuck to white. Stick to the classic look for the best visual impact.
Serving & Storage Suggestions
These cookies are best served at room temperature. They don’t need to be warmed up, and refrigeration will make them sticky and soft. Display them on a tiered stand for a spooky but elegant dessert table. They pair well with a hot cup of coffee or tea, as the crisp texture soaks up the liquid nicely without getting soggy too fast.
For storage, keep them in an airtight container at room temperature. They will stay crisp for up to two weeks. If you live in a humid climate, add a silica gel packet to the container to absorb moisture. Do not refrigerate them, as the condensation will ruin the texture.
If you want to make them ahead, you can pipe them and let them dry in the oven (turned off) for several hours or even overnight. This makes them super easy to bake in batches. Just be sure to store the unbaked piped meringues in a dry place, covered with a towel, to prevent them from drying out too much before baking.
The flavors don’t change much over time, but the texture might soften slightly if exposed to air. That’s why the airtight container is crucial. If they do get soft, you can refresh them in a 200°F oven for 10 minutes to crisp them back up.
Nutritional Information & Benefits
These crispy ghost meringue cookies with mini chocolate chips are relatively low in calories compared to traditional cookies, mainly because they are mostly air and sugar. A single ghost cookie contains about 40-50 calories, depending on the size. They are naturally gluten-free, making them a safe treat for those with gluten sensitivities.
The egg whites provide a good source of protein, while the sugar offers a quick energy boost. The mini chocolate chips add a small amount of antioxidants from the cocoa. However, they are still high in sugar, so enjoy them in moderation. They are a great way to satisfy a sweet tooth without the heaviness of a dense cake or brownie.
From a wellness perspective, I love that this recipe uses simple, whole-food ingredients. There are no artificial colors or preservatives. It’s a clean treat that feels indulgent but isn’t loaded with junk. I often enjoy one or two with my morning coffee as a small, mindful treat.
Conclusion
Making crispy ghost meringue cookies with mini chocolate chips is a fun, low-stress way to get into the Halloween spirit. It’s a recipe that rewards patience with a beautiful, crunchy result that tastes as good as it looks. Whether you’re baking for a party or just want a sweet treat for yourself, these ghosts are a win.
I encourage you to try them and see how they turn out. Feel free to experiment with the shapes or add a few sprinkles if you want a different vibe. And don’t forget to share your creations! I’d love to see your spooky designs in the comments below. Tag me on social media if you post them, because I’m always looking for inspiration for my next baking obsession.
Happy baking, and may your ghosts be crisp and your chocolate chips evenly distributed!
Frequently Asked Questions
Why did my meringues crack?
Cracking usually happens if the oven temperature is too high or if you open the door too early. Make sure you bake at a low temperature (200°F) and let them cool slowly in the turned-off oven with the door cracked.
Can I use egg whites from a carton?
Yes, you can use liquid egg whites from a carton, but they may not whip up as stiffly as fresh egg whites. You might need to beat them longer. Fresh egg whites are preferred for the best structure.
How do I store leftover meringues?
Store them in an airtight container at room temperature for up to two weeks. Keep them away from humidity to maintain their crisp texture. Do not refrigerate.
Can I make these gluten-free?
Yes, this recipe is naturally gluten-free. Just ensure that your chocolate chips and vanilla extract are certified gluten-free if you have celiac disease or a severe sensitivity.
What if I don’t have a piping bag?
You can use a ziplock bag with the corner snipped off to pipe the meringues. It’s not as precise as a piping bag, but it works in a pinch. You can also use two spoons to drop small dollops onto the baking sheet.
Pin This Recipe!
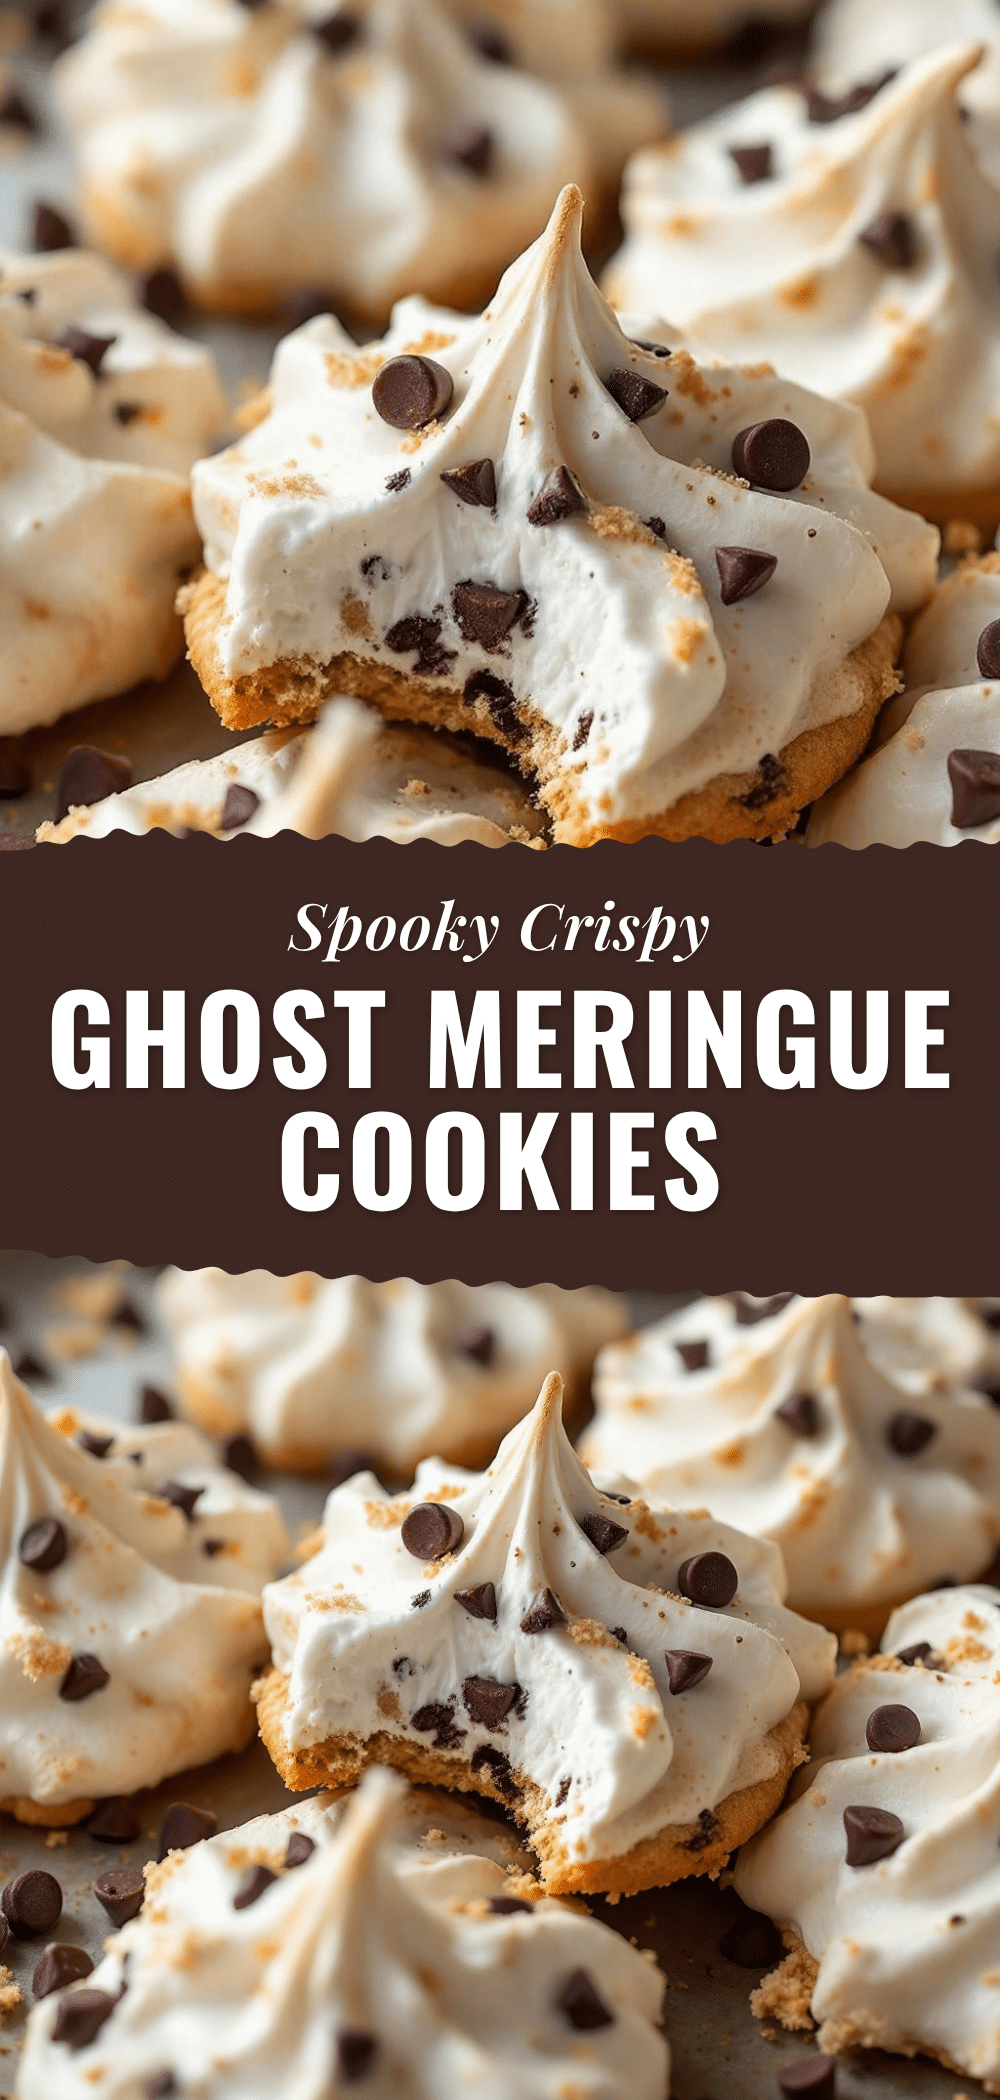
Crispy Ghost Meringue Cookies with Mini Chocolate Chips
These spooky, crisp meringue cookies are infused with mini chocolate chips for a sweet, airy Halloween treat that is easy to make and naturally gluten-free.
- Prep Time: 15 minutes
- Cook Time: 1.5 - 2 hours
- Total Time: 2 hours 15 minutes
- Yield: Approximately 20-24 cookies
- Category: Dessert
- Cuisine: American
Ingredients
- Large egg whites, room temperature
- Granulated sugar
- Cream of tartar
- Pure vanilla extract
- Mini chocolate chips
- Fine sea salt
Instructions
- Preheat oven to 200°F (95°C). Line two baking sheets with parchment paper.
- In a clean, dry mixing bowl, beat room temperature egg whites on medium speed until foamy and opaque.
- Sprinkle cream of tartar over the foamy egg whites. Increase speed to medium-high and beat until soft peaks form.
- Slowly pour in granulated sugar, one tablespoon at a time, while mixing on high speed. Continue beating until the meringue is glossy, thick, and holds stiff peaks.
- Turn off mixer. Gently fold in vanilla extract and a pinch of salt using a rubber spatula.
- Gently fold in mini chocolate chips until just distributed.
- Transfer meringue to a piping bag fitted with a large round tip. Pipe ghost shapes onto prepared baking sheets, spacing them 2 inches apart.
- Bake for 1.5 to 2 hours until dry to the touch and still white.
- Turn off oven and crack the door open slightly. Let meringues cool inside the oven for 30 minutes.
- Remove from oven and store in an airtight container at room temperature.
Notes
Ensure all equipment is completely clean and free of grease or egg yolk for the whites to whip properly. Humidity can affect crispness; if it’s humid, leave cookies in the turned-off oven longer. Do not refrigerate as condensation will make them sticky.
Nutrition
- Serving Size: 1 cookie
- Calories: 45
- Sugar: 7
- Sodium: 10
- Fat: 1
- Saturated Fat: 0.5
- Carbohydrates: 8
- Protein: 1
Keywords: Halloween cookies, meringue recipe, ghost cookies, gluten-free dessert, easy baking, chocolate chip meringue


