Love this? Save it for later!
Share the inspiration with your friends
Third batch in three days, and this time I didn’t peel the apple. It felt reckless, honestly—like skipping a step my grandmother would’ve rapped my knuckles for. But the soup came out silkier, with a faint sweetness that clung to the roof of my mouth in a way the perfectly peeled versions hadn’t. That’s the thing about this roasted butternut squash and apple soup: it keeps pulling me back into the kitchen, not because it’s complicated, but because every tiny tweak—a different apple variety, an extra clove of garlic, a splash of apple cider vinegar instead of lemon—changes the whole personality of the bowl.
The first time I made it, I was chasing that specific fall feeling you get when the air turns sharp and you just want something warm in your hands. I’d been staring at a butternut squash on my counter for three days, intimidated by its density. (Honestly, I’d bought it on a whim at the farmers’ market because it looked so perfect, all beige and bulbous.) I roasted it alongside a Honeycrisp apple because that’s what I had, blitzed it all with some vegetable broth, and ended up with something good—but not great. The second time, I swapped the Honeycrisp for a Granny Smith and added a pinch of cayenne. Better, but still missing something. It wasn’t until the third batch, with the peel-on apple and a whole head of roasted garlic, that I felt that little click in my chest. You know the one.
This soup isn’t trying to be fancy. It’s just trying to be the thing you make on a Tuesday when the world feels loud and you need a minute to breathe. And honestly? It works.
Why You’ll Love This Recipe
Look, I’ve tested a lot of squash soups over the years. Some are too watery, some are too sweet, and some taste like they’re trying too hard with a dozen spices. This one hits the sweet spot—literally and figuratively. Here’s why it’s earned a permanent spot in my fall rotation:
- Quick & Easy: From counter to bowl in about 45 minutes, most of which is hands-off roasting time. Perfect for a weeknight when you forgot to plan dinner (which, let’s face it, happens more than I’d like to admit).
- Simple Ingredients: No fancy grocery store trips. Butternut squash, apples, onion, garlic, broth, and a few pantry spices. That’s it.
- Perfect for Meal Prep: This soup actually gets better after a day in the fridge. Make it Sunday, eat it all week, and thank yourself on Wednesday.
- Crowd-Pleaser: I’ve served this to picky kids, vegan friends, and skeptical in-laws. Everyone goes back for seconds. The sweetness of the roasted apple disarms even the most vocal squash skeptics.
- Unbelievably Cozy: There’s something about the combination of caramelized squash and soft, roasted apple that just feels like wrapping yourself in a blanket. It’s comfort in a bowl, no exaggeration.
What makes this recipe different from the dozens of other squash soups out there? It’s the double-roasting technique. By roasting the squash and apples together on the same pan, they caramelize and mingle, their sugars concentrating into something almost jammy. Then you blend it all up with roasted garlic—not raw, which can be harsh—and the result is a soup that’s velvety without any cream. No dairy needed. No fuss. Just pure, concentrated fall flavor.
What Ingredients You Will Need
This recipe relies on a short list of ingredients, each pulling its weight. The key is using good-quality produce and not skipping the roasting step—it’s where all the magic happens.
- Butternut Squash (1 medium, about 2-3 pounds): Peeled, seeded, and cut into 1-inch cubes. Look for a squash that feels heavy for its size and has a solid, unblemished skin. I prefer organic here since you’re eating the flesh closest to the skin, but conventional works fine too. If you’re short on time, pre-cut squash from the grocery store is a lifesaver—just make sure the pieces are roughly the same size for even roasting.
- Apples (2 medium): I’ve tested this with Granny Smith, Honeycrisp, and Fuji. Granny Smith gives the best balance—tart enough to cut through the squash’s sweetness, but sweet enough to caramelize beautifully in the oven. Leave the peel on one of them (yes, really) for extra body and a subtle texture that blends smooth in the end. You won’t even notice it’s there.
- Yellow Onion (1 large): Diced into rough chunks. The onion roasts down into something sweet and mellow, forming the savory backbone of the soup. Don’t substitute red onion here—it turns an unappetizing gray color when cooked.
- Garlic (1 whole head): Roasted whole, then squeezed out. This is non-negotiable for me. Roasted garlic is sweet, nutty, and completely different from raw garlic. It adds depth without any sharpness. If you’re feeling extra garlicky, you can add a clove or two of raw garlic at the blending stage, but start with the roasted stuff.
- Vegetable Broth (4 cups): Use a good-quality low-sodium broth so you can control the salt. I like Better Than Bouillon roasted vegetable base—it has a rich, savory flavor that works perfectly here. Chicken broth also works if you’re not keeping it vegetarian.
- Olive Oil (3 tablespoons): For roasting. A good extra-virgin olive oil adds its own fruity notes, but any neutral oil works. Don’t skimp—the oil helps everything caramelize instead of steam.
- Maple Syrup (1 tablespoon, optional): I only add this if my apples are on the tart side. It rounds out the flavor without making the soup sweet. Use pure maple syrup, not pancake syrup.
- Apple Cider Vinegar (1 tablespoon): A splash at the end brightens everything up. It’s the secret ingredient that keeps the soup from tasting flat. Trust me on this one.
- Spices: 1 teaspoon salt, ½ teaspoon black pepper, ½ teaspoon ground cinnamon, ¼ teaspoon ground nutmeg, and a pinch of cayenne pepper. The cinnamon and nutmeg are warm and aromatic, while the cayenne is just enough to wake up your taste buds without making it spicy. If you’re sensitive to heat, leave the cayenne out—but I’d encourage you to try it once.
Equipment Needed
You don’t need a fancy kitchen to make this soup. Here’s what you’ll need:
- Baking Sheet (1 large, rimmed): A half-sheet pan is ideal. Rimmed is important so the juices don’t run off into your oven and smoke. Line it with parchment paper for easier cleanup—the caramelized bits can be sticky.
- Chef’s Knife: A sharp 8-inch knife makes quick work of the squash. If your knife is dull, this will be a frustrating experience. Take 30 seconds to sharpen it first—your wrists will thank you.
- Vegetable Peeler: For the squash. A Y-peeler is faster and gives you more control than a straight peeler, but either works.
- Cutting Board: A large, sturdy one. The squash can be slippery, so a damp paper towel underneath your board will keep it from sliding.
- Large Soup Pot or Dutch Oven (5-6 quart): For simmering the roasted vegetables with broth. A Dutch oven retains heat beautifully, but any heavy-bottomed pot works.
- Immersion Blender or Regular Blender: An immersion blender means less cleanup—you blend right in the pot. If using a regular blender, work in batches and don’t fill it more than halfway with hot liquid. Trust me, hot soup explosions are not fun to clean up. Let the soup cool slightly before blending if using a countertop blender.
- Measuring Spoons and Cups: For accuracy. I know some people eyeb it, but for the best balance of flavors, measure the spices and vinegar.
If you don’t have an immersion blender, a regular blender works perfectly. Just let the soup cool for 10 minutes first, and hold the lid down with a kitchen towel while blending. Budget tip: a simple immersion blender costs about $20 and is one of the most-used tools in my kitchen for soups, sauces, and even smoothies.
Preparation Method

Let’s make some soup. This method is straightforward, but I’ve included all the little details that make the difference between good soup and great soup.
- Preheat your oven to 400°F (200°C). Give it a full 15-20 minutes to come to temperature. A properly hot oven is crucial for caramelization—if you rush it, your vegetables will steam instead of roast.
- Prep the squash. Carefully cut off both ends of the butternut squash with your chef’s knife, then slice it in half crosswise where the narrow neck meets the bulbous bottom. Stand each piece upright and slice off the skin from top to bottom, following the curve of the squash. (Pro tip: microwave the whole squash for 2 minutes first—it softens the skin just enough to make peeling easier.) Cut the peeled squash in half lengthwise, scoop out the seeds with a spoon, and cut the flesh into 1-inch cubes. Aim for uniform pieces so they roast evenly.
- Prep the apples and onion. Wash the apples—leave the peel on one of them—and cut them into 1-inch chunks, removing the core and seeds. Peel the onion and cut it into similar-sized chunks. Don’t worry about perfect uniformity here; everything will get blended smooth in the end.
- Roast everything together. On your parchment-lined baking sheet, combine the squash cubes, apple chunks, and onion chunks. Break apart the head of garlic—don’t peel the cloves, just separate them—and nestle them in among the vegetables. Drizzle everything with 3 tablespoons of olive oil, then sprinkle with ½ teaspoon salt and ¼ teaspoon black pepper. Toss everything with your hands (yes, get in there) until every piece is lightly coated. Spread it all in a single, even layer. Don’t overcrowd the pan—if things are piled on top of each other, they’ll steam instead of caramelize. Use two pans if needed.
- Roast for 35-45 minutes. Halfway through, pull the pan out and give everything a good stir with a spatula. You’re looking for deep golden-brown edges on the squash and apples, and the garlic cloves should be soft when squeezed. The onions will look slightly shriveled and caramelized—that’s perfect. If your oven runs hot, check at 30 minutes; if it runs cool, give it the full 45.
- Cool the garlic slightly. Once the pan comes out of the oven, let it rest for 5 minutes. Then pick out the garlic cloves and set them on a small plate. When they’re cool enough to handle—about 2 minutes—squeeze the soft, roasted garlic out of each clove into a small bowl. Discard the papery skins. This is the most satisfying step in the whole recipe, honestly.
- Start the soup base. Transfer the roasted squash, apples, and onions to your soup pot or Dutch oven. Add the roasted garlic paste. Pour in 4 cups of vegetable broth. Add the remaining ½ teaspoon salt, ¼ teaspoon pepper, ½ teaspoon cinnamon, ¼ teaspoon nutmeg, and a pinch of cayenne. Stir everything together.
- Simmer for 10 minutes. Bring the soup to a gentle boil over medium-high heat, then reduce the heat to low and let it simmer, uncovered, for 10 minutes. This allows all the flavors to meld and the roasted bits to soften even more. You’ll notice the smell shifting from “roasted vegetables” to “I want to drink this immediately.”
- Blend until smooth. Remove the pot from the heat. If using an immersion blender, submerge it fully and blend until completely smooth—this takes about 1-2 minutes. If using a regular blender, let the soup cool for 10 minutes, then blend in batches, filling the blender no more than halfway each time. Hold the lid down with a folded kitchen towel and start on low speed before gradually increasing. Be careful—hot soup expands and can push the lid off.
- Finish with vinegar and maple syrup. Once blended, stir in 1 tablespoon of apple cider vinegar. Taste the soup. If it needs a touch more sweetness, add the maple syrup. If it needs more salt, add it a pinch at a time. The vinegar is crucial—it brightens everything and keeps the soup from tasting flat. You want the final flavor to be savory-sweet with a tiny tang.
- Serve immediately or store. Ladle into bowls and top with your favorite garnishes (see Serving & Storage Suggestions below). Or let it cool completely and store in the fridge for up to 5 days.
Cooking Tips & Techniques
I’ve made this soup at least a dozen times, and I’ve learned a few things the hard way. Here’s what I wish someone had told me:
- Don’t skip the roasting step. I know it’s tempting to just boil everything together and call it a day. But roasting transforms the squash and apples—it concentrates their sugars, deepens their flavor, and adds a subtle smokiness that you just can’t get from boiling. Trust the process.
- Cut your squash into uniform pieces. I learned this after one batch where half the squash was underdone and the other half was burnt. Aim for 1-inch cubes. If some pieces are smaller, they’ll cook faster, so keep an eye on them and pull them out early if needed.
- Use a rimmed baking sheet. The first time I made this, I used a flat cookie sheet without rims. The juices dripped off, hit the bottom of the oven, and smoked up my entire kitchen. My smoke alarm went off, my cat hid under the bed, and I had to open every window in November. Learn from my mistakes.
- Don’t over-blend. If you blend for too long, especially with an immersion blender, you can incorporate too much air into the soup, making it frothy and thin. Blend just until smooth—about 60 seconds with an immersion blender, or 30 seconds in a regular blender.
- Taste and adjust at the end. The amount of salt you need depends on your broth, your squash, and your personal preference. Always taste before serving and adjust accordingly. The same goes for the vinegar and maple syrup—your apples might be sweeter or tarter than mine, so trust your palate.
- Make it ahead. This soup is actually better on day two. The flavors meld and deepen overnight. If you have time, make it a day ahead and reheat gently. It’s a game-changer for meal prep.
Variations & Adaptations
One of the best things about this soup is how flexible it is. Here are some variations I’ve tried and loved:
- Vegan & Dairy-Free: This recipe is already vegan and dairy-free as written. The roasted garlic and apple cider vinegar provide enough richness that you won’t miss the cream. If you want it extra creamy, blend in ¼ cup of canned coconut milk at the end.
- Spicy Version: Add ½ teaspoon of smoked paprika and an extra pinch of cayenne along with the other spices. For even more heat, roast a small jalapeño (halved, seeds removed) on the baking sheet with the vegetables, then blend it in with the rest.
- Herb-Infused: Add 2 sprigs of fresh thyme or 1 sprig of fresh rosemary to the pot during the simmering step. Remove the sprigs before blending. The herbal notes pair beautifully with the roasted squash and apple.
- Protein-Packed: Stir in 1 cup of cooked white beans (cannellini or great northern) before blending. They add creaminess and a boost of protein without changing the flavor. I do this when I want the soup to be a full meal.
- Different Squash: No butternut squash? Use acorn squash, kabocha squash, or even a sugar pumpkin. The cooking time might vary slightly, so check for doneness by piercing the squash with a fork—it should be tender all the way through.
- Apple Variations: In the fall, I love using a mix of sweet and tart apples—one Honeycrisp and one Granny Smith, for example. In the summer, you can swap the apple for a ripe pear. It’s a different flavor profile, but equally delicious.
If you’re looking for another cozy fall recipe to round out your meal, try this cozy pumpkin sourdough bread for dipping—it’s the perfect companion to this soup.
Serving & Storage Suggestions
This soup is versatile enough to be the star of a meal or a supporting player. Here’s how I like to serve it:
- Serving Temperature: Serve hot, but not boiling. Let it cool for 5 minutes after blending so the flavors settle. Garnish with a drizzle of olive oil or a swirl of coconut cream, a sprinkle of pumpkin seeds or toasted pepitas for crunch, and a few cracks of black pepper. A sprinkle of fresh thyme leaves or a pinch of flaky sea salt adds a beautiful finish.
- What to Serve With It: A crusty loaf of bread is my go-to—sourdough, rye, or a simple baguette. For a heartier meal, serve it alongside a simple green salad with a tangy vinaigrette. This soup also pairs beautifully with a homemade pumpkin chai latte for the ultimate fall experience.
- Storage: Let the soup cool completely before transferring to an airtight container. Store in the refrigerator for up to 5 days. The flavors will actually improve after a day or two. I like to portion it into individual mason jars for easy grab-and-go lunches.
- Freezing: This soup freezes beautifully. Pour cooled soup into freezer-safe containers or zip-top bags, leaving an inch of headroom for expansion. Freeze for up to 3 months. Thaw overnight in the refrigerator before reheating.
- Reheating: Reheat gently on the stovetop over medium-low heat, stirring occasionally. If the soup has thickened in the fridge, add a splash of broth or water to thin it out. You can also reheat individual portions in the microwave—30-second intervals, stirring in between, until hot.
- Flavor Development: Like many soups, this one gets better with time. The roasted flavors deepen, the spices meld, and the texture becomes even silkier. Don’t be surprised if you like it more on day three than day one.
Nutritional Information & Benefits
This soup is as nourishing as it is delicious. Here’s a rough breakdown per serving (based on 6 servings):
- Calories: Approximately 180-200 per serving
- Fat: 7g (mostly from olive oil)
- Carbohydrates: 32g
- Fiber: 6g
- Sugar: 12g (naturally occurring from squash and apples)
- Protein: 3g
- Vitamin A: Over 200% of the daily value (hello, butternut squash!)
- Vitamin C: 25% of the daily value
Butternut squash is packed with vitamin A, which is great for eye health and immune function. Apples add fiber and vitamin C, while garlic and onions provide prebiotics that support gut health. This soup is naturally gluten-free, dairy-free, and vegan, making it accessible to a wide range of dietary needs. The only potential allergen is the garlic, but that’s pretty rare. If you’re watching your sodium, use low-sodium broth and go easy on the added salt.
Conclusion
This roasted butternut squash and apple soup is the kind of recipe that feels like a hug in a bowl. It’s simple enough for a Tuesday night, but impressive enough for a dinner party. The roasted garlic and caramelized apples give it a depth of flavor that’ll have you coming back for seconds—and maybe thirds.
I love this recipe because it’s forgiving. You can swap ingredients, adjust the spices, or double the batch without worrying about messing it up. It’s the kind of soup that makes you feel like you’ve got your life together, even if you’re just barely hanging on. And honestly? That’s exactly the kind of cooking I need in my life.
So go ahead—grab a butternut squash, a couple of apples, and give this a try. Let me know in the comments how it turns out! Did you add extra cayenne? Did you serve it with crusty bread? Did you make it for a crowd? I want to hear all about it. And if you’re looking for another cozy soup to add to your rotation, don’t miss this slow cooker chili with cornbread for those chilly game day afternoons. Happy cooking!
Frequently Asked Questions
Can I make this soup in a slow cooker or Instant Pot?
Yes! For a slow cooker, roast the vegetables as directed, then transfer them to the slow cooker with the broth and spices. Cook on low for 4-6 hours or high for 2-3 hours. Blend as directed. For an Instant Pot, use the sauté function to warm the broth, then add the roasted vegetables and spices. Pressure cook on high for 5 minutes, then quick release and blend.
Can I use frozen butternut squash?
You can, but the texture won’t be quite as good. Frozen squash tends to release more water during roasting, which means less caramelization. If using frozen, thaw it first and pat it dry with paper towels before roasting. The soup will still be tasty, just a little less rich.
How do I make this soup creamier without adding dairy?
The easiest way is to blend in ¼ cup of canned coconut milk or a handful of raw cashews (soaked in hot water for 15 minutes first). Both add creaminess without changing the flavor much. A peeled, boiled potato also works—it adds body and silkiness.
Can I double this recipe?
Absolutely. Just make sure to use two baking sheets for the roasting step (don’t overcrowd) and a large enough pot for simmering. The cooking time stays the same. Leftovers freeze beautifully, so doubling is a great meal prep strategy.
What if my soup is too thick or too thin?
If it’s too thick, stir in additional broth or water a splash at a time until it reaches your desired consistency. If it’s too thin, simmer it uncovered for an extra 10-15 minutes to reduce and concentrate the flavors. You can also blend in a handful of cooked white beans to thicken it naturally.
Pin This Recipe!
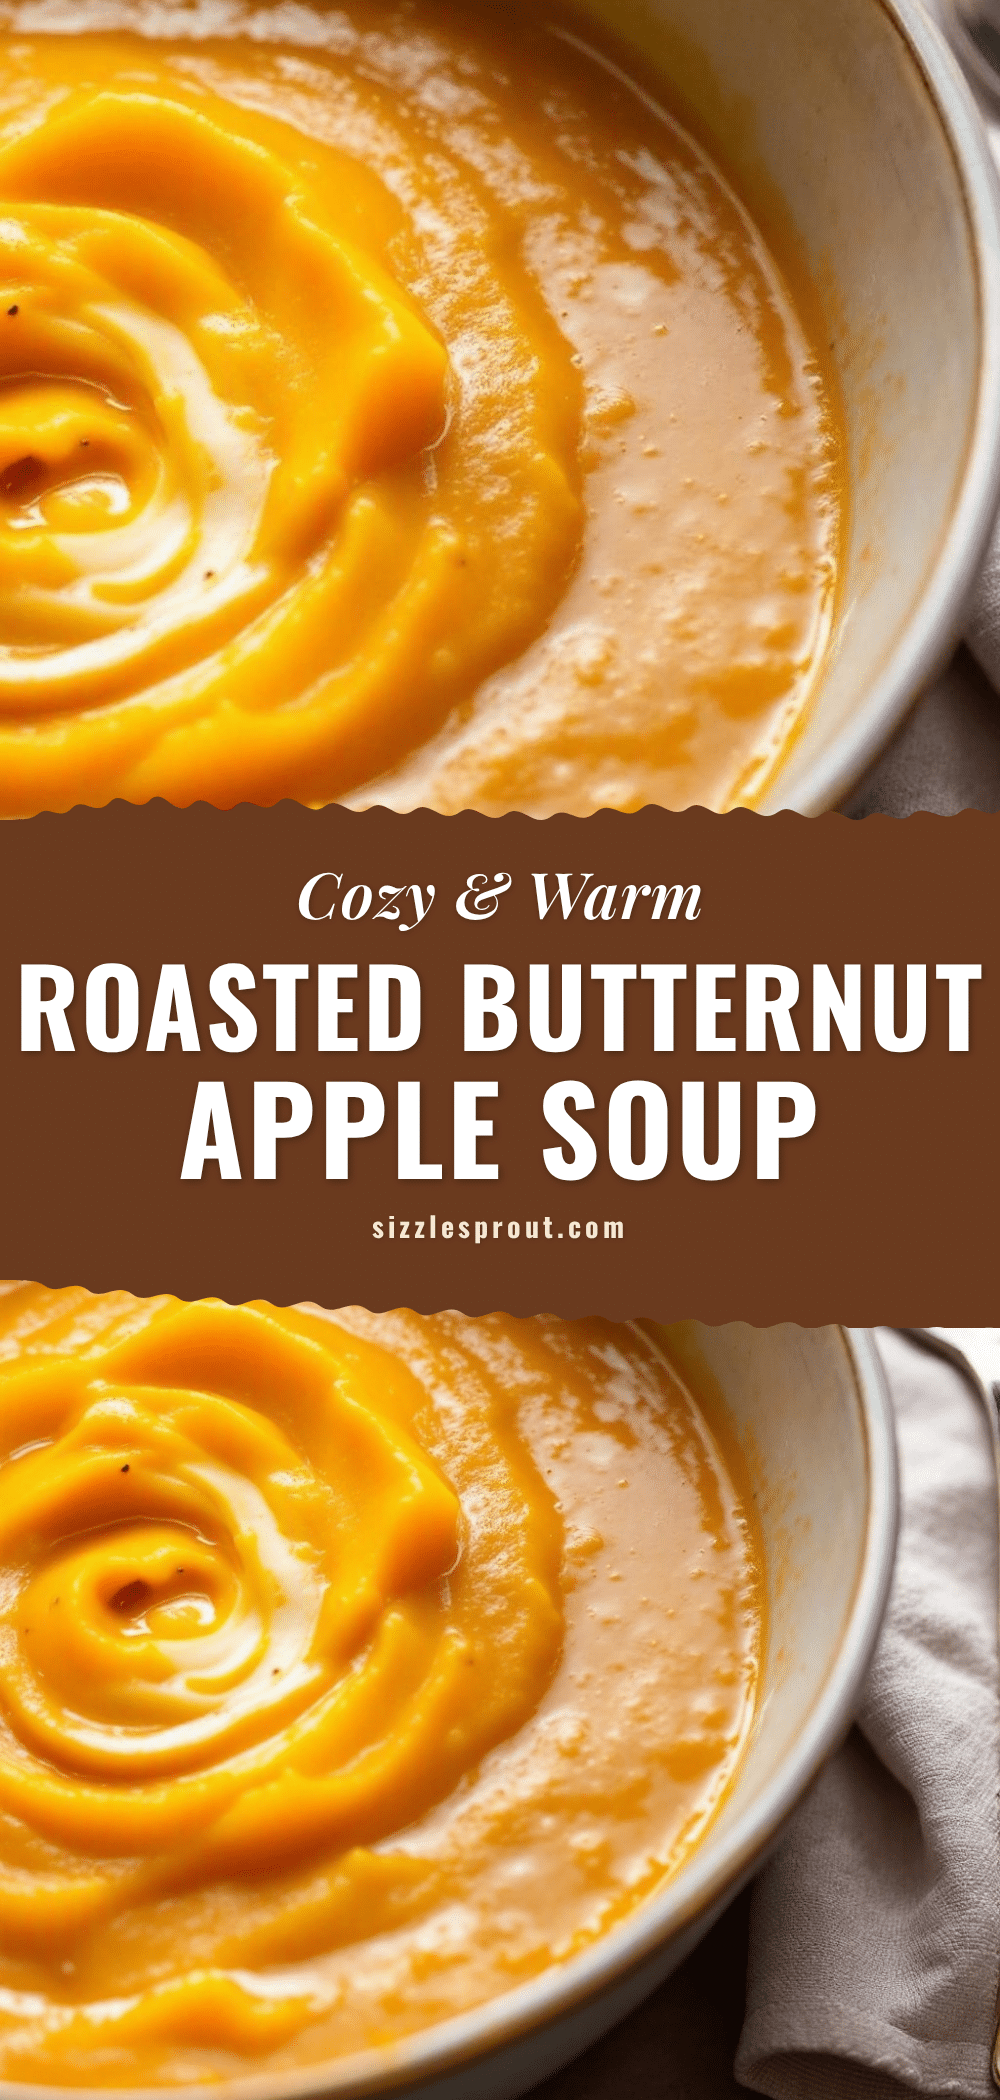
Cozy Roasted Butternut Squash and Apple Soup

This velvety roasted butternut squash and apple soup is the ultimate fall comfort food. With caramelized squash, sweet roasted apples, and mellow garlic, it’s a simple yet deeply flavorful bowl that’s perfect for weeknights or meal prep.
- Prep Time: 15 minutes
- Cook Time: 45 minutes
- Total Time: 1 hour
- Yield: 6 servings 1x
- Category: Soup
- Cuisine: American
Ingredients
- 1 medium butternut squash (about 2–3 pounds), peeled, seeded, and cut into 1-inch cubes
- 2 medium apples (Granny Smith recommended), one peeled and one with peel on, cut into 1-inch chunks
- 1 large yellow onion, diced into rough chunks
- 1 whole head garlic, cloves separated but unpeeled
- 4 cups low-sodium vegetable broth
- 3 tablespoons olive oil
- 1 tablespoon maple syrup (optional)
- 1 tablespoon apple cider vinegar
- 1 teaspoon salt, divided
- ½ teaspoon black pepper, divided
- ½ teaspoon ground cinnamon
- ¼ teaspoon ground nutmeg
- Pinch of cayenne pepper
Instructions
- Preheat oven to 400°F (200°C).
- Prep the squash: cut off both ends, slice in half crosswise, stand each piece upright and slice off skin. Cut in half lengthwise, scoop out seeds, and cut into 1-inch cubes.
- Prep the apples and onion: wash apples, leave peel on one, cut into 1-inch chunks (remove core and seeds). Peel onion and cut into similar-sized chunks.
- On a parchment-lined rimmed baking sheet, combine squash, apples, and onion. Nestle unpeeled garlic cloves among vegetables. Drizzle with olive oil, sprinkle with ½ teaspoon salt and ¼ teaspoon pepper. Toss to coat and spread in a single layer.
- Roast for 35-45 minutes, stirring halfway through, until vegetables are tender and golden-brown. Garlic cloves should be soft when squeezed.
- Let pan rest 5 minutes. Pick out garlic cloves, cool slightly, then squeeze roasted garlic from skins into a small bowl.
- Transfer roasted vegetables to a large soup pot or Dutch oven. Add roasted garlic paste, vegetable broth, remaining ½ teaspoon salt, ¼ teaspoon pepper, cinnamon, nutmeg, and cayenne. Stir.
- Bring to a gentle boil over medium-high heat, then reduce heat to low and simmer uncovered for 10 minutes.
- Remove from heat. Blend with an immersion blender until smooth (about 1-2 minutes). If using a regular blender, let soup cool 10 minutes, then blend in batches, filling no more than halfway.
- Stir in apple cider vinegar. Taste and add maple syrup if needed. Adjust salt to taste.
- Serve hot, garnished as desired, or let cool completely and store.
Notes
For extra creaminess without dairy, blend in ¼ cup canned coconut milk or a handful of soaked cashews. The soup thickens as it sits; thin with additional broth when reheating. Make ahead for best flavor—it’s even better on day two.
Nutrition
- Serving Size: 1 serving (about 1.5
- Calories: 190
- Sugar: 12
- Sodium: 480
- Fat: 7
- Saturated Fat: 1
- Carbohydrates: 32
- Fiber: 6
- Protein: 3
Keywords: butternut squash soup, apple soup, roasted squash soup, fall soup, vegan soup, gluten-free soup, dairy-free soup, easy soup recipe


