Love this? Save it for later!
Share the inspiration with your friends
I did not trust chocolate pudding in a dirt cup. Honestly, I thought it sounded like a mistake until I saw the gummy worms wriggling out of the dark, crumbly soil. I’ve always been a bit suspicious of kid-friendly desserts that promise to be “fun” or “spooky.” Usually, they are just overly sweet mush disguised as something edible. My kids love them, sure, but I usually end up eating the leftovers and wondering why I bothered making them in the first place. It felt like a waste of time.
Then came the year my daughter begged for a Halloween treat that wasn’t just candy corn. She wanted something she could make herself, something that looked like actual grave dirt. I looked at the ingredients list and shrugged. Chocolate cookies? Pudding? Cream cheese? It seemed too simple. Too basic. I figured it would be dry, or the pudding would be too runny, or it would just taste like a snack cake. I was ready to buy a bag of cookies and call it a day.
But then I tried it. I took a spoonful of that rich, dark “soil” topped with a swirl of tangy cream cheese frosting. The texture was right. The balance was perfect. It wasn’t just sweet; it had depth. The cream cheese cut through the sugar in a way that made me actually enjoy it as an adult. I looked at my daughter, who was watching me with wide eyes, expecting disappointment. Instead, I gave her a thumbs up. She screamed in delight. That was the moment I realized I had been wrong. This isn’t just a kid’s treat. It is a legitimate dessert that happens to look like a graveyard.
Now, every October, this is the first thing I make. It doesn’t require an oven, it doesn’t take long, and it always gets compliments. I was skeptical, but now I’m a believer. The combination of textures and flavors is just too good to ignore.
Why You’ll Love This Recipe
Let’s be honest, Halloween desserts usually fall into two categories: too sweet to eat or too hard to make. This creepy Halloween dirt cups recipe breaks that cycle completely. It hits that sweet spot of being incredibly easy while still tasting like something you’d buy at a high-end bakery. I have tested dozens of versions over the years, and this one stands out because it doesn’t rely on fancy techniques. You don’t need to temper chocolate or bake a perfect cake. You just mix, layer, and serve.
Here is why this recipe has earned a permanent spot in my fall rotation:
- Quick & Easy: This comes together in under 20 minutes. There is no baking, no cooling racks, and no waiting for layers to set. It is perfect for busy weeknights or last-minute Halloween party prep when you realize you forgot to make dessert.
- Simple Ingredients: No fancy grocery trips needed. You likely already have chocolate cookies, pudding mix, and cream cheese in your kitchen. It uses pantry staples that most people keep on hand, which makes it so much less stressful than recipes requiring exotic spices or hard-to-find items.
- Perfect for Parties: Great for school Halloween parties, trick-or-treating handouts, or spooky sleepovers. The individual cup format makes serving effortless. You can make a dozen in the time it takes to set up a buffet table.
- Crowd-Pleaser: It always gets rave reviews from kids and adults alike. The gummy worms add a playful element that kids love, while the rich chocolate and creamy topping satisfy adult sweet teeth. It bridges the gap between “treat” and “dessert.”
- Unbelievably Delicious: The texture and flavor combo is next-level comfort food. The contrast between the crunchy cookie crumbs and the smooth pudding is satisfying. The tangy cream cheese layer adds a sophisticated note that prevents it from being cloyingly sweet.
What makes this recipe different from the rest is the ratio of ingredients. Many recipes use too much pudding, making it soggy, or too few cookies, making it dry. This version balances the moisture perfectly. The cream cheese layer isn’t just a garnish; it is a crucial component that adds richness and stability. It feels like a cheat code for dessert making. Whether you are a novice baker or a seasoned pro, this recipe works. It is the kind that makes you close your eyes after the first bite and just enjoy the moment. It is comfort food reimagined—simpler, faster, but with the same soul-soothing satisfaction.
What Ingredients You Will Need
This recipe uses simple, wholesome ingredients to deliver bold flavor and satisfying texture without the fuss. The beauty of this dessert lies in its simplicity. You do not need expensive gourmet items. In fact, using standard, accessible ingredients often yields better results because you are familiar with how they behave. The key is to choose quality versions of these basic items to ensure the best taste.
Here is what you will need to create the perfect spooky soil:
- Chocolate Sandwich Cookies: You need about 24 to 30 standard chocolate sandwich cookies (like Oreos). These form the “dirt.” I recommend using the standard large size because they crush evenly. If you can find organic or fair-trade chocolate cookies, they often have a richer cocoa flavor that elevates the dish. Avoid the “thin” or “mini” versions, as they can be too dry and difficult to crush into the right consistency.
- Unsalted Butter: You will need 4 tablespoons of unsalted butter, melted. This acts as the binder for the cookie crumbs. Using unsalted butter allows you to control the saltiness. If you only have salted butter, you can use it, but you might want to reduce any additional salt in the cream cheese layer. Melt the butter slowly so it is liquid but not hot, which prevents the cookies from turning into a paste too quickly.
- Instant Vanilla Pudding Mix: One 3.4-ounce box of instant vanilla pudding mix is essential. Do not use the “cook and serve” variety, as it will be too thick and gummy. The instant mix dissolves smoothly into the milk. I personally prefer brands like Jell-O or Knox for their consistent texture. Look for a box that lists sugar and cornstarch as primary ingredients for that classic nostalgic flavor.
- Whole Milk: You need 2 cups of cold whole milk. The fat content in whole milk is crucial for creating a rich, creamy pudding. Skim milk will result in a thin, watery consistency that will make the dirt cups soggy. Make sure the milk is very cold, as this helps the pudding set faster when mixed.
- Full-Fat Cream Cheese: One 8-ounce package of full-fat cream cheese, softened to room temperature. This is non-negotiable. Low-fat cream cheese will not whip properly and will taste grainy. Block cream cheese is better than the spreadable tubs, which contain additives that can affect the texture. If you need a dairy-free option, you can use a high-quality vegan cream cheese block, but avoid the tub versions.
- Powdered Sugar: 2 tablespoons of powdered sugar are needed to sweeten the cream cheese layer slightly. This balances the tang of the cream cheese. If you prefer a less sweet dessert, you can reduce this to 1 tablespoon, but it helps to keep the flavor profile balanced against the sweet pudding.
- Heavy Cream: 2 tablespoons of heavy cream or half-and-half. This helps lighten the cream cheese mixture, making it easier to spread and less dense. It adds a silky mouthfeel that complements the pudding. You can substitute with milk if you are out of heavy cream, but the texture will be slightly less luxurious.
- Gummy Worms: A handful of gummy worms for decoration. These are the “bones” or “creatures” in the dirt. You can use standard gummy worms or spicy gummy worms for a kick. The visual element is what makes this recipe iconic, so do not skip them. They add a fun, interactive element for kids.
- Optional: Chocolate Chips: A small handful of mini chocolate chips can be mixed into the cookie crumbs for extra texture. This adds a bit of crunch and chocolate intensity. It is not required, but it is a nice touch if you have them on hand.
Equipment Needed
You do not need a fancy kitchen to make this recipe. Most of the tools are standard items you probably already have. The main challenge is getting the cookie crumbs to the right consistency.
- Food Processor or Blender: This is the easiest way to crush the cookies. Pulse them until they are fine crumbs. If you do not have one, a heavy-duty blender works too. Just be careful not to over-process, or you will end up with cookie butter instead of crumbs.
- Ziplock Bags and Rolling Pin: If you prefer a manual method, place the cookies in a large ziplock bag. Remove as much air as possible and seal it tight. Use a rolling pin, a heavy skillet, or a bottle of wine to crush the cookies. This method gives you more control over the texture, allowing you to leave some larger chunks for a more realistic “dirt” look.
- Mixing Bowls: You will need two medium-sized bowls. One for mixing the cookie crumbs with butter, and one for whipping the cream cheese mixture. Glass or ceramic bowls are best because they are sturdy and easy to clean.
- Electric Mixer: A hand mixer or stand mixer is helpful for whipping the cream cheese, powdered sugar, and heavy cream. It ensures the mixture is smooth and lump-free. If you do not have a mixer, you can use a whisk and a bit of elbow grease, but it will take longer and may not get as airy.
- Serving Cups: Clear plastic or glass cups are ideal for presentation. You want to be able to see the layers. Small dessert cups, mason jars, or even shot glasses work well. Make sure they are clean and dry before assembling.
- Spatula: A rubber spatula is useful for scraping the bowls and spreading the cream cheese layer evenly. It ensures you get every bit of the mixture out of the bowl.
Preparation Method
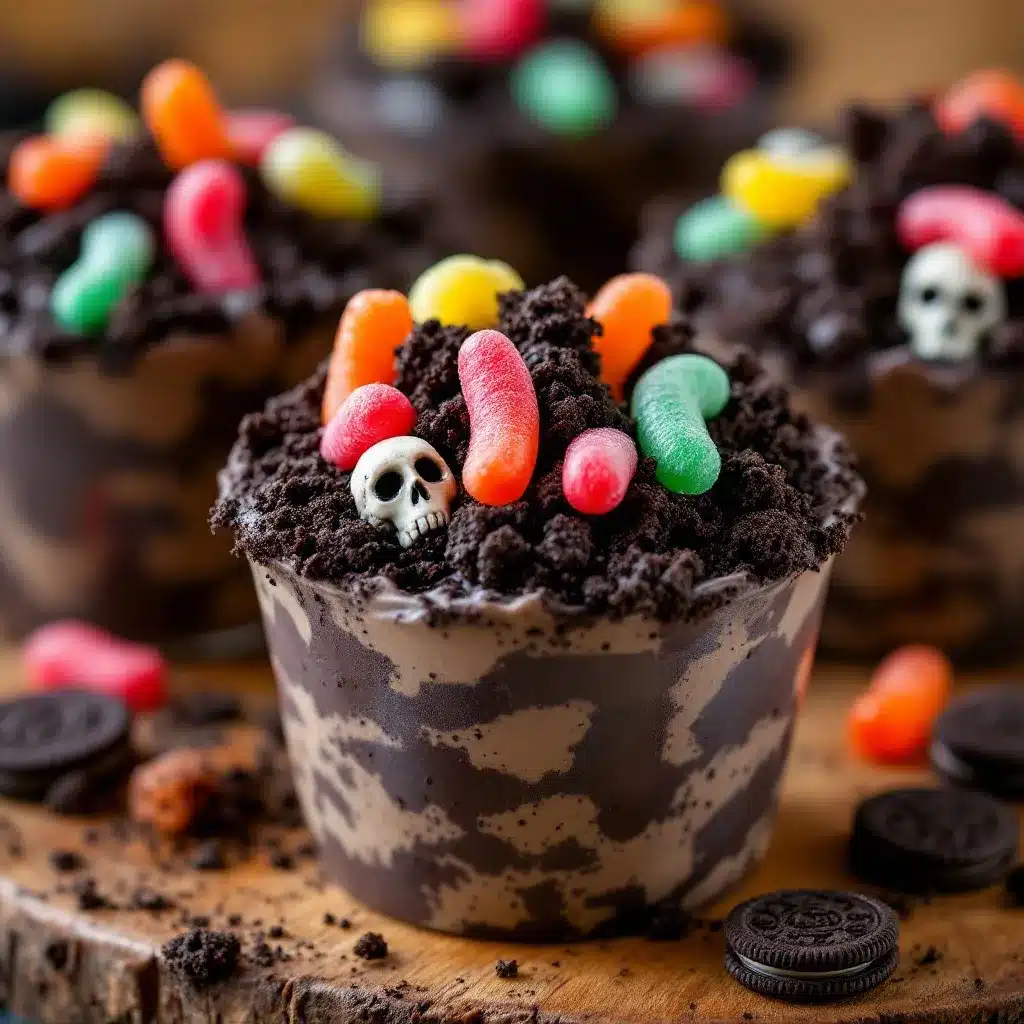
Making these dirt cups is straightforward, but paying attention to details ensures the best result. Follow these steps carefully for perfect layers and texture.
- Crush the Cookies: Start by crushing the chocolate sandwich cookies. If using a food processor, pulse the cookies until they are fine crumbs. This should take about 30 seconds. If using the bag method, crush them until you have a mix of fine crumbs and small chunks. You want a texture that resembles moist soil, not powder. Place the crumbs in a medium bowl.
- Add Butter: Pour the melted butter over the cookie crumbs. Use a fork or spatula to mix them together until the crumbs are evenly coated and look like wet sand. They should hold together when squeezed but still be crumbly. If the mixture seems too dry, add another teaspoon of butter. If it is too wet, add a few more crumbs. Set this aside.
- Make the Pudding: In a separate large bowl, whisk the instant vanilla pudding mix and cold milk together. Whisk vigorously for about 2 minutes, or until the mixture thickens and begins to pull away from the sides of the bowl. The pudding should be thick enough to hold its shape but still spoonable. Do not skip the whisking step, as it ensures the pudding sets properly.
- Prepare the Cream Cheese Layer: In another bowl, beat the softened cream cheese, powdered sugar, and heavy cream together using an electric mixer on medium speed. Beat for about 2-3 minutes until the mixture is smooth, creamy, and free of lumps. It should be light and fluffy. If the mixture is too thick, add a teaspoon more of heavy cream. If it is too thin, you can chill it for 10 minutes to firm up slightly.
- Assemble the Cups: Begin layering the dessert in your serving cups. Start with a layer of the chocolate cookie crumbs at the bottom. This will be your base “dirt.” Add about 2 tablespoons of crumbs per cup.
- Add the Pudding: Spoon a layer of the vanilla pudding over the cookie crumbs. Use about 3 tablespoons per cup. Spread it gently with a spoon to create an even layer. Be careful not to mix it into the crumbs too much, as you want distinct layers.
- Add the Cream Cheese: Spoon a layer of the cream cheese mixture over the pudding. Use about 1 tablespoon per cup. This layer should be smooth and white, contrasting with the dark pudding and crumbs. You can use a small spoon or a piping bag for a nicer look.
- Top with Dirt: Add another layer of chocolate cookie crumbs on top. This is the final “soil” layer. It should cover the cream cheese completely. Press it down gently with the back of a spoon to create a flat surface.
- Decorate: Stick the gummy worms into the top layer of crumbs. Push them in so they look like they are burrowing into the dirt. You can add multiple worms per cup for a creepier effect.
- Chill and Serve: Once assembled, you can serve immediately, but chilling them in the refrigerator for 15-20 minutes helps the layers set and the flavors meld. This is optional but recommended for the best texture.
Cooking Tips & Techniques
Getting the texture right is the most important part of this recipe. Here are some tips to ensure success.
- Cookie Crumb Consistency: Do not crush the cookies into dust. You want some texture. If the crumbs are too fine, the dirt cups will feel like a cake. If they are too large, they will be crunchy and unpleasant. Aim for a medium-fine crumb size.
- Pudding Thickness: If your pudding is too thin, your dirt cups will be soupy. Make sure you whisk the pudding mix and milk thoroughly. If it still seems runny, let it sit for 5 minutes before assembling. It will thicken further.
- Cream Cheese Temperature: Ensure the cream cheese is fully softened before mixing. If it is cold, you will get lumps in your frosting. Room temperature cream cheese whips up smoothly and integrates easily with the sugar and cream.
- Layering Technique: Use a spoon to gently press each layer down. This helps the layers adhere to each other and prevents them from sliding out when you serve. However, do not press too hard, or you will mix the layers together.
- Storage: These dirt cups are best served fresh. If you need to make them ahead, store them in the refrigerator for up to 24 hours. The crumbs may soften slightly over time, but the flavor will remain excellent. Do not freeze them, as the pudding and cream cheese can separate upon thawing.
Variations & Adaptations
While the classic version is delicious, there are many ways to customize these dirt cups.
- Chocolate Lovers: Substitute the vanilla pudding mix with chocolate pudding mix. This creates a double-chocolate experience that is rich and intense. You can also add mini chocolate chips to the cookie crumbs for extra crunch.
- Strawberry Shortcake: Use strawberry pudding mix and top with fresh sliced strawberries and whipped cream. This version is lighter and fruity, perfect for spring or summer parties.
- Red Velvet: Use red velvet cake mix instead of cookies for the crumbs. Mix red velvet pudding with the cream cheese layer for a festive, colorful treat. This is great for Valentine’s Day or Halloween.
- Gluten-Free: Use gluten-free chocolate sandwich cookies and ensure your pudding mix is certified gluten-free. Most instant pudding mixes are naturally gluten-free, but always check the label.
- Dairy-Free: Use dairy-free milk for the pudding and a vegan cream cheese block for the topping. There are many good vegan pudding mixes available that mimic the texture of dairy-based ones.
Serving & Storage Suggestions
These dirt cups are best served chilled. The cold temperature enhances the flavor of the pudding and cream cheese. You can serve them in individual cups for parties, or transfer them to a large bowl for family-style serving.
- Complementary Dishes: Serve with apple cider or pumpkin spice lattes for a fall-themed party. They pair well with savory snacks like buffalo chicken dip or cheese platters.
- Storage: Store leftovers in an airtight container in the refrigerator for up to 2 days. The texture may change slightly, but they will still be tasty.
- Reheating: Do not reheat these desserts. They are meant to be eaten cold. If the crumbs soften too much, you can sprinkle fresh crumbs on top before serving.
- Flavor Development: The flavors meld nicely after a few hours in the fridge. The cookies absorb some moisture from the pudding, creating a more cohesive texture. This is why making them a few hours ahead is recommended.
Nutritional Information & Benefits
While these are definitely a treat, they are not without some nutritional value. Chocolate cookies provide a small amount of iron and magnesium. The pudding offers calcium from the milk, and the cream cheese adds protein and fat. However, they are high in sugar and saturated fat, so enjoy them in moderation.
- Calories: Approximately 250-300 calories per cup.
- Sugar: High sugar content due to cookies, pudding, and cream cheese.
- Fat: Moderate fat content from butter, cream cheese, and cookies.
- Protein: Small amount of protein from milk and cream cheese.
For those with dietary restrictions, there are gluten-free and dairy-free options available. Always check labels for allergens.
Conclusion
These creepy Halloween dirt cups are a fun, easy, and delicious treat that everyone will love. They are perfect for Halloween parties, school events, or just a spooky snack at home. The combination of textures and flavors is irresistible, and the presentation is sure to impress.
I hope you enjoy making and eating these as much as I do. They are a staple in my house every October, and I know they will become a favorite in yours too. Feel free to customize them with your favorite flavors and toppings. Don’t forget to share your creations on social media and tag me. I love seeing how you make this recipe your own. Happy Halloween!
FAQs
Can I make these dirt cups ahead of time?
Yes, you can make them up to 24 hours in advance. Store them in the refrigerator in an airtight container. The flavors will meld together, and the texture will remain good.
What kind of cookies work best?
Standard chocolate sandwich cookies like Oreos work best. They crush easily and provide the right balance of sweetness and chocolate flavor. Avoid thin or mini cookies as they can be too dry.
Can I use homemade pudding instead of instant?
You can, but it will take longer to set. Cooked pudding needs to cool completely before assembling. Instant pudding is recommended for its convenience and consistent texture.
How do I store leftovers?
Store leftovers in an airtight container in the refrigerator for up to 2 days. Do not freeze them, as the texture may become watery upon thawing.
Can I make these dairy-free?
Yes, use dairy-free milk for the pudding and a vegan cream cheese block for the topping. There are many vegan pudding mixes available that work well.
Pin This Recipe!
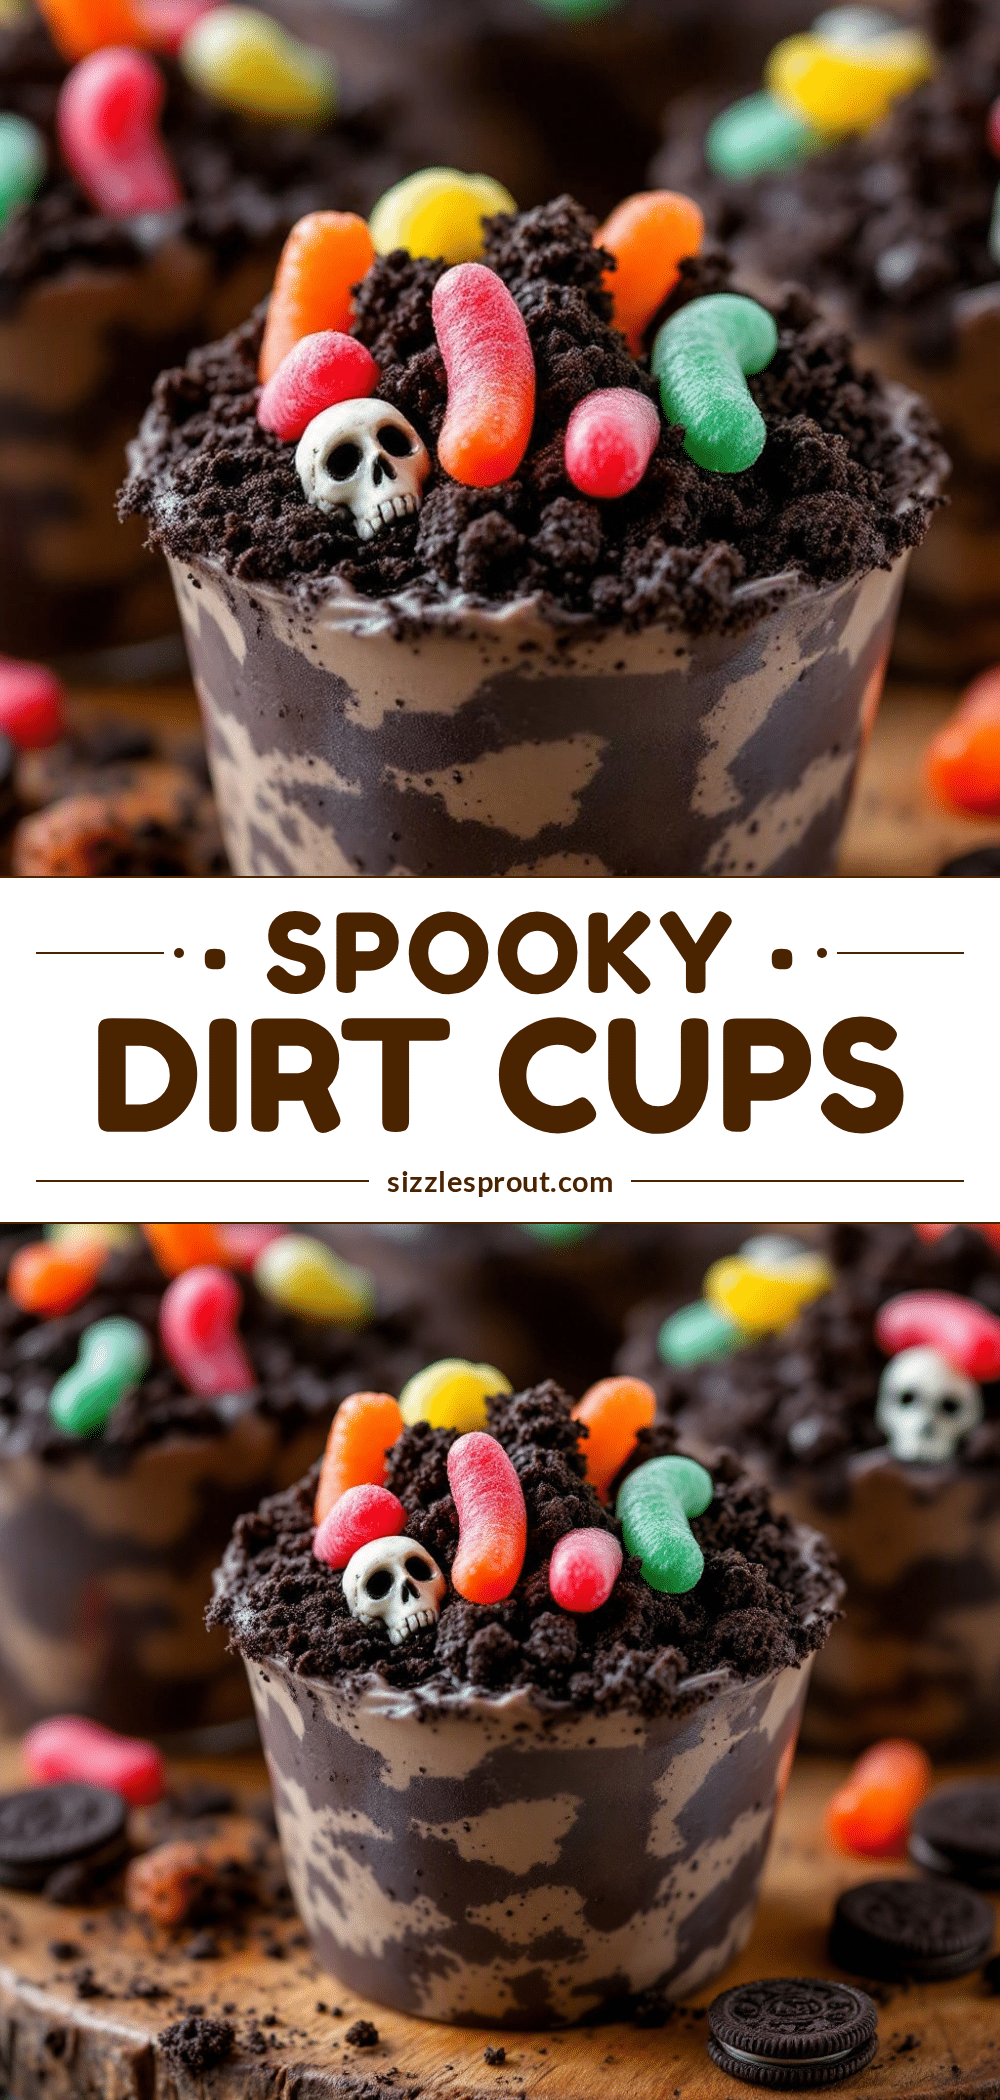
Creepy Halloween Dirt Cups with Gummy Worms

A simple, no-bake Halloween dessert featuring layers of chocolate cookie crumbs, vanilla pudding, and tangy cream cheese frosting, topped with gummy worms for a spooky effect.
- Prep Time: 20 minutes
- Cook Time: 0 minutes
- Total Time: 20 minutes
- Yield: 6-8 servings 1x
- Category: Dessert
- Cuisine: American
Ingredients
- 24–30 chocolate sandwich cookies (like Oreos)
- 4 tablespoons unsalted butter, melted
- 1 (3.4 oz) box instant vanilla pudding mix
- 2 cups cold whole milk
- 1 (8 oz) package full-fat cream cheese, softened
- 2 tablespoons powdered sugar
- 2 tablespoons heavy cream or half-and-half
- Gummy worms for decoration
- Optional: Mini chocolate chips
Instructions
- Crush the chocolate sandwich cookies into fine crumbs with some small chunks remaining, resembling moist soil.
- Pour the melted butter over the cookie crumbs and mix until evenly coated and resembling wet sand.
- In a separate bowl, whisk the instant vanilla pudding mix and cold milk vigorously for 2 minutes until thickened.
- In another bowl, beat the softened cream cheese, powdered sugar, and heavy cream with an electric mixer until smooth and fluffy.
- Assemble the cups by adding a layer of cookie crumbs at the bottom.
- Spoon a layer of vanilla pudding over the crumbs.
- Add a layer of the cream cheese mixture over the pudding.
- Top with another layer of cookie crumbs to cover the cream cheese.
- Decorate with gummy worms by sticking them into the top layer of crumbs.
- Chill in the refrigerator for 15-20 minutes before serving to allow flavors to meld.
Notes
Ensure cream cheese is fully softened to avoid lumps. Do not crush cookies into dust; keep some texture for a realistic ‘dirt’ look. Store in the refrigerator for up to 24 hours; do not freeze as the texture may separate.
Nutrition
- Serving Size: 1 cup
- Calories: 275
- Sugar: 22
- Sodium: 150
- Fat: 18
- Saturated Fat: 10
- Carbohydrates: 28
- Fiber: 1
- Protein: 4
Keywords: Halloween, dessert, no-bake, dirt cups, gummy worms, easy treat, kid-friendly, party food


