Love this? Save it for later!
Share the inspiration with your friends
I burned focaccia into the bottom of my oven three times before I understood what I was actually doing wrong. Not the recipe, not the timing—me. I was rushing it. Pushing it. Treating sourdough like a quick bread when it wanted to be a slow dance. That first successful pan came out with a crust so crackly and golden, I actually texted a photo to my mom before I even sliced it. And the crumb? Soft, airy, full of those irregular holes that make you feel like you actually know what you’re doing. This crispy no-knead sourdough focaccia with rosemary became my redemption arc in the kitchen.
Look, I know sourdough can feel intimidating. The starter, the schedules, the whole “am I doing this right” anxiety that creeps in when you peek under the towel. But this recipe strips all that pressure away. No kneading. No stand mixer. Just time, patience, and a hot pan. The rosemary gets all crispy and fragrant in the olive oil, and that flaky salt on top? Honestly, it’s the best part. This is the bread that made me stop buying focaccia from the bakery. And once you try it, you’ll probably feel the same way.
I’ve been making this for about two years now, and it still surprises me how something so simple can feel so special. It’s the kind of bread that makes any meal feel like an occasion, even if it’s just soup on a Tuesday night.
Why You’ll Love This Recipe
This isn’t just another bread recipe. This is the one that actually works without stressing you out. I’ve tested it through cold winters, humid summers, and everything in between. Here’s why it earns a permanent spot in your rotation:
- No Kneading Required: You don’t need to work that dough at all. A few folds, some patience, and the gluten develops itself. Perfect for busy days or lazy weekends.
- Simple Pantry Ingredients: Flour, water, salt, olive oil, and your sourdough starter. That’s it. No yeast packets to worry about, no specialty flours unless you want to experiment.
- Incredibly Crispy Crust: That golden, shatteringly crisp bottom and top come from a hot pan and generous olive oil. It’s the texture that keeps you coming back for just one more piece.
- Perfect for Entertaining: This focaccia looks impressive but requires almost zero effort on the day you serve it. Make the dough ahead, let it rise, and bake when you’re ready.
- Better Than Bakery Quality: I’m not exaggerating. The flavor from a slow, cold fermentation beats anything you’ll buy. It’s tangy, complex, and deeply satisfying.
This recipe is different because it respects your time. It doesn’t demand constant attention. You mix it, fold it a few times, let it rest, and bake. The result is a focaccia that’s crisp on the outside, pillowy on the inside, and studded with fragrant rosemary and crunchy salt. It’s comfort food that makes you feel accomplished without the burnout.
What Ingredients You Will Need
This recipe uses simple, everyday ingredients that come together to create something truly special. The magic is in the technique, not the grocery list. Here’s what you’ll need:
- Sourdough Starter: 100g active, bubbly starter. Use it at its peak for the best rise. If your starter is sluggish, feed it a few times before starting. (I keep mine in the fridge and feed it the night before I plan to bake.)
- Bread Flour: 400g (about 3 cups). Bread flour gives the best structure and chewy texture. All-purpose works in a pinch, but the crumb won’t be as open. (I prefer King Arthur for consistent results.)
- Warm Water: 300g (about 1 ¼ cups). Use water around 85-90°F. Too hot will kill the natural yeast, too cold will slow fermentation. (Tap water that feels warm to the wrist is perfect.)
- Olive Oil: ¼ cup plus extra for the pan. Use a good quality extra virgin olive oil. It’s not just for cooking—it flavors the dough and creates that crispy crust. (Don’t skimp here; it makes a difference.)
- Fine Sea Salt: 8g (about 1 ½ teaspoons). Salt controls fermentation and adds flavor. I use fine sea salt because it dissolves evenly. (Table salt works but reduce slightly to avoid over-salting.)
- Fresh Rosemary: 2-3 sprigs, leaves removed and roughly chopped. Fresh is non-negotiable here. Dried rosemary won’t give you that same aromatic punch. (I grow a small pot on my windowsill just for this recipe.)
- Flaky Sea Salt: For finishing. Maldon or any flaky salt. That final sprinkle adds a satisfying crunch and burst of salinity. (This is optional but highly recommended.)
Substitution Notes: If you don’t have bread flour, use all-purpose and expect a slightly denser crumb. Need it whole wheat? Replace up to 50% of the bread flour with whole wheat flour, but add an extra tablespoon of water. For a gluten-free version, this recipe isn’t ideal, but you can try a 1:1 gluten-free flour blend—just know the texture will be different.
Equipment Needed
You don’t need a fancy kitchen to make this focaccia. Here’s what you’ll actually use:
- Digital Kitchen Scale: This is the most important tool. Measuring by weight ensures consistency every time. (A $15 scale works perfectly.)
- Large Mixing Bowl: Glass or ceramic works best. Metal is fine too. Just make sure it’s big enough for the dough to double.
- 9×13-inch Baking Pan: Metal or dark non-stick gives the crispiest bottom. Glass pans work but won’t brown as well. (I use a USA Pan for perfect edges.)
- Bench Scraper: Makes folding and transferring the dough so much easier. (A plastic dough scraper is cheap and worth every penny.)
- Plastic Wrap or a Shower Cap: To cover the dough during bulk fermentation. A reusable shower cap is my favorite hack—it fits perfectly over the bowl.
- Kitchen Towel: For covering the dough during the final proof. Use a lint-free one so fibers don’t stick.
- Pastry Brush (Optional): For brushing olive oil on top before baking. Your fingers work too, honestly.
If you don’t have a 9×13 pan, a 10-inch cast iron skillet works beautifully. Just adjust the baking time slightly—it might need an extra 5 minutes. And no scale? You can use measuring cups, but I really recommend getting one. It’s the difference between good focaccia and great focaccia.
Preparation Method
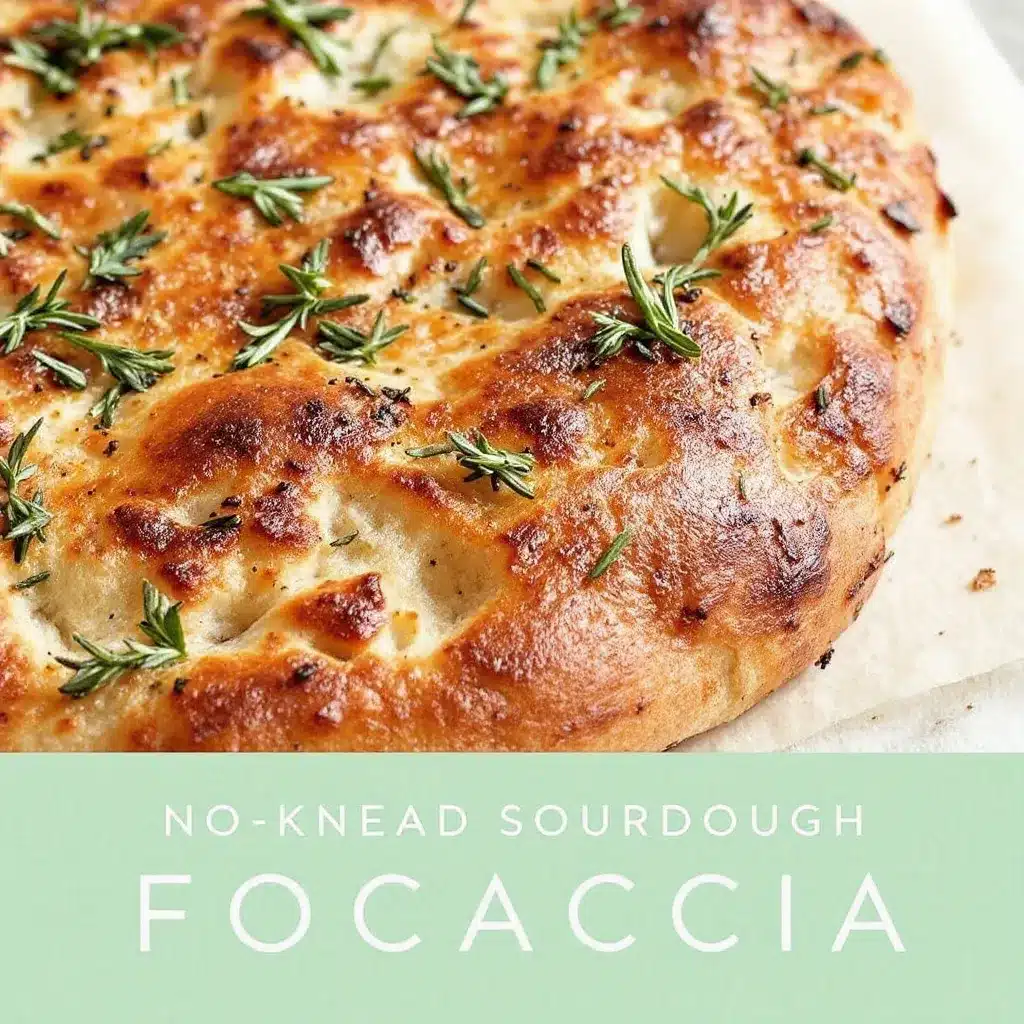
This is where the magic happens. Take your time with each step, and the dough will reward you.
- Mix the Dough: In a large bowl, combine 100g active sourdough starter and 300g warm water. Stir until the starter dissolves into the water—it should look milky. Add 400g bread flour and 8g fine sea salt. Mix with a spatula or your hand until no dry flour remains. The dough will be sticky and shaggy. That’s exactly what you want. Cover the bowl with plastic wrap and let it rest for 30 minutes. (This autolyse step helps the flour absorb water and makes the dough easier to handle later.)
- Perform the First Fold: After the rest, wet your hand slightly to prevent sticking. Grab one side of the dough, stretch it up, and fold it over the center. Rotate the bowl 90 degrees and repeat. Do this 4 times total, folding all sides into the center. The dough will start to feel smoother and more elastic. Cover and let it rest 30 minutes.
- Second and Third Folds: Repeat the folding process two more times at 30-minute intervals. After the third fold, the dough should feel bouncy and hold its shape slightly. You’ll notice small bubbles forming. That’s the sourdough doing its work. Cover the bowl and let it rest for the remainder of the bulk fermentation.
- Bulk Fermentation: Let the dough rise at room temperature (around 70-75°F) for 6-8 hours, or until it has doubled in size and looks bubbly and alive. The surface should be domed, not flat. If your kitchen is cold, it might take longer. If it’s warm, check earlier. (I usually start this in the morning and let it rise all day.)
- Cold Retard (Optional but Recommended): After bulk fermentation, cover the bowl tightly and place it in the refrigerator for 8-24 hours. This develops deeper flavor and makes the dough easier to handle. The cold fermentation is where the magic really happens—the tanginess intensifies, and the texture improves dramatically. (I’ve let it go up to 48 hours with excellent results.)
- Prepare the Pan: When you’re ready to bake, pour 3-4 tablespoons of olive oil into your 9×13 pan. Use your fingers to spread it evenly across the bottom and up the sides. The oil should pool slightly—this is what creates that crispy, fried-bottom crust.
- Transfer the Dough: If you cold-proofed the dough, let it sit at room temperature for 30 minutes first. Gently scrape the dough out of the bowl and into the oiled pan. Don’t deflate it too much—be gentle. Let it rest for 20 minutes so it relaxes.
- Stretch and Dimple: Using oiled fingertips, gently stretch the dough to fill the corners of the pan. If it resists, let it rest 10 minutes and try again. Once it fills the pan, dimple the entire surface with your fingers—press all the way down to the bottom of the pan. This creates those signature focaccia indentations and helps the oil pool on top. Drizzle with another tablespoon of olive oil and sprinkle with chopped fresh rosemary and flaky sea salt.
- Final Proof: Cover the pan with a kitchen towel and let the dough rise for 2-3 hours at room temperature, or until it looks puffy and jiggly. It should have risen noticeably—about 1 inch in the pan. (If you’re in a hurry, 1.5 hours in a warm spot works too.)
- Bake: Preheat your oven to 450°F (230°C) with a rack in the middle. Bake the focaccia for 25-30 minutes, until the top is deep golden brown and the edges are crispy and pulling away from the pan. The bottom should sound hollow when tapped. (If it’s browning too fast, tent with foil for the last 5 minutes.)
- Cool: Let the focaccia cool in the pan for 5 minutes, then transfer to a wire rack. Don’t skip this—cooling on a rack keeps the bottom crispy. Let it cool for at least 20 minutes before slicing. (I know it’s hard to wait, but the texture improves as it cools.)
Cooking Tips & Techniques
I’ve learned a few things the hard way so you don’t have to. Here’s what makes the difference between good focaccia and unforgettable focaccia:
- Don’t Skip the Cold Ferment: I used to bake straight from bulk fermentation, and the flavor was flat. That overnight rest in the fridge transforms the dough. The sourdough develops complexity, and the crust gets so much crispier. It’s worth the wait.
- Use Enough Oil: The first time I made this, I was stingy with the olive oil because I thought it would be greasy. Wrong. That generous pool of oil in the pan is what creates the crispy, almost fried bottom. Don’t be afraid of it. (I use about ¼ cup total between the pan and the top.)
- Wet Your Fingers: When dimpling the dough, dip your fingers in water or oil first. The dough is sticky, and dry fingers will just pull it up. Wet fingers glide right through. (I keep a small bowl of water nearby just for this.)
- Watch the Temperature: Sourdough is temperature-sensitive. If your kitchen is cold (below 68°F), the dough will take forever to rise. I use the oven with the light on as a makeshift proofing box. Just don’t turn the oven on—you want warmth, not heat.
- Let It Cool: I know the smell is intoxicating. But cutting into hot focaccia will give you a gummy interior. Let it rest on a wire rack for at least 20 minutes. The steam needs to escape, and the structure needs to set. (I’ve ruined many slices by being impatient.)
One more thing: if your focaccia doesn’t rise as much as you expected, don’t panic. It might be your starter’s activity level or the temperature. It will still taste amazing. Every focaccia is a learning experience.
Variations & Adaptations
This recipe is a great base for experimentation. Here are some variations I’ve tried and loved:
- Garlic and Herb Focaccia: Add 3-4 minced garlic cloves to the olive oil before pouring it into the pan. Let it sit for 10 minutes to infuse. Top with fresh thyme and oregano along with the rosemary. (This is my go-to for pasta nights.)
- Caramelized Onion and Goat Cheese: Top the dimpled dough with thinly sliced caramelized onions and crumbled goat cheese before baking. The onions get sweet and jammy, and the cheese gets all melty. (Perfect for a light lunch with a salad.)
- Everything Bagel Focaccia: Skip the rosemary and sprinkle everything bagel seasoning (sesame seeds, poppy seeds, garlic flakes, onion flakes, salt) over the top before baking. It’s incredible for breakfast sandwiches. (I use this for egg and cheese sandwiches all week.)
- Sun-Dried Tomato and Olive: Press halved cherry tomatoes and sliced Kalamata olives into the dough before the final proof. The tomatoes roast and get sweet, and the olives add a briny punch. (Great for Mediterranean-inspired meals.)
- Cheese Lovers: Sprinkle shredded Parmesan or pecorino over the top during the last 5 minutes of baking. It melts into the crust and gets all crispy. (I’ve also used crumbled feta with great results.)
For dietary needs: use gluten-free 1:1 flour blend (expect a denser crumb), or try a dairy-free version by skipping any cheese toppings. The base recipe is naturally vegan—just use a vegan-friendly sugar if you add any sweet toppings.
Serving & Storage Suggestions
This focaccia is versatile. Here’s how to enjoy it at its best:
- Serving Temperature: Serve warm or at room temperature. Warm is best—pop slices in a 350°F oven for 5 minutes to re-crisp. (Microwaving will make it soggy, so avoid that.)
- Pairing Ideas: This focaccia is perfect alongside a bowl of tomato soup, a hearty salad, or grilled meats. It’s also amazing as sandwich bread—slice it horizontally and fill with roasted vegetables, mozzarella, and pesto. (I’ve used it for paninis that rival any deli.)
- Storage: Store leftover focaccia in an airtight container at room temperature for up to 3 days. Do not refrigerate—the fridge will dry it out and make the crust tough. (I learned this the hard way after a sad, stale slice.)
- Freezing: Freeze for up to 3 months. Wrap tightly in plastic wrap, then foil. Thaw at room temperature and reheat in a 350°F oven for 10 minutes. (I freeze individual slices for quick lunches.)
- Flavor Development: The flavor actually gets better on day two. The rosemary and olive oil meld together, and the salt mellows out. If you can resist eating it all immediately, you’ll be rewarded. (I’ve never managed to keep it past day two, but theoretically…)
Nutritional Information & Benefits
Per serving (1/8 of the recipe):
- Calories: Approximately 220
- Carbohydrates: 35g
- Protein: 6g
- Fat: 7g
- Fiber: 1g
- Sodium: 450mg
This focaccia offers some surprising benefits. The sourdough fermentation process breaks down phytic acid, making the nutrients in the flour more bioavailable. It also produces beneficial bacteria that support gut health. Olive oil provides healthy monounsaturated fats and antioxidants. Rosemary contains compounds with anti-inflammatory properties. (It’s not health food, but it’s certainly not junk—everything in moderation.)
Dietary Notes: This recipe is naturally vegan and dairy-free. It contains gluten, so it’s not suitable for celiacs without modification. The sodium content is moderate—you can reduce the flaky salt on top if you’re watching your intake.
Conclusion
This crispy no-knead sourdough focaccia with rosemary is the bread that made me fall in love with baking all over again. It’s simple enough for a Tuesday night but impressive enough for a dinner party. The tangy, complex flavor from the slow fermentation, the crackly crust from the generous olive oil, the fragrant rosemary—it all comes together in a way that feels both humble and special.
I hope you give this recipe a try. Don’t worry about making it perfect the first time. Sourdough is forgiving, and every batch teaches you something. Maybe your dimples aren’t uniform, or your crust is a little darker than you wanted. That’s okay. It’s still going to be delicious, and you’ll get better each time.
If you make this focaccia, I’d love to hear about it. Leave a comment below and tell me how it turned out. Did you try a variation? Serve it with something amazing? Share your stories—I read every single one. And if you’re looking for more sourdough inspiration, check out my cozy pumpkin sourdough bread or my original no-knead focaccia recipe for more ideas. Happy baking!
Frequently Asked Questions
Can I use active dry yeast instead of sourdough starter?
Yes, you can. Use 1 teaspoon of active dry yeast dissolved in the warm water. Skip the sourdough starter entirely. The flavor won’t be as tangy, but you’ll still get a great focaccia. Let the dough rise for 2-3 hours at room temperature instead of the long bulk fermentation.
Why is my focaccia dense and not airy?
This usually happens for a few reasons. Your starter might not have been active enough—use it at its bubbly peak. The dough might have been under-proofed (not enough rise time). Or your water was too hot and killed the natural yeast. Try extending the bulk fermentation and checking your water temperature.
Can I make this dough ahead of time?
Absolutely. The cold retard step is perfect for make-ahead baking. You can keep the dough in the refrigerator for up to 48 hours after bulk fermentation. Just bring it to room temperature for 30 minutes before transferring to the pan and proceeding with the final proof.
How do I get a crispier bottom crust?
Use a metal pan (not glass or ceramic) and be generous with the olive oil. Preheat the pan slightly if you can—pour the oil in and place it in the oven for 5 minutes before adding the dough. And make sure to cool the focaccia on a wire rack, not in the pan, so steam doesn’t soften the bottom.
What if I don’t have fresh rosemary?
Fresh rosemary is best, but you can substitute dried rosemary in a pinch. Use about 1 tablespoon of dried rosemary, crushed between your fingers to release the oils. Other herbs like fresh thyme, oregano, or even dried Italian seasoning work well too. Or skip the herbs entirely for a plain focaccia that’s still delicious.
Pin This Recipe!
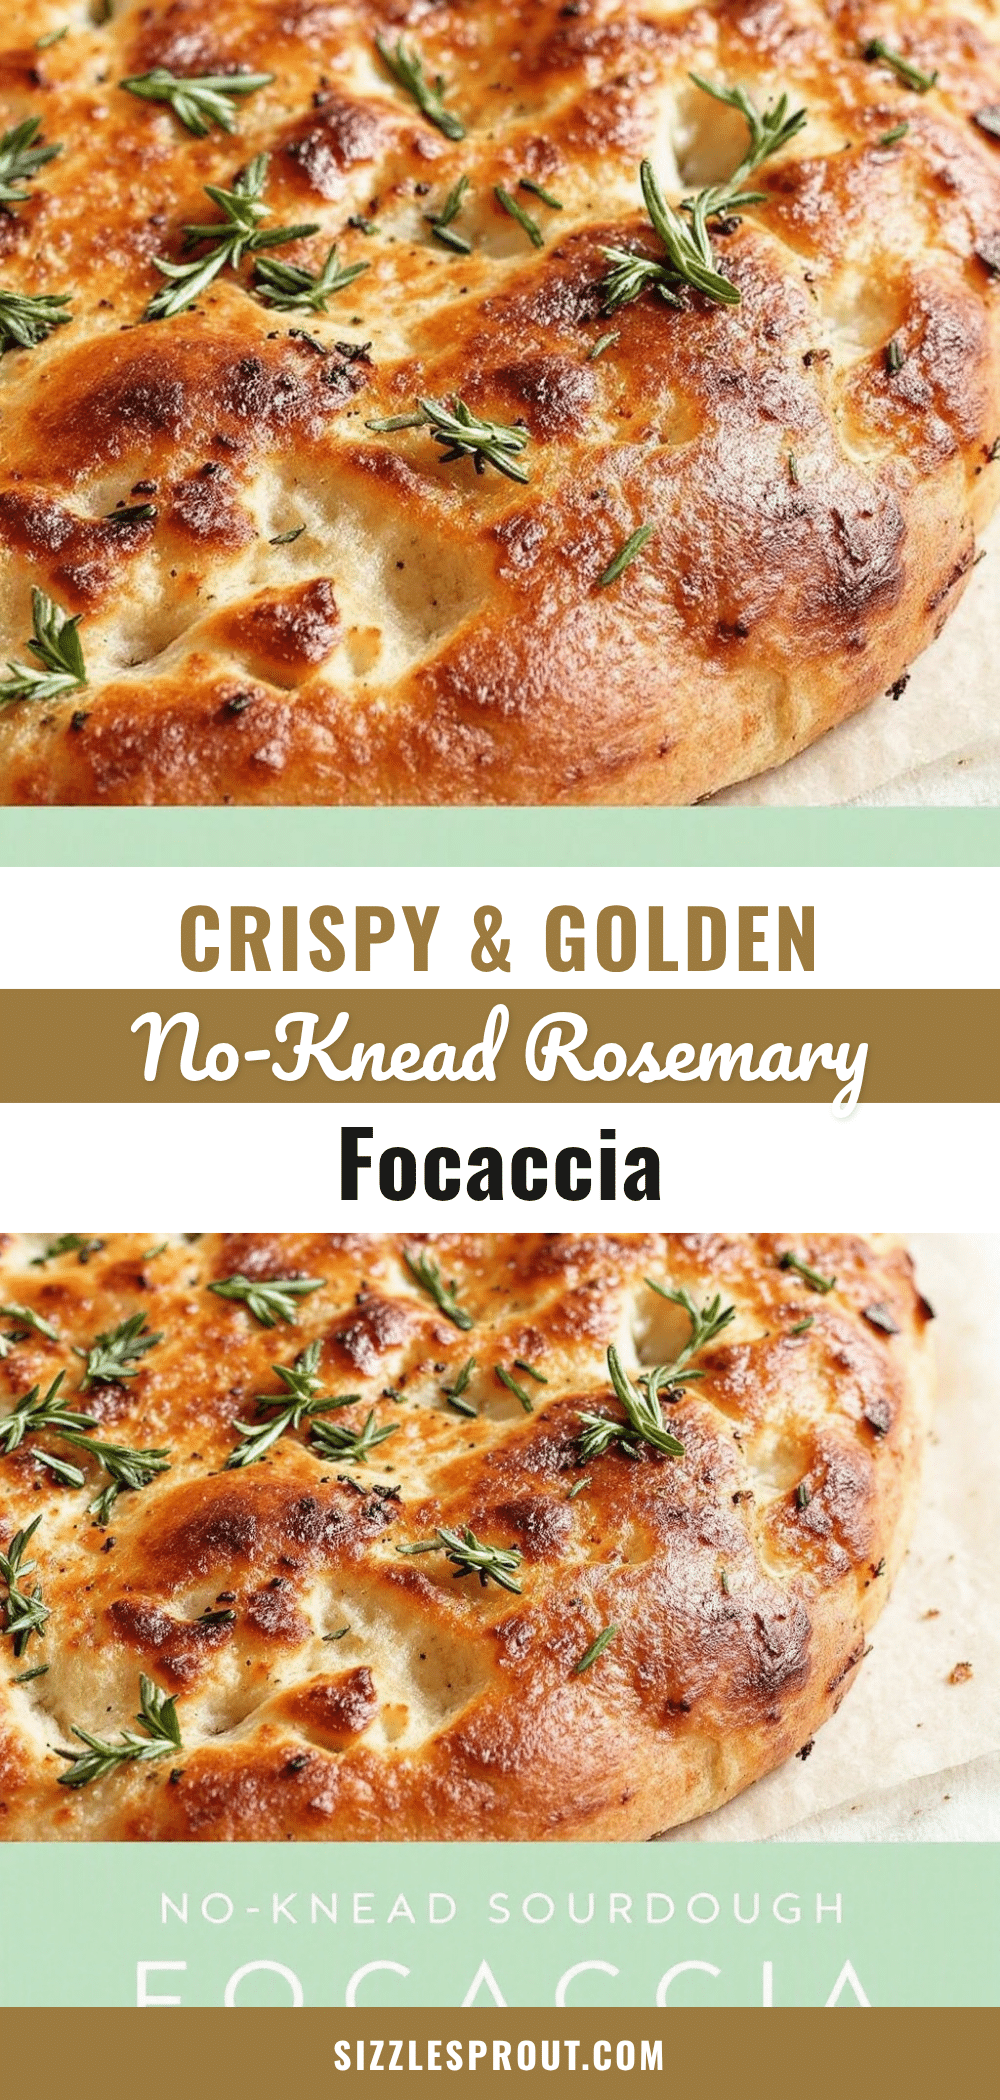
Crispy No-Knead Sourdough Focaccia with Rosemary

This crispy no-knead sourdough focaccia with rosemary is the bread that made me stop buying focaccia from the bakery. No kneading, no stand mixer—just time, patience, and a hot pan for a crackly crust and pillowy interior.
- Prep Time: 20 minutes
- Cook Time: 30 minutes
- Total Time: 8-24 hours (including fermentation and optional cold retard)
- Yield: 8 servings 1x
- Category: Bread
- Cuisine: Italian
Ingredients
- 100g active sourdough starter (about 1/2 cup)
- 400g bread flour (about 3 cups)
- 300g warm water (about 1 1/4 cups, 85-90°F)
- 1/4 cup olive oil, plus extra for the pan
- 8g fine sea salt (about 1 1/2 teaspoons)
- 2–3 sprigs fresh rosemary, leaves removed and chopped
- Flaky sea salt for finishing (optional)
Instructions
- Mix the Dough: In a large bowl, combine 100g active sourdough starter and 300g warm water. Stir until the starter dissolves. Add 400g bread flour and 8g fine sea salt. Mix with a spatula or your hand until no dry flour remains. The dough will be sticky and shaggy. Cover with plastic wrap and let rest for 30 minutes.
- Perform the First Fold: After the rest, wet your hand slightly. Grab one side of the dough, stretch it up, and fold it over the center. Rotate the bowl 90 degrees and repeat. Do this 4 times total. Cover and let rest 30 minutes.
- Second and Third Folds: Repeat the folding process two more times at 30-minute intervals. After the third fold, the dough should feel bouncy and hold its shape slightly. Cover and let rest for the remainder of bulk fermentation.
- Bulk Fermentation: Let the dough rise at room temperature (70-75°F) for 6-8 hours, or until doubled in size and bubbly.
- Cold Retard (Optional but Recommended): After bulk fermentation, cover the bowl tightly and refrigerate for 8-24 hours for deeper flavor.
- Prepare the Pan: When ready to bake, pour 3-4 tablespoons of olive oil into a 9×13-inch baking pan. Spread evenly across the bottom and up the sides.
- Transfer the Dough: If cold-proofed, let dough sit at room temperature for 30 minutes. Gently scrape dough into the oiled pan. Let rest for 20 minutes.
- Stretch and Dimple: Using oiled fingertips, gently stretch dough to fill the pan corners. Dimple the entire surface with your fingers, pressing all the way to the bottom. Drizzle with another tablespoon of olive oil and sprinkle with chopped rosemary and flaky sea salt.
- Final Proof: Cover the pan with a kitchen towel and let rise for 2-3 hours at room temperature, until puffy and jiggly (about 1 inch in the pan).
- Bake: Preheat oven to 450°F (230°C). Bake for 25-30 minutes, until deep golden brown and edges are crispy. The bottom should sound hollow when tapped.
- Cool: Let cool in the pan for 5 minutes, then transfer to a wire rack. Cool for at least 20 minutes before slicing.
Notes
For a crispier bottom crust, use a metal pan and be generous with olive oil. The cold retard step is highly recommended for deeper flavor. If your kitchen is cold, use the oven with the light on as a proofing box. Let the focaccia cool completely on a wire rack to maintain crispiness.
Nutrition
- Serving Size: 1/8 of recipe
- Calories: 220
- Sodium: 450
- Fat: 7
- Saturated Fat: 1
- Carbohydrates: 35
- Fiber: 1
- Protein: 6
Keywords: sourdough focaccia, no-knead bread, rosemary focaccia, crispy focaccia, homemade bread, easy sourdough recipe


