Love this? Save it for later!
Share the inspiration with your friends
Late October, and the only thing I want is a little ramekin of warm baked apple crisp. The kitchen is quiet, the windows are fogged up from the steam of a kettle I forgot I turned on, and the only light comes from the oven hood. I peel one apple—a Honeycrisp, because that is what I grabbed from the farmers market last Saturday—and the scent of it fills the small space. It is not a big production. No mixer, no stand, no complicated layers. Just a bowl, a knife, a little dish, and that particular kind of silence that feels like permission to slow down.
I discovered this recipe by accident (honestly, most good things in my kitchen happen that way). I had a single apple left in the fruit bowl, a craving that would not quit, and zero desire to make a whole 9×13 pan of dessert. Because let’s be real—who needs eight servings of apple crisp sitting on the counter when you are just one person, or maybe two people who want something warm after dinner without leftovers for a week? That is how this ramekin-sized version was born. It is not a scaled-down afterthought. It is the perfect little portion, designed from the ground up to fit in those cute ceramic dishes you probably already own.
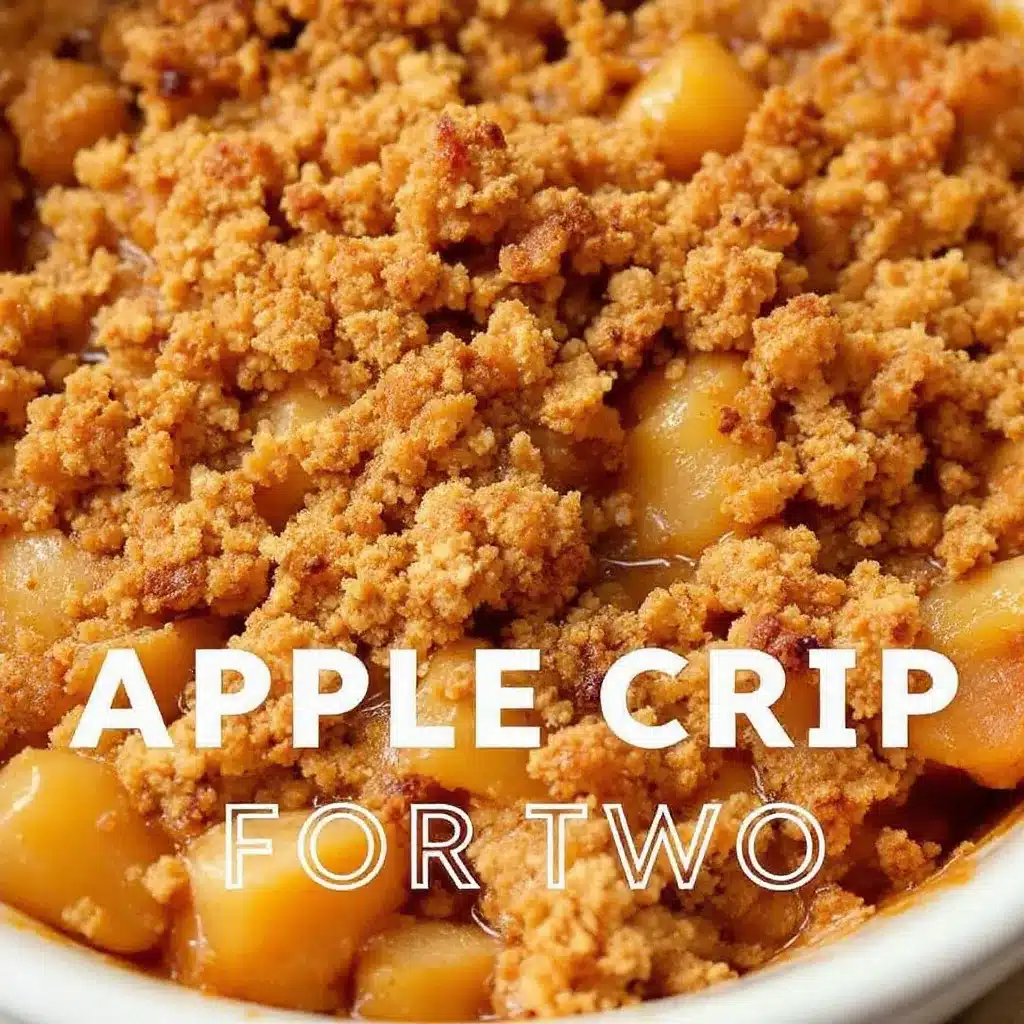
I have made this cozy baked apple crisp for two more times than I can count now, and it still surprises me how something so small can feel so complete. The apples get tender and jammy, the topping turns golden and crunchy, and the whole thing fits in the palm of your hand. There is something about eating dessert out of a ramekin that feels personal, like the meal was made just for you. And honestly? It was.
Why You Will Love This Recipe
Let me tell you why this little dessert has earned a permanent spot in my recipe rotation. I have tested it about six times (my taste buds took one for the team), and every single batch convinced me more that this is the best way to make apple crisp when you do not need a crowd.
- Perfect for Two: No more staring at a giant pan of leftover crisp wondering what to do with it. This recipe makes exactly two servings, so you can enjoy it fresh without the guilt of waste.
- Ramekin-Ready: These bake right in standard 6-ounce ramekins, which means minimal cleanup and maximum cute factor. Plus, everyone gets their own little dish.
- Simple Ingredients: You probably have everything in your kitchen right now. Apples, oats, flour, butter, brown sugar, cinnamon—pantry staples that come together like magic.
- Fast and Easy: From start to warm-out-of-the-oven, you are looking at about 35 minutes. That is faster than driving to the store for a slice of pie.
- Customizable: Swap the apples, change the spices, add nuts or dried fruit—this recipe is a template for whatever you are craving.
- Comfort Food, Miniaturized: There is something deeply satisfying about having your own personal dessert. It feels special without being fussy.
I have made this for weeknight cravings, for a quiet Sunday night with a movie, and even for a small dinner party where everyone got their own ramekin with a scoop of vanilla ice cream melting on top. It never fails to get that little oh, this is lovely reaction. That is the kind of recipe worth keeping.
What Ingredients You Will Need
This recipe uses simple, wholesome ingredients to deliver bold flavor and satisfying texture without the fuss. Most of these are pantry staples, which is exactly what you want when a craving hits unexpectedly.
For the Apple Filling
- 1 large apple (about 200g), peeled, cored, and diced into ½-inch cubes (I recommend Honeycrisp, Granny Smith, or Braeburn for the best balance of sweet and tart)
- 1 tablespoon granulated sugar (15g)
- 1 tablespoon brown sugar, packed (15g)
- ½ teaspoon ground cinnamon
- ⅛ teaspoon ground nutmeg (freshly grated if you have it)
- 1 teaspoon lemon juice (fresh squeezed, about half a small lemon)
- 1 teaspoon cornstarch (this helps thicken the juices so they are not watery)
- 1 tablespoon unsalted butter, cut into small pieces (14g)
For the Crisp Topping
- ¼ cup old-fashioned rolled oats (25g) (do not use instant oats here—they get mushy)
- ¼ cup all-purpose flour (30g)
- ¼ cup brown sugar, packed (50g)
- ¼ teaspoon ground cinnamon
- Pinch of salt (trust me on this—it balances the sweetness)
- 2 tablespoons unsalted butter, cold and cut into small cubes (28g)
- 2 tablespoons chopped pecans or walnuts (optional, but highly recommended for crunch)
A few notes on ingredients: I prefer using old-fashioned rolled oats because they hold their texture during baking. Quick oats turn into a paste, and steel-cut oats stay too chewy. For the apples, you want something that holds its shape—Honeycrisp is my go-to, but Granny Smith gives you that lovely tart contrast. If you only have one type of apple on hand, do not stress. I have used Gala and Fuji before, and they work fine (just a little softer).
For the butter, use unsalted so you control the salt level. If you only have salted butter, just skip the pinch of salt in the topping. And if you are out of brown sugar, you can mix 1 tablespoon of molasses with ¼ cup of white sugar as a quick substitute. I have done this more times than I care to admit.
Equipment Needed
The beauty of this recipe is that it does not require much gear. Here is what you will need:
- Two 6-ounce ramekins (standard size, the kind you would use for crème brûlée or individual soufflés)
- Small mixing bowl (for the topping)
- Medium mixing bowl (for the apple filling)
- Paring knife or chef’s knife (for dicing the apple)
- Cutting board
- Measuring spoons and cups
- Baking sheet (to place the ramekins on—catches any drips and makes handling easier)
- Pastry cutter or fork (for cutting butter into the topping)
If you do not have ramekins, you can use small oven-safe bowls or even a 4-inch cast iron skillet. I have made this in a little enameled cast iron dish before, and it worked beautifully (just watch the baking time—cast iron holds heat longer). A baking sheet is not strictly necessary, but it saves you from a sticky oven floor if the filling bubbles over. And honestly, I always forget to use one and then regret it. Learn from my mistakes.
For the topping, a pastry cutter is nice but not essential. You can use two forks, a food processor (pulse just a few times), or even your fingertips. Cold hands make better pastry, so if your hands run warm, rinse them in cold water first.
Preparation Method
Follow these steps, and you will have two perfect little crisps in about 35 minutes. I have included time estimates and sensory cues so you know exactly what to look for.
Step 1: Preheat and Prep (5 minutes)
Preheat your oven to 375°F (190°C). Place a baking sheet on the middle rack to heat up as the oven warms (this helps the bottoms of the ramekins cook evenly). While the oven heats, peel and core your apple, then dice it into ½-inch cubes. You want them roughly the same size so they cook evenly. Do not go too small or they will turn to mush; too large and they will stay crunchy.
Step 2: Make the Apple Filling (5 minutes)
In a medium bowl, combine the diced apple, granulated sugar, brown sugar, cinnamon, nutmeg, lemon juice, and cornstarch. Toss everything together with a spoon until the apple pieces are evenly coated. You will see the sugars start to dissolve and the mixture become slightly glossy. Let it sit for a couple of minutes while you make the topping—this gives the apples time to release a little juice, which will turn into that lovely thick syrup during baking.
Step 3: Make the Crisp Topping (5 minutes)
In a small bowl, whisk together the oats, flour, brown sugar, cinnamon, and salt. Add the cold butter cubes. Using a pastry cutter, two forks, or your fingertips, work the butter into the dry ingredients until the mixture resembles coarse crumbs with some pea-sized butter pieces remaining. If you are using nuts, stir them in now. Do not overwork the mixture—you want some texture, not a paste. The topping should clump together when you squeeze a handful, then break apart easily.
Step 4: Assemble the Ramekins (3 minutes)
Divide the apple mixture evenly between the two ramekins. The filling should come almost to the top—the apples will soften and settle as they bake. Dot the top of each ramekin with the small pieces of butter you set aside (this adds richness and helps the filling stay moist). Sprinkle the crisp topping evenly over the apples, pressing down gently so it sticks. Do not pack it tight—you want air gaps for crispiness.
Step 5: Bake (25 minutes)
Place the ramekins on the preheated baking sheet. Bake for 22-25 minutes, until the topping is golden brown and the filling is bubbling around the edges. You should see thick, syrupy bubbles breaking through the topping in a few places. If the topping is browning too quickly (after about 15 minutes), loosely tent a piece of foil over the ramekins. The apples should be tender when pierced with a fork—if they are still firm, give them another 3-5 minutes.
Step 6: Cool and Serve (5 minutes)
Remove the ramekins from the oven and let them cool on a wire rack for at least 5 minutes. This is not just patience—the filling is lava-hot straight out of the oven, and it needs time to set up. The sauce will thicken slightly as it cools. Serve warm, with a scoop of vanilla ice cream or a dollop of whipped cream if you are feeling fancy.
Cooking Tips and Techniques
I have made this recipe enough times to learn a few things the hard way. Here is what I wish someone had told me:
Do not skip the cornstarch. The first time I made this, I left it out thinking it would not matter. Big mistake. The filling was watery and the topping got soggy. Cornstarch thickens the apple juices into a luscious syrup that clings to every spoonful. It is non-negotiable.
Cold butter is your friend. For the topping, the butter needs to be straight from the fridge. Warm butter gets absorbed into the flour and oats, making the topping dense and greasy instead of crumbly and crisp. If your kitchen is warm, pop the topping in the fridge for 10 minutes before baking.
Watch the clock, but trust your senses. Oven temperatures vary wildly. My oven runs hot, so I start checking at 20 minutes. Look for golden brown topping and bubbling filling. Listen for a gentle sizzle. Smell for that caramelized apple aroma. Your senses are better than any timer.
Let the apples sit. After tossing the apples with sugar and spices, let them rest for 5 minutes before assembling. This draws out some moisture, which mixes with the sugar to create a natural syrup. It is a small step that makes a big difference in texture.
Bake on a sheet pan. I mentioned this before, but it bears repeating. Even if you are careful, the filling can bubble over. A sheet pan saves you from scrubbing the bottom of your oven. Plus, it makes transferring the hot ramekins much safer.
Do not overfill. Leave about ¼ inch of space at the top of each ramekin. The filling expands as it bakes, and you do not want it spilling over and burning on the pan. Trust me—I have cleaned that mess up before.
Variations and Adaptations
One of the best things about this recipe is how easy it is to change up. Here are some variations I have tried and loved:
Apple Variety Swap
Try using two different apple varieties in the same batch. I love a mix of Honeycrisp for sweetness and Granny Smith for tartness. The contrast in textures is delightful—some pieces stay firm, others get jammy.
Spice It Up
Add ¼ teaspoon of cardamom or ginger to the filling for a warming twist. Or try a pinch of cloves and allspice for a more traditional apple pie spice blend. I once added a tiny pinch of black pepper to the filling (inspired by a friend who puts it in her apple pie), and it was surprisingly good—the heat brings out the sweetness.
Gluten-Free Version
Swap the all-purpose flour for a 1:1 gluten-free baking flour blend. Oats are naturally gluten-free, but check the label if you are sensitive (some are processed in facilities that handle wheat). I have tested this with Bob’s Red Mill gluten-free flour, and the topping turned out perfectly crisp.
Vegan Adaptation
Use cold vegan butter (I like Miyoko’s or Earth Balance) in the topping and skip the butter pieces on top of the filling. The crisp topping works beautifully with plant-based butter—just make sure it is cold. For serving, use coconut whipped cream or your favorite dairy-free ice cream.
Add Some Crunch
Stir 2 tablespoons of chopped pecans, walnuts, or even sliced almonds into the topping. Toasted coconut flakes are also fantastic—add them in the last 5 minutes of baking so they do not burn. I once added crushed graham crackers to the topping (because I had some leftover from a cheesecake), and it was absurdly good.
Berry-Apple Combination
Toss a handful of fresh or frozen cranberries, blueberries, or raspberries into the apple filling. Reduce the sugar slightly if using sweet berries, or keep it as-is for tart cranberries. The berries burst and create little pockets of jammy goodness.
Serving and Storage Suggestions
These ramekin crisps are best served warm, straight from the oven. The contrast between the hot, tender apples and the cold ice cream is pure magic. Here are my favorite ways to serve them:
- With vanilla ice cream (classic and perfect—the melting cream mixes with the syrupy apples)
- With a dollop of whipped cream (lighter option, still indulgent)
- With a drizzle of caramel sauce (for when you want to go all out)
- With a sprinkle of flaky sea salt (trust me—it makes the sweetness pop)
- On its own (the topping is so good, you might not want anything else)
If you have leftovers (unlikely, but possible), cover the ramekins with plastic wrap or foil and store them in the refrigerator for up to 3 days. The topping will lose some of its crunch, but the flavors will meld beautifully. To reheat, pop the ramekin in a 350°F oven for 10-12 minutes, or microwave for 45 seconds (the topping will be softer, but it is still delicious).
I do not recommend freezing these—the apples get mushy and the topping loses its texture. But honestly, they are so small and so good that I have never had leftovers long enough to worry about freezing.
These crisps also pair wonderfully with a hot cup of coffee or tea. I love serving them alongside a warm pumpkin chai latte for a cozy fall evening, or with a simple mug of spiced apple cider. The combination is pure comfort.
Nutritional Information and Benefits
Here is the estimated nutritional breakdown for one ramekin (without ice cream or whipped cream):
| Nutrient | Amount per Serving |
|---|---|
| Calories | 310 |
| Total Fat | 14g |
| Saturated Fat | 8g |
| Carbohydrates | 47g |
| Fiber | 4g |
| Sugar | 31g |
| Protein | 3g |
This dessert is not health food, but it does have some redeeming qualities. Apples are a great source of fiber and vitamin C, and the oats provide whole grains and a little protein. The cinnamon has anti-inflammatory properties, and the nuts (if you add them) offer healthy fats and a bit of crunch.
For a lighter version, you can reduce the brown sugar in the filling by half and skip the nuts. The topping will still be plenty sweet. Or serve it with Greek yogurt instead of ice cream for a protein boost. I have done this for breakfast before (no judgment, please), and it was surprisingly satisfying.
If you are watching your sugar intake, try using a sugar substitute like monk fruit or erythritol in the filling. The topping is trickier to substitute because sugar is key for texture, but you can reduce the amount by a tablespoon without losing too much crunch.
Conclusion
This cozy baked apple crisp for two is the kind of dessert that makes you feel taken care of. It is small enough to not be overwhelming, but satisfying enough to feel like a real treat. The apples get tender and jammy, the topping gets golden and crunchy, and the whole thing fits in the palm of your hand. It is comfort food, miniaturized and personalized.
I love that this recipe is flexible enough to work with whatever apples you have, whatever spices you are in the mood for, and whatever toppings you want to add. It is a template for cozy, not a rigid formula. And honestly, that is the best kind of recipe to have in your back pocket.
If you make this, I would love to hear about it. Did you use a different apple variety? Add nuts? Serve it with something unexpected? Drop a comment below and let me know how it turned out. And if you are looking for more cozy fall desserts, you might enjoy this cozy pumpkin sourdough bread or these pumpkin cream cheese muffins—both are perfect for those crisp autumn days.
Go ahead, grab that single apple sitting in your fruit bowl, and make yourself something warm. You deserve it.
Frequently Asked Questions
Can I use a different type of apple?
Absolutely. Honeycrisp, Granny Smith, Braeburn, and Fuji all work well. Softer apples like McIntosh will break down more, creating a saucier filling. Firmer apples hold their shape better. Mix and match for the best of both worlds.
Can I make this in a larger dish instead of ramekins?
Yes. You can double or triple the recipe and bake it in a small baking dish (like a 6-inch skillet or an 8×8 pan). Increase the baking time by 10-15 minutes, and check for doneness by looking for bubbling filling and a golden topping.
Can I prepare these ahead of time?
You can assemble the ramekins up to 24 hours in advance. Cover them with plastic wrap and refrigerate. When ready to bake, add 5 minutes to the baking time (since the filling will be cold). The topping may brown a little faster, so keep an eye on it.
Can I use quick oats instead of old-fashioned oats?
You can, but the texture will be different. Quick oats absorb more liquid and become softer, almost like a porridge topping. If that sounds good to you, go for it. I prefer the chewiness of old-fashioned oats, but your kitchen, your rules.
Can I freeze the unbaked ramekins?
I do not recommend freezing these. The apples release a lot of water when thawed, which makes the filling watery and the topping soggy. These are best made fresh, but they keep well in the fridge for a few days if you have leftovers.
Pin This Recipe!
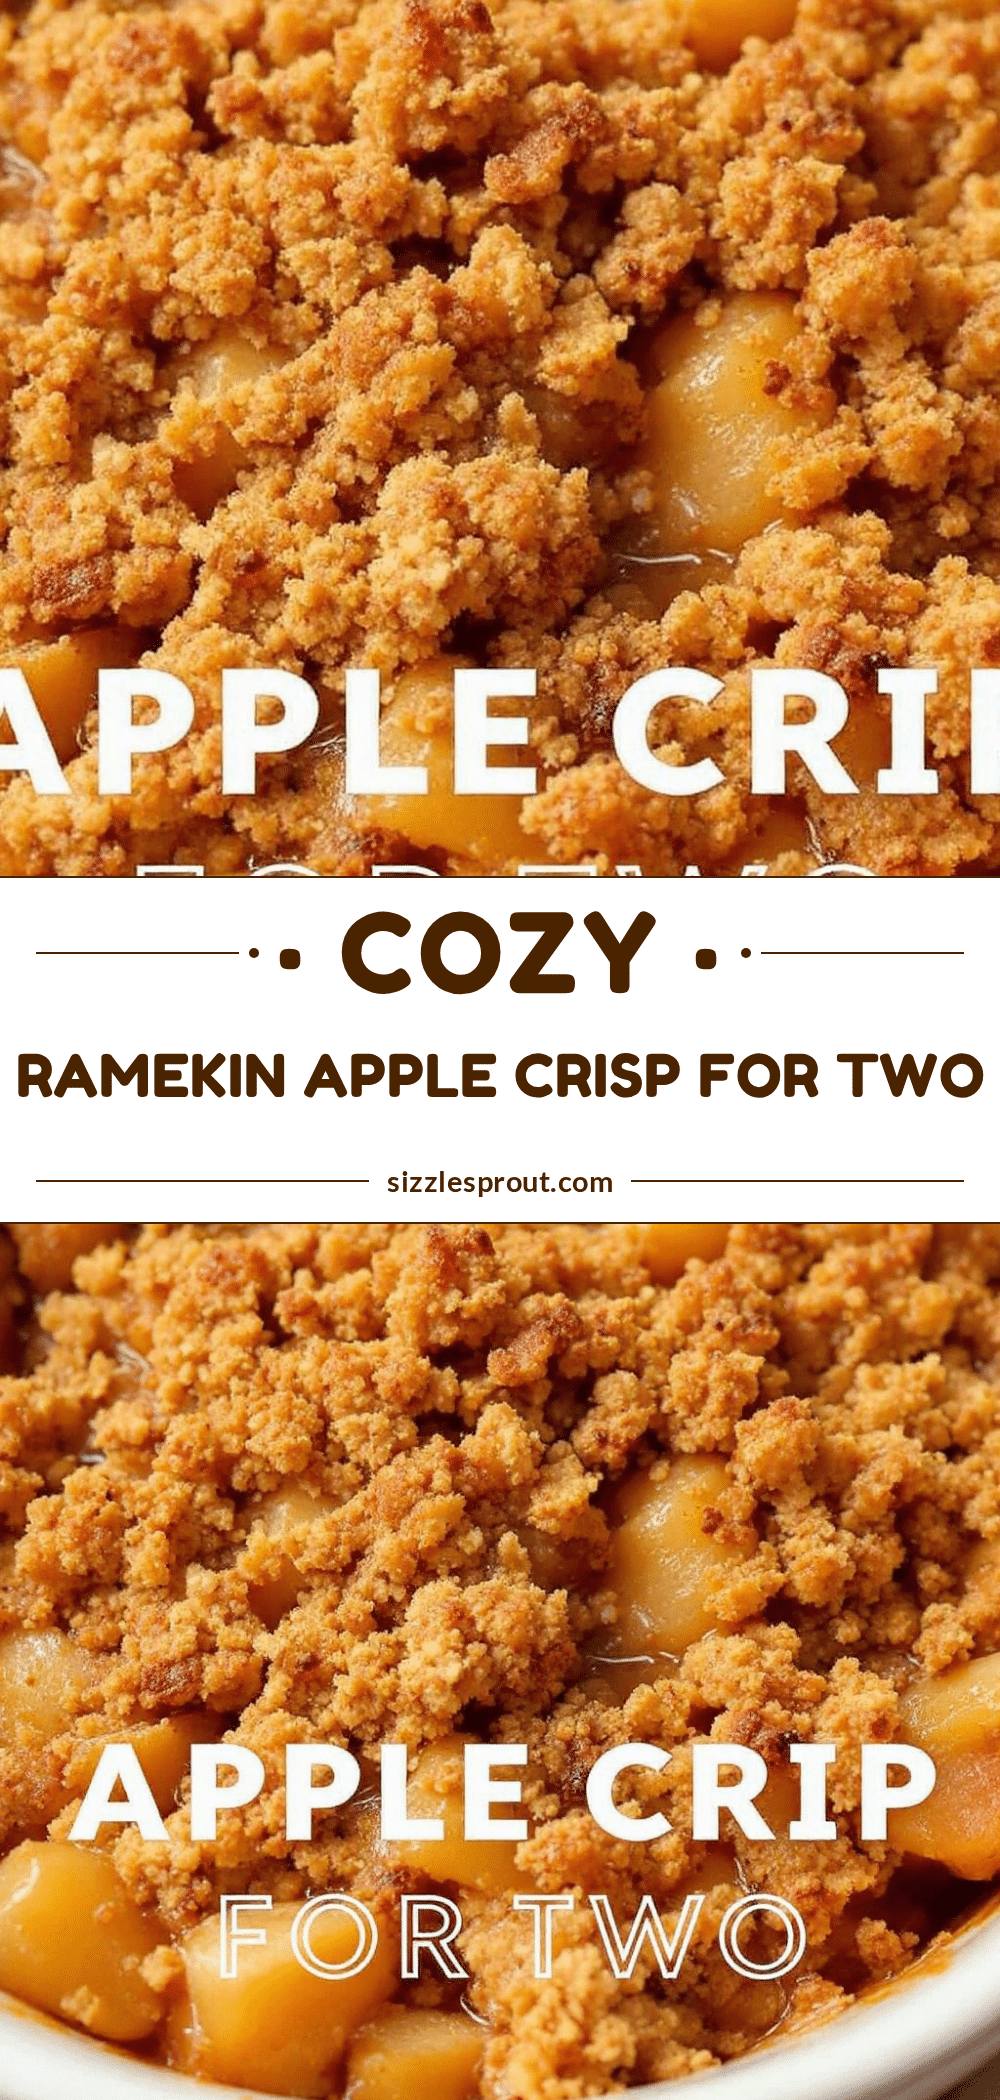
Easy Cozy Baked Apple Crisp for Two (Best Ramekin Recipe)

A perfectly portioned baked apple crisp for two, made in ramekins with tender jammy apples and a golden crunchy oat topping. Ready in about 35 minutes, this cozy dessert is ideal for a quiet night in.
- Prep Time: 10 minutes
- Cook Time: 25 minutes
- Total Time: 35 minutes
- Yield: 2 servings 1x
- Category: Dessert
- Cuisine: American
Ingredients
- 1 large apple (about 200g), peeled, cored, and diced into ½-inch cubes (Honeycrisp, Granny Smith, or Braeburn recommended)
- 1 tablespoon granulated sugar (15g)
- 1 tablespoon brown sugar, packed (15g)
- ½ teaspoon ground cinnamon
- ⅛ teaspoon ground nutmeg (freshly grated if possible)
- 1 teaspoon lemon juice (fresh squeezed, about half a small lemon)
- 1 teaspoon cornstarch
- 1 tablespoon unsalted butter, cut into small pieces (14g)
- ¼ cup old-fashioned rolled oats (25g)
- ¼ cup all-purpose flour (30g)
- ¼ cup brown sugar, packed (50g)
- ¼ teaspoon ground cinnamon
- Pinch of salt
- 2 tablespoons unsalted butter, cold and cut into small cubes (28g)
- 2 tablespoons chopped pecans or walnuts (optional)
Instructions
- Preheat your oven to 375°F (190°C). Place a baking sheet on the middle rack to heat up as the oven warms.
- Peel and core your apple, then dice it into ½-inch cubes.
- In a medium bowl, combine the diced apple, granulated sugar, brown sugar, cinnamon, nutmeg, lemon juice, and cornstarch. Toss until the apple pieces are evenly coated. Let it sit for a couple of minutes.
- In a small bowl, whisk together the oats, flour, brown sugar, cinnamon, and salt. Add the cold butter cubes. Using a pastry cutter, two forks, or your fingertips, work the butter into the dry ingredients until the mixture resembles coarse crumbs with some pea-sized butter pieces remaining. If using nuts, stir them in now.
- Divide the apple mixture evenly between two 6-ounce ramekins. Dot the top of each ramekin with the small pieces of butter. Sprinkle the crisp topping evenly over the apples, pressing down gently.
- Place the ramekins on the preheated baking sheet. Bake for 22-25 minutes, until the topping is golden brown and the filling is bubbling around the edges. If the topping is browning too quickly, loosely tent a piece of foil over the ramekins.
- Remove the ramekins from the oven and let them cool on a wire rack for at least 5 minutes. Serve warm, with vanilla ice cream or whipped cream if desired.
Notes
Do not skip the cornstarch—it thickens the apple juices into a luscious syrup. Use cold butter for the topping to ensure a crumbly, crisp texture. Let the apples sit after tossing with sugar to draw out moisture. Bake on a sheet pan to catch any drips. Leave about ¼ inch of space at the top of each ramekin to prevent overflow.
Nutrition
- Serving Size: 1 ramekin
- Calories: 310
- Sugar: 31
- Fat: 14
- Saturated Fat: 8
- Carbohydrates: 47
- Fiber: 4
- Protein: 3
Keywords: apple crisp, ramekin dessert, dessert for two, baked apple crisp, easy apple crisp, individual apple crisp, cozy dessert


