Love this? Save it for later!
Share the inspiration with your friends
For a while, I just accepted that game-day snacks and elegant appetizers were two completely different worlds. You had the gooey, crowd-pleasing dips on one side and the flaky, impressive-looking pastries on the other, and never the twain did meet. I’d make a batch of Buffalo chicken dip bites for one party, then spend an afternoon folding delicate spanakopita for another, and honestly, I was tired of choosing.
It hit me one Sunday, staring at a half-empty bowl of spinach artichoke dip and a tube of pre-made pizza dough in my fridge. The dip was incredible—creamy, cheesy, with that slight tang from the artichokes—but it needed a vehicle that wasn’t just a chip. I wanted something that could stand on its own, something you could pick up and eat without a plate, something that combined the soft, salty chew of a pretzel with the rich, comforting filling of my favorite dip. (You know how sometimes the best ideas come from just being too lazy to make two separate things?)
The first attempt was a bit of a mess, honestly. The filling oozed out, the pretzel wasn’t pretzel-y enough, and I ended up with a pan of cheesy, delicious chaos. But that first bite, where the warm, buttery pretzel met the creamy spinach and artichoke, was a lightbulb moment. After a few more tries—and a crucial lesson in how to seal the dough properly—these Cheesy Spinach Artichoke Pretzel Twists were born. They’re the snack that finally bridges the gap between casual and classy, and they’ve become my non-negotiable bring-along for everything from tailgates to holiday parties.
Why You’ll Love These Cheesy Spinach Artichoke Pretzel Twists
These aren’t just another appetizer. They’re the kind of recipe that makes people stop mid-conversation to ask, “Wait, did you make these from scratch?” (And you can honestly say yes, even though they’re deceptively simple.)
- Perfect Party Food: They’re self-contained, easy to grab, and disappear faster than almost anything else on the table. I’ve brought them to game-day nacho bars and they steal the show every single time.
- Simple, Store-Cupboard Ingredients: No weird, hard-to-find items here. You can grab everything you need from a standard grocery store, and you probably already have the pantry staples.
- Surprisingly Easy Dough: We’re using store-bought pizza dough, which makes this recipe incredibly approachable. There’s no yeast, no rising time, and no complicated kneading. It’s a total cheat code for homemade flavor.
- That Bakery-Style Pretzel Finish: The secret is a quick bath in a baking soda solution. It gives the twists that signature dark, glossy, and chewy crust that makes a pretzel taste like it came from a mall kiosk. It’s pure alchemy.
- Incredibly Versatile: They work as a fun appetizer, a side for a big bowl of chili, or even a super satisfying after-school snack. You can also switch up the filling with whatever cheese or veggies you have on hand.
What Ingredients You Will Need
This recipe uses a handful of simple ingredients to create something that tastes way more complex than it is. It’s all about the quality of the filling and that magical pretzel crust.
- Pizza Dough (1 lb): The foundation. I use a standard 1-pound ball of store-bought pizza dough from the refrigerated section. Let it sit at room temperature for about 20-30 minutes before you start. This makes it much easier to stretch and shape without it snapping back. (I like the brand from my local bakery, but any plain, unflavored dough works perfectly.)
- Frozen Chopped Spinach (10 oz): This is your main green. You absolutely must thaw it completely and then squeeze it dry. I mean, really squeeze it. Use a clean kitchen towel or paper towels and wring out every last drop of water. Wet spinach will make your filling watery and will leak out of the twists during baking, creating a soggy mess.
- Canned Artichoke Hearts (14 oz): Drain them well and give them a rough chop. I like to leave some slightly larger chunks for texture, but you want them small enough to distribute evenly throughout the filling. The subtle tanginess is what cuts through the richness of the cheese and cream cheese.
- Cream Cheese (4 oz, softened): This is the secret to a luxuriously creamy filling. It binds everything together and adds a slight tang. Make sure it’s at room temperature so it blends in smoothly without any lumps.
- Shredded Mozzarella Cheese (1 cup): The MVP for that perfect, stringy, melty pull. I prefer low-moisture part-skim mozzarella for the best melt without making the filling greasy.
- Shredded Parmesan Cheese (1/2 cup): Adds a salty, nutty, savory depth that mozzarella alone can’t provide. It’s the flavor backbone of the filling.
- Garlic (2-3 cloves, minced): Non-negotiable. Fresh garlic is a must here. It provides a pungent, aromatic kick that wakes up the entire filling. Don’t even think about using the jarred stuff.
- Salt, Pepper, and a Pinch of Red Pepper Flakes: Simple seasonings to enhance all the flavors. The red pepper flakes are optional, but I love the tiny bit of warmth they bring. It’s not spicy, just a gentle hum in the background.
For the Pretzel Wash & Topping:
- Warm Water (1/2 cup) & Baking Soda (2 tablespoons): This is your pretzel-izing solution. It’s not a boil, just a quick dip. The baking soda raises the pH of the dough’s surface, which is what creates that dark, shiny, chewy crust.
- Coarse Sea Salt or Pretzel Salt: Don’t use fine table salt here. The large, crunchy crystals are essential for that classic pretzel experience. You can find pretzel salt in the spice aisle or online.
- Melted Butter (2-3 tablespoons): Brushed on right after baking. This is what gives the twists that irresistible, glossy, buttery sheen and adds another layer of rich flavor.
Equipment Needed
You don’t need any fancy gadgets for this recipe. The list is short and sweet.
- Large Baking Sheet: A standard half-sheet pan works perfectly. Line it with parchment paper for easy cleanup.
- Mixing Bowls: One medium bowl for the filling, and another small, shallow bowl for the baking soda wash.
- Sharp Knife or Pizza Cutter: For cutting the dough into even strips. A pizza cutter makes this job incredibly fast and easy.
- Pastry Brush: For brushing on the butter after baking. A silicone one is easiest to clean.
- Clean Kitchen Towel or Paper Towels: Essential for squeezing the water out of the thawed spinach. I’ve learned this the hard way—don’t skip it!
Preparation Method
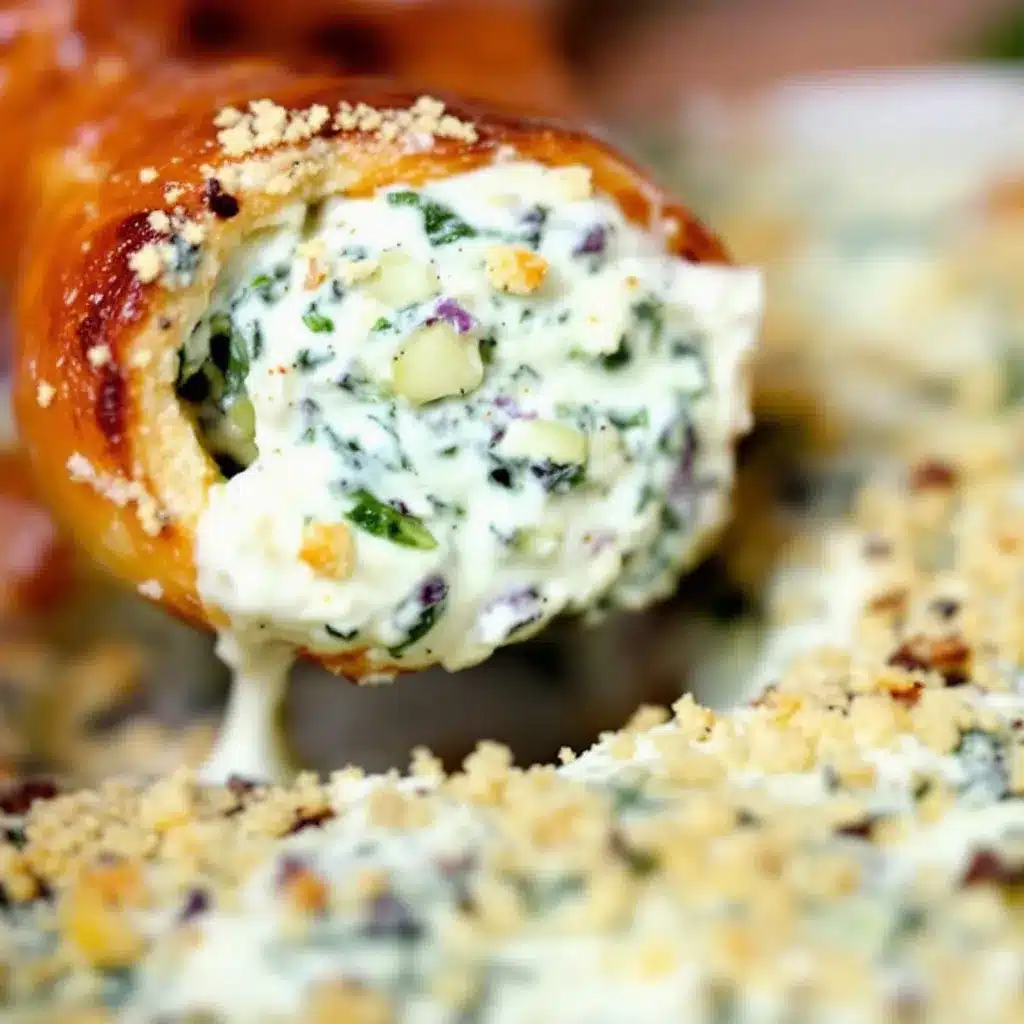
Let’s get these twists in the oven. The process is more about assembly than actual cooking, which is my favorite kind of recipe.
- Preheat and Prep: Preheat your oven to 425°F (220°C). Line your baking sheet with parchment paper. Take your pizza dough out of the fridge and let it sit on the counter for about 20 minutes to come to room temperature.
- Make the Filling: While the dough rests, make the filling. In a medium bowl, combine the squeezed-dry spinach, chopped artichoke hearts, softened cream cheese, mozzarella, parmesan, and minced garlic. Season with a pinch of salt, a few grinds of black pepper, and a pinch of red pepper flakes if using. Mix everything together until it’s a uniform, chunky paste. Give it a taste and adjust the seasoning if needed. Set aside.
- Prepare the Pretzel Wash: In your small, shallow bowl, whisk together the warm water and baking soda until the baking soda is mostly dissolved. It won’t fully dissolve, and that’s totally fine. The mixture will look a little cloudy.
- Shape the Twists: On a lightly floured surface, roll or stretch your room-temperature pizza dough into a large rectangle, roughly 12×10 inches. It doesn’t need to be perfect. Using a pizza cutter or sharp knife, cut the dough lengthwise into 10-12 strips, each about 1-inch wide.
- Fill and Seal: Working with one strip at a time, spoon a generous 1-2 tablespoons of the filling down the center of the strip. Leave a little bit of dough exposed on the ends (about 1/2 inch). Carefully pinch the long edges of the dough together over the filling, sealing it tightly. You want to make sure no filling is peeking out, or it will leak during baking. Gently roll the sealed log back and forth to smooth it out.
- The Pretzel Bath: Dip each filled dough log into the baking soda solution, turning to coat all sides. Let any excess drip off for a second before placing it on your prepared baking sheet. This step is messy but so worth it!
- Twist and Top: Once all the logs are on the sheet, carefully twist each one a couple of times to create that classic pretzel twist shape. Don’t twist too tightly or they might burst. Sprinkle the tops generously with your coarse sea salt or pretzel salt.
- Bake: Bake for 12-15 minutes, or until the twists are deep golden brown and puffed up. The filling should be bubbly and hot. (Your kitchen is going to smell amazing at this point.)
- Finish with Butter: The moment they come out of the oven, brush the hot twists with the melted butter. This step is not optional. It gives them that incredible sheen and softens the crust just enough. Let them cool on the baking sheet for about 5 minutes before serving. They are dangerously hot inside!
Cooking Tips & Techniques
I’ve made these twists more times than I can count, and I’ve definitely had a few learning experiences along the way. Here are my best tips to ensure yours turn out perfectly.
- The Spinach Squeeze is Everything: I cannot stress this enough. If you skip this step or do it half-heartedly, your filling will be watery. That water turns to steam in the oven, which makes the twists soggy and causes them to burst open. Take a clean kitchen towel, dump the thawed spinach in the middle, gather the corners, and twist it tightly over the sink. You’ll be shocked at how much liquid comes out.
- Don’t Overfill: It’s tempting to cram as much filling as possible into each strip, but resist the urge. Overfilling makes the twists impossible to seal properly. A generous tablespoon is plenty. You’ll get a perfect filling-to-dough ratio in every bite.
- Seal Like Your Life Depends On It: Pinch the dough edges together firmly. I like to crimp them with my fingers or press them with the tines of a fork to create a really strong seal. This is your insurance policy against filling leakage.
- Work in Batches: If your kitchen is warm, the dough can get sticky. If you’re making a double batch, keep the dough you’re not working with in the fridge. Also, only dip and twist the logs right before they go into the oven. If they sit around after the baking soda bath, they can get a little too soft.
- My Biggest Failure: The first time I made these, I thought I could skip the baking soda bath. I just brushed it on top. They baked up pale, soft, and tasted like a cheesy breadstick, not a pretzel. The bath is the single most important step for achieving that authentic pretzel texture and color. Don’t skip it!
Variations & Adaptations
One of the best things about this recipe is how easy it is to change up. It’s a fantastic base for all sorts of flavor combinations.
- Make it Meaty: Add 1/2 cup of cooked, crumbled Italian sausage or crispy bacon to the filling. The smoky, savory flavor pairs beautifully with the spinach and artichoke.
- Different Cheeses: Swap the mozzarella for provolone or fontina for a different melt. You can also use a sharp white cheddar for a bolder, tangier flavor profile.
- Spice It Up: Add more red pepper flakes, a dash of cayenne, or even some finely chopped jalapeño to the filling for a spicy kick. A drizzle of hot honey over the finished twists is also incredible.
- Gluten-Free Option: You can use a gluten-free pizza dough. Just be aware that gluten-free doughs can be more fragile and harder to seal. Work gently and don’t over-twist them.
- Dipping Sauces: While they are perfect on their own, these twists are amazing with a side of warm marinara sauce, a creamy ranch dip, or even a balsamic glaze for dipping.
Serving & Storage Suggestions
These twists are best enjoyed warm, fresh from the oven, when the cheese is at its stretchiest and the crust is perfectly chewy.
- Serving: Arrange them on a large platter, perhaps with a small bowl of buffalo chicken dip for a true game-day spread. They’re fantastic as a side to a big bowl of slow cooker chili—the soft, salty pretzel is perfect for sopping up the last bits of broth.
- Storage: If you have any leftovers (which is rare in my house!), let them cool completely. Store them in an airtight container in the refrigerator for up to 3 days.
- Reheating: The best way to revive them is in a 350°F (175°C) oven for about 5-7 minutes. This will re-crisp the outside and re-melt the cheese. You can also use an air fryer at 350°F for 3-4 minutes. I don’t recommend the microwave, as it will make the dough tough and the filling rubbery.
- Freezing: You can freeze the unbaked, assembled twists on a baking sheet until solid, then transfer them to a freezer bag. Bake them from frozen, adding about 5 minutes to the baking time. You can also freeze baked and cooled twists for up to a month.
Nutritional Information & Benefits
While these are undeniably a treat, they do have some redeeming qualities! The exact values will depend on your specific ingredients, but here’s a general idea per twist (based on 12 twists).
- Estimated Calories: 180-220 per twist
- Protein: 8-10g (from the cheese and dough)
- Carbohydrates: 20-25g
- Fat: 8-12g
- Fiber: 2-3g (thanks to the spinach and artichokes)
- Key Benefits: Spinach is packed with iron and vitamins A and K. Artichokes are a great source of fiber and antioxidants. The protein from the cheese and dough helps make this a more satisfying snack than a simple chip or cracker.
- Dietary Considerations: This recipe is vegetarian. To make it gluten-free, use a certified gluten-free pizza dough. To reduce the fat, you can use reduced-fat cream cheese and part-skim mozzarella.
Conclusion
These Cheesy Spinach Artichoke Pretzel Twists are more than just a recipe; they’re a solution to the eternal appetizer dilemma. They have the comforting, cheesy soul of your favorite dip wrapped in the fun, portable, and undeniably delicious package of a soft pretzel. They’re the kind of snack that makes you look like you spent hours in the kitchen, when in reality, the store-bought dough did most of the heavy lifting.
I love making these because they always make people happy. They’re a little unexpected, a little nostalgic, and completely satisfying. Whether you’re hosting a big party or just want a fun weekend snack, I really hope you give these a try. Don’t be afraid to make them your own—swap in your favorite cheeses or add a little heat. The base recipe is incredibly forgiving.
I’d love to hear how yours turn out! Please leave a comment below and let me know if you tried any fun variations. And if you loved them, share this recipe with a friend who needs a new go-to appetizer. Happy twisting!
Frequently Asked Questions
Can I use homemade pizza dough instead of store-bought?
Absolutely! If you have a favorite homemade pizza dough recipe, it will work perfectly here. Just make sure it’s a standard, pliable dough that’s not too enriched with eggs or butter, as that can change the pretzel texture.
My filling leaked out in the oven. What did I do wrong?
This usually happens for one of two reasons. First, you may have overfilled the dough strips. Second, the dough may not have been sealed tightly enough. Make sure to pinch the edges firmly and consider crimping them with a fork for extra security.
Can I make these ahead of time for a party?
Yes! You can assemble the twists completely (through step 7) and then place them on the baking sheet. Cover them loosely with plastic wrap and refrigerate for up to 4 hours. Bake them right before your guests arrive for the best texture.
Why do I need to use a baking soda bath? Can I skip it?
The baking soda bath is not optional for a true pretzel texture. It alkalizes the surface of the dough, which is what creates the dark, glossy, and chewy crust. Without it, you’ll just have soft, pale breadsticks.
Can I use fresh spinach instead of frozen?
You can, but it requires a bit more work. You’ll need to sauté about 10-12 ounces of fresh spinach until it wilts, then let it cool and squeeze it dry just like you would with the frozen kind. Using frozen is much faster and more convenient.
Pin This Recipe!
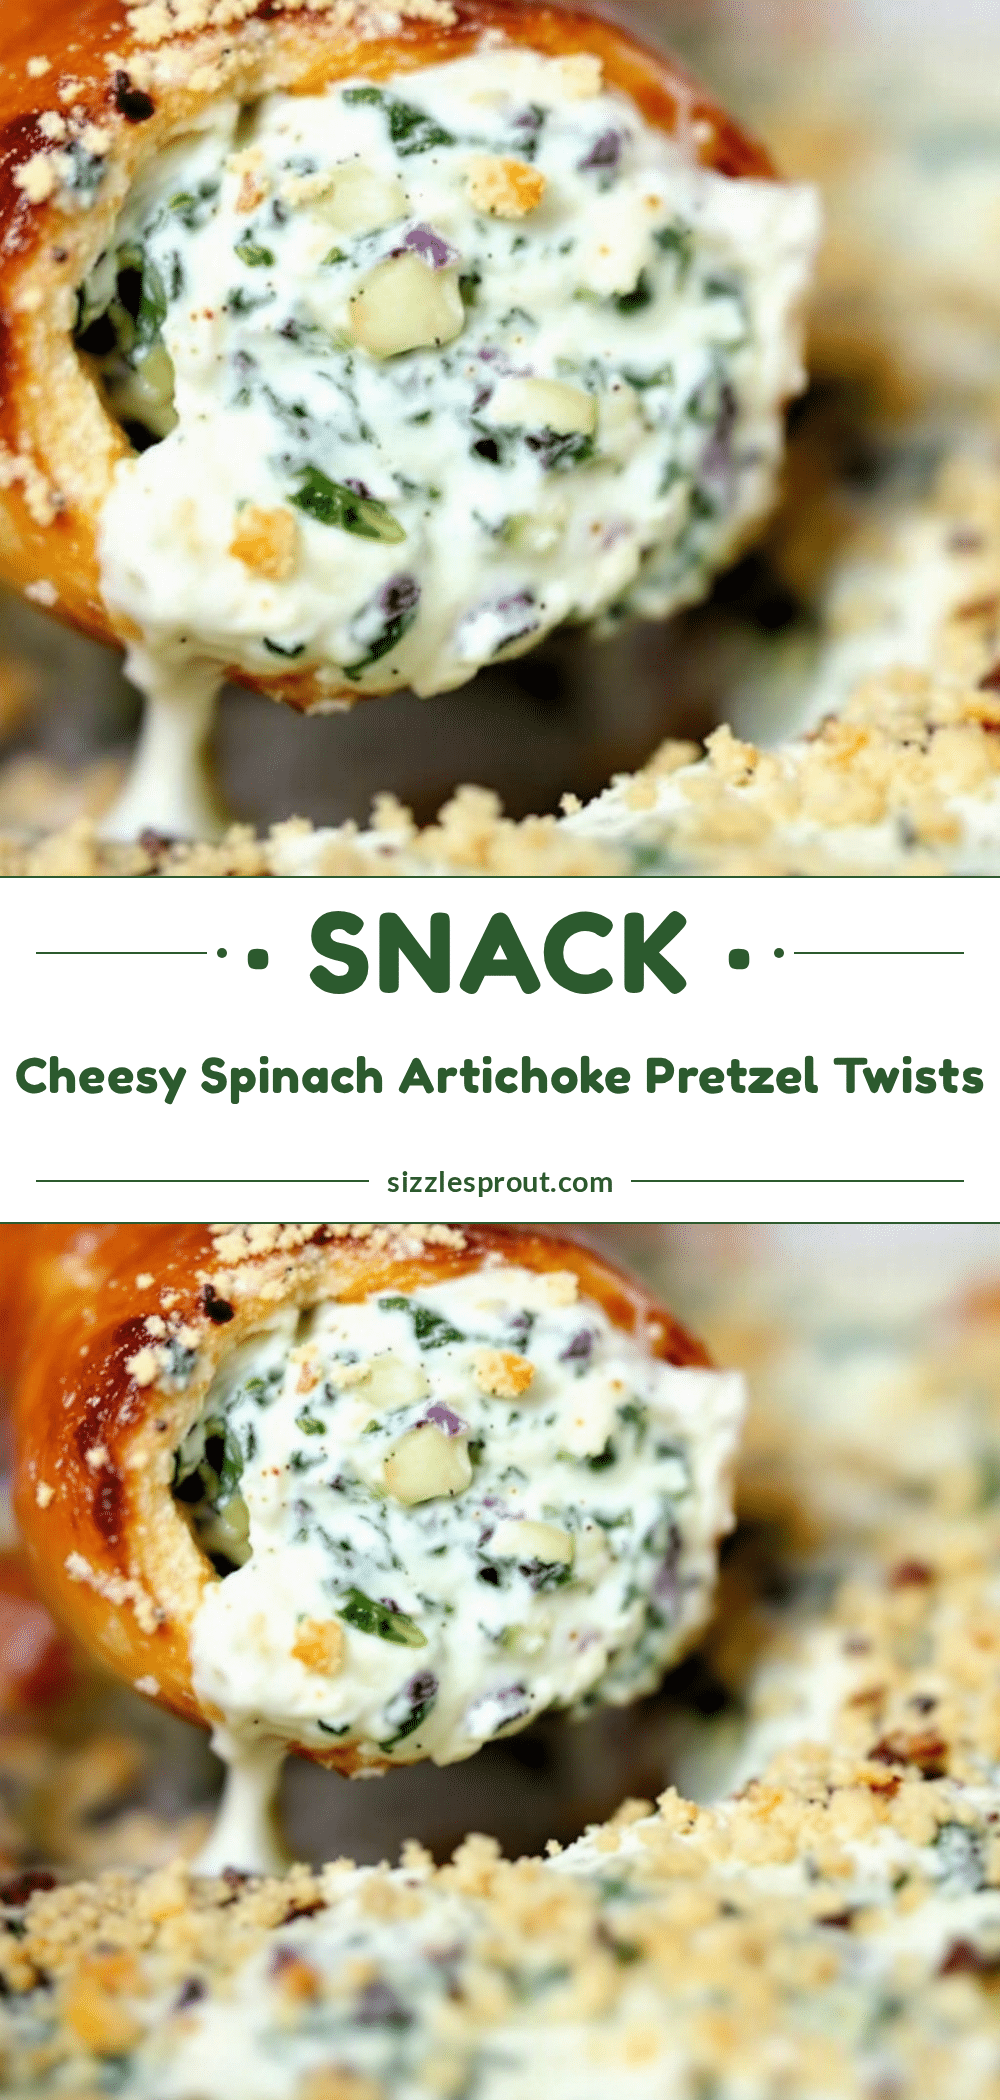
Easy Cheesy Spinach Artichoke Pretzel Twists
These Cheesy Spinach Artichoke Pretzel Twists combine the creamy, comforting filling of your favorite dip with the soft, salty chew of a pretzel. They’re the perfect self-contained, crowd-pleasing appetizer for game days, parties, or any snack occasion.
- Prep Time: 20 minutes
- Cook Time: 15 minutes
- Total Time: 35 minutes
- Yield: 10-12 twists 1x
- Category: Appetizer
- Cuisine: American
Ingredients
- 1 lb pizza dough, at room temperature
- 10 oz frozen chopped spinach, thawed and squeezed dry
- 14 oz canned artichoke hearts, drained and roughly chopped
- 4 oz cream cheese, softened
- 1 cup shredded mozzarella cheese (low-moisture part-skim)
- 1/2 cup shredded Parmesan cheese
- 2–3 cloves garlic, minced
- Salt, to taste
- Black pepper, to taste
- Pinch of red pepper flakes (optional)
- 1/2 cup warm water
- 2 tablespoons baking soda
- Coarse sea salt or pretzel salt, for topping
- 2–3 tablespoons melted butter, for brushing
Instructions
- Preheat your oven to 425°F (220°C). Line a large baking sheet with parchment paper. Let the pizza dough sit at room temperature for 20-30 minutes.
- In a medium bowl, combine the squeezed-dry spinach, chopped artichoke hearts, softened cream cheese, mozzarella, Parmesan, and minced garlic. Season with salt, pepper, and red pepper flakes (if using). Mix until a uniform, chunky paste forms. Set aside.
- In a small, shallow bowl, whisk together the warm water and baking soda until mostly dissolved (it will be cloudy).
- On a lightly floured surface, roll or stretch the pizza dough into a large rectangle, roughly 12×10 inches. Cut the dough lengthwise into 10-12 strips, each about 1-inch wide.
- Working with one strip at a time, spoon 1-2 tablespoons of the filling down the center, leaving about 1/2 inch of dough exposed at the ends. Pinch the long edges of the dough together over the filling, sealing tightly. Gently roll the sealed log to smooth it out.
- Dip each filled dough log into the baking soda solution, turning to coat all sides. Let excess drip off, then place on the prepared baking sheet.
- Once all logs are on the sheet, carefully twist each one a couple of times to create a classic pretzel twist shape. Sprinkle generously with coarse sea salt or pretzel salt.
- Bake for 12-15 minutes, until deep golden brown and puffed up.
- Immediately brush the hot twists with melted butter. Let cool on the baking sheet for about 5 minutes before serving.
Notes
Squeeze the thawed spinach very dry to prevent a watery filling. Seal the dough edges tightly to prevent leakage. The baking soda bath is essential for the authentic pretzel texture and color. For best results, serve warm.
Nutrition
- Serving Size: 1 twist
- Calories: 200
- Sugar: 2
- Sodium: 600
- Fat: 10
- Saturated Fat: 5
- Carbohydrates: 22
- Fiber: 2
- Protein: 9
Keywords: spinach artichoke pretzel twists, cheesy pretzel twists, game day appetizer, party snack, easy appetizer, vegetarian appetizer


