Love this? Save it for later!
Share the inspiration with your friends
I need a Halloween cookie that actually looks like it belongs at a witch’s sabbath, not a preschool bake sale. That’s the thought that hit me at 10 PM on a Tuesday, three days before our annual Halloween party, while staring at a bag of almonds and a stick of butter on my counter. The cute ghost cookies and frosted pumpkin cakes are fine, but they don’t make people hesitate before taking a bite. I wanted that reaction—the split second where someone picks one up and thinks, “Wait, is that actually a finger?”
These spooky witch finger cookies deliver exactly that. They’re buttery, nutty shortbread shaped into knobby fingers with almond fingernails, and they look genuinely unsettling. The secret is in the knuckle creases and the slight almond tint that gives them that pale, witchy skin tone. I tested three different dough formulas before landing on this one—too much flour and they crack, too little and they lose their shape. This version holds every wrinkle and ridge.
Honestly, they’re the easiest Halloween treat I’ve ever made that looks this convincing. The dough comes together in one bowl, no chilling required, and you can shape them in under twenty minutes. No cookie cutters, no royal icing, no food coloring disasters. Just your hands, some almonds, and a willingness to make something that looks a little grotesque. Which, let’s face it, is the whole point of Halloween baking.
Why You’ll Love This Recipe
These aren’t just another Halloween cookie. They’re the kind of treat that gets photographed, shared, and talked about long after the candy bowls are empty. I’ve brought them to three different Halloween parties now, and every single time, someone asks for the recipe before they’ve even finished eating one.
- Quick & Easy : Ready in under 40 minutes from start to finish, with zero chilling time. The dough mixes by hand in five minutes flat.
- Simple Ingredients : Butter, sugar, flour, almond extract, and whole almonds. That’s it. No specialty baking supplies needed.
- Perfect for Halloween : These are the star of any Halloween party, trunk-or-treat event, or spooky movie night spread.
- Crowd-Pleaser : Kids love the gross-out factor, adults appreciate the buttery shortbread flavor. Everyone wins.
- Unbelievably Realistic : The almond fingernails, the knuckle wrinkles, the pale skin tone—people will genuinely do a double-take.
What makes these different from every other witch finger recipe out there? It’s the texture. Most versions are either too crumbly (they break apart when you bite them) or too cakey (they look like stubby fingers, not elegant witch hands). This dough strikes the perfect balance—firm enough to hold detailed finger shapes, tender enough to melt in your mouth. I spent a full afternoon testing ratios of butter to flour to get that ideal shortbread crumb that still holds a knuckle crease.
There’s something deeply satisfying about watching someone’s face when they pick one up. The hesitation. The squint. The moment they realize it’s just a cookie and laugh. That reaction never gets old. These cookies create a memory, and honestly, that’s what Halloween baking should be about.
What Ingredients You Will Need
This recipe keeps things refreshingly simple. You probably have most of these ingredients in your kitchen right now, which means you can whip up a batch on impulse—and trust me, once word gets out that you make witch finger cookies, you’ll be making them on impulse a lot.
- Unsalted butter, softened (1 cup / 226g) – I use Kerrygold for the richest flavor, but any good-quality unsalted butter works. Make sure it’s truly softened to room temperature, not melted. Softened butter creams properly with the sugar and gives you that tender shortbread texture. If your butter is too cold, the dough will be stiff and hard to shape.
- Powdered sugar (1 cup / 120g) – Not granulated. Powdered sugar dissolves more completely into the butter, giving the cookies that smooth, melt-in-your-mouth quality. Plus, it keeps the dough pale, which is essential for realistic witch fingers. Sift it if it’s lumpy.
- Large egg (1, room temperature) – The egg binds everything together. Take it out of the fridge when you start softening the butter so they reach room temperature together. A cold egg will seize the butter and make the dough difficult to work with.
- Almond extract (1 teaspoon) – This is non-negotiable. Almond extract gives the cookies that distinctive marzipan-like flavor and, more importantly, that pale, slightly nutty tint that makes them look like actual witch skin. I use Nielsen-Massey for the purest flavor, but store brands work fine too.
- Vanilla extract (1 teaspoon) – Rounds out the almond flavor and adds depth. Pure vanilla extract is worth the splurge here; the artificial stuff has a chemical aftertaste that you don’t want in such a simple recipe.
- All-purpose flour (2 ½ cups / 312g) – Spoon and level your flour. Scooping directly from the bag packs in too much flour and makes the cookies dry and crumbly. I use King Arthur Flour for consistent results, but any brand works if you measure correctly.
- Salt (½ teaspoon) – Balances the sweetness and enhances the buttery flavor. Fine sea salt dissolves more evenly than kosher salt in this application.
- Whole almonds (30-36, for fingernails) – Look for raw almonds with the skin still on. The brown skin gives the fingernails that realistic, slightly dirty look. If you only have blanched almonds, toast them lightly to get a bit of color. I prefer Blue Diamond whole natural almonds—they’re consistently sized and have that perfect almond shape.
- Red jam or food coloring (optional, for blood effect) – Strawberry jam thinned with a drop of water works beautifully. Squeeze a tiny dot at the base of the fingernail for that “just pulled it out of the cauldron” look. I use Bonne Maman strawberry preserves because the color is naturally deep red.
Equipment Needed
You don’t need any special Halloween cookie cutters or fancy tools for this recipe. That’s part of the beauty—these are entirely hand-shaped, which makes each finger slightly different and more realistic.
- Large mixing bowl – Any bowl big enough to cream butter and sugar without splattering. I use a ceramic mixing bowl because it doesn’t conduct heat, but glass or metal works fine.
- Hand mixer or stand mixer – A hand mixer is perfectly adequate. I actually prefer it because I have more control over the creaming process. If you’re using a stand mixer, use the paddle attachment on medium speed.
- Rubber spatula – For scraping down the sides of the bowl and folding in the flour. A silicone spatula is ideal because it doesn’t scratch your bowls.
- Baking sheets (2) – Line them with parchment paper. The cookies spread slightly, and parchment makes cleanup effortless. I use half-sheet pans because they fit in most ovens and give you room to space the fingers out.
- Parchment paper – Non-negotiable. The cookies will stick to ungreased baking sheets, and you’ll lose those beautiful almond fingernails when you try to pry them off.
- Sharp knife or bench scraper – For creating the knuckle creases. A dull knife will drag through the dough instead of cutting clean lines. I use a paring knife with a thin blade.
- Small bowl of water – For moistening your fingers when shaping the dough. This prevents sticking and helps smooth out any rough edges.
- Cooling rack – Wire racks allow air to circulate around the cookies so they cool evenly. If you don’t have one, transfer the cookies to a plate and flip them after a few minutes.
Preparation Method
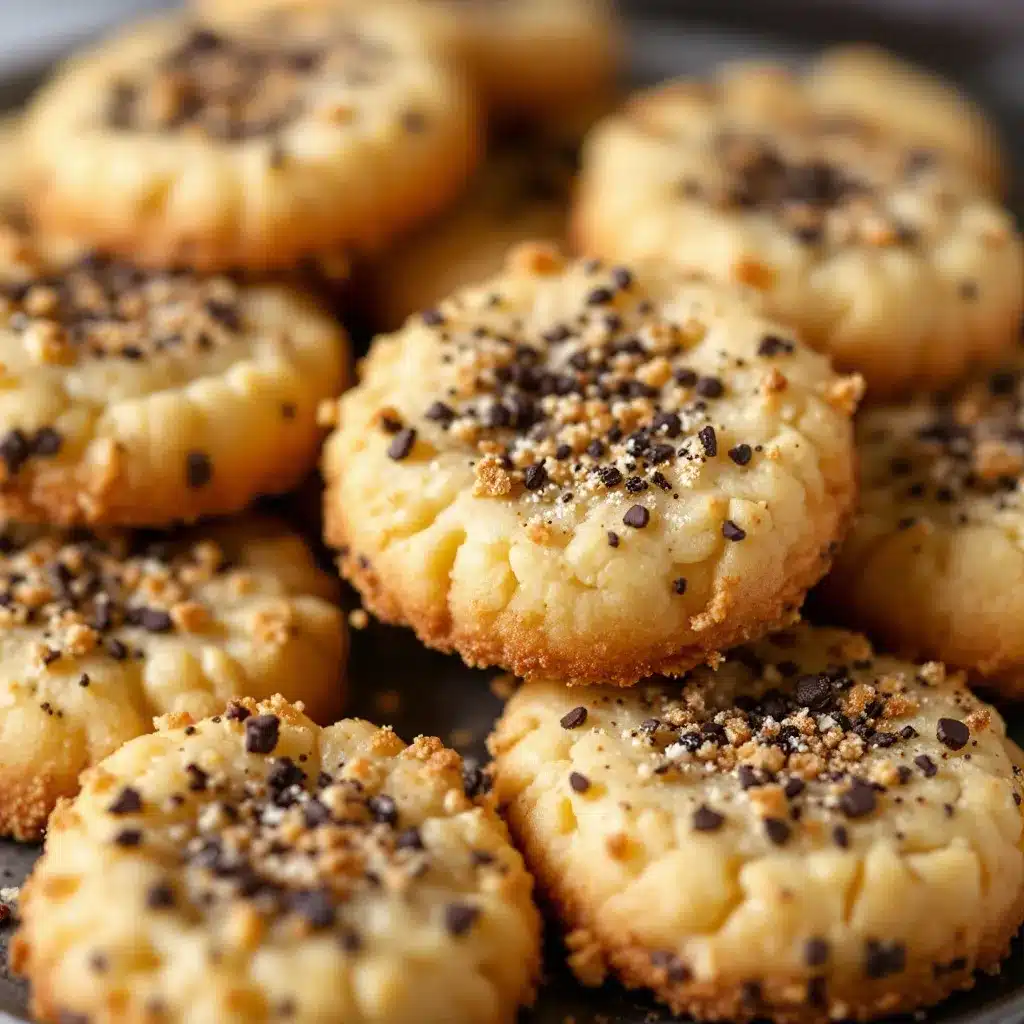
Preheat your oven to 325°F (163°C). Line two baking sheets with parchment paper. This is the moment when you transform ordinary cookie dough into something that looks like it crawled out of a witch’s kitchen.
- Cream the butter and sugar – In a large mixing bowl, beat the softened butter and powdered sugar together until light and fluffy, about 3 minutes with a hand mixer on medium speed. Scrape down the sides of the bowl halfway through. The mixture should look pale, almost white, and feel silky smooth. If it looks greasy or separated, your butter was too warm. Pop the bowl in the fridge for 10 minutes and try again.
- Add the wet ingredients – Beat in the egg, almond extract, and vanilla extract until fully combined. The mixture might look slightly curdled at this point—that’s normal. Don’t panic. The flour will bring everything back together. Scrape the bowl again to make sure everything is incorporated.
- Add the dry ingredients – In a separate small bowl, whisk the flour and salt together. Gradually add the flour mixture to the butter mixture, mixing on low speed until just combined. Stop as soon as you don’t see any more white flour streaks. Overmixing develops gluten and makes the cookies tough. The dough should be soft but not sticky—if it sticks to your fingers, refrigerate it for 15 minutes.
- Portion the dough – Scoop out about 1 tablespoon of dough (roughly 20g) for each finger. Roll it into a log shape about 3 inches long and ¾ inch thick. Don’t make them perfectly uniform—real fingers come in different sizes. Slightly thicker at the top (where the finger meets the hand) and tapering slightly toward the fingertip. Place them on the prepared baking sheets, spacing them about 2 inches apart. You should get 30-36 fingers depending on how generous you are with portions.
- Shape the fingers – Here’s where the magic happens. Gently press down on each log to flatten it slightly—fingers aren’t perfectly round cylinders. Use the back of a knife or your finger to create indentations at the knuckle joints. Make two or three creases per finger. Don’t cut all the way through; you want deep impressions, not severed fingers. Press the tip of each finger to flatten it slightly, creating a nail bed.
- Add the fingernails – Press one whole almond firmly into the flattened tip of each finger. The pointed end of the almond should face outward, with the rounded edge embedded in the dough. Press until the almond is flush with the dough surface. If the almond doesn’t stay put, dab a tiny bit of water underneath it to act as glue.
- Create the knuckle wrinkles – Use a sharp knife to make small slashes around the knuckle indentations. These should be shallow cuts that mimic the creases in real knuckles. Also press a few tiny indentations near the base of the fingernail to simulate cuticles. The more detail you add, the more convincing they’ll look.
- Bake the cookies – Bake at 325°F (163°C) for 14-16 minutes, or until the edges are just barely golden. The centers should still look pale and slightly underdone. They’ll continue to set as they cool. Rotate the baking sheets halfway through for even baking. Your kitchen will smell like toasted almonds and butter—it’s intoxicating.
- Cool completely – Let the cookies cool on the baking sheets for 5 minutes, then transfer them to a wire cooling rack. Don’t try to move them immediately—they’re fragile when hot. Once fully cooled, the shortbread firms up beautifully. This takes about 20 minutes.
- Add optional blood effect – If you want extra gore, thin a tablespoon of strawberry jam with a few drops of water and microwave for 10 seconds. Use a toothpick to dab a tiny amount at the base of each almond fingernail. Let the jam set for 10 minutes before serving.
Cooking Tips & Techniques
I learned most of these the hard way—through batches of cookies that looked more like stubby sausages than elegant witch fingers. My first attempt was genuinely embarrassing. They were too thick, the knuckles were barely visible, and the almonds kept falling off during baking. Here’s what I figured out so you don’t have to repeat my mistakes.
Keep your hands cool. Warm hands will soften the butter in the dough, making it greasy and difficult to shape. If your hands run hot, run them under cold water before handling the dough and dry them thoroughly. I keep a small bowl of ice water nearby and dip my fingers in between shaping batches.
Don’t skip the knuckle details. The difference between a cookie that looks like a finger and a cookie that looks like a weird log is entirely in the knuckles. Use the back of a paring knife to press deep, angled lines into the dough. Then use the tip of the knife to create small crescent-shaped cuts around each knuckle. It takes an extra 30 seconds per finger and makes them exponentially more realistic.
Watch the bake time like a hawk. These cookies go from perfectly pale to overbaked in about 90 seconds. The edges should be just barely golden—if you see any browning on the surface, you’ve gone too far. Overbaked witch fingers look tan and healthy, which defeats the entire creepy aesthetic. I set a timer for 14 minutes and check every minute after that.
Use the right almond placement. The almond should sit flush against the dough, not perched on top. If it’s sticking up, it’ll fall off during baking or when someone takes a bite. Press firmly until the almond is embedded about halfway into the dough. The dough will bake around it and hold it in place.
Make them look imperfect on purpose. Real fingers aren’t perfectly straight or uniformly sized. Some should be longer, some shorter. A few slightly crooked. Maybe one with a bent knuckle. The variation makes them more convincing. I always make one or two that look broken or mangled—those are always the first ones people grab.
Variations & Adaptations
Once you master the basic witch finger, the possibilities are delightfully creepy. Here are some variations I’ve tested over several Halloweens.
Gluten-Free Witch Fingers – Substitute the all-purpose flour with a 1:1 gluten-free baking flour blend that contains xanthan gum. I’ve used King Arthur Measure for Measure with excellent results. The dough will be slightly more fragile, so handle it gently when shaping. Add an extra tablespoon of butter to compensate for the drier gluten-free flour.
Chocolate Witch Fingers – Replace ¼ cup of the flour with unsweetened cocoa powder. The cookies turn a dark, earthy brown that looks like aged witch hands. Use slivered almonds for the fingernails instead of whole almonds—the smaller size looks more proportional against the darker cookie. These taste like chocolate shortbread and are dangerously addictive.
Green Witch Fingers – Add ½ teaspoon of matcha powder or a few drops of green food coloring to the dough. The pale green tint gives them an otherworldly, swamp-witch vibe. I prefer matcha because it adds a subtle earthy flavor that complements the almond extract. Start with a small amount and add more until you achieve the desired color.
Bloody Knuckle Variation – After baking, use a pastry brush to lightly paint a mixture of corn syrup and red food coloring onto the knuckle creases. Let it pool slightly in the indentations. The effect is genuinely disturbing—it looks like the fingers have been recently injured. I only do this for adult parties because it’s a bit too realistic for young kids.
Vegan Witch Fingers – Substitute the butter with vegan butter (I use Miyoko’s European Style Cultured Vegan Butter) and the egg with 1 tablespoon of ground flaxseed mixed with 3 tablespoons of water. Let the flax mixture sit for 5 minutes to thicken before adding it to the dough. The texture is slightly less tender but still delicious. Use maple syrup instead of honey if you’re adding the blood effect.
Serving & Storage Suggestions
These cookies are at their best when served slightly warm, but they’re also fantastic at room temperature. The presentation is everything with witch fingers—how you arrange them matters almost as much as how they taste.
How to serve – Arrange the fingers in a loose pile on a black or dark purple platter. Scatter a few loose almonds around them like discarded fingernails. For maximum creep factor, stand a few fingers upright in a mason jar filled with crushed chocolate cookies (dirt effect). I’ve also tucked them into a hollowed-out pumpkin with the lid off, so they look like they’re reaching out of the pumpkin.
What to serve with them – These pair beautifully with a warm mug of pumpkin cream cold foam or a cup of hot apple cider. For a full Halloween spread, serve them alongside spider web pumpkin sugar cookies and poison apple black velvet bundt cake for a truly themed dessert table. The contrast between the delicate sugar cookies and the creepy witch fingers is visually stunning.
Storage instructions – Store the cookies in an airtight container at room temperature for up to 5 days. Layer them between sheets of parchment paper to prevent the almonds from scratching each other. Do not refrigerate them—the cold air dries out shortbread and makes it crumbly.
Freezer instructions – You can freeze the unbaked shaped fingers on a parchment-lined baking sheet until solid, then transfer them to a freezer bag for up to 3 months. Bake directly from frozen, adding 2-3 minutes to the baking time. I always keep a batch in the freezer for last-minute Halloween emergencies. The baked cookies also freeze well for up to 2 months.
Reheating tips – If you want that just-baked warmth, pop the cookies in a 300°F (150°C) oven for 3-4 minutes. The microwave will make them soft and sad. A quick reheat brings back the buttery aroma and makes the almond extract fragrance bloom again.
Nutritional Information & Benefits
Let’s be honest—these are Halloween cookies, not health food. But they’re made with real, whole ingredients, which puts them a step above anything from a package. Here’s the breakdown per cookie (based on 36 cookies):
| Nutrient | Amount per Cookie |
|---|---|
| Calories | 115 |
| Total Fat | 7g |
| Saturated Fat | 4g |
| Carbohydrates | 12g |
| Sugar | 5g |
| Protein | 2g |
| Fiber | 0.5g |
| Sodium | 45mg |
Health highlights – Almonds are packed with vitamin E, healthy monounsaturated fats, and magnesium. They’re one of the few nuts that actually survive the baking process with their nutritional profile mostly intact. The butter provides vitamin A and conjugated linoleic acid, which has some interesting metabolic benefits. Is this a health cookie? No. But it’s a cookie made with ingredients you can actually identify, and that counts for something.
Dietary considerations – This recipe contains dairy (butter), eggs, gluten (flour), and tree nuts (almonds). For a dairy-free version, use vegan butter. For gluten-free, use a 1:1 gluten-free flour blend. The almond extract is naturally gluten-free, but always check your brand’s label if you’re serving someone with celiac disease.
Allergen note – The almond fingernails are a choking hazard for very young children. If you’re serving these at a party with toddlers, consider pressing a slivered almond into each finger instead of a whole almond, or use a small piece of dried apricot for a nut-free version.
Conclusion
These spooky witch finger cookies are exactly what Halloween baking should be—fun, slightly unsettling, and absolutely delicious. They’re the kind of treat that makes people stop, laugh, and then reach for another one. I’ve made them every Halloween for the past four years, and they never fail to be the most talked-about item on the dessert table.
The best part? They’re genuinely easy. No complicated techniques, no specialty equipment, no hours of decorating. Just a simple shortbread dough, some almonds, and a willingness to make something that looks a little grotesque. That’s the spirit of Halloween, isn’t it? Taking something ordinary and making it just a little bit weird.
I’d love to see how your witch fingers turn out. Tag me in your photos, leave a comment below with your variations, or share your best Halloween baking story. Did anyone in your family refuse to eat them because they looked too real? That’s always my favorite reaction. Happy baking, and have a wonderfully spooky Halloween!
Frequently Asked Questions
Can I make these cookies ahead of time?
Absolutely. You can prepare the dough up to 3 days in advance and keep it wrapped tightly in the refrigerator. When you’re ready to bake, let the dough sit at room temperature for 10 minutes to soften slightly before shaping. You can also freeze the shaped unbaked fingers for up to 3 months and bake them directly from frozen.
Why did my almond fingernails fall off during baking?
This usually happens when the almond isn’t pressed deeply enough into the dough. The almond should be embedded about halfway into the finger tip, with the dough coming up around its edges. If your dough is too cold, the almond won’t stick—let the dough warm slightly before pressing in the almonds. A tiny dab of water underneath the almond helps create a seal.
Can I use almond flour instead of almond extract?
You can, but the flavor will be much more subtle. Almond extract is concentrated and gives that distinctive marzipan taste that makes these cookies so recognizable. If you substitute almond flour, use ½ cup of almond flour and reduce the all-purpose flour by the same amount. The cookies will be more tender and slightly denser.
How do I get the cookies to look more realistic?
Focus on the details. Make the knuckle creases deep and angled, not straight across. Add tiny crescent cuts around each knuckle. Press small indentations at the base of the fingernail to simulate cuticles. Vary the sizes and shapes of your fingers—real hands don’t have identical fingers. And don’t overbake them; pale cookies look much more realistic than golden ones.
Can I make these nut-free?
Yes, but you’ll need to replace the almond extract and the almond fingernails. Use 1½ teaspoons of vanilla extract instead of the almond extract. For the fingernails, press a small piece of dried apricot, a slivered cashew, or a white chocolate chip into the tip of each finger. The look won’t be quite as convincing, but they’ll still be delicious and spooky.
Pin This Recipe!
Spooky Witch Finger Cookies: Best Easy Halloween Treat Recipe
These buttery, nutty shortbread cookies are shaped into knobby fingers with almond fingernails, creating a genuinely unsettling Halloween treat that’s surprisingly easy to make.
- Prep Time: 20 minutes
- Cook Time: 16 minutes
- Total Time: 36 minutes
- Yield: 30-36 cookies 1x
- Category: Dessert
- Cuisine: American
Ingredients
- 1 cup (226g) unsalted butter, softened
- 1 cup (120g) powdered sugar
- 1 large egg, room temperature
- 1 teaspoon almond extract
- 1 teaspoon vanilla extract
- 2 ½ cups (312g) all-purpose flour
- ½ teaspoon salt
- 30–36 whole almonds (with skin on)
- Red jam or food coloring (optional, for blood effect)
Instructions
- Preheat oven to 325°F (163°C). Line two baking sheets with parchment paper.
- In a large mixing bowl, beat the softened butter and powdered sugar together until light and fluffy, about 3 minutes with a hand mixer on medium speed. Scrape down the sides of the bowl halfway through.
- Beat in the egg, almond extract, and vanilla extract until fully combined. The mixture might look slightly curdled—that’s normal.
- In a separate small bowl, whisk the flour and salt together. Gradually add the flour mixture to the butter mixture, mixing on low speed until just combined. Stop as soon as no white flour streaks remain.
- Scoop out about 1 tablespoon (20g) of dough for each finger. Roll into a log shape about 3 inches long and ¾ inch thick, slightly thicker at the top and tapering toward the fingertip. Place on prepared baking sheets, spacing 2 inches apart.
- Gently press down on each log to flatten slightly. Use the back of a knife or your finger to create 2-3 deep indentations at the knuckle joints. Press the tip of each finger to flatten it slightly, creating a nail bed.
- Press one whole almond firmly into the flattened tip of each finger, pointed end outward, until flush with the dough surface.
- Use a sharp knife to make small slashes around the knuckle indentations and press tiny indentations near the base of the fingernail to simulate cuticles.
- Bake at 325°F (163°C) for 14-16 minutes, until edges are just barely golden. Rotate baking sheets halfway through.
- Let cookies cool on baking sheets for 5 minutes, then transfer to a wire cooling rack. Cool completely (about 20 minutes).
- Optional: For blood effect, thin 1 tablespoon strawberry jam with a few drops of water, microwave 10 seconds, and dab a tiny amount at the base of each almond fingernail. Let set 10 minutes before serving.
Notes
Keep hands cool when shaping dough to prevent butter from softening. Don’t overbake—cookies should remain pale for realistic look. Vary finger sizes and shapes for more convincing appearance.
Nutrition
- Serving Size: 1 cookie
- Calories: 115
- Sugar: 5
- Sodium: 45
- Fat: 7
- Saturated Fat: 4
- Carbohydrates: 12
- Fiber: 0.5
- Protein: 2
Keywords: Halloween cookies, witch finger cookies, shortbread cookies, spooky treats, easy Halloween recipe


