Love this? Save it for later!
Share the inspiration with your friends
The platter was empty. Not a single yolk smear left on the ceramic, just the faint scent of dill and paprika hanging in the air like a ghost. I had just set it down, confident that the spooky theme would at least earn a polite nod or two, if not a full-on scream. Instead, my brother-in-law asked if I could make them for Thanksgiving. Thanksgiving. After Halloween.
It was the third time that week someone had texted me asking for the formula. Honestly, I didn’t see it coming. I thought the band-aids would be too much. I thought the googly eyes would look too childish for a group of adults who usually stick to plain deviled eggs or maybe some fancy brie bites. But no. The mummy wrap held up. The texture was right. They were gone in twelve minutes flat.
I still remember the first time I tried this. I was stressed, running around trying to get the house ready for guests, and I realized I had a dozen hard-boiled eggs sitting on the counter doing nothing. I didn’t want to make something complicated. I wanted something that looked like effort but took about twenty minutes of actual hands-on time. So I grabbed a roll of band-aids, some black olives, and a piping bag. It wasn’t supposed to be a masterpiece. It was supposed to be a snack.
But something clicked. The contrast of the sharp mustard filling against the creamy white egg white, wrapped in that salty, chewy bandage, just worked. It’s funny how a little bit of fear can make food taste better. You know? It makes you pay attention. Now, every time I make these, I’m slightly surprised they don’t vanish before I can even take a photo. It’s not just about the scare factor. It’s about that perfect balance of savory and fun. And apparently, my family prefers spooky over sweet, which is a revelation I’m still processing.
Why You’ll Love This Recipe
Let’s be real for a second. Deviled eggs are the ultimate party workhorse. They are reliable, they are delicious, and they are easy to eat while standing up and holding a drink. But plain deviled eggs? They’re a bit boring. They disappear into the background of the snack table. These Spooky Mummy Halloween Deviled Eggs, however, demand attention. They are the centerpiece of the appetizer spread. I’ve made these for office parties, neighborhood trick-or-treat drop-offs, and late-night viewing parties, and they consistently get the most compliments. Here is why they are worth the extra ten minutes of assembly time:
- Quick & Easy Prep: The actual cooking part is just boiling eggs. The assembly is where the fun happens. You can boil a dozen eggs ahead of time, and when your guests arrive, you just mix the filling and wrap them up. It takes less than 30 minutes from start to finish if you have your eggs ready.
- Simple Ingredients: You likely have everything you need in your kitchen right now. Eggs, mayonnaise, mustard, paprika, black olives, and band-aids. No fancy grocery runs. No obscure spices that you’ll use once and forget. It’s pantry-friendly spooky.
- Perfect for Parties: Whether it’s a Halloween party, a fall harvest dinner, or just a Tuesday night craving, these fit anywhere. They are bite-sized, mess-free (mostly), and visually striking. They look like they came from a high-end bistro but taste like comfort food.
- Crowd-Pleaser Factor: I have seen grown adults giggle like children when they see these. Kids love the “gross” factor of the mummy theme. Adults love the savory flavor profile. It bridges the gap between the sweet treats and the savory snacks, which is usually a pain point at parties.
- Unbelievably Delicious: Don’t let the gimmick fool you. The flavor is classic deviled egg perfection. Creamy, tangy, and slightly salty from the olives. The texture of the band-aid adds a nice chew that contrasts with the soft egg. It’s next-level comfort food with a side of fright.
What makes this recipe different from the rest? It’s the band-aid technique. Most mummy eggs use strips of cheese or ham, which can get messy or melt. The band-aid provides a clean, white canvas that holds its shape. It’s a simple twist that elevates the presentation without complicating the flavor. It’s not just another version; it’s the best way to do mummy eggs.
This recipe isn’t just good—it’s the kind that makes you smile when you see the empty plate. It’s comfort food reimagined with a playful twist. It’s perfect for impressing guests without stress, or turning a simple snack into a memorable moment. Plus, if you love fall flavors, you might also enjoy checking out my best easy sourdough discard pumpkin bread for a sweet pairing that balances out the savory eggs.
What Ingredients You Will Need
This recipe relies on simple, wholesome ingredients to deliver bold flavor and satisfying texture without the fuss. The magic here is in the assembly, so the quality of your base ingredients matters. You want eggs that are fresh enough to peel cleanly but old enough to boil easily. For the filling, standard pantry staples work best. I prefer a good quality mayonnaise that isn’t too oily, and a mustard that has a bit of a kick. The band-aids are the star of the show, so make sure they are the standard adhesive type, not the fabric ones.
Here is what you need to gather:
- Large Eggs: 12 large eggs. I recommend pastured eggs if you can find them, as the yolks tend to be a richer yellow color, which looks better in the filling. Room temperature eggs peel easier after boiling.
- Mayonnaise: ½ cup. I use Hellmann’s or Duke’s. You want a creamy, stable mayo that won’t make the filling runny. If you need a dairy-free option, a high-quality vegan mayo works well too.
- Yellow Mustard: 1 tablespoon. Dijon can work, but yellow mustard gives that classic deviled egg tang and color. It’s a non-negotiable for me.
- Paprika: 1 teaspoon, plus more for garnish. Smoked paprika adds a nice depth, but regular sweet paprika is traditional. It adds color and a subtle earthiness.
- Garlic Powder: ½ teaspoon. Just a little bit to round out the flavors. Don’t skip it; it adds a savory background note.
- Salt and Black Pepper: To taste. I usually use about ½ teaspoon of kosher salt and a few cracks of fresh black pepper. Adjust to your preference.
- Black Olives: 1 jar of sliced black olives. Look for firm slices that hold their shape. You will need about 24 slices for the eyes. If you can’t find sliced, you can chop pitted olives into small rounds.
- Band-Aids: 1 roll of standard adhesive bandages. The kind with the white pad and the beige adhesive strip. Make sure they are clean and unused. You’ll need about 2-3 band-aids per egg, depending on how “wrapped” you want them.
If you want to get fancy, you can use red food coloring mixed with a little water to make “blood” drips, but I find the black olive eyes are spooky enough. For the olives, I recommend buying them pre-sliced to save time. If you are making these for a large group, buy two jars. It’s better to have extra than to run out in the middle of assembly.
Equipment Needed
You don’t need a lot of fancy tools to make these, which is part of the appeal. Here is what you’ll need on your counter:
- Large Saucepan: Something that can hold 12 eggs in a single layer. If you have a small pot, you might need to boil them in batches. A medium pot works if you are careful not to crack the shells.
- Large Bowl with Ice Water: This is crucial for stopping the cooking process and making the eggs easier to peel. Fill it with cold water and lots of ice cubes.
- Mixing Bowl: A medium-sized bowl for whisking the egg yolks with the mayonnaise and spices.
- Whisk or Fork: A simple whisk works best for a smooth filling, but a fork is fine if you want a slightly chunkier texture.
- Piping Bag or Ziploc Bag: This makes filling the egg whites much easier and cleaner. If you don’t have a piping bag, just cut the corner off a Ziploc bag.
- Small Knife: For slicing the black olives if they aren’t pre-sliced.
- Spoons or Tweezers: To help place the olive slices for the eyes. Tweezers give you more precision, but a small spoon works fine.
I’ve tried using a spoon to fill the eggs before, and it’s messy. The piping bag is a game-changer. It keeps your hands clean and ensures every egg gets the same amount of filling. If you are on a budget, a reusable silicone piping bag is a great investment. It lasts forever and is easy to clean.
Preparation Method
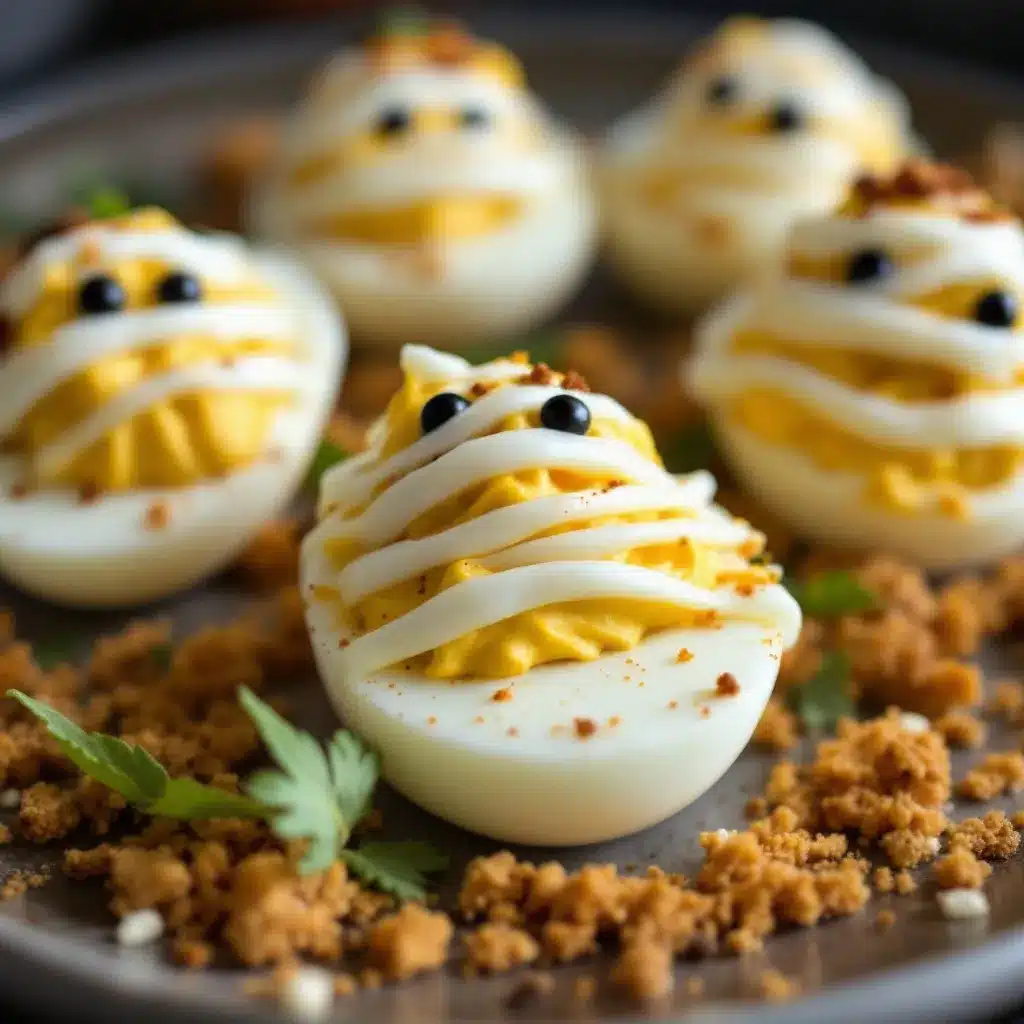
Getting these ready is straightforward, but timing is key. Here is how to bring your spooky mummies to life:
- Boil the Eggs (12-15 minutes): Place the eggs in a single layer in your saucepan. Cover them with cold water by about an inch. Bring the water to a rolling boil over high heat. Once boiling, reduce the heat to medium-low to keep it at a gentle boil. Cook for exactly 12-15 minutes. I prefer 13 minutes for a firm white and a creamy yolk. If you like hard-boiled eggs with a bit of gray ring, go for 15 minutes, but I find it affects the flavor slightly. Don’t overcook them!
- Ice Bath (5 minutes): While the eggs are boiling, prepare your ice bath. As soon as the timer goes off, use a slotted spoon to transfer the eggs immediately into the ice water. Let them sit for at least 5 minutes, or until completely cool. This stops the cooking and contracts the egg inside the shell, making it much easier to peel.
- Peel and Trim (10 minutes): Once cool, tap each egg gently on the counter to crack the shell all over. Peel the eggs under running water to help remove any stubborn shell bits. After peeling, trim the bottom of each egg slightly so it sits flat on the plate. This helps them stand up better for the mummy wrap.
- Halve the Eggs (5 minutes): Slice each egg in half lengthwise. Use a small spoon to gently scoop out the yolks, leaving about ¼ inch of white on the bottom half. Place the yolks in your mixing bowl. Don’t throw away the whites; they are your mummy’s body!
- Make the Filling (5 minutes): To the yolks, add the mayonnaise, mustard, garlic powder, salt, and pepper. Whisk or mash until smooth and creamy. If the mixture is too thick, add a teaspoon of water or more mayo. If it’s too thin, add a bit more mayo. You want a texture that holds its shape but is still spreadable.
- Fill the Whites (5 minutes): Transfer the filling to your piping bag or Ziploc bag. Pipe or squeeze the filling back into the egg white halves. You can make a nice mound on top, or smooth it out. I prefer a slight mound because it gives the mummy something to “wrap” around.
- Apply the Band-Aids (10 minutes): This is the fun part. Take a band-aid and apply it to the egg, starting from the bottom and wrapping around the top. Tear the excess band-aid at the top to create a frayed look. You’ll need about 2-3 band-aids per egg, depending on the size. The goal is to cover the filling but leave a little peek of yolk at the top for texture.
- Add the Eyes (5 minutes): Place two slices of black olive on the front of the egg, just below the top edge. These are the eyes. Press them gently into the band-aid so they stick. Adjust the position so they look slightly crossed or wide-eyed, depending on the vibe you want.
- Chill and Serve: Place the finished mummies on a platter and refrigerate for at least 30 minutes before serving. This helps the band-aids set and the flavors meld. Garnish with a light dusting of paprika if you want a spooky red tint, but it’s not necessary.
Cooking Tips & Techniques
I’ve made a lot of deviled eggs in my time, and I’ve made my share of mistakes. Here is what I’ve learned to ensure your mummies are perfect:
- Freshness Matters for Peeling: Paradoxically, very fresh eggs are harder to peel. If you boil eggs the same day they are laid, you will struggle. Use eggs that are at least a week old. If you only have fresh eggs, add a teaspoon of baking soda to the boiling water, which raises the pH and helps the shell release.
- Don’t Skip the Ice Bath: I know it’s an extra step, but it’s the difference between a perfect egg and a rubbery one. The ice bath also makes the eggs easier to handle when you are peeling them. Cold hands, cold eggs, happy peeling.
- Trimming the Bottom: If your eggs wobble on the plate, your mummies will look unstable. Trimming a tiny slice off the bottom creates a flat surface. It’s a small detail that makes the presentation look professional.
- Band-Aid Technique: Don’t stretch the band-aid too tight. If you pull it too hard, it might snap or tear. Let it wrap naturally. The frayed edges at the top add to the spooky aesthetic, so don’t worry about neatness there.
- Olive Slicing: If your olives are too thick, they might slide off. Slice them thinly. If they are too thin, they might disintegrate. Aim for a medium-thin slice. If you can’t find sliced olives, chop them and press them firmly into the band-aid.
- Make Ahead: You can boil and peel the eggs up to 2 days in advance. Store them in an airtight container in the fridge. Assemble the mummies the day of serving so the band-aids stay crisp. If you assemble too early, the band-aids might get soggy from the moisture of the egg.
Variations & Adaptations
While the classic mummy is a crowd-pleaser, there are plenty of ways to tweak this recipe to suit different tastes or dietary needs:
- Spicy Mummy: Add a dash of cayenne pepper or hot sauce to the yolk mixture. This adds a kick that balances the sweetness of the band-aid. It’s great for those who like a little heat with their Halloween treats.
- Herb-Infused Filling: Mix in some fresh chives or dill into the yolk mixture. The green flecks look great against the white egg and add a fresh flavor profile. This is a nice change from the traditional mustard-heavy filling.
- Vegan Version: Use vegan hard-boiled eggs (there are many brands now) or tofu-based deviled eggs. Swap the mayo for vegan mayo and use vegan band-aids (check the adhesive, as some are animal-based). It’s surprisingly easy to find vegan alternatives for most of these ingredients.
- Gluten-Free Check: Most standard band-aids are gluten-free, but always check the packaging. Some brands use wheat-based adhesives. If you are unsure, use strips of cheese or ham, though the look will be different.
- Colorful Eyes: Instead of black olives, use sliced almonds for a “white eye” look, or use red bell pepper slices for a “bloodshot” effect. It changes the vibe from spooky to festive.
I once tried using green olives for the eyes, and it looked like the mummy was sick. Stick to black or dark purple olives for the best contrast. If you want to get really creative, you can add a tiny dot of red food coloring to the olive to make it look like an eye with bloodshot veins. It’s gross, but it works for Halloween.
Serving & Storage Suggestions
These mummies are best served chilled. The cold temperature keeps the mayo filling firm and the band-aids crisp. Arrange them on a platter with some fake spiderwebs or candy corn around the edges for extra flair. They pair well with a cold drink, like a sparkling water with lemon or a light beer.
If you have leftovers, store them in an airtight container in the refrigerator for up to 2 days. The band-aids might soften slightly, but the flavor will still be good. Do not freeze them, as the egg whites will become rubbery and the texture will be ruined. When you are ready to serve, take them out of the fridge 10 minutes before serving to take the chill off slightly.
Nutritional Information & Benefits
Deviled eggs are a great source of protein and healthy fats. Each egg provides about 70-80 calories, depending on the amount of mayo used. They are naturally gluten-free (if using gluten-free band-aids) and low in carbohydrates. The eggs are rich in choline, which is good for brain health. The olives add some fiber and healthy monounsaturated fats. While this is a treat, it’s not entirely devoid of nutritional value. Just be mindful of the mayo content if you are watching your calorie intake. You can reduce the mayo by half and use Greek yogurt for a lighter version, though the texture will be slightly different.
Conclusion
These Spooky Mummy Halloween Deviled Eggs are more than just a snack; they are a conversation starter. They bring a little bit of humor and creativity to your table, which is exactly what Halloween is all about. I love how easy they are to make and how much joy they bring to people of all ages. Whether you are hosting a party or just want a fun treat for your family, these mummies are a winner.
I encourage you to try them out and see how your guests react. Feel free to customize the filling or the eyes to match your theme. And if you make them, I’d love to hear how they turned out! Leave a comment below with your thoughts or share a photo. Happy Halloween, and happy eating!
Frequently Asked Questions
Can I make these ahead of time?
Yes, you can boil and peel the eggs up to 2 days in advance. Store them in an airtight container in the fridge. Assemble the mummies the day of serving to keep the band-aids crisp.
What if I can’t find black olives?
You can use sliced kalamata olives or even small pieces of black sesame seeds for the eyes. The contrast is key, so choose something dark.
Are band-aids edible?
Standard band-aids are not considered food-grade, but they are generally safe to eat in small amounts. However, some people prefer to use cheese or ham strips instead. If you use band-aids, just make sure they are clean and unused.
Can I use jumbo eggs?
Absolutely. Jumbo eggs will give you larger mummies, which might be better for kids. Adjust the number of band-aids accordingly, as you might need 3-4 per egg.
How do I keep the band-aids from sliding off?
Make sure the egg whites are dry before applying the band-aids. Moisture can prevent the adhesive from sticking. If they still slide, you can use a tiny dot of cream cheese to act as glue.
Pin This Recipe!
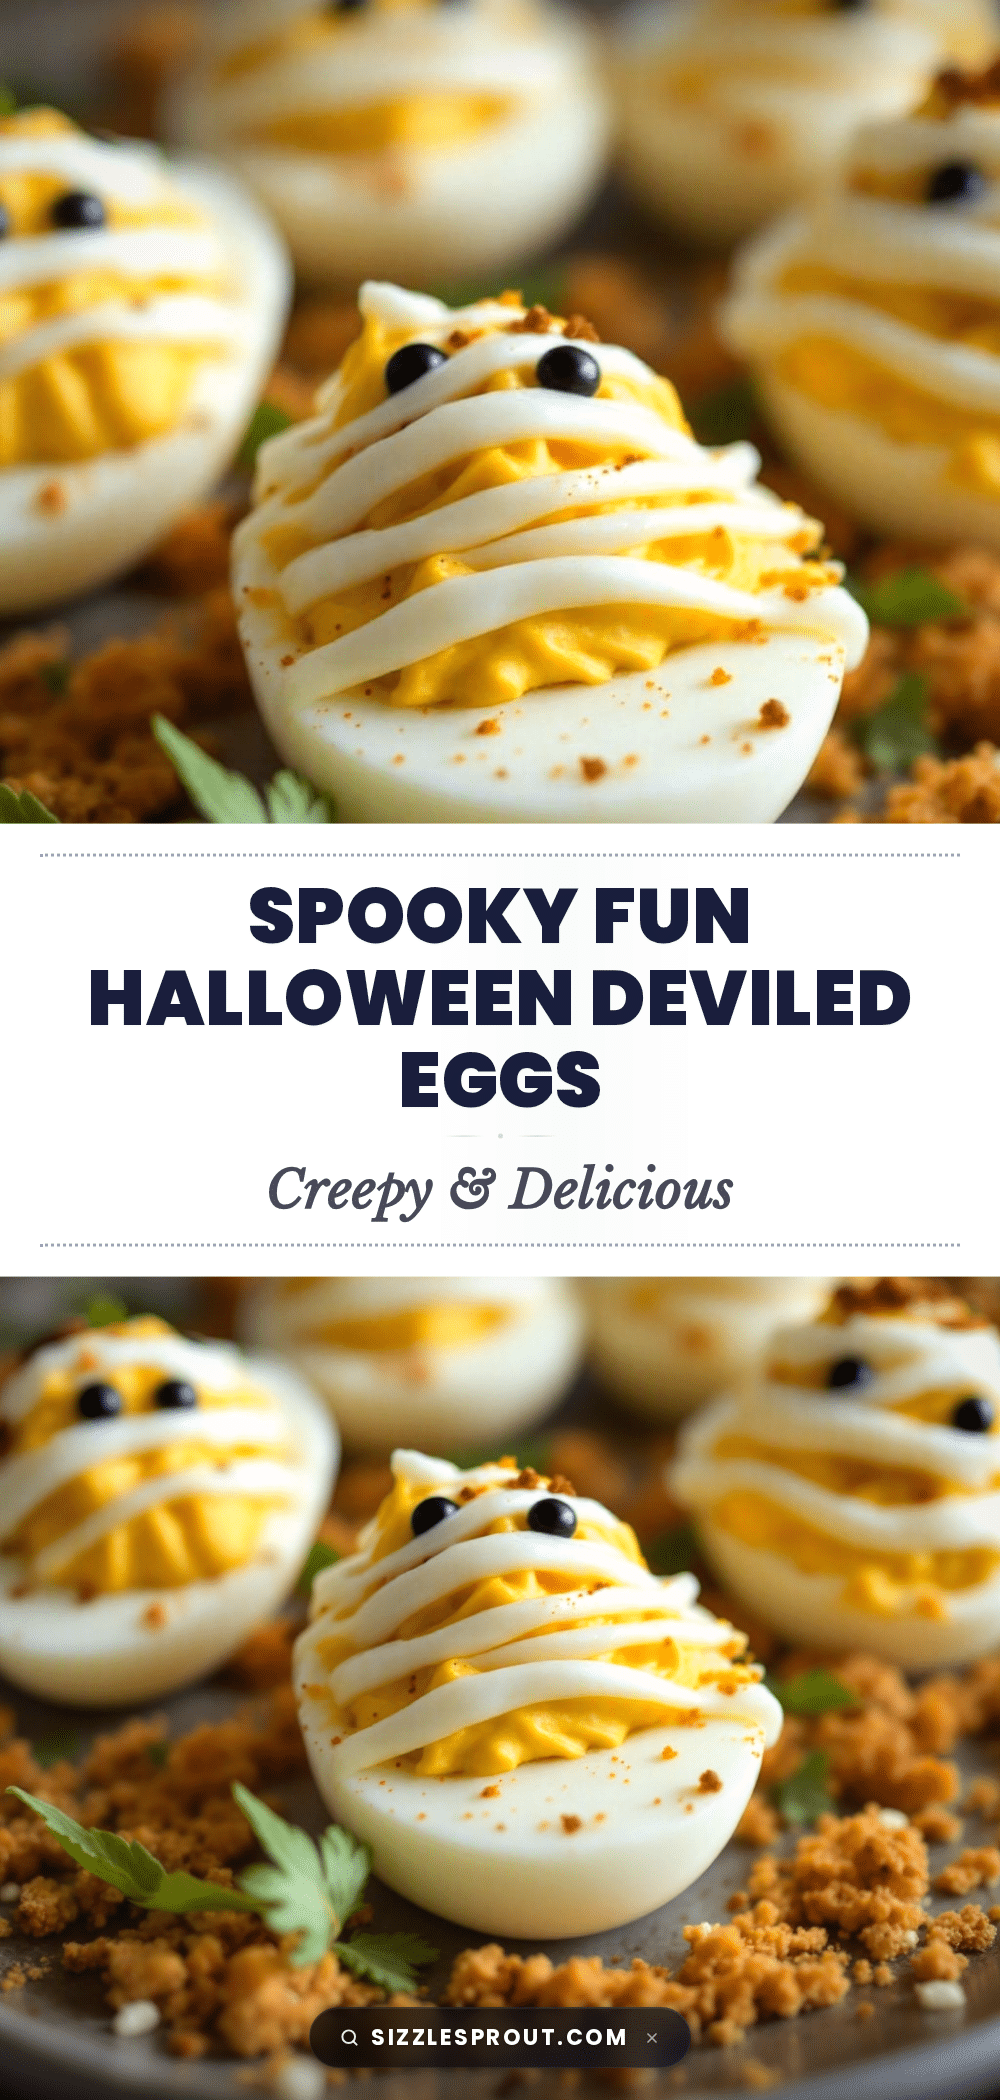
Spooky Mummy Halloween Deviled Eggs
A fun and spooky Halloween party snack featuring classic deviled eggs wrapped in adhesive bandages with black olive eyes. These easy-to-make appetizers are a crowd-pleaser that combines savory flavor with festive presentation.
- Prep Time: 20 minutes
- Cook Time: 15 minutes
- Total Time: 35 minutes
- Yield: 24 servings 1x
- Category: Appetizer
- Cuisine: American
Ingredients
- 12 large eggs
- 1/2 cup mayonnaise
- 1 tablespoon yellow mustard
- 1 teaspoon paprika (plus more for garnish)
- 1/2 teaspoon garlic powder
- 1/2 teaspoon kosher salt
- Fresh black pepper to taste
- 1 jar sliced black olives (approx. 24 slices)
- 1 roll of standard adhesive bandages
Instructions
- Place eggs in a single layer in a saucepan and cover with cold water by an inch. Bring to a rolling boil, then reduce heat to medium-low and cook for 12-15 minutes.
- Transfer eggs immediately to an ice bath and let sit for at least 5 minutes until completely cool.
- Peel the eggs under running water, trim the bottom slightly to create a flat base, and slice each egg in half lengthwise.
- Scoop out the yolks into a mixing bowl, leaving about 1/4 inch of white on the bottom halves.
- Whisk the yolks with mayonnaise, mustard, garlic powder, salt, and pepper until smooth and creamy.
- Transfer the filling to a piping bag or Ziploc bag and pipe it back into the egg white halves.
- Wrap each egg with 2-3 band-aids, starting from the bottom and tearing the excess at the top for a frayed look.
- Place two slices of black olive on the front of each egg to serve as eyes.
- Refrigerate for at least 30 minutes before serving to allow flavors to meld and band-aids to set.
Notes
Use eggs that are at least a week old for easier peeling. Ensure eggs are dry before applying band-aids to help them stick. Band-aids are not food-grade but are generally safe in small amounts; cheese or ham strips can be used as an alternative. Do not freeze these eggs as the texture will become rubbery.
Nutrition
- Serving Size: 2 halves per serving
- Calories: 75
- Sodium: 70
- Fat: 5
- Saturated Fat: 1
- Carbohydrates: 1
- Protein: 6
Keywords: Halloween, deviled eggs, mummy eggs, party snack, easy appetizer, spooky food, band-aid eggs, olive eyes


