Love this? Save it for later!
Share the inspiration with your friends
My niece’s fifth birthday was two days away, and I had promised her a unicorn cake. The kind with the horn, the ears, the whole magical shebang. I had pinned about forty different versions, bought specialty pans, and even practiced a buttercream that was supposed to be “flawlessly smooth.” Then my mixer died. Not a slow, wheezing death either—a dramatic, smoke-from-the-motor, game-over kind of death. I stood there, staring at a counter covered in flour and a bowl of butter that was getting softer by the second, feeling that familiar pinch of panic. There was no time for a unicorn. There was barely time for a regular cake. I grabbed my hand mixer from the back of the pantry—the one I keep for emergencies—and decided to just make the simple, reliable, perfect classic birthday cake I’ve been making since I was a teenager. The one with the sprinkle buttercream that looks like a party on a plate. And honestly? It was better than any unicorn. The kids went wild for the rainbow-freckled frosting, and the adults kept sneaking back for “just one more sliver.” That’s when I remembered that sometimes the most memorable cakes aren’t the most complicated ones. They’re the ones made with love and a little bit of desperation. This is that cake.
Why You’ll Love This Recipe
This isn’t just another birthday cake recipe. This is the one that will end your search for the perfect celebration cake. I’ve tested this batter more times than I care to count, tweaking the ratio of butter to sugar until the crumb was just right—tender but sturdy enough to hold a generous layer of frosting. It’s the kind of cake that makes you look like a pro baker without requiring a culinary degree.
- Foolproof Texture: The combination of buttermilk and cake flour creates a crumb that’s impossibly soft and moist. It’s not dry, it’s not dense—it’s just right.
- Simple Ingredients: You probably have most of these in your pantry right now. No weird extracts or hard-to-find flours.
- Perfect for Any Celebration: Birthdays, anniversaries, Tuesday nights—this cake is always appropriate. The sprinkle buttercream makes it feel special without being fussy.
- Crowd-Pleaser: I’ve brought this to potlucks, school bake sales, and family reunions. It disappears every single time. Kids love the sprinkles, adults love the balanced sweetness.
- Make-Ahead Friendly: The cake layers freeze beautifully, and the frosting can be made a day in advance. This is a stress-free party dessert.
What makes this version different from the rest? It’s the technique. Creaming the butter and sugar for a full five minutes—not just until combined—creates air pockets that make the cake light and fluffy. And the sprinkle buttercream? I fold the sprinkles in by hand at the very end so they don’t bleed their color into the frosting. Little details like that make a big difference. This cake is the one you’ll turn to for every birthday from now on. It’s reliable, it’s beautiful, and it tastes like pure joy.
What Ingredients You Will Need
This recipe uses simple, wholesome ingredients to create a cake that tastes anything but basic. The magic is in how they work together. Let’s break down each ingredient and why it matters.
For the Cake
- Unsalted Butter (1 cup / 2 sticks), softened: Use good quality butter here. I prefer Kerrygold or Challenge. The butter provides richness and flavor. Make sure it’s truly softened to room temperature—if it’s too cold, it won’t cream properly.
- Granulated Sugar (2 cups): Standard white sugar sweetens the cake and helps create that tender crumb. Don’t substitute with a liquid sweetener here.
- Large Eggs (4), room temperature: Room temperature eggs emulsify better into the batter, creating a smoother, more uniform texture. Take them out of the fridge about 30 minutes before you start.
- Cake Flour (3 cups): This is key. Cake flour has a lower protein content than all-purpose flour, which results in a softer, more delicate crumb. If you don’t have cake flour, you can make a substitute: measure 3 cups of all-purpose flour, remove 6 tablespoons, and replace with 6 tablespoons of cornstarch. Sift it all together.
- Baking Powder (2 teaspoons): Our leavening agent. Make sure it’s fresh—test it by adding a teaspoon to hot water; if it bubbles vigorously, it’s good.
- Baking Soda (½ teaspoon): Works with the buttermilk to help the cake rise and brown beautifully.
- Salt (1 teaspoon): Balances the sweetness and enhances the flavor of the butter.
- Buttermilk (1½ cups), room temperature: This is the secret to a moist cake. The acid in buttermilk tenderizes the gluten, making the cake incredibly soft. If you don’t have buttermilk, you can make a quick version: add 1½ tablespoons of lemon juice or white vinegar to a measuring cup, then fill with regular milk to the 1½ cup line. Let it sit for 5 minutes.
- Vanilla Extract (2 teaspoons): Pure vanilla, not imitation. It makes a noticeable difference in the depth of flavor.
- Vegetable Oil (¼ cup): This is my secret ingredient. A little oil adds extra moisture and keeps the cake tender for days.
For the Sprinkle Buttercream
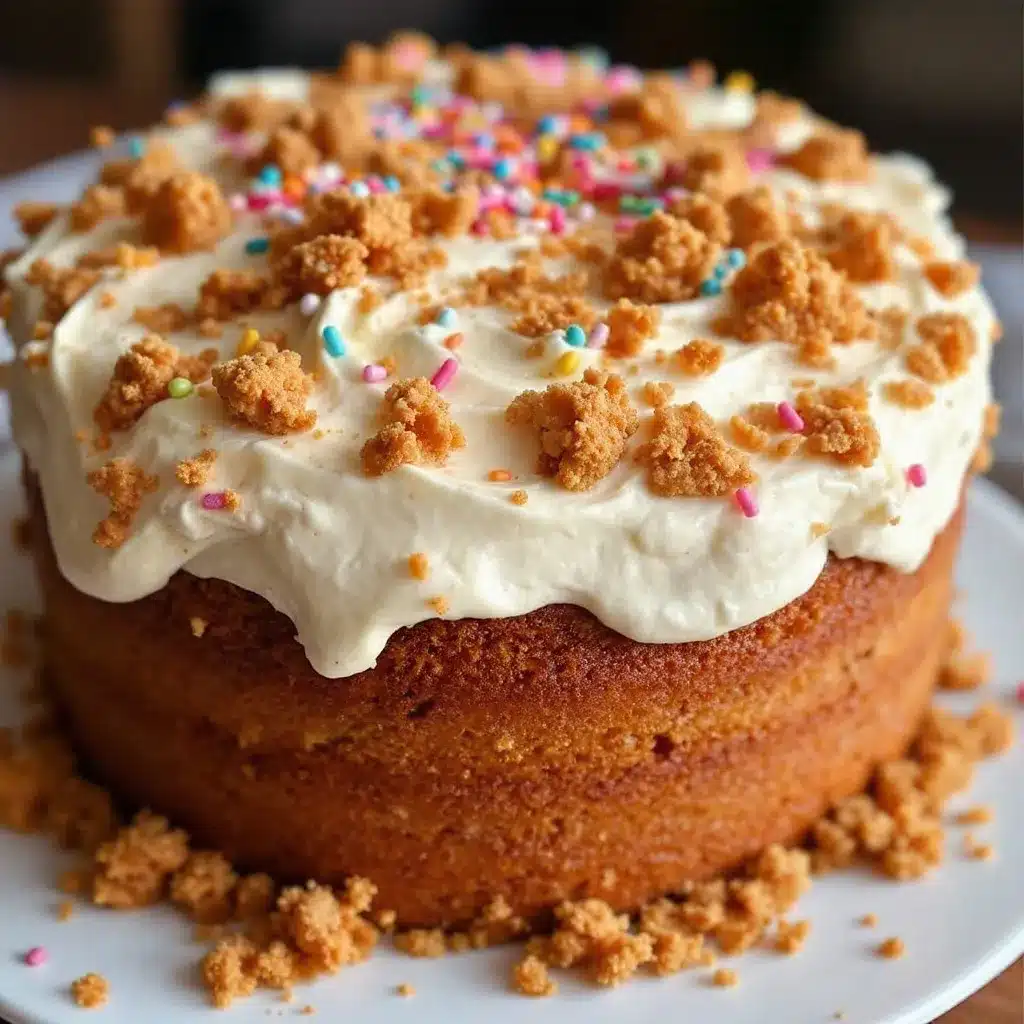
- Unsalted Butter (1½ cups / 3 sticks), softened: Again, use good butter. The frosting is mostly butter, so its flavor matters.
- Powdered Sugar (4-5 cups): Sifted to avoid lumps. You can adjust the amount depending on how stiff you want the frosting.
- Heavy Cream (3-4 tablespoons): Adds richness and helps achieve the perfect spreading consistency. You can use milk in a pinch.
- Vanilla Extract (1 tablespoon): More vanilla for more flavor.
- Salt (¼ teaspoon): Cuts the sweetness and makes the frosting taste more complex.
- Rainbow Sprinkles (½ cup): Use jimmies—the long, thin kind—not nonpareils (the tiny round ones). Nonpareils tend to bleed their color into the frosting. Jimmies hold up much better.
Equipment Needed
You don’t need a fancy bakery setup for this cake, but having the right tools makes the process smoother. Here’s what you’ll need:
- Two 9-inch round cake pans: I recommend light-colored metal pans for even baking. Dark pans can cause the edges to brown too quickly.
- Stand mixer or hand mixer: A stand mixer with the paddle attachment is ideal for creaming the butter and sugar. But my hand mixer saved the day when my stand mixer died, so don’t worry if that’s all you have.
- Mixing bowls: You’ll need at least two—one for dry ingredients, one for wet.
- Whisk: For sifting and combining dry ingredients.
- Rubber spatula: For scraping down the bowl and folding in sprinkles.
- Cooling rack: Essential for cooling the cakes evenly so they don’t get soggy on the bottom.
- Offset spatula: Makes frosting the cake much easier, but a butter knife works too.
- Cake stand or plate: For serving.
- Parchment paper: Cut circles to line the bottom of your cake pans. This guarantees the cakes release perfectly.
Preparation Method
Let’s make this perfect classic birthday cake. Take your time with each step—rushing is the enemy of a good cake.
- Preheat and Prep: Preheat your oven to 350°F (175°C). Grease two 9-inch round cake pans with butter or non-stick spray. Cut two circles of parchment paper to fit the bottoms of the pans, place them in, and grease the parchment too. This extra step is worth it—I learned the hard way after a cake stuck to the pan and I had to serve it as “trifle.”
- Whisk Dry Ingredients: In a medium bowl, whisk together the 3 cups of cake flour, 2 teaspoons of baking powder, ½ teaspoon of baking soda, and 1 teaspoon of salt. Set aside.
- Cream Butter and Sugar: In the bowl of your stand mixer (or a large bowl if using a hand mixer), beat the 1 cup of softened butter and 2 cups of granulated sugar together on medium-high speed. This is the most important step. Beat for a full 5 minutes. It should look light, fluffy, and pale yellow. Scrape down the sides and bottom of the bowl halfway through. Don’t skimp on this—it’s where the cake gets its structure.
- Add Eggs One at a Time: With the mixer on medium speed, add the 4 room-temperature eggs one at a time, beating well after each addition (about 30 seconds each). Add the 2 teaspoons of vanilla extract with the last egg. The mixture might look a little curdled at this point—that’s okay. It will come together when you add the flour.
- Alternate Dry and Wet Ingredients: With the mixer on low speed, add the flour mixture in three parts, alternating with the buttermilk in two parts. Start and end with the flour. So: ⅓ flour, ½ buttermilk, ⅓ flour, ½ buttermilk, ⅓ flour. Mix just until combined after each addition. Overmixing at this stage will make the cake tough. After the last addition of flour, add the ¼ cup of vegetable oil and mix on low for just a few seconds until it’s incorporated.
- Divide and Bake: Divide the batter evenly between the two prepared pans. I use a kitchen scale for accuracy—about 650 grams per pan. Smooth the tops with a spatula. Bake for 28-32 minutes, or until a toothpick inserted into the center comes out clean or with a few moist crumbs. The cakes should be golden and the edges should just start to pull away from the pan. Let them cool in the pans for 10 minutes, then turn them out onto a cooling rack to cool completely. Resist the urge to frost them while they’re warm—the frosting will melt into a puddle.
- Make the Buttercream: While the cakes cool, make the frosting. In the bowl of your stand mixer with the paddle attachment, beat the 1½ cups of softened butter on medium-high speed for 5 minutes. It should look pale and creamy. Reduce the speed to low and gradually add the 4 cups of sifted powdered sugar. Add the ¼ teaspoon of salt and 1 tablespoon of vanilla. Add 3 tablespoons of heavy cream. Increase the speed to medium-high and beat for 3-4 minutes until the frosting is light, fluffy, and spreadable. If it’s too stiff, add another tablespoon of cream. If it’s too soft, add a little more powdered sugar.
- Fold in Sprinkles: This is the crucial step. Remove the bowl from the mixer and use a rubber spatula to gently fold in the ½ cup of rainbow jimmies. Fold just until they’re distributed. Over-folding can cause the colors to bleed.
- Assemble the Cake: Place one cooled cake layer on your cake stand. Use an offset spatula to spread about 1 cup of frosting evenly on top. Place the second cake layer on top, making sure it’s level. Apply a thin crumb coat of frosting all over the entire cake—this seals in the crumbs. Refrigerate for 20 minutes to set the crumb coat.
- Frost and Decorate: Once the crumb coat is firm, apply the remaining frosting to the top and sides of the cake. Create swoops and swirls with your spatula for that classic bakery look. Top with extra sprinkles if you’re feeling festive.
Cooking Tips & Techniques
I’ve made this cake dozens of times, and I’ve made every mistake in the book. Here’s what I’ve learned so you don’t have to.
Room Temperature Ingredients are Non-Negotiable: This isn’t just a suggestion. Cold eggs or cold buttermilk will seize the butter in the creaming stage, giving you a dense, heavy cake. Set everything out on the counter at least an hour before you start. Trust me on this—I once tried to speed things up with cold ingredients and ended up with a cake that was more like a hockey puck.
Don’t Overmix the Batter: Once you add the flour, you’re just trying to bring everything together. Overmixing develops gluten, which makes the cake tough and chewy. Mix on low speed and stop as soon as you don’t see any streaks of flour. A few lumps are fine.
The “Pillowcase” Trick for Even Layers: If your cakes dome in the center, you can level them with a serrated knife once they’re completely cool. But a better trick is to use a damp kitchen towel wrapped around the outside of the cake pan. It insulates the pan and helps the cake bake more evenly. I learned this from a pastry chef friend, and it works like magic.
Frosting Consistency: If your buttercream is too soft, it might be because your butter was too soft. Pop the bowl in the fridge for 10 minutes, then beat it again. If it’s too stiff, add a tiny splash of cream. The perfect buttercream should be smooth, spreadable, and hold its shape.
Make it Ahead: This cake is actually better the next day. The flavors meld together, and the texture becomes even more moist. You can bake the cakes a day in advance, wrap them tightly in plastic wrap, and store them at room temperature. Or freeze them for up to a month. The frosting can be made a day ahead and stored in the fridge—just let it come to room temperature and re-whip it before using.
Variations & Adaptations
This perfect classic birthday cake is a blank canvas. Here are some of my favorite ways to change it up.
Chocolate Birthday Cake: Replace ½ cup of the cake flour with ½ cup of unsweetened cocoa powder. Sift it with the other dry ingredients. The buttermilk keeps this chocolate version incredibly moist. It’s a game-changer for chocolate lovers.
Lemon Sprinkle Cake: Add the zest of 2 lemons to the creamed butter and sugar. Replace the vanilla extract with lemon extract. The bright citrus flavor pairs beautifully with the sweet sprinkle buttercream. This is my go-to for spring birthdays.
Confetti Cake: Fold ½ cup of rainbow jimmies into the cake batter itself, right at the end. They’ll create little pockets of color throughout the cake. This is the classic “funfetti” approach, and kids absolutely love it.
Cupcakes: This batter makes about 24 standard cupcakes. Bake them at 350°F (175°C) for 18-20 minutes. The sprinkle buttercream pipes beautifully on top.
Gluten-Free Option: Use a good quality gluten-free all-purpose flour blend that contains xanthan gum. Bob’s Red Mill 1-to-1 works well. The texture will be slightly different, but it’s still delicious.
Dairy-Free Option: Use a plant-based butter (I like Miyoko’s) and substitute the buttermilk with 1½ cups of unsweetened almond milk mixed with 1½ tablespoons of lemon juice. The frosting can be made with plant-based butter too.
Serving & Storage Suggestions
This cake is best served at room temperature. The buttercream softens and the cake becomes incredibly tender. If you’ve refrigerated it, let it sit on the counter for about 30 minutes before serving.
Serving: Cut slices with a sharp, thin-bladed knife. Wipe the knife clean between cuts for neat slices. A scoop of vanilla ice cream on the side is never a bad idea. For an extra special touch, drizzle a little warm fudge sauce over each slice.
Storage: Store the frosted cake in an airtight container at room temperature for up to 3 days. If your kitchen is warm (above 75°F), store it in the refrigerator to prevent the frosting from melting. Bring it back to room temperature before serving.
Freezing: You can freeze the entire frosted cake. Place it in the freezer unwrapped for an hour to firm up the frosting, then wrap it tightly in plastic wrap and foil. It will keep for up to 3 months. Thaw overnight in the refrigerator before bringing to room temperature.
Leftover Frosting: If you have extra buttercream, it’s wonderful on graham crackers or spread on a slice of banana bread. It also freezes well for up to 2 months.
Nutritional Information & Benefits
Let’s be honest—this is a celebration cake. It’s not health food, and that’s okay. But I do believe in knowing what’s in your food. Here’s an approximate breakdown per slice (based on 12 servings):
- Calories: 520
- Fat: 28g
- Saturated Fat: 17g
- Carbohydrates: 67g
- Sugar: 48g
- Protein: 5g
The buttermilk provides a small amount of calcium and protein. The butter contains fat-soluble vitamins. And honestly? The biggest benefit of this cake is the joy it brings. There’s something special about a homemade birthday cake that a store-bought one just can’t replicate. It’s a labor of love, and that counts for something.
If you’re looking for a lighter option, you can try my healthy no-bake granola bars for a treat that’s a bit more everyday-friendly.
Conclusion
This perfect classic birthday cake with sprinkle buttercream is more than just a recipe—it’s a tradition. It’s the cake I make for every family birthday, for friends who need cheering up, and for those moments when you just need something beautiful and delicious. It’s reliable, it’s forgiving, and it always, always makes people smile.
I hope you make this cake for someone you love. Or for yourself—because you deserve a birthday cake even if it’s not your birthday. Customize it with your favorite sprinkles, add a different extract, or pile on the frosting. That’s the beauty of a classic recipe: it’s a starting point, not a rulebook.
If you make this perfect classic birthday cake, I’d love to hear about it. Leave a comment below and let me know how it turned out. Did you add any fun variations? Did the sprinkle buttercream make everyone’s day? Share your photos and tag me on social media—I can’t wait to see your creations. Happy baking, friend!
Frequently Asked Questions
Can I use all-purpose flour instead of cake flour?
You can, but the cake won’t be as tender. Cake flour has less protein, which means less gluten development and a softer crumb. If you only have all-purpose flour, use the substitute I mentioned above: remove 6 tablespoons of flour and replace with 6 tablespoons of cornstarch, then sift it all together.
Why did my cake sink in the middle?
This usually happens for a few reasons. The oven might not be hot enough, so the cake doesn’t set properly before it rises and then falls. Or you might have over-beaten the batter after adding the flour, which develops too much gluten. Also, make sure your baking powder and baking soda are fresh.
Can I make this cake without a stand mixer?
Absolutely! A hand mixer works perfectly. You’ll just need to hold it for a bit longer during the creaming stage. You can even mix it by hand with a wooden spoon, but it will take some elbow grease. The key is still to cream the butter and sugar until light and fluffy.
How do I get my sprinkle buttercream to be bright white?
To get a pure white buttercream, use clear vanilla extract instead of the dark brown kind. Also, beat the butter for a full 5-7 minutes until it’s very pale. A tiny drop of purple food coloring can also help cancel out any yellow tones in the butter.
Can I use this recipe for a layered cake with more than two tiers?
Yes! This recipe makes about 7 cups of batter, which is perfect for two 9-inch layers. For a three-layer cake, multiply the recipe by 1.5. For a four-layer cake, double it. Just make sure your pans aren’t too full—fill them only about halfway to avoid overflow.
Pin This Recipe!
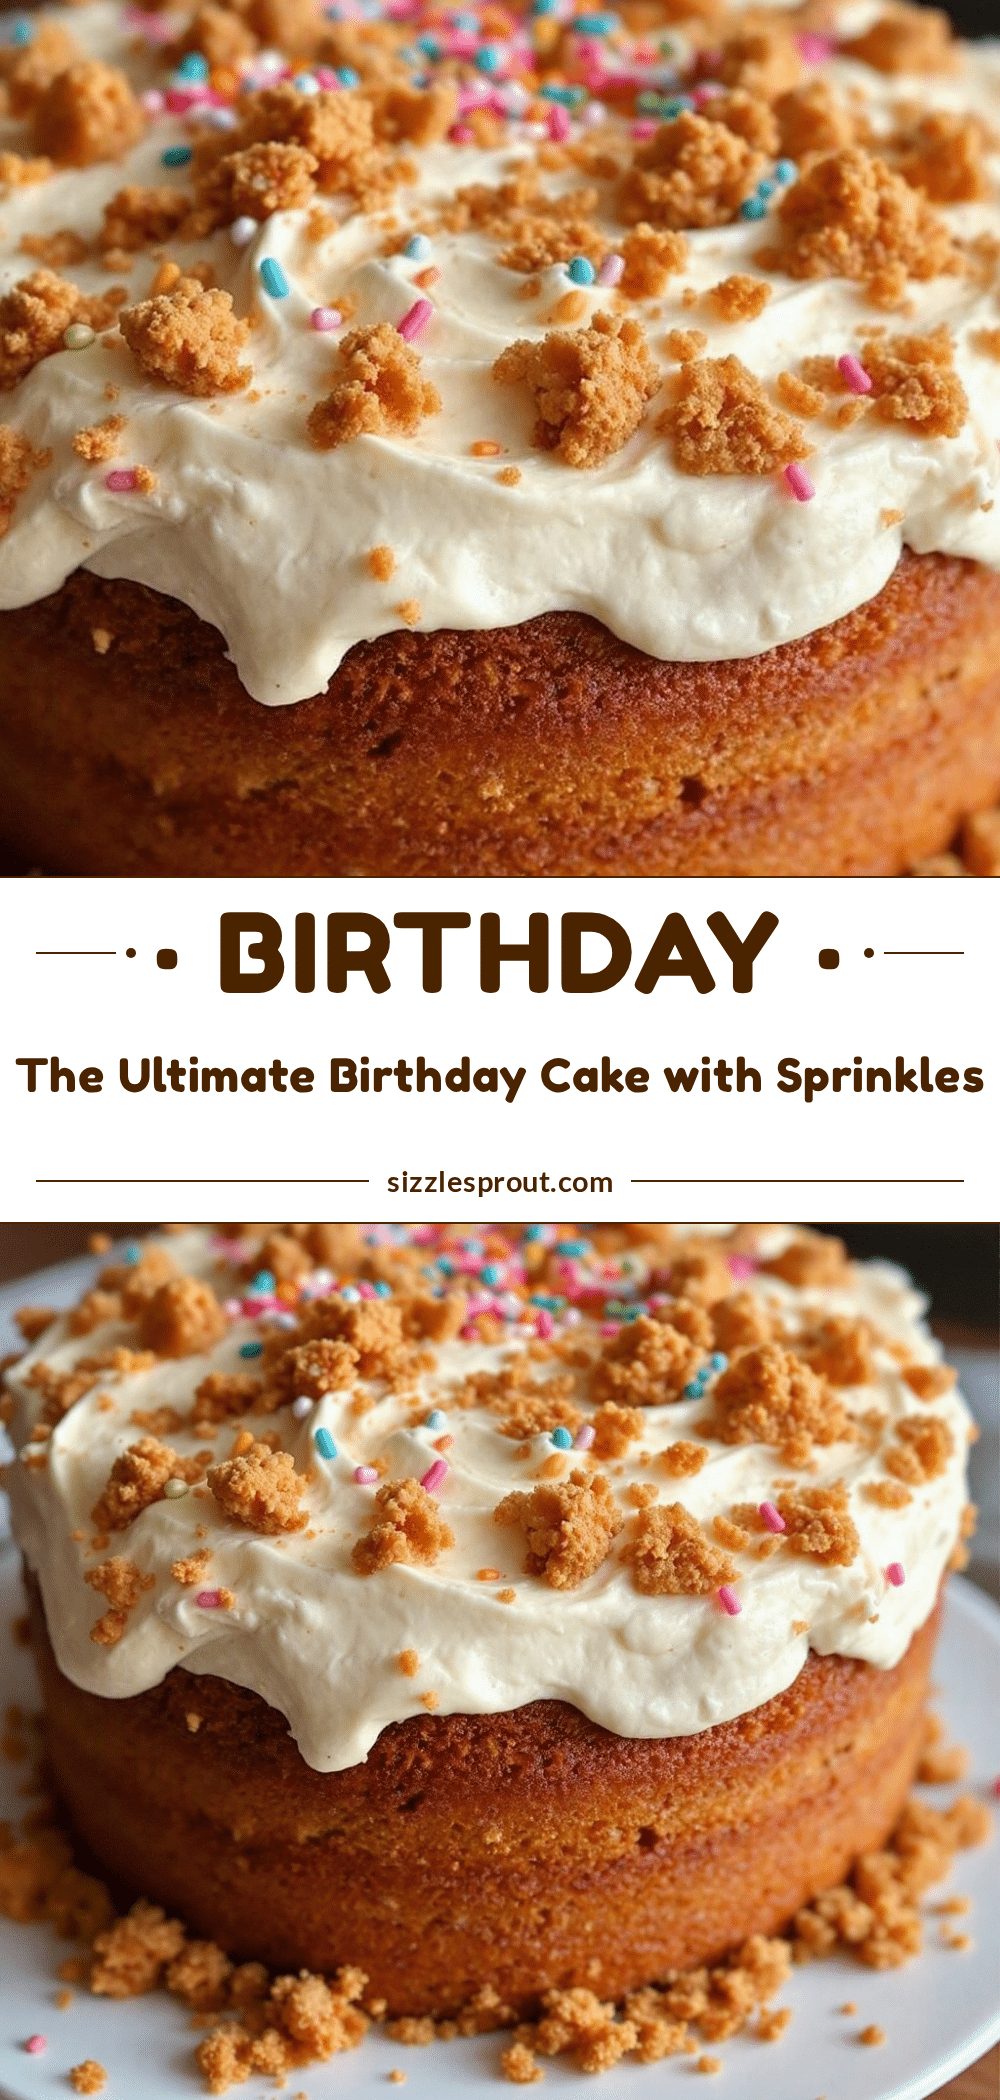
Perfect Classic Birthday Cake with Sprinkle Buttercream
This foolproof birthday cake features a tender, moist crumb thanks to buttermilk and cake flour, topped with a vibrant sprinkle buttercream. It’s the reliable, crowd-pleasing celebration cake you’ll turn to for every birthday.
- Prep Time: 30 minutes
- Cook Time: 30 minutes
- Total Time: 1 hour 30 minutes (includes cooling and chilling)
- Yield: 12 servings 1x
- Category: Dessert
- Cuisine: American
Ingredients
- 1 cup (2 sticks) unsalted butter, softened
- 2 cups granulated sugar
- 4 large eggs, room temperature
- 3 cups cake flour
- 2 teaspoons baking powder
- ½ teaspoon baking soda
- 1 teaspoon salt
- 1½ cups buttermilk, room temperature
- 2 teaspoons vanilla extract
- ¼ cup vegetable oil
- 1½ cups (3 sticks) unsalted butter, softened (for frosting)
- 4–5 cups powdered sugar, sifted
- 3–4 tablespoons heavy cream
- 1 tablespoon vanilla extract
- ¼ teaspoon salt
- ½ cup rainbow jimmies (sprinkles)
Instructions
- Preheat oven to 350°F (175°C). Grease two 9-inch round cake pans, line bottoms with parchment paper, and grease the parchment.
- In a medium bowl, whisk together cake flour, baking powder, baking soda, and salt. Set aside.
- In a stand mixer with paddle attachment (or large bowl with hand mixer), beat softened butter and granulated sugar on medium-high speed for 5 minutes until light, fluffy, and pale yellow. Scrape down bowl halfway through.
- Add eggs one at a time, beating well after each addition (about 30 seconds each). Add vanilla extract with the last egg.
- With mixer on low, add flour mixture in three parts, alternating with buttermilk in two parts, starting and ending with flour. Mix just until combined after each addition. Add vegetable oil and mix on low for a few seconds until incorporated.
- Divide batter evenly between prepared pans (about 650 grams each). Smooth tops. Bake for 28-32 minutes, until a toothpick inserted in center comes out clean or with a few moist crumbs. Cool in pans for 10 minutes, then turn out onto a cooling rack to cool completely.
- For buttercream: In stand mixer with paddle attachment, beat 1½ cups softened butter on medium-high speed for 5 minutes until pale and creamy. Reduce speed to low, gradually add 4 cups sifted powdered sugar, salt, and vanilla. Add 3 tablespoons heavy cream. Increase speed to medium-high and beat for 3-4 minutes until light, fluffy, and spreadable. Adjust consistency with additional cream or powdered sugar as needed.
- Remove bowl from mixer. Gently fold in rainbow jimmies with a rubber spatula until just distributed.
- Place one cooled cake layer on cake stand. Spread about 1 cup frosting evenly on top. Place second layer on top, ensuring it’s level. Apply a thin crumb coat of frosting all over the cake. Refrigerate for 20 minutes to set.
- Once crumb coat is firm, apply remaining frosting to top and sides. Create swoops and swirls with spatula. Top with extra sprinkles if desired.
Notes
Room temperature ingredients are crucial for proper creaming. Don’t overmix the batter once flour is added. For even layers, wrap a damp kitchen towel around the outside of the cake pans. The cake is even better the next day. Store frosted cake in an airtight container at room temperature for up to 3 days, or refrigerate if kitchen is warm.
Nutrition
- Serving Size: 1 slice (1/12 of cak
- Calories: 520
- Sugar: 48
- Sodium: 320
- Fat: 28
- Saturated Fat: 17
- Carbohydrates: 67
- Protein: 5
Keywords: birthday cake, classic cake, sprinkle buttercream, vanilla cake, celebration cake, homemade cake


