Love this? Save it for later!
Share the inspiration with your friends
The pan was scraped clean before the coffee even finished brewing. My neighbor actually texted me at 9 PM asking if I had any left to trade for her famous chili. That’s when I knew these caramel apple cheesecake bars were something special.
I wasn’t trying to create a masterpiece that day. Honestly, I had a half-bag of apples from a failed attempt at homemade applesauce, a block of cream cheese about to expire, and a serious craving for something sweet but not too heavy. You know those afternoons when you just start pulling things from the fridge hoping they’ll make sense together? That was this.
The first batch came out okay. The second batch—after I figured out the caramel situation—came out dangerous. The crust had that buttery snap, the cheesecake layer was silky without being dense, and the apples softened just enough to melt into everything without turning into mush. Then the caramel on top? Let’s just say I stood at the counter eating the edge pieces straight from the pan. No plate. No shame.
These bars have become my unofficial fall signature, the thing people request for gatherings and the thing I make when I need to feel like I’ve got at least one dessert completely dialed in. They’re not fussy. They don’t require a water bath or a springform pan or any of that fancy stuff that makes baking feel like a science experiment. They’re just really, really good.
Why You’ll Love This Recipe
I’ve tested this recipe seven times to get every layer just right. Not because it was hard, but because I wanted it to feel effortless for you. Here is why these bars stand out from every other apple dessert you have tried:
- No Water Bath Needed : The cheesecake layer stays creamy without the hassle of wrapping pans in foil or worrying about leaks. I tested it both ways and honestly, skipping the water bath actually gave me better texture.
- Simple Ingredients : You likely have most of this in your pantry right now. No fancy extracts, no hard-to-find cheeses, no specialty flours. Just real ingredients that make sense together.
- Perfect for Fall Gatherings : These bars travel well, slice cleanly, and look impressive without requiring assembly at the last minute. Bring them to a potluck and watch them disappear before the main course even hits the table.
- Balanced Sweetness : The tartness from the apples cuts through the creamy cheesecake and buttery crust. It is sweet but not cloying—the kind of dessert you can actually finish and still want another bite.
- Make-Ahead Friendly : These bars actually taste better the next day. The flavors meld together overnight and the texture firms up perfectly for clean slicing.
What makes this recipe different from the countless apple cheesecake bars out there? It is the caramel situation. Most recipes tell you to drizzle store-bought caramel on top, which either slides right off or gets absorbed into the apples. I figured out a way to create a caramel layer that stays put, gets slightly chewy around the edges, and doesn’t make the bars soggy. That alone took three test batches to nail.
These bars are the kind of dessert that makes you close your eyes after the first bite. Not because they’re fancy, but because they taste exactly like what you wanted them to taste like. Comfort food that actually delivers.
What Ingredients You Will Need
This recipe uses straightforward ingredients to build layers of flavor without unnecessary complexity. Each component plays a specific role, from the sturdy crust to the silky filling to that golden apple topping.
For the Crust
- 1 ½ cups all-purpose flour (spooned and leveled—don’t scoop straight from the bag)
- ½ cup granulated sugar
- ½ cup unsalted butter, cold and cut into small cubes (I use Kerrygold for the flavor, but any good unsalted butter works)
- ¼ teaspoon salt
For the Cheesecake Layer
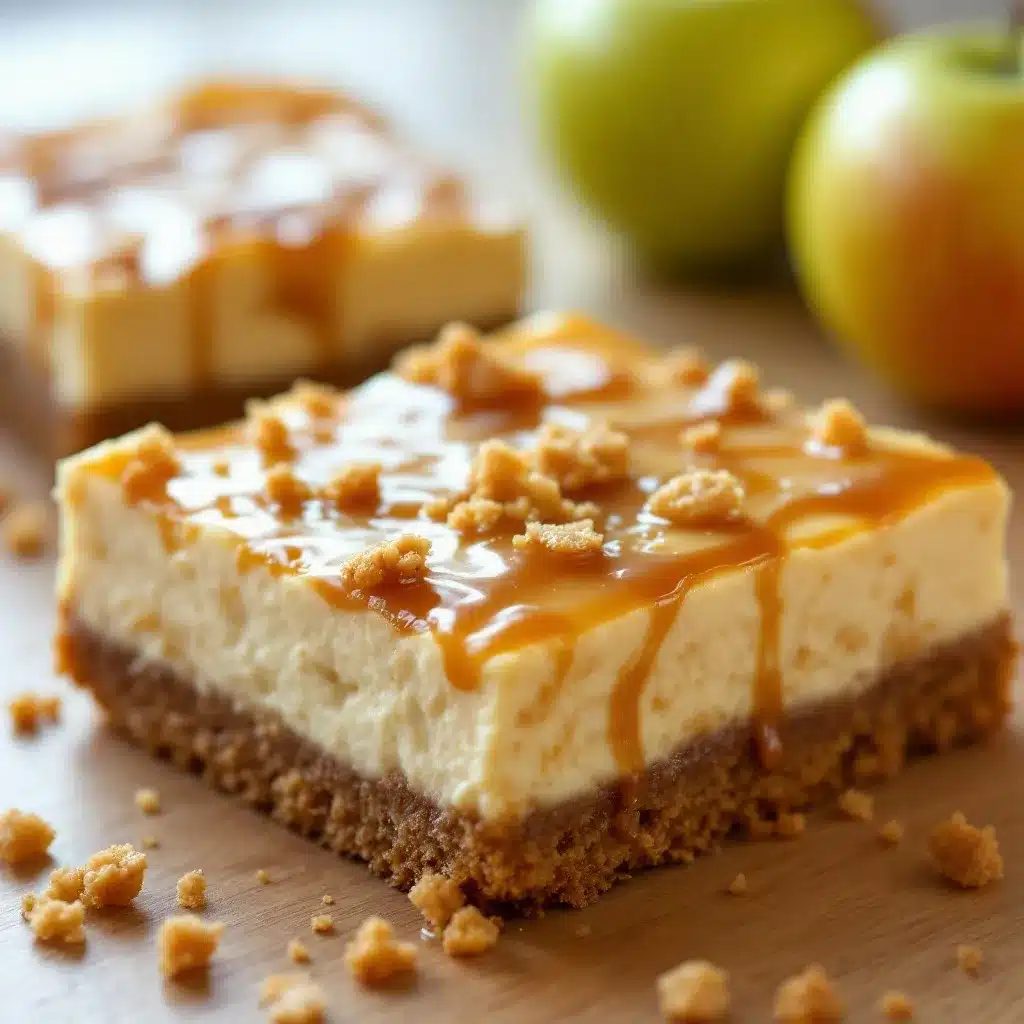
- 16 ounces cream cheese, softened to room temperature (full-fat is non-negotiable here—low-fat turns grainy)
- ½ cup granulated sugar
- 2 large eggs, room temperature
- 1 teaspoon vanilla extract (use the real stuff, not imitation)
- 2 tablespoons all-purpose flour (helps stabilize the filling)
For the Apple Layer
- 3 medium apples, peeled, cored, and diced into ½-inch cubes (about 3 cups)
- 2 tablespoons granulated sugar
- 1 tablespoon all-purpose flour
- 1 teaspoon ground cinnamon
- ¼ teaspoon ground nutmeg
- 1 tablespoon lemon juice (keeps apples from browning and adds brightness)
For the Caramel Topping
- ½ cup unsalted butter
- 1 cup packed brown sugar (light or dark—dark gives deeper flavor)
- ¼ cup heavy cream
- ¼ teaspoon salt (flaky salt on top at the end is optional but highly recommended)
A note on apple selection: I prefer Honeycrisp or Granny Smith for these bars. Honeycrisp holds its shape beautifully and provides natural sweetness. Granny Smith gives you that tart contrast that makes the caramel shine. You can also use Fuji or Braeburn if that’s what you have. Avoid Red Delicious—they turn into mush and don’t provide enough structure for the bar format.
Equipment Needed
You do not need a fancy kitchen to make these bars work. Here is what you will actually use:
- 9×13-inch baking pan (glass or metal both work; I prefer metal for even browning on the crust)
- Parchment paper (non-negotiable—makes lifting the bars out so much easier)
- Electric hand mixer or stand mixer (you can mix by hand but the cheesecake layer needs to be really smooth)
- Medium saucepan (for the caramel—use a heavy-bottomed one to prevent scorching)
- Sharp knife and cutting board (for dicing the apples evenly)
- Large mixing bowls (one for crust, one for cheesecake, one for apples)
- Pastry cutter or fork (for cutting butter into the flour for the crust)
- Spatula (a rubber spatula for scraping every bit of cheesecake into the pan)
If you don’t have a pastry cutter, just use two forks or your fingertips. The goal is pea-sized butter pieces throughout the flour. I have definitely used my hands more times than I care to admit—cold hands work best, so run them under cold water first if you tend to run warm.
Preparation Method
Let me walk you through this step by step. I have included every little detail I wish someone had told me the first time I made these.
Step 1: Prepare the Crust
Preheat your oven to 350°F (175°C). Line your 9×13 baking pan with parchment paper, leaving a few inches of overhang on the long sides. This creates handles for lifting the bars out later.
In a large bowl, whisk together the flour, sugar, and salt. Add the cold butter cubes. Using a pastry cutter or your fingertips, work the butter into the flour mixture until it resembles coarse meal with some pea-sized butter pieces remaining. Do not overwork it—those little butter pockets create flakiness.
Press the mixture firmly into the bottom of the prepared pan. I use the bottom of a measuring cup to really pack it down evenly. Bake for 15-18 minutes until the edges just start to turn golden. The center will still look slightly pale—that is perfect. Set aside to cool while you make the filling.
Step 2: Make the Cheesecake Layer
In a large bowl, beat the softened cream cheese with an electric mixer on medium speed until completely smooth, about 2 minutes. Scrape down the sides and bottom of the bowl. Add the sugar and beat until combined, another minute.
Add the eggs one at a time, beating on low after each addition just until incorporated. Overbeating at this stage introduces too much air and can cause cracks later. Add the vanilla and the 2 tablespoons of flour, mixing until just combined. The flour helps prevent the cheesecake layer from separating from the crust.
Pour the cheesecake mixture over the cooled crust and spread it evenly. Set aside while you prepare the apples.
Step 3: Prepare the Apple Layer
In a medium bowl, toss the diced apples with sugar, flour, cinnamon, nutmeg, and lemon juice. Make sure every piece is coated. The flour helps thicken the juices as the apples bake, preventing a watery layer between the cheesecake and the topping.
Spoon the apple mixture evenly over the cheesecake layer. Do not press them down—just let them sit on top. Spread them out so every bar gets a fair share of apples.
Step 4: Bake the Bars
Bake at 350°F (175°C) for 30-35 minutes. The edges should be set and slightly puffed, but the center will still jiggle slightly when you shake the pan. That jiggle is your friend—it means the cheesecake will stay creamy instead of turning rubbery.
Remove from the oven and let cool completely on a wire rack. Once cool, refrigerate for at least 4 hours, preferably overnight. This step is crucial for clean slices. I know it is hard to wait, but the bars need this time to set properly.
Step 5: Make the Caramel Topping
About 30 minutes before you plan to serve the bars, make the caramel. In a medium saucepan over medium heat, melt the butter. Add the brown sugar and whisk until combined. The mixture will look grainy at first—that is normal.
Bring to a gentle boil and let it bubble for 2 minutes without stirring. Remove from heat and slowly whisk in the heavy cream. The mixture will bubble up vigorously, so be careful. Add the salt and whisk until smooth.
Let the caramel cool for 10-15 minutes until it thickens slightly but is still pourable. Pour over the chilled bars and spread evenly. If you are using flaky salt, sprinkle it on top while the caramel is still wet.
Return to the refrigerator for 15-20 minutes to let the caramel set slightly before slicing.
Cooking Tips & Techniques
I have made every mistake possible with these bars so you do not have to. Here is what I learned the hard way:
Room temperature ingredients matter. Cold cream cheese creates lumps that never fully smooth out, no matter how long you beat it. Set your cream cheese and eggs out on the counter at least 30 minutes before starting. If you forgot, unwrap the cream cheese and microwave it in 10-second bursts until it is soft but not warm.
Do not overmix the cheesecake batter. I ruined my third batch by getting distracted and letting the mixer run too long. The bars puffed up like a soufflé in the oven and then collapsed into a cracked mess. Mix just until everything comes together, then stop.
Slice with a hot knife. Run your knife under hot water, dry it off, and make one clean cut. Wipe the blade clean between cuts. This gives you those beautiful, clean edges that make these bars look bakery-made. I learned this trick from a pastry chef friend and it changed everything.
Let the bars chill completely. I know you want to dig in while they are warm. I get it. But warm bars turn into apple cheesecake soup. The texture needs time to set, and the flavors need time to meld. Overnight chilling is ideal. Trust me on this one.
Watch your caramel carefully. Caramel can go from perfect to burnt in about 30 seconds. If you see dark specks forming, you have gone too far. Keep the heat at medium and do not walk away from the stove.
Variations & Adaptations
One of the best things about this recipe is how flexible it is. Here are some variations I have tried and loved:
Gluten-Free Version : Substitute the all-purpose flour in the crust with a 1:1 gluten-free baking flour blend. I have used King Arthur Measure for Measure with excellent results. The texture is slightly more crumbly but still holds together beautifully.
Nutty Crust : Add ½ cup of finely chopped pecans or walnuts to the crust mixture. Toast them first for extra flavor. This adds a wonderful crunch and pairs perfectly with the apples and caramel.
Spiced Apple Variation : Add ¼ teaspoon of cardamom and a pinch of cloves to the apple mixture alongside the cinnamon and nutmeg. This gives the bars a more complex, chai-inspired flavor profile that is absolutely stunning in the fall.
Individual Mini Bars : Make these in a muffin tin for perfectly portioned individual desserts. Line a 12-cup muffin tin with paper liners, press the crust mixture into the bottom of each cup, and adjust the baking time to 18-20 minutes. These are perfect for parties or lunchbox treats.
I once made a batch with pear instead of apple when I ran out of apples mid-recipe. It was surprisingly good—pears caramelize beautifully and have a softer texture that melts into the cheesecake layer. If you try this, use slightly firmer pears like Bosc or Anjou.
Serving & Storage Suggestions
These bars are best served chilled or at room temperature. I prefer them straight from the fridge because the cheesecake layer firms up beautifully and the caramel gets slightly chewy. If you want them at room temperature, let them sit out for about 15-20 minutes before serving.
For presentation, I like to cut them into 12 even bars and arrange them on a wooden board or a simple white platter. A light dusting of cinnamon on top adds visual appeal. If you have any extra caramel left over, drizzle a little more on each bar right before serving.
These pair wonderfully with a cup of hot coffee or a glass of cold milk. For a more indulgent dessert, serve with a scoop of vanilla bean ice cream and an extra drizzle of caramel. It turns these bars into a full-on sundae situation.
Storage: Keep the bars in an airtight container in the refrigerator for up to 5 days. Place a sheet of parchment paper between layers if stacking them. The caramel may soften slightly over time, but the bars will still taste incredible.
Freezing: These bars freeze beautifully for up to 3 months. Wrap each bar individually in plastic wrap, then place them in a freezer-safe bag or container. To thaw, transfer to the refrigerator overnight. Do not thaw at room temperature—the condensation can make the crust soggy.
The flavors actually deepen after a day or two in the fridge. I have found the bars taste even better on day two than they do on day one. The apples release more juice, the cheesecake sets completely, and everything melds together into one cohesive bite.
Nutritional Information & Benefits
These are definitely a treat, so I am not going to pretend they are health food. But there are some redeeming qualities worth mentioning.
Estimated per bar (based on 12 servings):
- Calories: 420
- Fat: 24g
- Saturated Fat: 15g
- Carbohydrates: 48g
- Sugar: 34g
- Protein: 6g
- Fiber: 2g
- Sodium: 260mg
Apples provide a solid dose of fiber and vitamin C, along with antioxidants like quercetin that support heart health. The cream cheese adds calcium and protein, though admittedly also a fair amount of saturated fat. The cinnamon in the apple layer offers anti-inflammatory benefits and can help with blood sugar regulation.
If you are looking for a lighter option, you can reduce the sugar in the crust by a couple of tablespoons without affecting the texture too much. You can also use a sugar substitute in the apple layer, though I cannot vouch for the results since I have not tested it that way.
These bars contain dairy, gluten, and eggs. Not suitable for vegan or dairy-free diets without significant modifications.
Conclusion
These caramel apple cheesecake bars are the kind of recipe that earns a permanent spot in your rotation. They look impressive enough for holiday gatherings but come together simply enough for a random Tuesday when you just need something sweet. The combination of buttery crust, creamy cheesecake, tender apples, and rich caramel is honestly hard to beat.
I love how forgiving this recipe is. You do not need to be a pastry chef or own fancy equipment. You just need good ingredients, a little patience for the chilling time, and maybe someone to share them with. Or not. I will not judge if you keep the whole pan for yourself.
If you try these bars, I would love to hear how they turn out. Drop a comment below and let me know what apple variety you used, whether you added any twists, or if you managed to resist eating the entire pan in one sitting. And if you are looking for more fall-inspired treats, my pumpkin cream cheese muffins with streusel topping are another reader favorite that hits that same sweet-and-creamy spot.
Happy baking, friends. May your caramel stay smooth and your bars slice clean.
Frequently Asked Questions
Can I use store-bought caramel instead of making my own?
You absolutely can, but the texture will be different. Store-bought caramel sauce is thinner and tends to soak into the bars rather than forming that slightly chewy top layer. If you are short on time, warm up a good quality jarred caramel and drizzle it on just before serving instead of pouring it over the whole pan.
Why did my cheesecake layer crack?
Cracking usually happens from overmixing the batter or overbaking. Mix just until the ingredients come together, and pull the bars out while the center still has a slight jiggle. Also, make sure your cream cheese is fully softened before you start beating it—cold cream cheese creates lumps that require extra mixing to smooth out.
Can I make these bars ahead of time for a party?
Yes, and I actually recommend it. Make the bars completely, including the caramel topping, up to two days in advance. Keep them covered in the refrigerator. The flavors meld together beautifully and the texture firms up for cleaner slicing. Just let them sit at room temperature for 15 minutes before serving.
What apples work best for this recipe?
Honeycrisp and Granny Smith are my top picks. Honeycrisp provides natural sweetness and holds its shape well. Granny Smith offers that tart contrast that balances the sweetness of the caramel and cheesecake. Fuji and Braeburn also work. Avoid Red Delicious and McIntosh as they break down too much during baking.
Can I freeze these cheesecake bars?
Absolutely. Wrap each bar individually in plastic wrap, then place them in a freezer-safe bag or container. They will keep for up to 3 months. Thaw overnight in the refrigerator for best results. I do not recommend thawing at room temperature as condensation can make the crust soggy. If you are planning to freeze them, consider adding the caramel topping after thawing for the freshest texture.
Pin This Recipe!
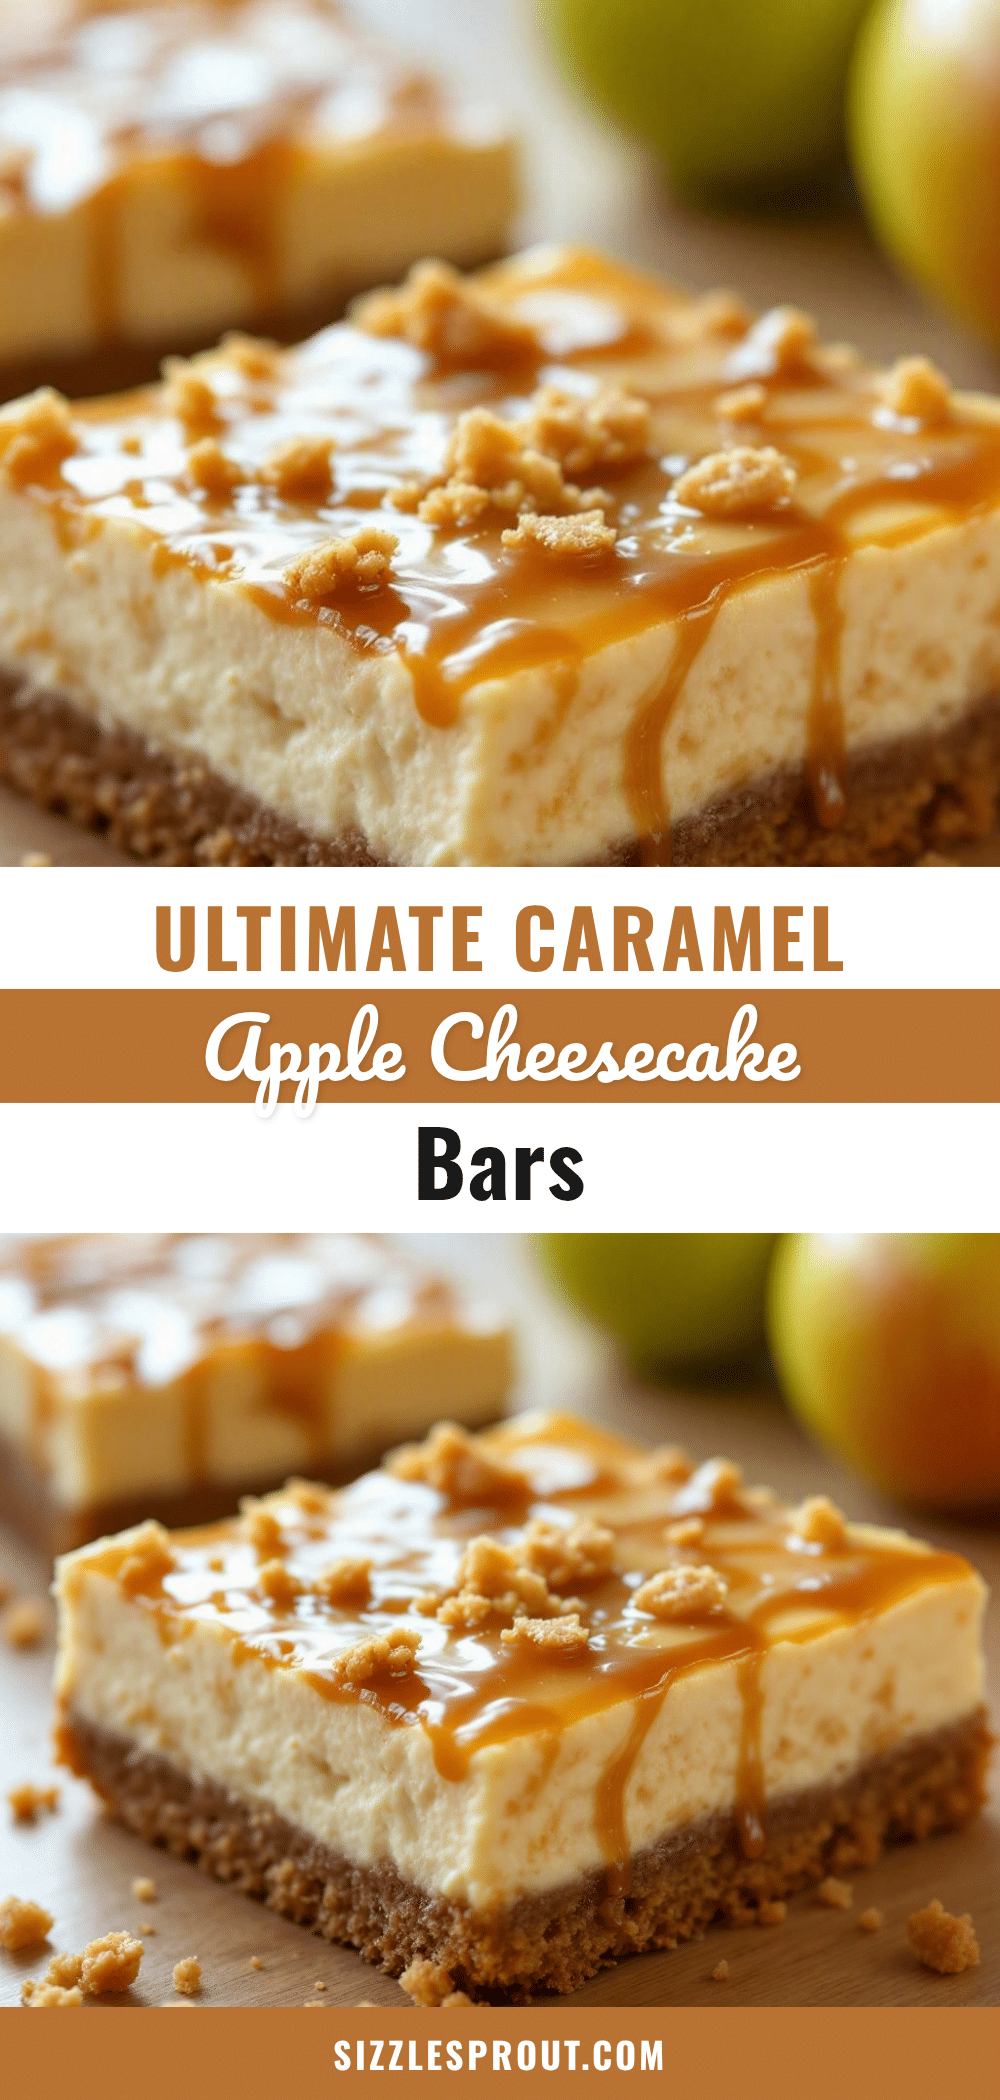
Best Caramel Apple Cheesecake Bars: Easy & Perfect Recipe
These caramel apple cheesecake bars feature a buttery crust, creamy cheesecake layer, tender spiced apples, and a rich homemade caramel topping. They are easy to make, require no water bath, and are perfect for fall gatherings.
- Prep Time: 30 minutes
- Cook Time: 50 minutes
- Total Time: 5 hours 20 minutes (includes chilling)
- Yield: 12 servings 1x
- Category: Dessert
- Cuisine: American
Ingredients
- 1 ½ cups all-purpose flour
- ½ cup granulated sugar
- ½ cup unsalted butter, cold and cut into small cubes
- ¼ teaspoon salt
- 16 ounces cream cheese, softened to room temperature
- ½ cup granulated sugar
- 2 large eggs, room temperature
- 1 teaspoon vanilla extract
- 2 tablespoons all-purpose flour
- 3 medium apples, peeled, cored, and diced into ½-inch cubes (about 3 cups)
- 2 tablespoons granulated sugar
- 1 tablespoon all-purpose flour
- 1 teaspoon ground cinnamon
- ¼ teaspoon ground nutmeg
- 1 tablespoon lemon juice
- ½ cup unsalted butter
- 1 cup packed brown sugar
- ¼ cup heavy cream
- ¼ teaspoon salt
Instructions
- Preheat oven to 350°F (175°C). Line a 9×13-inch baking pan with parchment paper, leaving overhang on the long sides.
- In a large bowl, whisk together 1 ½ cups flour, ½ cup sugar, and ¼ teaspoon salt. Cut in ½ cup cold butter until mixture resembles coarse meal with pea-sized butter pieces. Press firmly into the bottom of the prepared pan. Bake for 15-18 minutes until edges are lightly golden. Cool.
- In a large bowl, beat 16 ounces softened cream cheese until smooth. Add ½ cup sugar and beat until combined. Add eggs one at a time, beating on low after each. Mix in 1 teaspoon vanilla and 2 tablespoons flour until just combined. Pour over cooled crust.
- In a medium bowl, toss diced apples with 2 tablespoons sugar, 1 tablespoon flour, 1 teaspoon cinnamon, ¼ teaspoon nutmeg, and 1 tablespoon lemon juice. Spoon evenly over cheesecake layer.
- Bake at 350°F (175°C) for 30-35 minutes until edges are set but center jiggles slightly. Cool completely on a wire rack, then refrigerate for at least 4 hours or overnight.
- About 30 minutes before serving, make caramel: In a medium saucepan over medium heat, melt ½ cup butter. Add 1 cup brown sugar and whisk until combined. Bring to a gentle boil and let bubble for 2 minutes without stirring. Remove from heat and slowly whisk in ¼ cup heavy cream and ¼ teaspoon salt. Cool for 10-15 minutes until slightly thickened.
- Pour caramel over chilled bars and spread evenly. Sprinkle with flaky salt if desired. Refrigerate for 15-20 minutes to set caramel before slicing.
Notes
Room temperature ingredients are crucial for a smooth cheesecake layer. Do not overmix the cheesecake batter to avoid cracks. Slice with a hot knife for clean edges. The bars taste even better the next day. For freezing, wrap individually and thaw overnight in the refrigerator.
Nutrition
- Serving Size: 1 bar
- Calories: 420
- Sugar: 34
- Sodium: 260
- Fat: 24
- Saturated Fat: 15
- Carbohydrates: 48
- Fiber: 2
- Protein: 6
Keywords: caramel apple cheesecake bars, apple cheesecake bars, fall dessert, cheesecake bars, apple dessert, caramel dessert


