Love this? Save it for later!
Share the inspiration with your friends
Fourth time in two weeks and I finally stopped measuring the rice with my heart. The first batch was soupy, the second one burned on the bottom of the pot, and the third one came out perfect—except I forgot to season the chicken and ended up eating bland cubes of sad protein for five days straight. That was the week I almost gave up on meal prep entirely.
But here’s the thing about these easy weekly meal prep chicken and rice bowls—they fixed my relationship with Sunday cooking. I needed something that didn’t make me dread the Tupperware drawer by Tuesday morning. Something that actually tasted good on day four, not just day one. Something that didn’t require a PhD in timing to pull off.
This version came together after a particularly chaotic week when I had exactly one hour between grocery delivery and a work call. I threw things together out of pure desperation, and honestly? It was the best batch I’d ever made. The chicken stayed juicy, the rice didn’t turn into paste, and the vegetables kept their color. That’s when I realized meal prep doesn’t have to be complicated—it just has to be smart.
These bowls became my anchor. The thing I could count on when the week got loud and my willpower got quiet. And I think that’s why they stuck.
Why You’ll Love This Recipe
I’ve tested this recipe more times than I care to admit, and each round taught me something new about keeping meal prep fresh and flavorful. This isn’t just another chicken and rice recipe—it’s the one that actually works for real life.
- Quick & Easy : Ready in about 45 minutes for the whole week’s worth of lunches or dinners. That’s less time than you’d spend debating what to order for delivery.
- Simple Ingredients : Everything comes from a regular grocery store. No specialty items, no obscure spices, no trips to three different stores.
- Perfect for Busy Weeks : Whether you’re meal prepping for work lunches, post-workout dinners, or just want grab-and-go options, these bowls deliver.
- Crowd-Pleaser : My picky-eating partner and my health-conscious gym buddy both ask for this recipe. It’s that rare dish that pleases everyone.
- Unbelievably Delicious : The secret is in the seasoning blend and the cooking method. The chicken stays tender, the rice stays fluffy, and every bite hits that sweet-savory spot.
What makes this different from every other meal prep recipe out there? It’s the balance. Not too salty, not too bland. The vegetables keep their crunch, the chicken doesn’t dry out, and the rice stays separate instead of turning into a sticky brick. I’ve cracked the code on texture retention, and I’m sharing every trick I learned through trial and error.
This recipe isn’t just good—it’s the kind that makes you look forward to opening your lunch container at work. It’s meal prep that actually tastes like a real meal, not a sad desk lunch.
What Ingredients You Will Need
This recipe uses simple, wholesome ingredients that work together to create bowls that are satisfying, flavorful, and actually good for you. Most of these are pantry staples, which makes this recipe perfect for those weeks when you need to grocery shop efficiently.
For the Chicken
- Boneless, skinless chicken breasts (1.5 pounds or about 680 grams) – Look for breasts that are similar in size so they cook evenly. I prefer organic when it’s on sale, but conventional works perfectly fine.
- Olive oil (2 tablespoons, divided) – Use a good quality extra virgin for flavor, but regular olive oil works too.
- Garlic powder (1 teaspoon) – Not the same as fresh garlic, but it distributes more evenly and doesn’t burn during cooking.
- Onion powder (1 teaspoon) – Adds depth without the texture of real onions, which some people don’t love in meal prep.
- Smoked paprika (1 teaspoon) – This is my secret weapon. It adds a subtle smokiness that makes the chicken taste like it cooked all day.
- Dried oregano (½ teaspoon) – A little goes a long way. Don’t skip it—it adds an earthy note that ties everything together.
- Salt (1 teaspoon) – I use kosher salt because it’s easier to control. Adjust based on your preference.
- Black pepper (½ teaspoon) – Freshly ground is always better, but pre-ground works in a pinch.
For the Rice
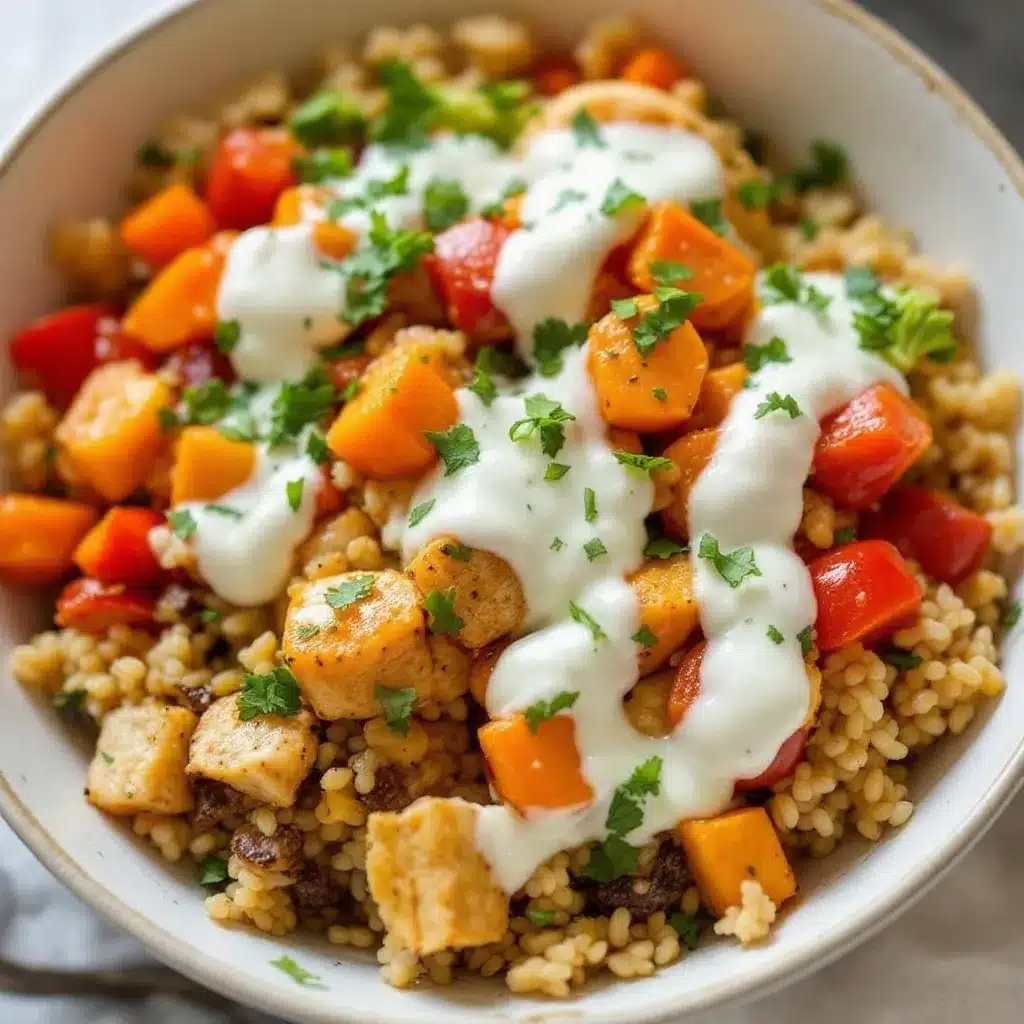
- Long-grain white rice (1½ cups or 300 grams) – Basmati or jasmine work best. They stay fluffy and don’t clump together as much as short-grain varieties.
- Chicken broth (2¼ cups or 530 ml) – Low-sodium is ideal so you control the salt level. Vegetable broth works too if that’s what you have.
- Butter (1 tablespoon, optional) – Adds richness and helps prevent the rice from sticking. I use salted butter because I like the extra flavor.
- Bay leaf (1) – Adds subtle aroma. Remove it before mixing everything together.
For the Vegetables
- Broccoli florets (2 cups or about 200 grams) – Fresh is best for texture. Frozen works but you’ll need to pat them dry first.
- Red bell pepper (1 large, diced) – Adds sweetness and crunch. Orange or yellow peppers work too, but red has the most flavor.
- Carrots (2 medium, sliced into half-moons) – They hold up well in the fridge and add natural sweetness.
- Frozen peas (½ cup) – I add these at the very end so they just warm through without getting mushy.
For the Sauce (Optional but Recommended)
- Soy sauce (2 tablespoons) – Low-sodium is best. Tamari works for gluten-free.
- Honey (1 tablespoon) – Balances the saltiness. Maple syrup works in a pinch.
- Rice vinegar (1 tablespoon) – Adds brightness. Apple cider vinegar works as a substitute.
- Sesame oil (1 teaspoon) – A little goes a long way. It adds that restaurant-quality finish.
- Red pepper flakes (¼ teaspoon, optional) – For heat lovers. Adjust to your tolerance.
Equipment Needed
You don’t need fancy equipment for these easy weekly meal prep chicken and rice bowls. Here’s what I use and what you can substitute if needed.
- Large skillet or cast iron pan (12-inch) – This is my go-to for searing the chicken. A non-stick pan works too, but cast iron gives better browning. If you only have a smaller pan, cook the chicken in batches to avoid overcrowding.
- Medium saucepan with lid (2-3 quart) – For cooking the rice. A tight-fitting lid is crucial for fluffy rice. If your lid is loose, wrap the top with foil before putting it on.
- Cutting board – I prefer a large wooden board, but plastic works fine. Just make sure it’s stable and big enough to chop everything without crowding.
- Sharp chef’s knife (8-inch) – A dull knife is dangerous and makes prep take forever. If your knife isn’t sharp, get it sharpened or use a pull-through sharpener.
- Measuring cups and spoons – I use these religiously for the rice and seasoning. Eyeballing the rice-to-water ratio is how I ended up with soup, remember?
- Meal prep containers (4-5 containers, about 2-cup capacity each) – Glass containers with snap lids are my favorite. They don’t stain, they don’t absorb smells, and they stack beautifully. If you’re on a budget, BPA-free plastic containers work fine.
- Instant-read thermometer (optional but recommended) – Takes the guesswork out of chicken. You’re looking for 165°F (74°C) in the thickest part.
I bought my cast iron skillet at a thrift store for eight dollars, and it’s been my most-used pan for years. You don’t need expensive equipment—you need equipment that works for you.
Preparation Method
Let me walk you through this step by step. I’ve organized it so you can multitask efficiently without feeling overwhelmed. The whole process takes about 45 minutes, and most of that is hands-off cooking time.
Step 1: Prep Your Ingredients (10 minutes)
Start by taking the chicken out of the fridge and letting it sit on the counter while you prep everything else. This helps it cook more evenly. Pat the chicken dry with paper towels—this is non-negotiable for good browning. Season both sides generously with the garlic powder, onion powder, smoked paprika, oregano, salt, and pepper. Rub the seasoning in with your hands so it sticks.
While the chicken rests, chop your vegetables. Cut the broccoli into small florets—about bite-sized. Dice the red bell pepper into ½-inch pieces. Slice the carrots into thin half-moons, about ¼-inch thick. Set everything aside in separate bowls if you can, or just pile them on the cutting board if you’re short on space.
Step 2: Cook the Rice (20 minutes, mostly unattended)
Rinse the rice in a fine-mesh strainer under cold water until the water runs clear. This removes excess starch and prevents clumpy rice. In your medium saucepan, combine the rinsed rice, chicken broth, butter, and bay leaf. Bring it to a boil over high heat, then reduce the heat to low, cover tightly, and let it simmer for 15 minutes.
Here’s the trick I learned after three failed batches: do not lift the lid. Not even a peek. The steam needs to stay trapped to cook the rice properly. After 15 minutes, turn off the heat but leave the lid on for another 5 minutes. Then fluff with a fork and remove the bay leaf. Your rice should be fluffy, separate, and perfectly cooked.
Step 3: Sear the Chicken (12-15 minutes)
While the rice cooks, heat 1 tablespoon of olive oil in your large skillet over medium-high heat. You want the oil shimmering but not smoking. Place the seasoned chicken breasts in the pan—they should sizzle when they hit the oil. Cook for 5-6 minutes on the first side without moving them. You’re looking for a deep golden-brown crust.
Flip the chicken and cook for another 5-6 minutes. If your chicken breasts are thick (over 1 inch), you might need to reduce the heat to medium and cook for an additional 2-3 minutes per side to ensure they cook through without burning the outside. Use your instant-read thermometer to check—165°F (74°C) is the magic number.
Once cooked, transfer the chicken to a cutting board and let it rest for at least 5 minutes. This is crucial—if you cut into it immediately, all the juices run out and you get dry chicken. Resting lets the juices redistribute throughout the meat.
Step 4: Cook the Vegetables (8-10 minutes)
In the same skillet you used for the chicken (don’t wash it—all those brown bits are flavor), add the remaining 1 tablespoon of olive oil over medium heat. Add the broccoli, bell pepper, and carrots. Cook for 5-6 minutes, stirring occasionally, until the vegetables are tender-crisp. You want them to have some bite left, not be mushy.
Add the frozen peas in the last minute of cooking—they just need to warm through. Season the vegetables with a pinch of salt and pepper. If the pan looks dry, add a tablespoon of water to help steam the vegetables slightly.
Step 5: Slice the Chicken and Assemble (5 minutes)
Slice the rested chicken breasts against the grain into ½-inch thick strips or bite-sized cubes. Against the grain is important—it makes the meat more tender when you bite into it.
Now it’s time to assemble your bowls. Divide the rice evenly among your 4-5 meal prep containers. Top with the sliced chicken and vegetables. If you’re using the sauce, whisk together the soy sauce, honey, rice vinegar, sesame oil, and red pepper flakes in a small bowl, then drizzle it over each bowl. Start with a little—you can always add more later.
Let the bowls cool completely before putting the lids on. This prevents condensation from making everything soggy. I usually leave them on the counter for 20-30 minutes while I clean up.
Cooking Tips & Techniques
I’ve made every mistake in the book with meal prep, and I’m sharing them so you don’t have to. Here are the most important things I’ve learned.
Don’t overcook the chicken. This is the number one meal prep crime. Chicken that’s perfectly juicy on day one can be dry by day three. The solution? Cook it to 160°F (71°C) and let carryover cooking bring it to 165°F (74°C). Yes, I know the USDA says 165°F, but taking it off the heat a few degrees early saves you from rubbery chicken later. I’ve been doing this for years and never had an issue.
Season in layers. Don’t just dump all the seasoning on the chicken. Season the rice with a pinch of salt while it cooks. Season the vegetables while they sauté. Season the sauce with intention. Each layer of seasoning builds on the last, and the final result tastes more complex than the sum of its parts.
Undercook the vegetables slightly. They’ll continue cooking when you reheat the bowls. If you cook them to perfect tenderness on Sunday, they’ll be mushy by Wednesday. Aim for bright, vibrant colors and a slight crunch. Trust me on this one—I learned it the hard way when my Tuesday lunch was a sad pile of limp broccoli.
Let everything cool completely before refrigerating. I know it’s tempting to put hot food straight in the fridge to save time, but that creates condensation that turns your rice into paste and your vegetables into mush. Spread the components out on a baking sheet to cool faster if you’re in a hurry. Thirty minutes on the counter is usually enough.
Store the sauce separately. If you’re using the optional sauce, keep it in a small container and add it right before eating. This keeps the rice from getting soggy and the chicken from getting weirdly wet. I’ve forgotten to do this before, and the difference is noticeable.
One more thing—don’t skip the resting period for the chicken. I know you’re hungry and the house smells amazing, but those 5 minutes make the difference between juicy chicken and dry chicken. I’ve tested it side by side, and the rested chicken was noticeably more tender even on day four of meal prep.
Variations & Adaptations
This recipe is incredibly flexible. Here are some ways I’ve adapted it for different needs and cravings.
Spicy Southwest Version: Swap the smoked paprika for chipotle powder, add a can of drained black beans and corn to the vegetable mix, and top with fresh cilantro and a squeeze of lime. The beans add fiber and make the bowls even more filling. I make this version when I’m craving something with a kick.
Low-Carb/Keto Adaptation: Replace the rice with cauliflower rice. Cook it in the same skillet after the vegetables are done—just add the cauliflower rice, season with salt and pepper, and cook for 3-4 minutes until tender. The rest of the recipe stays the same. I’ve tested this, and it’s genuinely satisfying, not like a sad diet version.
Mediterranean Twist: Season the chicken with lemon zest, dried oregano, and garlic. Replace the broccoli and bell pepper with diced cucumbers, cherry tomatoes, and red onion. Skip the soy sauce-based dressing and use a simple lemon vinaigrette instead. Add crumbled feta cheese and Kalamata olives when serving. This version is incredible for summer meal prep.
Vegetarian Version: Replace the chicken with extra-firm tofu or chickpeas. If using tofu, press it for 30 minutes first, then cube and pan-fry until golden. For chickpeas, drain and pat dry, then roast with the same seasonings at 400°F (200°C) for 20 minutes. Both options work beautifully.
Freezer-Friendly Prep: Make a double batch and freeze half. Assemble the bowls without the sauce, wrap tightly in plastic wrap and then foil, and freeze for up to 3 months. To reheat, thaw overnight in the fridge and microwave for 2-3 minutes. The texture holds up surprisingly well—I’ve done this multiple times.
My personal favorite variation is the Mediterranean one. I stumbled on it when I had leftover chicken and vegetables from a different recipe, and it was so good that it became its own regular rotation. Sometimes the best recipes come from happy accidents.
Serving & Storage Suggestions
These easy weekly meal prep chicken and rice bowls are designed to be eaten cold or reheated, which makes them incredibly versatile for busy weeks.
Serving Temperature: I prefer these bowls reheated, but they’re also delicious cold—especially in the summer. If reheating, microwave for 2-3 minutes, stirring halfway through. The rice steams back to fluffy perfection, and the chicken warms up without drying out.
Presentation: When serving at home, I like to arrange the components separately on a plate instead of mixing everything together. It looks more intentional and allows each element to shine. A sprinkle of fresh herbs—cilantro, parsley, or green onions—adds a pop of color and freshness.
Storage: These bowls stay good in the refrigerator for 4-5 days. Store them in airtight containers. Glass containers are ideal because they don’t absorb odors and they reheat evenly. If you’re using plastic containers, make sure they’re microwave-safe and BPA-free.
Reheating Tips: If the rice seems dry when reheating, sprinkle a few drops of water over it before microwaving. This creates steam that rehydrates the rice. For the crispiest chicken, reheat in a skillet with a splash of water and cover for 2-3 minutes. It takes a bit longer, but the texture is noticeably better.
Flavor Development: Here’s something interesting—these bowls actually taste better on day two or three. The flavors meld together overnight, and the seasoning penetrates deeper into the chicken and rice. I’ve had bowls on day four that were somehow more delicious than day one. Don’t ask me the science behind it, but it’s real.
I’ve also found that these bowls pair beautifully with a simple side salad or some fresh fruit. If I’m feeling fancy, I’ll add a dollop of Greek yogurt or avocado slices right before eating. The creaminess balances the savory flavors perfectly.
Nutritional Information & Benefits
Each serving of these easy weekly meal prep chicken and rice bowls provides a balanced mix of protein, carbohydrates, and vegetables. Here’s the estimated breakdown per bowl (without the optional sauce):
| Nutrient | Amount Per Serving |
|---|---|
| Calories | 420-450 |
| Protein | 35-40g |
| Carbohydrates | 45-50g |
| Fiber | 5-7g |
| Fat | 8-10g |
| Saturated Fat | 2-3g |
| Sodium | 500-600mg |
The chicken provides lean protein that keeps you full and supports muscle recovery—especially helpful if you’re meal prepping for post-workout meals. The broccoli and bell peppers are packed with vitamin C and antioxidants. The carrots add beta-carotene for eye health, and the peas contribute a surprising amount of fiber and plant-based protein.
This recipe is naturally gluten-free (just use tamari instead of soy sauce) and can be made dairy-free by omitting the butter in the rice. It’s also relatively low in added sugars, with most of the sweetness coming from the honey in the optional sauce and the natural sweetness of the vegetables.
I’m not a nutritionist, but I’ve found that having these bowls on hand makes it much easier to make good choices during busy weeks. When lunch is already packed and waiting, I’m less likely to grab something processed or skip eating altogether. That’s a win in my book.
Conclusion
These easy weekly meal prep chicken and rice bowls have genuinely changed how I approach busy weeks. They’re not fancy, they’re not complicated, and they don’t require a culinary degree to pull off. What they are is reliable—the kind of recipe you can count on when life gets loud and your energy runs low.
I love that this recipe leaves room for your own creativity. Swap the vegetables based on what’s in season. Change up the seasoning depending on your mood. Make it spicy one week and mild the next. The framework is solid, but the details are yours to play with.
If you make these bowls, I’d love to hear how they turn out. Did you add something unexpected? Did you find a new favorite variation? Drop a comment below and let me know. And if you’re looking for more meal prep inspiration, you might enjoy my healthy 5-ingredient dinner bowl or this slow cooker salsa verde chicken that’s perfect for batch cooking.
Here’s to weeks that feel a little less chaotic and lunches that actually taste good. You’ve got this.
Frequently Asked Questions
Can I use chicken thighs instead of chicken breasts?
Absolutely. Chicken thighs are actually more forgiving because they have more fat, which means they stay juicier longer. Adjust the cooking time slightly—thighs usually need 7-8 minutes per side depending on thickness. The internal temperature should still reach 165°F (74°C).
How do I keep the rice from getting hard in the fridge?
The key is to let the rice cool completely before refrigerating, and to store it in an airtight container. If your rice is already getting hard, sprinkle a few drops of water over it before reheating and cover the container with a damp paper towel. The steam will rehydrate the grains.
Can I freeze these bowls?
Yes, but I recommend freezing them without the sauce. Assemble the bowls, let them cool completely, wrap tightly in plastic wrap and then foil, and freeze for up to 3 months. Thaw overnight in the fridge before reheating. The texture of the vegetables might soften slightly, but the flavor holds up beautifully.
What other vegetables can I use?
Almost any sturdy vegetable works. Green beans, snap peas, zucchini, summer squash, asparagus, and cauliflower are all excellent choices. Avoid watery vegetables like cucumber or tomato—they’ll make everything soggy. If you want to add leafy greens like spinach or kale, stir them in at the very end of cooking so they just wilt.
How long do these bowls last in the fridge?
They stay fresh for 4-5 days when stored properly in airtight containers. I typically make them on Sunday and eat them through Thursday. If you’re worried about freshness, you can freeze half the batch on day one and thaw them later in the week. Trust your nose—if something smells off, don’t risk it.
Pin This Recipe!
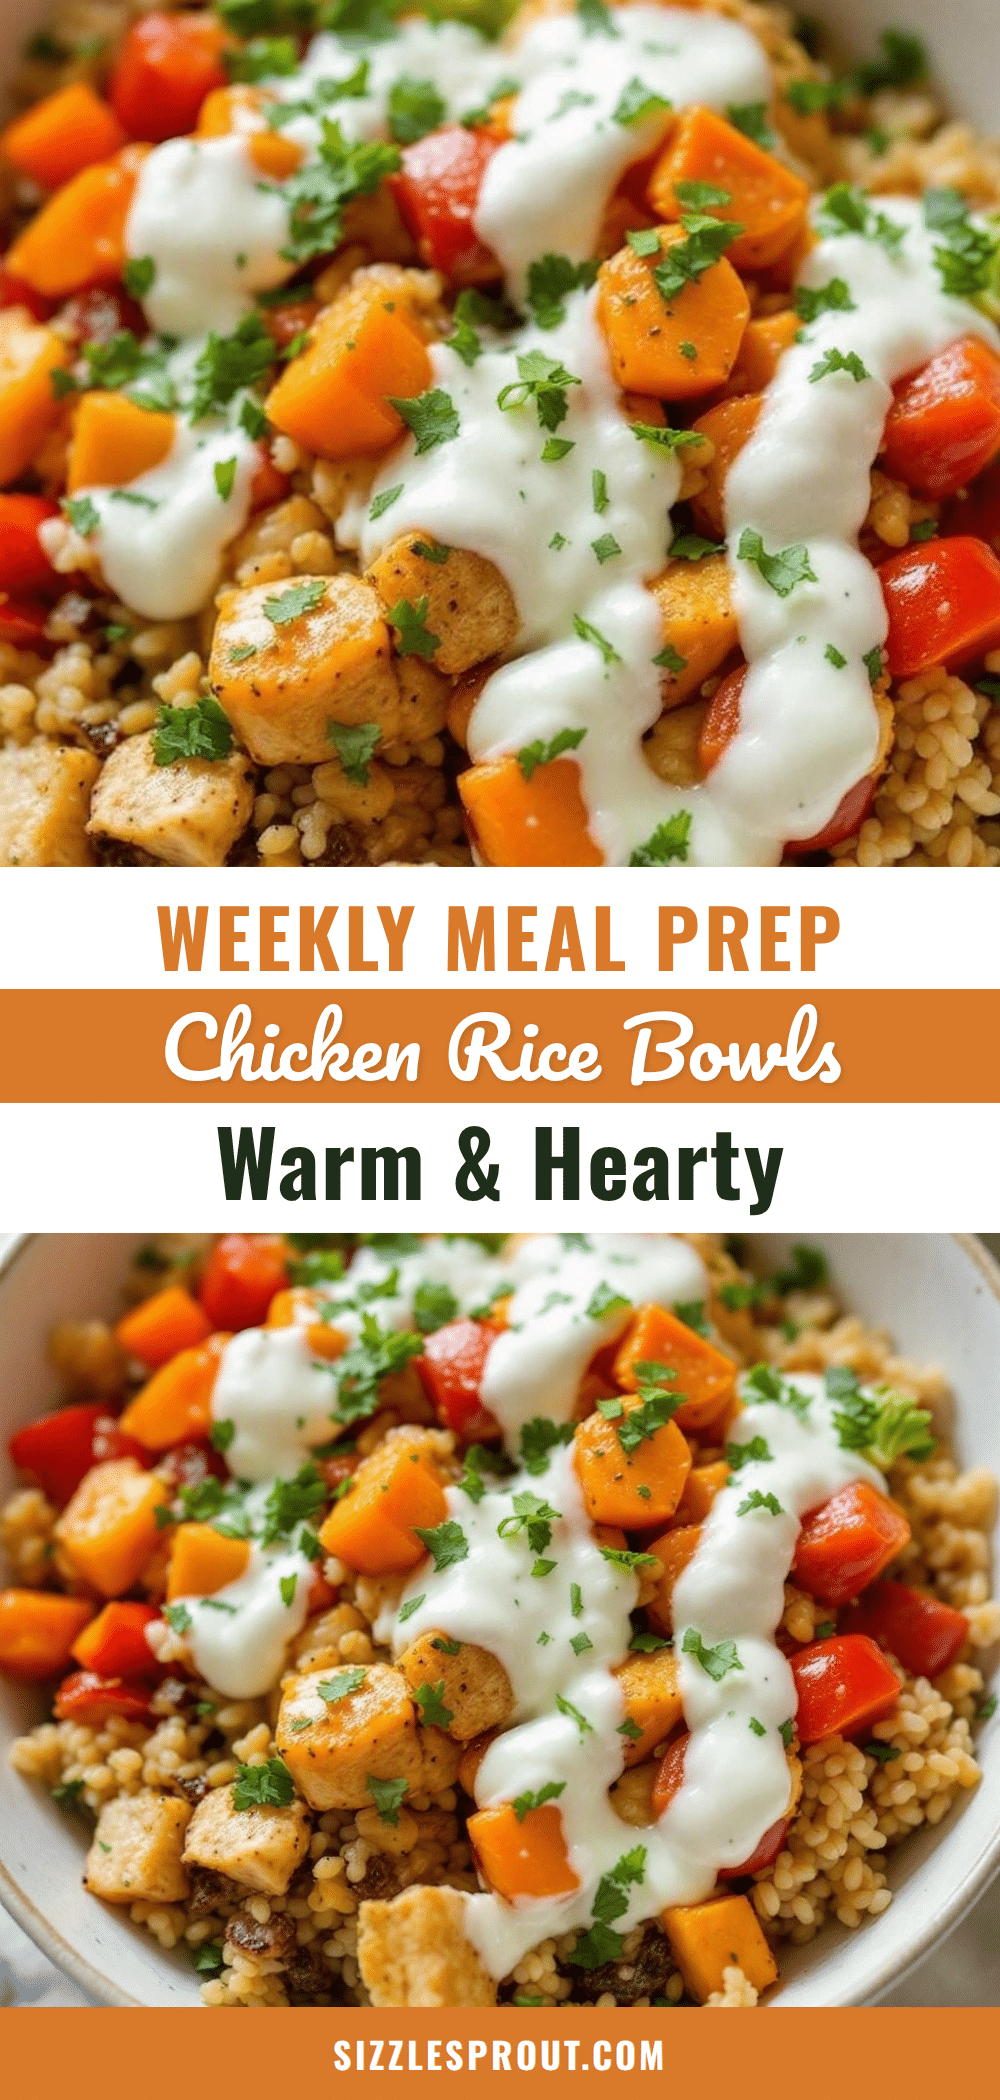
Easy Weekly Meal Prep Chicken and Rice Bowls
These easy weekly meal prep chicken and rice bowls are the perfect solution for busy weeks. With juicy chicken, fluffy rice, and colorful vegetables, they stay delicious for days and make healthy eating effortless.
- Prep Time: 15 minutes
- Cook Time: 30 minutes
- Total Time: 45 minutes
- Yield: 4-5 servings 1x
- Category: Main Course
- Cuisine: American
Ingredients
- 1.5 pounds (680g) boneless, skinless chicken breasts
- 2 tablespoons olive oil, divided
- 1 teaspoon garlic powder
- 1 teaspoon onion powder
- 1 teaspoon smoked paprika
- ½ teaspoon dried oregano
- 1 teaspoon kosher salt
- ½ teaspoon black pepper
- 1½ cups (300g) long-grain white rice (basmati or jasmine)
- 2¼ cups (530ml) low-sodium chicken broth
- 1 tablespoon butter (optional)
- 1 bay leaf
- 2 cups (200g) broccoli florets
- 1 large red bell pepper, diced
- 2 medium carrots, sliced into half-moons
- ½ cup frozen peas
- 2 tablespoons low-sodium soy sauce (or tamari for gluten-free)
- 1 tablespoon honey
- 1 tablespoon rice vinegar
- 1 teaspoon sesame oil
- ¼ teaspoon red pepper flakes (optional)
Instructions
- Take chicken out of fridge and let sit on counter. Pat dry with paper towels. Season both sides with garlic powder, onion powder, smoked paprika, oregano, salt, and pepper. Rub seasoning in.
- Chop broccoli into small florets, dice red bell pepper into ½-inch pieces, slice carrots into thin half-moons (¼-inch thick). Set aside.
- Rinse rice in fine-mesh strainer under cold water until water runs clear. In medium saucepan, combine rinsed rice, chicken broth, butter, and bay leaf. Bring to boil over high heat, then reduce heat to low, cover tightly, and simmer for 15 minutes. Do not lift lid. After 15 minutes, turn off heat and let sit covered for 5 minutes. Fluff with fork and remove bay leaf.
- While rice cooks, heat 1 tablespoon olive oil in large skillet over medium-high heat. Place seasoned chicken breasts in pan and cook for 5-6 minutes on first side without moving. Flip and cook for another 5-6 minutes. For thick breasts, reduce heat to medium and cook 2-3 minutes more per side. Internal temperature should reach 165°F (74°C). Transfer to cutting board and rest for at least 5 minutes.
- In same skillet, add remaining 1 tablespoon olive oil over medium heat. Add broccoli, bell pepper, and carrots. Cook for 5-6 minutes, stirring occasionally, until tender-crisp. Add frozen peas in last minute of cooking. Season with pinch of salt and pepper.
- Slice rested chicken breasts against the grain into ½-inch thick strips or bite-sized cubes.
- Divide rice evenly among 4-5 meal prep containers. Top with sliced chicken and vegetables.
- For sauce: whisk together soy sauce, honey, rice vinegar, sesame oil, and red pepper flakes. Drizzle over each bowl (start with a little).
- Let bowls cool completely (20-30 minutes) before putting lids on to prevent condensation.
Notes
Don’t overcook the chicken; cook to 160°F and let carryover cooking bring it to 165°F. Season in layers for best flavor. Undercook vegetables slightly as they’ll continue cooking when reheated. Let everything cool completely before refrigerating to prevent sogginess. Store sauce separately and add before eating. Don’t skip resting the chicken for juicier results.
Nutrition
- Serving Size: 1 bowl
- Calories: 420450
- Sugar: 57
- Sodium: 500600
- Fat: 810
- Saturated Fat: 23
- Carbohydrates: 4550
- Fiber: 57
- Protein: 3540
Keywords: meal prep, chicken and rice bowls, healthy lunch, easy dinner, batch cooking, chicken breast recipe, rice bowl


