Love this? Save it for later!
Share the inspiration with your friends
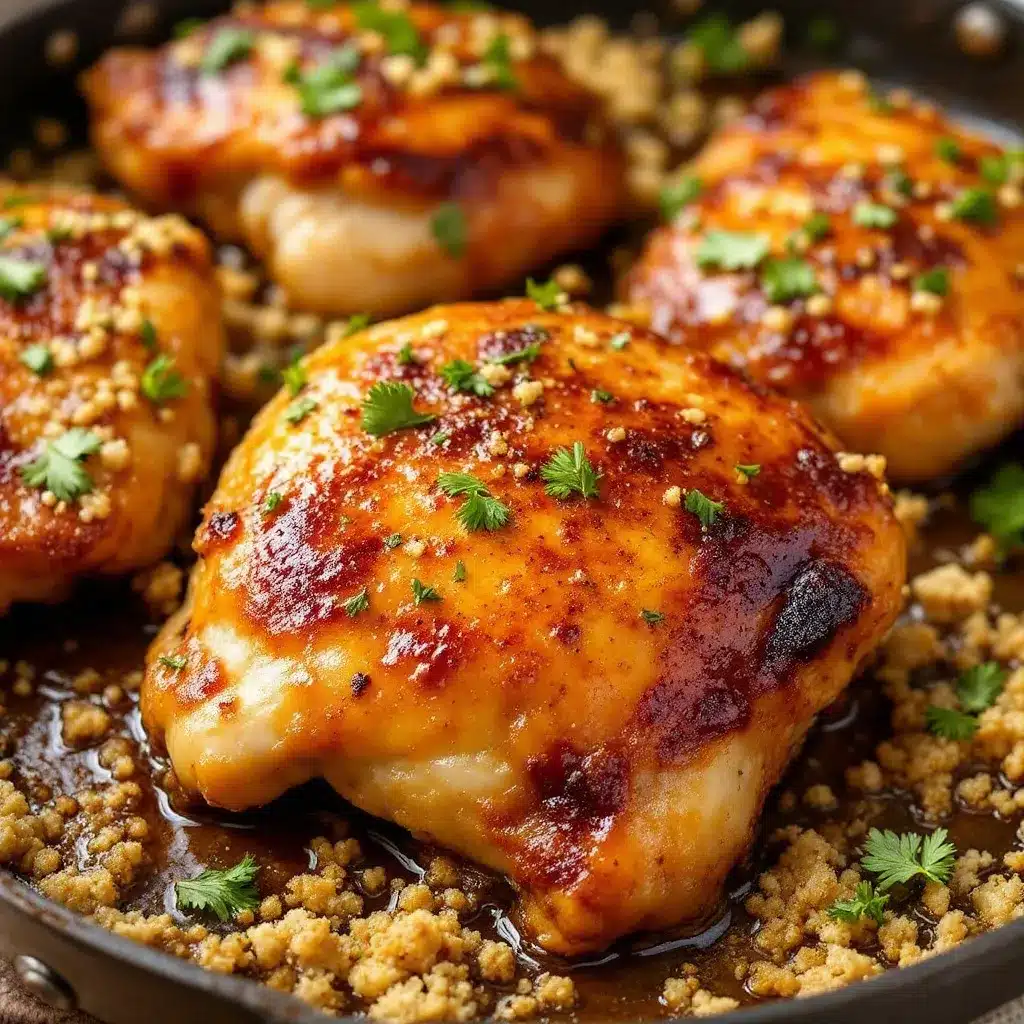
The skin on these chicken thighs gets this sticky, almost lacquered look — like someone brushed it with amber shellac and let it set under a hot light. That glossy sheen is the whole point, honestly. Everything else — the tender meat underneath, the way the garlic melts into the sauce, the little charred bits clinging to the pan — it all works in service of that first visual hit. You see it and you already know what the bite is going to feel like.
I stumbled onto this combination during a week where I had exactly zero patience for complicated dinners. There was a package of bone-in thighs in the fridge, a half-used bottle of honey from a baking project, and a head of garlic that was starting to sprout. The original plan was just to sear the chicken and call it a night. But then I deglazed the pan with a splash of soy sauce (because that’s what was next to the stove) and watched the whole thing transform into this dark, glossy sauce that smelled like a restaurant kitchen. I stood there stirring it, thinking, “This is too simple to be this good.”
And that’s the thing about this recipe — it doesn’t try to impress you with technique or a long ingredient list. It just delivers. The honey caramelizes in the rendered chicken fat, the garlic infuses the oil, and the soy sauce adds that savory backbone that keeps it from being cloying. Twenty minutes later, you’ve got dinner that looks like you fussed. I make it on nights when I need something reliable, something that doesn’t ask questions. It’s become my go-to for those evenings when cooking feels like a chore but eating still needs to feel like a treat.
Why You’ll Love This Recipe
This isn’t just another chicken dinner — it’s the one you’ll keep coming back to when you need a guaranteed win. I’ve tested this exact method at least a dozen times, tweaking the heat levels and timing to get that perfect balance between caramelized exterior and juicy interior. Here’s why it works:
- One Pan, Minimal Mess: Everything happens in a single skillet. No transferring, no extra dishes, no complicated steps. The sauce reduces right in the pan with the chicken, so cleanup is almost embarrassingly easy.
- Pantry-Friendly Ingredients: Honey, soy sauce, garlic, chicken thighs — that’s basically it. You probably have all of this right now, which means no last-minute grocery runs.
- Ready in Under 30 Minutes: From the moment you turn on the burner to the moment you’re sitting down to eat, it’s about 25 minutes. That’s faster than takeout in most neighborhoods.
- Perfect for Busy Weeknights: This is the kind of dinner that saves you after a long day. No marinating required, no complicated techniques — just straightforward cooking that delivers every single time.
- Crowd-Pleasing Flavor: The combination of sweet honey and savory garlic hits that universal sweet spot. Kids devour it, adults ask for the recipe, and leftovers (if there are any) are just as good the next day.
What sets this recipe apart from other honey garlic chicken versions is the technique. Most recipes either burn the honey or end up with a watery sauce that never thickens properly. I figured out that searing the chicken skin-side down first to render the fat, then building the sauce in that rendered fat, creates a natural emulsion that clings to every surface. It’s not complicated — it’s just smart cooking. And once you try it, you’ll never go back to the watery versions.
This recipe has become my secret weapon for those nights when I need dinner to be both comforting and impressive. It’s the kind of meal that makes you close your eyes after the first bite, not because it’s fancy, but because it’s exactly what you needed.
What Ingredients You Will Need
This recipe relies on simple, everyday ingredients that work together to create something surprisingly complex. The magic happens when the honey meets the rendered chicken fat and the soy sauce adds that savory depth. Here’s what you’ll need:
- Chicken Thighs (bone-in, skin-on): About 4-6 thighs, depending on size. Bone-in gives you more flavor and keeps the meat juicier. Skin-on is non-negotiable here — that skin crisps up and creates the foundation for the whole dish. If you only have boneless, skinless thighs, reduce cooking time by about 5-7 minutes and add a tablespoon of oil to compensate for the missing fat.
- Honey (¼ cup): Use a good-quality honey that’s not too thick or crystallized. I prefer a mild wildflower honey or clover honey — something that won’t overpower the other flavors. Local honey is always a nice touch if you have it. If your honey has crystallized, warm the jar in a bowl of hot water for a few minutes to loosen it up.
- Soy Sauce (3 tablespoons): Regular soy sauce works perfectly. Low-sodium is fine too, but you might want to add a pinch of salt at the end. I’ve tested this with tamari for a gluten-free option and it works beautifully. Coconut aminos also work, though the flavor will be slightly milder and a touch sweeter.
- Garlic (6-8 cloves, minced): Fresh garlic is essential here — don’t use the jarred stuff. The garlic softens and sweetens as it cooks, creating little pockets of flavor throughout the sauce. I usually add a few extra cloves because I’m a garlic fanatic, but adjust to your taste.
- Olive Oil (2 tablespoons): For searing the chicken. You can use avocado oil or any high-smoke-point oil instead. Butter works too, but it’ll brown faster, so watch the heat.
- Salt and Black Pepper (to taste): Season the chicken generously before searing. Don’t be shy — the skin needs a good coating to develop that crispy crust.
- Optional Garnishes: Sliced green onions, sesame seeds, or fresh parsley add a nice pop of color and freshness at the end. A squeeze of lemon juice right before serving brightens everything up.
I recommend using chicken thighs from a brand like Bell & Evans or Springer Mountain Farms if you can find them — the quality really shows in the final dish. For the honey, I’ve had great results with local farmers’ market honey, but anything from the grocery store works fine. The soy sauce I swear by is Kikkoman — it’s consistent and has that perfect balance of salty and savory.
One thing I learned the hard way: don’t use dark soy sauce here. It’s too thick and molasses-like, and it’ll make the sauce look muddy instead of glossy. Stick with regular soy sauce for that beautiful amber color.
Equipment Needed
You don’t need a fancy kitchen to pull this off. Here’s what you’ll actually use:
- Large Skillet (12-inch): Cast iron is my first choice — it holds heat beautifully and gives you that perfect sear. A stainless steel skillet works great too. Avoid nonstick if you can, because you want those brown bits (fond) to stick to the pan for the sauce. If all you have is nonstick, it’ll still work — just don’t expect quite as much browning.
- Tongs: For flipping the chicken without piercing the skin. A good pair of metal tongs makes all the difference. I use OXO brand — they’re affordable and last forever.
- Measuring Spoons and Cups: For the honey and soy sauce. A silicone spatula helps get every last drop of honey out of the measuring cup.
- Chef’s Knife and Cutting Board: For mincing the garlic and prepping any garnishes. A sharp knife makes the garlic mincing go much faster.
- Small Bowl: For mixing the sauce ingredients together before adding them to the pan. This isn’t strictly necessary — you can add them separately — but it helps ensure even distribution.
If you don’t have a cast iron skillet, don’t worry. I’ve made this in a regular stainless steel pan and even in a well-seasoned carbon steel wok. The key is using a pan that can handle high heat without warping. Budget tip: check thrift stores for old cast iron skillets — they’re often under $20 and with a little TLC, they’ll outlast anything new.
Preparation Method
Let’s get cooking. This whole process takes about 25 minutes from start to finish, and most of that is hands-off time while the chicken cooks. Here’s how it breaks down:
- Prep the Chicken (5 minutes): Pat the chicken thighs dry with paper towels. This is crucial — wet skin won’t crisp up. Season both sides generously with salt and black pepper. Don’t be shy with the salt; the skin needs it to develop that golden crust. Let the chicken sit at room temperature for about 10 minutes while you prep the other ingredients.
- Mix the Sauce (2 minutes): In a small bowl, whisk together the honey, soy sauce, and minced garlic. Set it aside. If your honey is really thick, microwave the mixture for about 10 seconds to help it combine more easily.
- Heat the Pan (2 minutes): Place your skillet over medium-high heat and add the olive oil. Let it heat until the oil shimmers and moves like water in the pan — about 2 minutes. You want it hot enough that the chicken sizzles immediately when it hits the pan.
- Sear the Chicken (8-10 minutes): Place the chicken thighs skin-side down in the hot pan. Don’t crowd them — leave a little space between each piece so they brown instead of steam. Let them cook undisturbed for 5-6 minutes. The skin should be deep golden brown and crispy. Flip the thighs and cook for another 3-4 minutes on the other side. The chicken should be cooked through (internal temperature of 165°F) but still juicy.
- Add the Sauce (3-4 minutes): Pour the honey garlic mixture into the pan around the chicken, not directly over the skin (you want to keep that crispiness). Let it bubble and reduce for 2-3 minutes, spooning the sauce over the chicken occasionally. The sauce will thicken and become glossy as it reduces. You’ll know it’s ready when it coats the back of a spoon and clings to the chicken.
- Rest and Serve (2 minutes): Remove the pan from the heat. Let the chicken rest in the pan for 2 minutes — this lets the juices redistribute and the sauce set a bit more. Transfer to a serving platter and spoon any remaining sauce from the pan over the top.
Troubleshooting Tips:
- If the sauce starts to burn before the chicken is done, reduce the heat to medium-low. Honey can burn quickly, so keep an eye on it.
- If the sauce seems too thin, remove the chicken and let the sauce simmer on its own for another minute or two. It’ll thicken as it reduces.
- If the skin isn’t crispy enough, you didn’t pat it dry enough or the pan wasn’t hot enough. Next time, let the chicken sit uncovered in the fridge for 30 minutes before cooking to dry out the skin.
Sensory Cues: When the chicken hits the pan, you should hear a satisfying sizzle. The skin will start to turn golden around the edges after about 3 minutes. When it’s ready to flip, the skin should release easily from the pan — if it sticks, give it another minute. The sauce will go from thin and watery to thick and syrupy, and it’ll start to smell intensely sweet-savory. You’ll see it coat the chicken in a glossy, amber layer.
I’ve made this recipe so many times that I can now tell when the sauce is ready just by the sound — it goes from a vigorous bubble to a slower, thicker pop. It’s one of those little kitchen skills you develop over time, and it’s honestly kind of satisfying.
Cooking Tips & Techniques
After making this recipe more times than I can count, I’ve picked up a few tricks that make a real difference. Here’s what I’ve learned:
The Skin Secret: The biggest mistake people make with skin-on chicken thighs is not getting the skin dry enough. I literally pat mine with paper towels, then let them sit uncovered in the fridge for 15-20 minutes if I have time. That extra drying time makes the skin unbelievably crispy. I learned this after a particularly disappointing batch where the skin came out rubbery — now I never skip this step.
Don’t Move the Chicken: Once you place the chicken skin-side down, leave it alone. I know it’s tempting to peek or move it around, but that skin needs uninterrupted contact with the hot pan to develop that deep golden crust. Trust the process. Set a timer for 5 minutes and walk away.
Watch the Heat: Honey burns easily, so keep an eye on the heat level once you add the sauce. Medium heat is usually perfect — high enough to reduce the sauce but low enough to prevent burning. If you see the sauce starting to darken too quickly around the edges of the pan, reduce the heat immediately.
Timing Strategy: Start your rice or vegetables before you begin the chicken. This recipe comes together fast, and you don’t want to be waiting on sides while the chicken gets cold. I usually start my rice, then begin the chicken, and everything finishes around the same time.
The Fond Factor: Those brown bits stuck to the pan after searing the chicken? That’s pure flavor. When you add the sauce, scrape them up with a wooden spoon — they’ll dissolve into the sauce and add incredible depth. This is why I prefer cast iron or stainless steel over nonstick; you get more of those flavorful bits.
Resting Matters: I know you’re hungry, but let the chicken rest for those 2 minutes. The juices need time to redistribute, and the sauce needs a moment to set. Cutting into it immediately will give you dry chicken and a watery sauce. Patience pays off here.
Variations & Adaptations
This recipe is endlessly adaptable. Here are some variations I’ve tried and loved:
Spicy Honey Garlic: Add 1-2 teaspoons of sriracha or red pepper flakes to the sauce mixture. The heat balances beautifully with the sweetness. I make this version when I’m craving something with a kick. If you want even more heat, slice a fresh jalapeño and add it to the pan along with the sauce.
Lemon Honey Garlic: Add the juice of half a lemon and a teaspoon of lemon zest to the sauce. The acidity cuts through the richness and brightens everything up. This is my go-to summer version, especially when served with a simple green salad. For another citrusy chicken option, try my crispy lemon garlic chicken thighs — they use a similar technique with a different flavor profile.
Herb-Infused Version: Add a sprig of fresh rosemary or thyme to the pan while the sauce reduces. The herbs infuse the oil and add an aromatic layer that’s really lovely. I usually remove the sprig before serving, but you can leave it in for a rustic presentation.
Dijon Twist: Stir in a tablespoon of whole-grain Dijon mustard along with the sauce. It adds a tangy complexity that pairs wonderfully with the honey. This version is especially good with roasted vegetables on the side. If you love this combination, check out my one-pan honey dijon chicken thighs with green beans for a complete meal in one dish.
Dietary Adaptations: For a gluten-free version, use tamari or coconut aminos instead of soy sauce. For a lower-sugar option, reduce the honey to 2 tablespoons and add an extra tablespoon of soy sauce — it won’t be as glossy, but it’ll still be delicious. If you’re watching your sodium, use low-sodium soy sauce and reduce the added salt.
Baking Method: If you prefer not to pan-fry, you can bake the chicken. Sear the skin-side down in an oven-safe skillet, then pour the sauce over and transfer to a 400°F oven for 15-20 minutes. The skin won’t be quite as crispy, but it’s a great hands-off option.
Serving & Storage Suggestions
This honey garlic chicken is incredibly versatile when it comes to serving. Here’s how I like to enjoy it:
Serving Temperature: Serve the chicken hot, straight from the pan. The sauce should be warm and glossy, coating each piece. I like to let it rest for exactly 2 minutes before serving — any longer and the skin starts to soften.
What to Serve With It: The classic pairing is steamed white rice or jasmine rice — the grains soak up all that honey garlic sauce beautifully. For a lower-carb option, try cauliflower rice or a bed of sautéed greens. Roasted vegetables like broccoli, green beans, or asparagus work wonderfully too. If you’re in the mood for something heartier, serve it alongside my creamy mashed potatoes for a truly comforting meal.
Presentation Ideas: Arrange the chicken thighs on a platter, spoon the remaining sauce over the top, and garnish with sliced green onions and sesame seeds. The contrast of the dark amber sauce against the white rice and green onions is gorgeous. A sprinkle of flaky sea salt right before serving adds a nice finishing touch.
Storage Instructions: Store any leftovers in an airtight container in the refrigerator for up to 4 days. The chicken will absorb some of the sauce as it sits, so it won’t be quite as crispy the next day, but the flavor will be even better. I actually love the leftovers — the flavors meld together overnight and become even more cohesive.
Reheating Tips: The best way to reheat is in a skillet over medium heat with a splash of water or chicken broth. This helps rehydrate the sauce and keeps the chicken from drying out. Cover the pan for the first 2 minutes to steam the chicken, then uncover for the last minute to let any excess moisture evaporate. Microwave works in a pinch, but the skin will be soft rather than crispy.
Freezer Instructions: You can freeze the cooked chicken in an airtight container for up to 3 months. Thaw overnight in the refrigerator and reheat as directed above. The sauce might separate slightly after freezing, but a quick whisk will bring it back together.
One thing I’ve noticed: the flavors actually deepen and improve after a day in the fridge. The honey and garlic meld together, and the soy sauce penetrates the meat more deeply. If you can plan ahead, making this a day before you want to serve it is actually a great strategy.
Nutritional Information & Benefits
Here’s the estimated nutritional breakdown for one serving (based on 4 servings, using bone-in, skin-on chicken thighs):
| Nutrient | Amount per Serving |
|---|---|
| Calories | 385 |
| Protein | 28g |
| Fat | 22g |
| Saturated Fat | 6g |
| Carbohydrates | 18g |
| Sugar | 16g |
| Sodium | 680mg |
| Fiber | 0g |
Health Benefits: Chicken thighs are an excellent source of high-quality protein, which supports muscle maintenance and repair. They also provide important B vitamins, particularly B6 and B12, which are essential for energy metabolism and brain function. The skin contains healthy fats that help with nutrient absorption and keep you feeling satisfied.
Dietary Considerations: This recipe is naturally gluten-free if you use tamari instead of soy sauce. It’s also dairy-free and nut-free. If you’re watching your sugar intake, you can reduce the honey to 2 tablespoons — the flavor will be less sweet but still delicious.
Allergen Information: Contains soy (from the soy sauce). If you have a soy allergy, substitute with coconut aminos or a soy-free tamari alternative.
From a wellness perspective, I love that this recipe feels indulgent but is actually quite balanced. You’re getting a good amount of protein, the fat comes from natural sources, and the sweetness is from honey rather than refined sugar. It’s the kind of meal that satisfies both your taste buds and your body’s nutritional needs.
Conclusion
This easy one-pan honey garlic chicken thighs recipe has become a staple in my kitchen for good reason. It’s quick enough for a busy weeknight, impressive enough for company, and delicious enough that you’ll find yourself craving it on random Tuesday evenings. The combination of crispy skin, tender meat, and that glossy, sweet-savory sauce is something special — and it all comes together in one pan with minimal effort.
What I love most about this recipe is how forgiving it is. You don’t need to be a professional chef to nail it. The technique is straightforward, the ingredients are simple, and the results are consistently fantastic. It’s the kind of recipe that builds confidence in the kitchen, because you make it once and immediately think, “I can do this.” And you can.
I’d love to hear how it turns out for you. Did you add any twists? Serve it with something unexpected? Have a question about a step? Drop a comment below — I read every single one and I’m always happy to help. And if you loved it, share it with a friend who needs a reliable dinner recipe in their life. Happy cooking!
Frequently Asked Questions
Can I use chicken breasts instead of thighs?
Yes, but you’ll need to adjust the cooking time. Chicken breasts cook faster and can dry out easily. Use boneless, skinless breasts and cook them for about 4-5 minutes per side, then add the sauce and cook for another 2-3 minutes. Check the internal temperature — it should reach 165°F. The skin won’t be as crispy since breasts have less fat, so consider pounding them to an even thickness for more consistent cooking.
How do I prevent the honey from burning?
Keep the heat at medium once you add the sauce. Honey burns quickly at high temperatures. If you notice the sauce darkening too fast around the edges of the pan, reduce the heat immediately. You can also add a tablespoon of water to the sauce to thin it out and give it more time to reduce without burning.
Can I make this recipe ahead of time?
Absolutely. The chicken can be cooked up to 4 days in advance and stored in the refrigerator. Reheat it in a skillet with a splash of water or chicken broth to bring the sauce back to life. The flavors actually deepen overnight, so leftovers are often even better than the original. Just know that the skin won’t be as crispy after refrigeration.
What’s the best way to get crispy skin?
Pat the chicken thighs very dry with paper towels before seasoning. For extra-crispy skin, let them sit uncovered in the refrigerator for 15-30 minutes before cooking. Make sure your pan is hot enough before adding the chicken — the oil should shimmer. And most importantly, don’t move the chicken once it’s in the pan. Let it cook undisturbed for 5-6 minutes to develop that deep golden crust.
Can I double this recipe?
Yes, but you might need to cook the chicken in batches to avoid overcrowding the pan. Overcrowding lowers the pan temperature and causes the chicken to steam instead of sear. Cook the first batch, remove it to a plate, then cook the second batch. You can combine both batches in the pan when you add the sauce, or make a separate batch of sauce for each round.
Pin This Recipe!
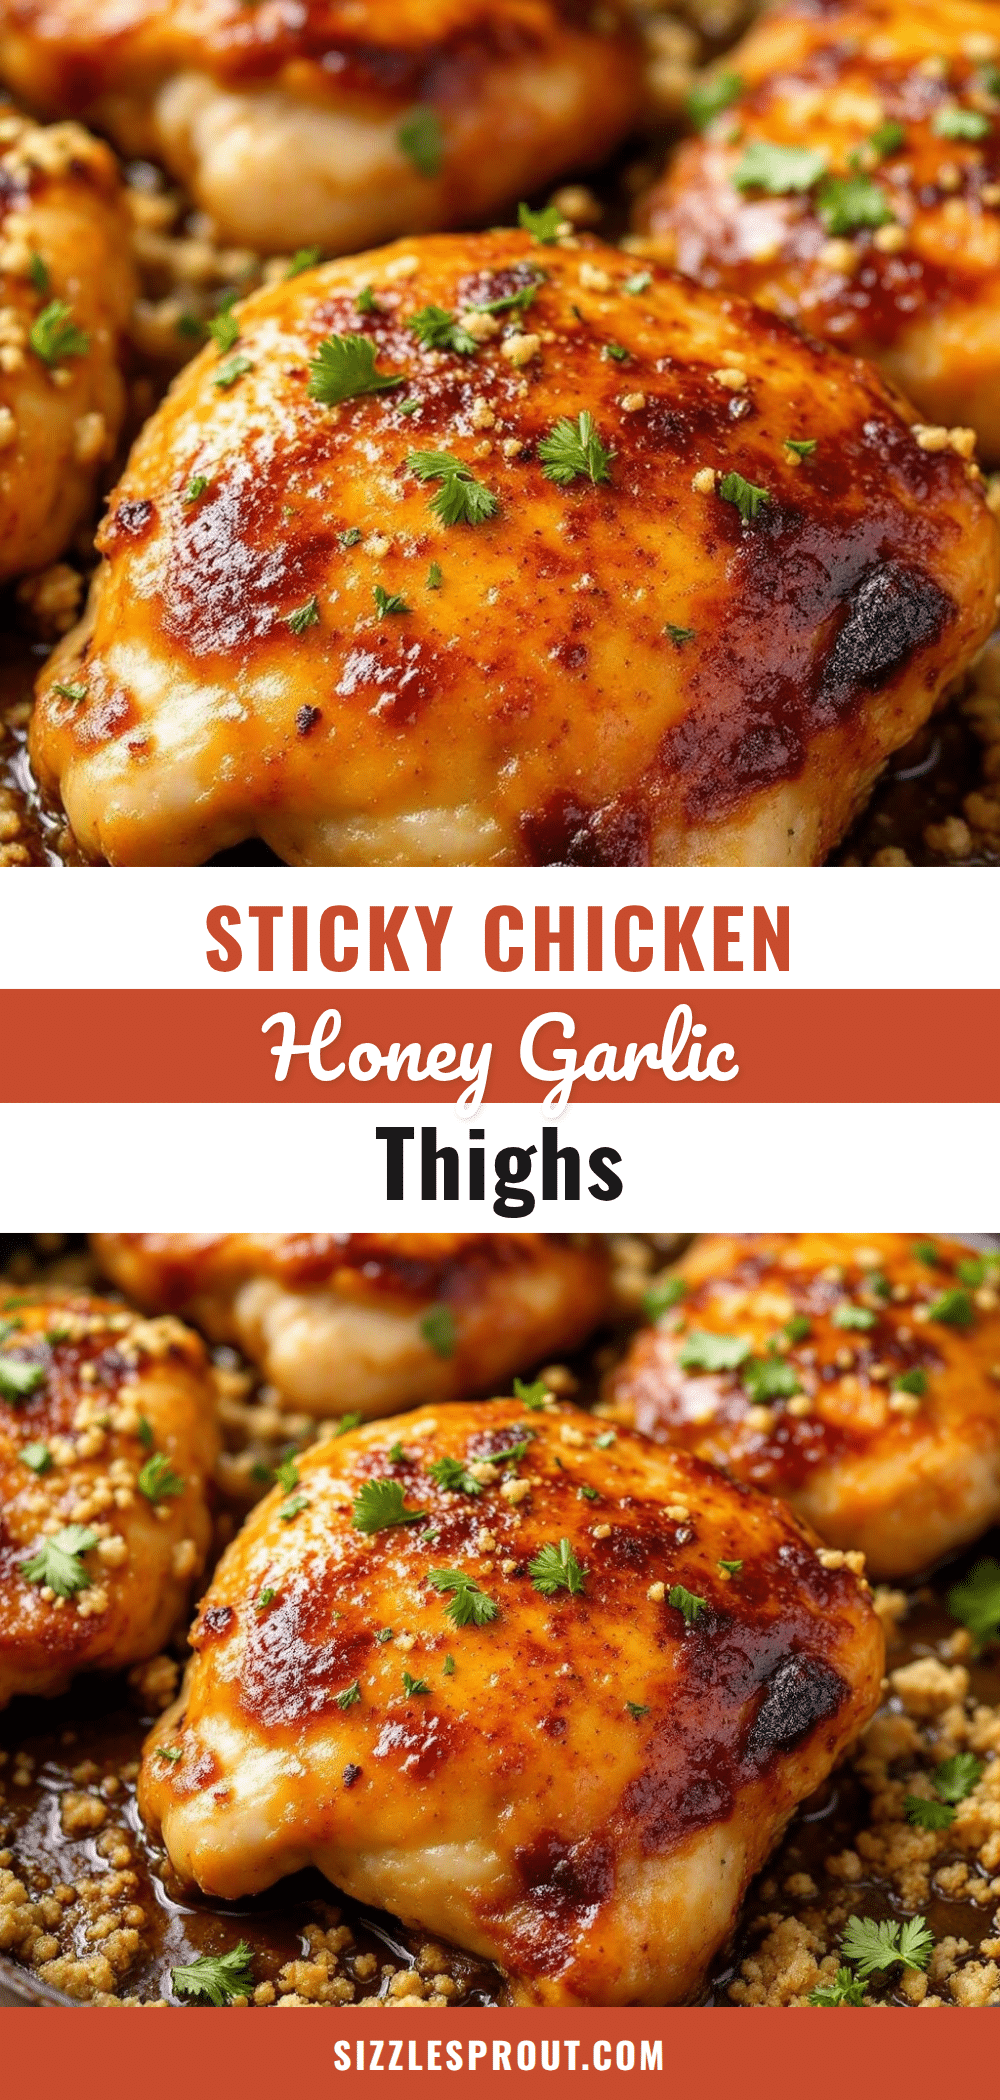
Easy One-Pan Honey Garlic Chicken Thighs: The Best Dinner

These honey garlic chicken thighs get a sticky, glossy lacquered look with tender meat, melted garlic, and a savory-sweet sauce. Ready in under 30 minutes with one pan and minimal mess, this is the perfect busy weeknight dinner that looks like you fussed.
- Prep Time: 10 minutes
- Cook Time: 15 minutes
- Total Time: 25 minutes
- Yield: 4 servings 1x
- Category: Main Course
- Cuisine: American
Ingredients
- 4–6 bone-in, skin-on chicken thighs
- ¼ cup honey
- 3 tablespoons soy sauce (or tamari for gluten-free)
- 6–8 cloves garlic, minced
- 2 tablespoons olive oil
- Salt and black pepper to taste
- Optional: sliced green onions, sesame seeds, fresh parsley, lemon juice for garnish
Instructions
- Pat the chicken thighs dry with paper towels. Season both sides generously with salt and black pepper. Let sit at room temperature for 10 minutes.
- In a small bowl, whisk together honey, soy sauce, and minced garlic. Set aside.
- Place a large skillet (12-inch, preferably cast iron or stainless steel) over medium-high heat. Add olive oil and heat until shimmering, about 2 minutes.
- Place chicken thighs skin-side down in the hot pan, leaving space between each piece. Cook undisturbed for 5-6 minutes until skin is deep golden brown and crispy.
- Flip the thighs and cook for another 3-4 minutes on the other side until cooked through (internal temperature of 165°F).
- Pour the honey garlic mixture into the pan around the chicken (not directly over the skin). Let it bubble and reduce for 2-3 minutes, spooning sauce over the chicken occasionally until thickened and glossy.
- Remove pan from heat. Let chicken rest in the pan for 2 minutes. Transfer to a serving platter and spoon remaining sauce over the top. Garnish as desired.
Notes
For extra crispy skin, pat chicken dry and let sit uncovered in the fridge for 15-30 minutes before cooking. Don’t move the chicken once it’s in the pan. If sauce starts to burn, reduce heat to medium-low. Let chicken rest 2 minutes before serving. Leftovers keep in the fridge for up to 4 days; reheat in a skillet with a splash of water or broth.
Nutrition
- Serving Size: 1 chicken thigh with
- Calories: 385
- Sugar: 16
- Sodium: 680
- Fat: 22
- Saturated Fat: 6
- Carbohydrates: 18
- Protein: 28
Keywords: honey garlic chicken, one-pan chicken, chicken thighs, easy dinner, weeknight dinner, sticky chicken, garlic chicken, honey chicken


