Love this? Save it for later!
Share the inspiration with your friends
I ruined pumpkin cookies for three straight autumns before I finally figured out what I was doing wrong. Not a little wrong—catastrophically wrong, where the cookies came out flat as pancakes and dense as hockey pucks. My kitchen smelled amazing, sure, but biting into one was like chewing on a slightly sweet pumpkin-flavored floor tile. I kept trying different recipes, convinced the problem was the baker, not the formula. Turns out, it was both.
The thing about pumpkin is it holds onto moisture like it’s getting paid for it. You dump a cup of puree into a standard cookie dough and suddenly you’ve got soup, not dough. So you add more flour, and then the cookies turn tough. It’s a vicious cycle, honestly, and I fell for it every single time. I’d pull a tray out of the oven, see the sad little puddles of batter, and just sigh. My husband would pat my shoulder and say, “They’ll still taste fine,” which is code for “please stop making these.”
Then last October, I got stubborn. I mean, really stubborn. I went back to basics—like, back to understanding what each ingredient actually does. I tested batches with different fat ratios, different leavening agents, different resting times. I burned through five pounds of pumpkin puree and more chocolate chips than I care to admit. But somewhere around batch number seven, it clicked. The texture was light, almost pillowy. The cookies held their shape. And when I topped one with a swirl of cream cheese icing and took a bite? I actually closed my eyes. That’s how I knew I had it right.
These fluffy pumpkin chocolate chip cookies with cream cheese icing are the result of all that trial and error. They’re not just another pumpkin cookie recipe. They’re the one that finally made me stop searching.
Why You’ll Love This Recipe
Let me tell you why these cookies are different from every other pumpkin cookie you’ve tried. First off, they’re actually fluffy. Not cakey, not dense—fluffy. There’s a difference, and it matters. The texture comes from a technique I stumbled onto by accident, and I’m honestly still proud of it.
- Quick & Easy: From start to finish, you’re looking at about 35 minutes. That includes the icing. Perfect for when a pumpkin craving hits out of nowhere (which, let’s face it, happens all autumn long).
- Simple Ingredients: Nothing weird here. No specialty flours, no obscure extracts. You probably have most of this in your pantry right now, minus maybe the pumpkin puree.
- Perfect for Fall Baking: These cookies scream sweater weather. They’re great for Thanksgiving dessert tables, Halloween parties, or just a random Tuesday when you need something cozy.
- Crowd-Pleaser: My kids devour them. My neighbor, who claims she doesn’t like pumpkin desserts, ate four in one sitting. The cream cheese icing is the secret weapon here.
- Unbelievably Delicious: The combo of soft pumpkin, melty chocolate chips, and tangy cream cheese icing is next-level. I’m not exaggerating when I say these are the best pumpkin cookies I’ve ever had.
What makes this recipe different from the rest? It’s the way we handle the pumpkin. Most recipes just dump it in and hope for the best. We’re going to do something smarter—and I’ll show you exactly how. This isn’t just another version of pumpkin cookies. It’s the version I spent three years perfecting so you don’t have to.
These cookies are the kind that make you close your eyes after the first bite. They’re comfort food reimagined—just sweet enough, just spiced enough, and completely satisfying without being heavy. Perfect for impressing guests without stressing yourself out.
What Ingredients You Will Need
This recipe uses simple, wholesome ingredients to create something genuinely special. Most of these are pantry staples, especially if you do any fall baking at all. Let’s break down what you need and why each ingredient matters.
For the Cookies
- 1/2 cup unsalted butter, softened (I prefer Land O’Lakes for consistent results—adds richness and helps create that tender crumb)
- 3/4 cup granulated sugar (adds sweetness and helps with spreading during baking)
- 1/4 cup packed light brown sugar (adds moisture and a hint of molasses flavor—dark brown sugar works too if that’s what you have)
- 1 large egg, room temperature (binds everything together and adds structure)
- 1 teaspoon vanilla extract (use pure, not imitation—it makes a difference in the overall flavor)
- 3/4 cup pumpkin puree (not pumpkin pie filling—make sure you grab the plain stuff. I like Libby’s for its consistent thickness)
- 2 cups all-purpose flour (spoon and level it—don’t scoop directly from the bag or you’ll end up with too much)
- 1 teaspoon baking soda (helps with lift and browning)
- 1/2 teaspoon baking powder (adds extra fluffiness)
- 1/2 teaspoon salt (balances sweetness and enhances all the flavors)
- 2 teaspoons pumpkin pie spice (store-bought is fine, or make your own with cinnamon, nutmeg, ginger, and cloves)
- 1 teaspoon ground cinnamon (because you can never have too much cinnamon in fall baking)
- 1 cup semi-sweet chocolate chips (I use Ghirardelli—they hold their shape and melt beautifully. Dark chocolate chips work great too if you prefer less sweetness)
For the Cream Cheese Icing
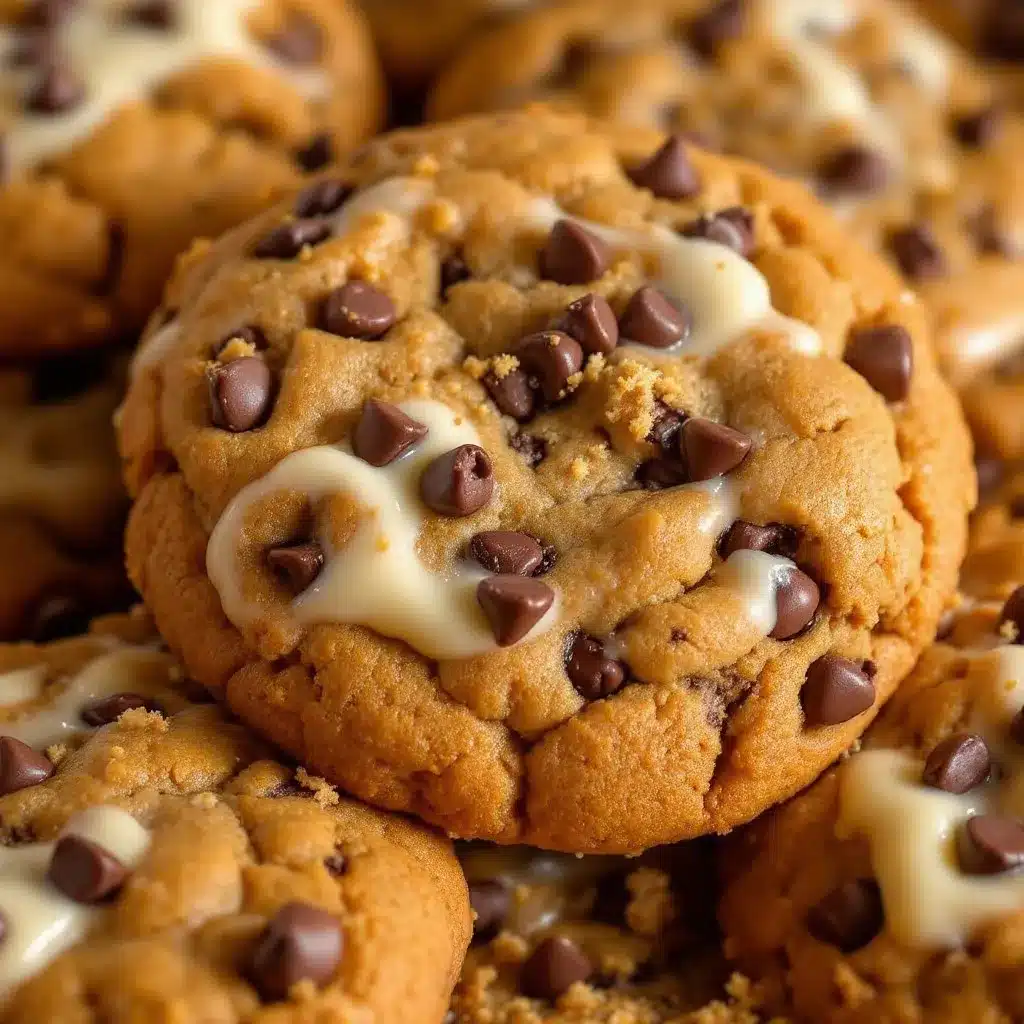
- 4 ounces cream cheese, softened (full-fat is best here—low-fat can make the icing runny)
- 2 tablespoons unsalted butter, softened (adds richness and helps stabilize the icing)
- 1 cup powdered sugar (sifted if you want extra smooth icing, but honestly, I usually skip sifting and it’s fine)
- 1/2 teaspoon vanilla extract (again, pure is better)
- 1-2 tablespoons milk (to thin the icing to your preferred consistency—start with one and add more if needed)
A quick note on ingredient selection: Look for pumpkin puree that’s thick and not watery. If you open a can and it looks runny, you can blot it with paper towels to remove some excess moisture. I’ve done this plenty of times and it works like a charm.
For substitutions, you can use dairy-free butter and cream cheese if needed—just make sure they’re the block-style cream cheese alternative, not the spreadable kind. Gluten-free all-purpose flour works well here too, though the texture will be slightly different (still delicious, just less fluffy).
Equipment Needed
You don’t need anything fancy for these cookies, which is one of the reasons I love this recipe. Here’s what you’ll need:
- Large mixing bowls (two of them—one for wet ingredients, one for dry)
- Hand mixer or stand mixer (a hand mixer works perfectly; I’ve made these with both and honestly prefer my hand mixer for this recipe)
- Measuring cups and spoons (please use dry measuring cups for flour and sugar—it matters)
- Baking sheets (two if you have them, so you can bake more cookies at once)
- Parchment paper or silicone baking mats (parchment paper is cheap and makes cleanup a breeze)
- Cookie scoop (a 1.5-tablespoon scoop is ideal for even-sized cookies—I got mine for like eight bucks on Amazon)
- Cooling rack (essential for letting the icing set properly)
- Small offset spatula (for spreading the icing, though a butter knife works in a pinch)
If you don’t have a cookie scoop, just use two spoons to portion the dough. The cookies won’t be perfectly round, but they’ll taste the same. I’ve done it both ways and honestly, the slightly imperfect ones have more charm anyway.
One tip: If you’re using new baking sheets, keep an eye on your first batch. Darker pans absorb more heat and can cause the bottoms to brown faster. I learned this the hard way with a batch of scorched cookies that smelled like regret.
Preparation Method
Alright, let’s get to the good part. Here’s how to make these fluffy pumpkin chocolate chip cookies with cream cheese icing, step by step.
Step 1: Preheat and Prep
Preheat your oven to 350°F (175°C). Line two baking sheets with parchment paper or silicone mats. This is non-negotiable—pumpkin cookies are sticky and will absolutely glue themselves to an unlined pan.
Step 2: Cream the Butter and Sugars
In a large bowl, beat the softened butter, granulated sugar, and brown sugar together until light and fluffy—about 2-3 minutes with a hand mixer on medium speed. You want it to look pale and airy. Scrape down the sides of the bowl once or twice.
Step 3: Add Egg, Vanilla, and Pumpkin
Add the egg and vanilla extract, then beat until well combined. Now add the pumpkin puree and mix on low speed until just incorporated. Here’s the important part: the mixture will look slightly curdled or separated at this point. Don’t panic. That’s normal. Pumpkin and butter don’t always play nice together, but it comes together in the end.
Step 4: Whisk Dry Ingredients
In a separate bowl, whisk together the flour, baking soda, baking powder, salt, pumpkin pie spice, and cinnamon. Whisking ensures everything is evenly distributed—no one wants a pocket of baking soda in their cookie.
Step 5: Combine Wet and Dry
Gradually add the dry ingredients to the wet mixture, mixing on low speed until just combined. Stop as soon as you don’t see any more streaks of flour. Overmixing will make the cookies tough, and we want fluffy, not tough.
Step 6: Fold in Chocolate Chips
Gently fold in the chocolate chips with a spatula. Make sure they’re evenly distributed throughout the dough. If you want a few extra chips on top for presentation, set aside about 2 tablespoons to press onto the dough balls before baking.
Step 7: Chill the Dough (This Is Important)
Cover the bowl with plastic wrap and refrigerate the dough for at least 30 minutes. I know, I know—you want cookies now. But trust me on this. Chilling the dough allows the flavors to meld and prevents the cookies from spreading too much. If you skip this step, you’ll get flat cookies. I’ve tested it both ways, and the chilled dough wins every time.
Step 8: Scoop and Bake
Using a 1.5-tablespoon cookie scoop, portion the dough into balls and place them on the prepared baking sheets, spacing them about 2 inches apart. If you reserved extra chocolate chips, press a few into the tops of each dough ball. Bake for 10-12 minutes, or until the edges are set and the centers look slightly underdone. The cookies will continue to set as they cool.
Step 9: Cool Completely
Let the cookies cool on the baking sheet for 5 minutes, then transfer them to a wire cooling rack. Let them cool completely before icing—about 20 minutes. Warm cookies + cream cheese icing = melted mess. I’ve done it, and it’s not pretty.
Step 10: Make the Icing
While the cookies cool, make the cream cheese icing. In a medium bowl, beat the softened cream cheese and butter together until smooth and creamy. Add the powdered sugar and vanilla extract, then beat on low speed until combined. Add milk one tablespoon at a time until the icing reaches a spreadable consistency. It should be thick enough to hold its shape but thin enough to spread easily.
Step 11: Ice and Serve
Once the cookies are completely cool, spread a generous amount of icing on each one. I like to leave some cookies un-iced for my husband, who claims the icing is “too much.” He’s wrong, but I love him anyway. Serve immediately or store as directed below.
Cooking Tips & Techniques
After three years of trial and error, I’ve collected a few tricks that make these cookies turn out perfectly every time. Here are the ones that matter most:
Blot your pumpkin puree. If your pumpkin puree looks watery at all, dump it onto a plate lined with paper towels and let it sit for a few minutes. Then blot the top with another paper towel. This removes excess moisture that can make your cookies flat and gummy. I started doing this after a particularly disastrous batch that spread into one giant cookie pancake.
Use room temperature ingredients. I know it’s annoying to wait for butter and eggs to come to room temperature, but it really does matter. Cold butter doesn’t cream properly, and cold egg can seize up the batter. If you’re in a hurry, cut the butter into small cubes and let it sit for 15 minutes. For the egg, place it in a bowl of warm water for 5 minutes.
Don’t overmix the dough. This is the most common mistake I see in cookie recipes. Once you add the flour, mix just until it disappears. Overmixing develops gluten, which makes cookies tough and dense. We want fluffy, remember?
Chill the dough. I mentioned this in the method, but it’s worth repeating. Chilling solidifies the fat, which means the cookies spread less and stay thicker. It also gives the flavors time to meld. I’ve left the dough in the fridge overnight before, and the cookies were even better the next day.
Bake one sheet at a time. If you have two baking sheets, bake them one at a time in the center of the oven. Putting both in at once can lead to uneven baking. If you’re in a rush, you can bake both on separate racks, but swap their positions halfway through.
Underbake slightly. Pull the cookies out when the edges are set but the centers still look soft and slightly underdone. They’ll continue to cook on the hot baking sheet as they cool. This is how you get that soft, fluffy interior.
Variations & Adaptations
One of the best things about this recipe is how adaptable it is. Here are some variations I’ve tried and loved:
Gluten-Free Version: Substitute the all-purpose flour with a 1:1 gluten-free baking flour blend. I’ve used Bob’s Red Mill and King Arthur Measure for Measure, and both worked well. The cookies will be slightly more delicate, so handle them gently when transferring to the cooling rack.
Dairy-Free Version: Use dairy-free butter and cream cheese alternative. Miyoko’s and Violife are my go-to brands. Make sure the cream cheese alternative is the block style, not the spreadable kind, or your icing might be too thin.
White Chocolate Pumpkin Cookies: Swap the semi-sweet chocolate chips for white chocolate chips. The sweetness of white chocolate pairs beautifully with the pumpkin spice. I made a batch for a Halloween party last year and they disappeared in minutes.
Pumpkin Walnut Cookies: Add 1/2 cup of chopped walnuts along with the chocolate chips. The crunch adds a nice contrast to the soft cookie. Toast the walnuts first for extra flavor—just spread them on a baking sheet and bake at 350°F for 5-7 minutes.
Extra Spicy Pumpkin Cookies: If you like your pumpkin desserts with a kick, add an extra teaspoon of pumpkin pie spice and a pinch of cayenne pepper. The heat sneaks up on you and works surprisingly well with the cream cheese icing.
Pumpkin Chocolate Chip Cookie Sandwiches: Take two cookies, spread a thick layer of cream cheese icing on one, and sandwich them together. It’s decadent and ridiculous and absolutely worth doing at least once.
My personal favorite variation is the white chocolate version. I stumbled onto it when I ran out of semi-sweet chips mid-batch and had to improvise. Now I make it on purpose all the time. If you love chocolate chip pumpkin sourdough bread with cream cheese glaze, you’ll adore this twist.
Serving & Storage Suggestions
These cookies are best served at room temperature, which lets the cream cheese icing soften to the perfect consistency. If you’ve stored them in the fridge (which I recommend for iced cookies), let them sit out for about 15 minutes before serving.
For presentation, arrange the cookies on a rustic wooden board or a simple white platter. A light dusting of cinnamon on top of the icing adds a beautiful finishing touch. I also like to sprinkle a few flaky sea salt crystals on top—the salt cuts through the sweetness and makes the flavors pop.
These cookies pair beautifully with a hot cup of coffee, a chai latte, or a glass of cold milk. For a fall-themed dessert board, serve them alongside homemade pumpkin cream cold foam for dipping—trust me, it’s a game-changer.
Storage Instructions:
- Un-iced cookies: Store in an airtight container at room temperature for up to 5 days. They’ll stay soft and delicious.
- Iced cookies: Store in an airtight container in the refrigerator for up to 5 days. The icing needs to stay chilled to maintain its texture.
- Freezer (un-iced): Place the baked, un-iced cookies in a single layer on a baking sheet and freeze until solid, then transfer to a freezer-safe bag or container. They’ll keep for up to 3 months. Thaw at room temperature and ice before serving.
- Freezer (dough): Scoop the dough into balls, place them on a baking sheet, and freeze until solid. Transfer the frozen dough balls to a freezer bag. Bake from frozen, adding 2-3 minutes to the baking time.
One thing I love about these cookies is that the flavors actually develop over time. Day-old cookies (stored properly) taste even better than fresh-baked ones. The pumpkin spice mellows out and the chocolate chips seem to meld with the dough. If you can resist eating them all on day one, you’re in for a treat on day two.
Nutritional Information & Benefits
Here’s the approximate nutritional breakdown for one cookie (based on 24 cookies with icing):
| Nutrient | Amount |
|---|---|
| Calories | 185 |
| Total Fat | 9g |
| Saturated Fat | 5g |
| Cholesterol | 25mg |
| Sodium | 95mg |
| Total Carbohydrates | 25g |
| Dietary Fiber | 1g |
| Sugars | 16g |
| Protein | 2g |
| Vitamin A | 35% DV |
| Calcium | 2% DV |
| Iron | 4% DV |
While these cookies are definitely a treat, they do offer some nutritional benefits thanks to the pumpkin. Pumpkin is packed with vitamin A, which supports eye health and immune function. It’s also a good source of fiber and antioxidants. The cream cheese icing adds calcium and a little protein, though let’s be honest—we’re eating these for the flavor, not the nutrition.
If you’re looking for a healthier option, you can reduce the sugar to 1/2 cup total and use dark chocolate chips with at least 70% cacao. The cookies won’t be as sweet, but they’ll still be delicious. For a lower-carb version, you can try a keto-friendly flour blend, though I haven’t tested that myself.
Potential allergens: This recipe contains dairy, eggs, and wheat (gluten). It can be adapted for dairy-free and gluten-free diets as noted in the variations section.
Conclusion
These fluffy pumpkin chocolate chip cookies with cream cheese icing are the result of three years of stubborn determination, countless failed batches, and one very patient family. They’re soft, tender, and packed with just the right amount of pumpkin spice and chocolate in every bite.
What I love most about this recipe is how forgiving it is once you understand the key steps. Blot the pumpkin, chill the dough, don’t overmix, and underbake slightly. Follow those four rules and you’ll have perfect cookies every single time. And that cream cheese icing? It’s the kind of topping that makes you wonder why you ever ate cookies without it.
I’d love to hear how these turn out for you. Did you try any of the variations? Did you add extra chocolate chips? Did you eat three before the icing even set? (No judgment here—I’ve done it too.) Drop a comment below and let me know. And if you’re looking for more cozy fall recipes, don’t miss my pumpkin cream cheese swirl muffins with maple glaze or these brown butter pumpkin snickerdoodle cookies.
Happy baking, friends. May your cookies be fluffy, your icing be creamy, and your autumn be full of warm, delicious moments.
Frequently Asked Questions
Can I use pumpkin pie filling instead of pumpkin puree?
No, please don’t. Pumpkin pie filling is already sweetened and spiced, which will throw off the balance of this recipe. Stick with plain pumpkin puree for the best results. If you accidentally bought pie filling, save it for making a quick pumpkin pie instead.
Why did my cookies turn out flat?
Flat cookies usually mean one of three things: the butter was too soft, the dough wasn’t chilled long enough, or the pumpkin puree was too watery. Make sure your butter is softened but not melted, chill the dough for at least 30 minutes, and blot your pumpkin puree if it looks runny.
Can I make these cookies ahead of time?
Absolutely. You can make the dough up to 3 days in advance and keep it refrigerated. You can also freeze the baked, un-iced cookies for up to 3 months. Just thaw and ice them before serving. The iced cookies are best eaten within 2 days, but they’ll still taste great for up to 5 days in the fridge.
Can I skip the cream cheese icing?
You can, but I don’t recommend it. The icing adds a tangy creaminess that balances the sweetness of the cookies perfectly. If you really want to skip it, try a simple dusting of powdered sugar or a drizzle of melted white chocolate instead. Or you can leave them plain—they’re still delicious, just not as special.
How do I know when the cookies are done baking?
Look for edges that are set and lightly golden, while the centers still look soft and slightly underdone. The cookies will continue to bake on the hot sheet as they cool. If you wait until the centers look fully set, they’ll be overbaked and dry. When in doubt, pull them out a minute early rather than a minute late.
Pin This Recipe!
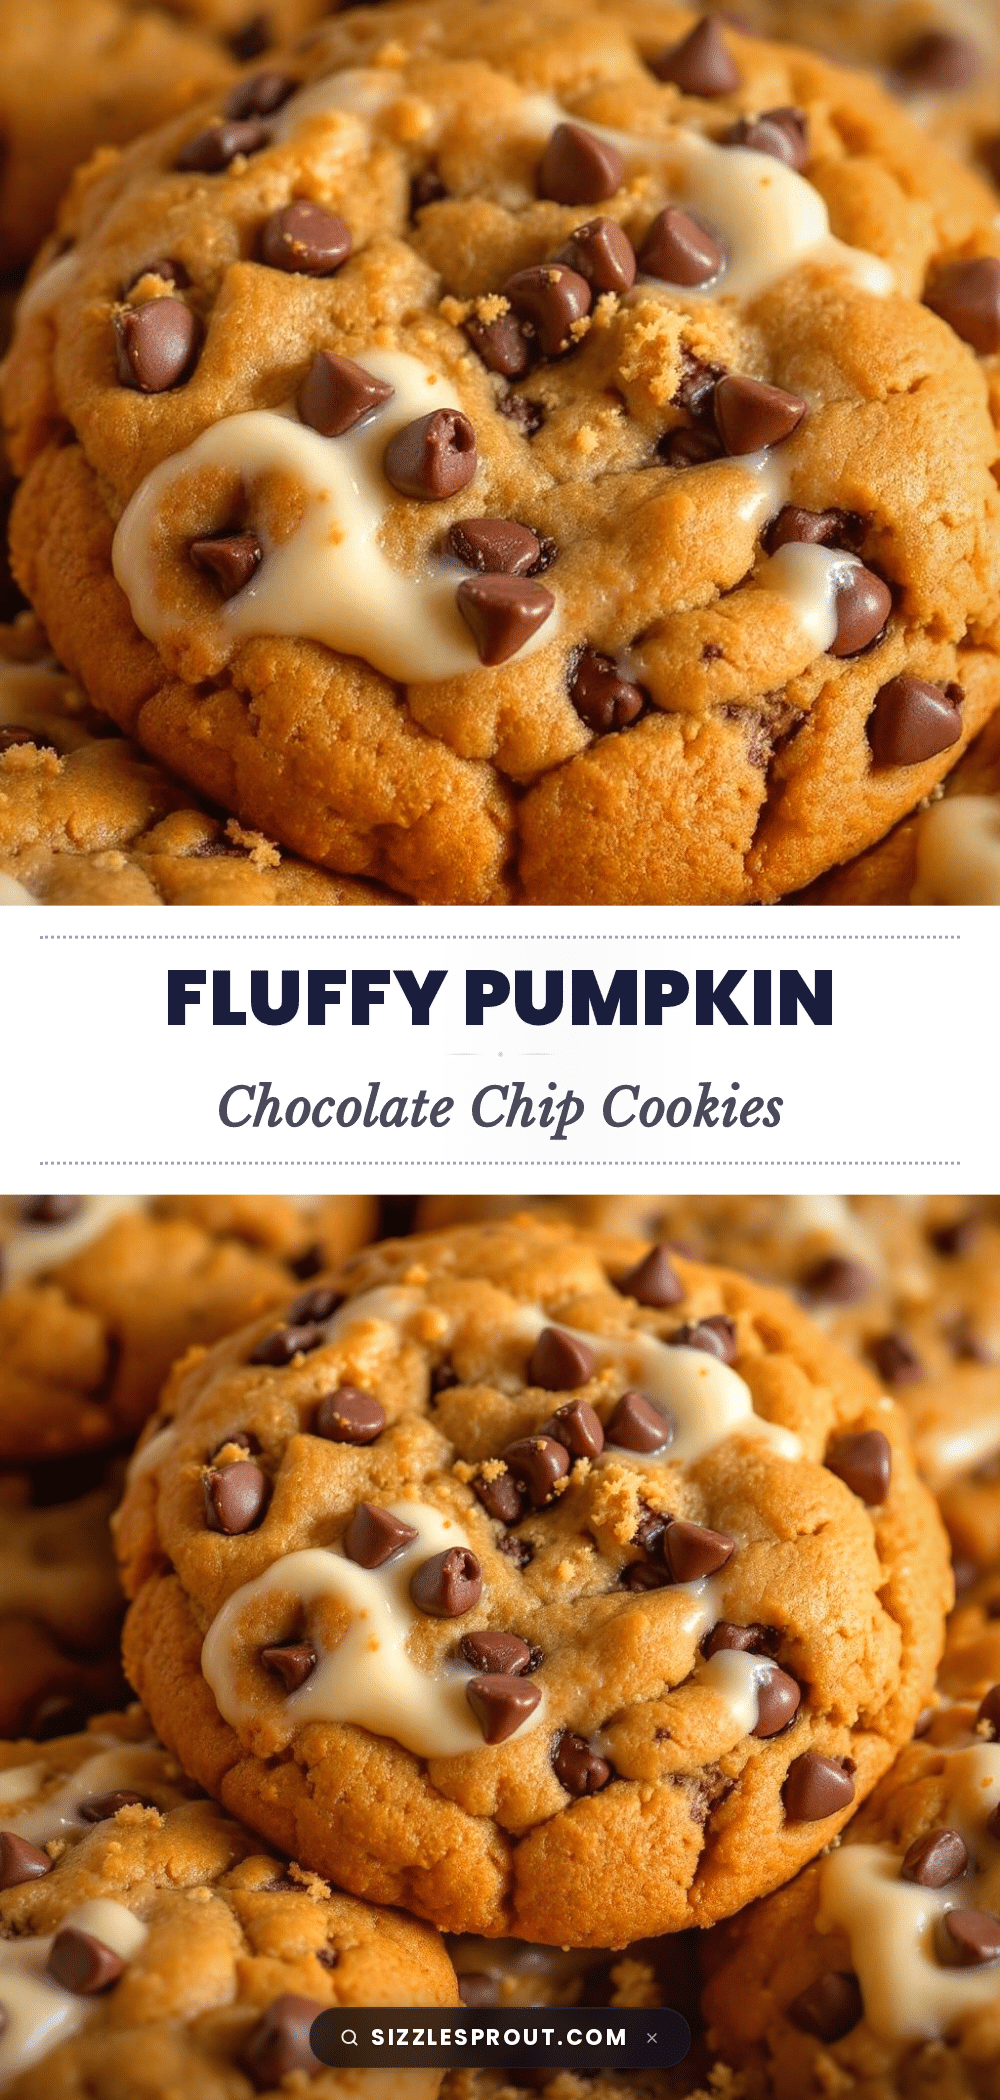
Fluffy Pumpkin Chocolate Chip Cookies with Cream Cheese Icing

These fluffy pumpkin chocolate chip cookies are soft, tender, and packed with pumpkin spice and chocolate chips, topped with a tangy cream cheese icing. The result of three years of trial and error, this recipe ensures perfect, pillowy cookies every time.
- Prep Time: 15 minutes
- Cook Time: 12 minutes
- Total Time: 35 minutes
- Yield: 24 servings 1x
- Category: Dessert
- Cuisine: American
Ingredients
- 1/2 cup unsalted butter, softened
- 3/4 cup granulated sugar
- 1/4 cup packed light brown sugar
- 1 large egg, room temperature
- 1 teaspoon vanilla extract
- 3/4 cup pumpkin puree (not pumpkin pie filling)
- 2 cups all-purpose flour (spooned and leveled)
- 1 teaspoon baking soda
- 1/2 teaspoon baking powder
- 1/2 teaspoon salt
- 2 teaspoons pumpkin pie spice
- 1 teaspoon ground cinnamon
- 1 cup semi-sweet chocolate chips
- 4 ounces cream cheese, softened
- 2 tablespoons unsalted butter, softened
- 1 cup powdered sugar
- 1/2 teaspoon vanilla extract
- 1–2 tablespoons milk
Instructions
- Preheat oven to 350°F (175°C). Line two baking sheets with parchment paper or silicone mats.
- In a large bowl, beat softened butter, granulated sugar, and brown sugar together until light and fluffy, about 2-3 minutes with a hand mixer on medium speed. Scrape down sides as needed.
- Add egg and vanilla extract, beat until well combined. Add pumpkin puree and mix on low speed until just incorporated (mixture may look slightly curdled; this is normal).
- In a separate bowl, whisk together flour, baking soda, baking powder, salt, pumpkin pie spice, and cinnamon.
- Gradually add dry ingredients to wet mixture, mixing on low speed until just combined. Do not overmix.
- Gently fold in chocolate chips with a spatula until evenly distributed. Optionally, reserve 2 tablespoons of chips to press onto dough balls before baking.
- Cover bowl with plastic wrap and refrigerate dough for at least 30 minutes.
- Using a 1.5-tablespoon cookie scoop, portion dough into balls and place on prepared baking sheets, spacing 2 inches apart. If reserved, press extra chocolate chips onto tops.
- Bake for 10-12 minutes, until edges are set and centers look slightly underdone. Cool on baking sheet for 5 minutes, then transfer to a wire rack to cool completely (about 20 minutes).
- While cookies cool, make icing: In a medium bowl, beat softened cream cheese and butter until smooth and creamy. Add powdered sugar and vanilla extract, beat on low until combined. Add milk one tablespoon at a time until spreadable consistency is reached.
- Once cookies are completely cool, spread a generous amount of icing on each cookie. Serve immediately or store as directed.
Notes
Blot pumpkin puree with paper towels if watery to prevent flat cookies. Use room temperature ingredients for best results. Chill dough for at least 30 minutes to prevent spreading. Underbake slightly for fluffy texture. Store un-iced cookies at room temperature for up to 5 days; iced cookies in refrigerator for up to 5 days. Freeze un-iced cookies or dough balls for up to 3 months.
Nutrition
- Serving Size: 1 cookie
- Calories: 185
- Sugar: 16
- Sodium: 95
- Fat: 9
- Saturated Fat: 5
- Carbohydrates: 25
- Fiber: 1
- Protein: 2
Keywords: pumpkin cookies, chocolate chip cookies, cream cheese icing, fall baking, pumpkin dessert, fluffy cookies


