Love this? Save it for later!
Share the inspiration with your friends
The summer I turned thirty, I found myself in the most unexpected place for a recipe—a quiet little corner of a bustling flea market, right next to a vintage flag seller. I was sifting through weathered postcards when the guy running the booth, an unassuming man with paint-splattered hands and a slow smile, casually started talking about his grandmother’s “flag cake.” Now, you wouldn’t guess a handyman doubling as a storyteller would hold the secret to the perfect red velvet flag cake with cream cheese frosting, but honestly, that’s exactly what happened. I mean, I was there to hunt for old Americana memorabilia, not cake tips, but let me tell you, his description was so vivid I almost forgot why I was there.
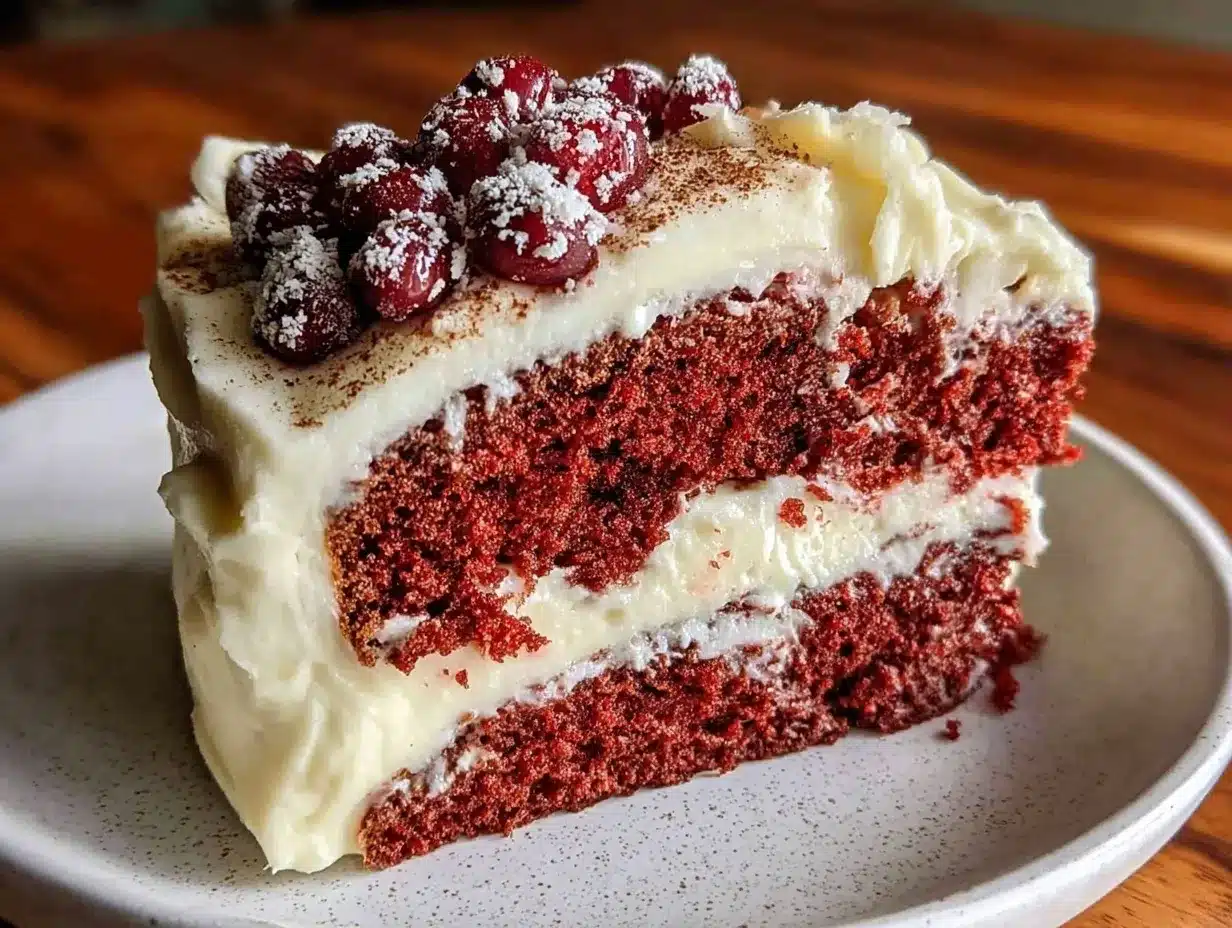
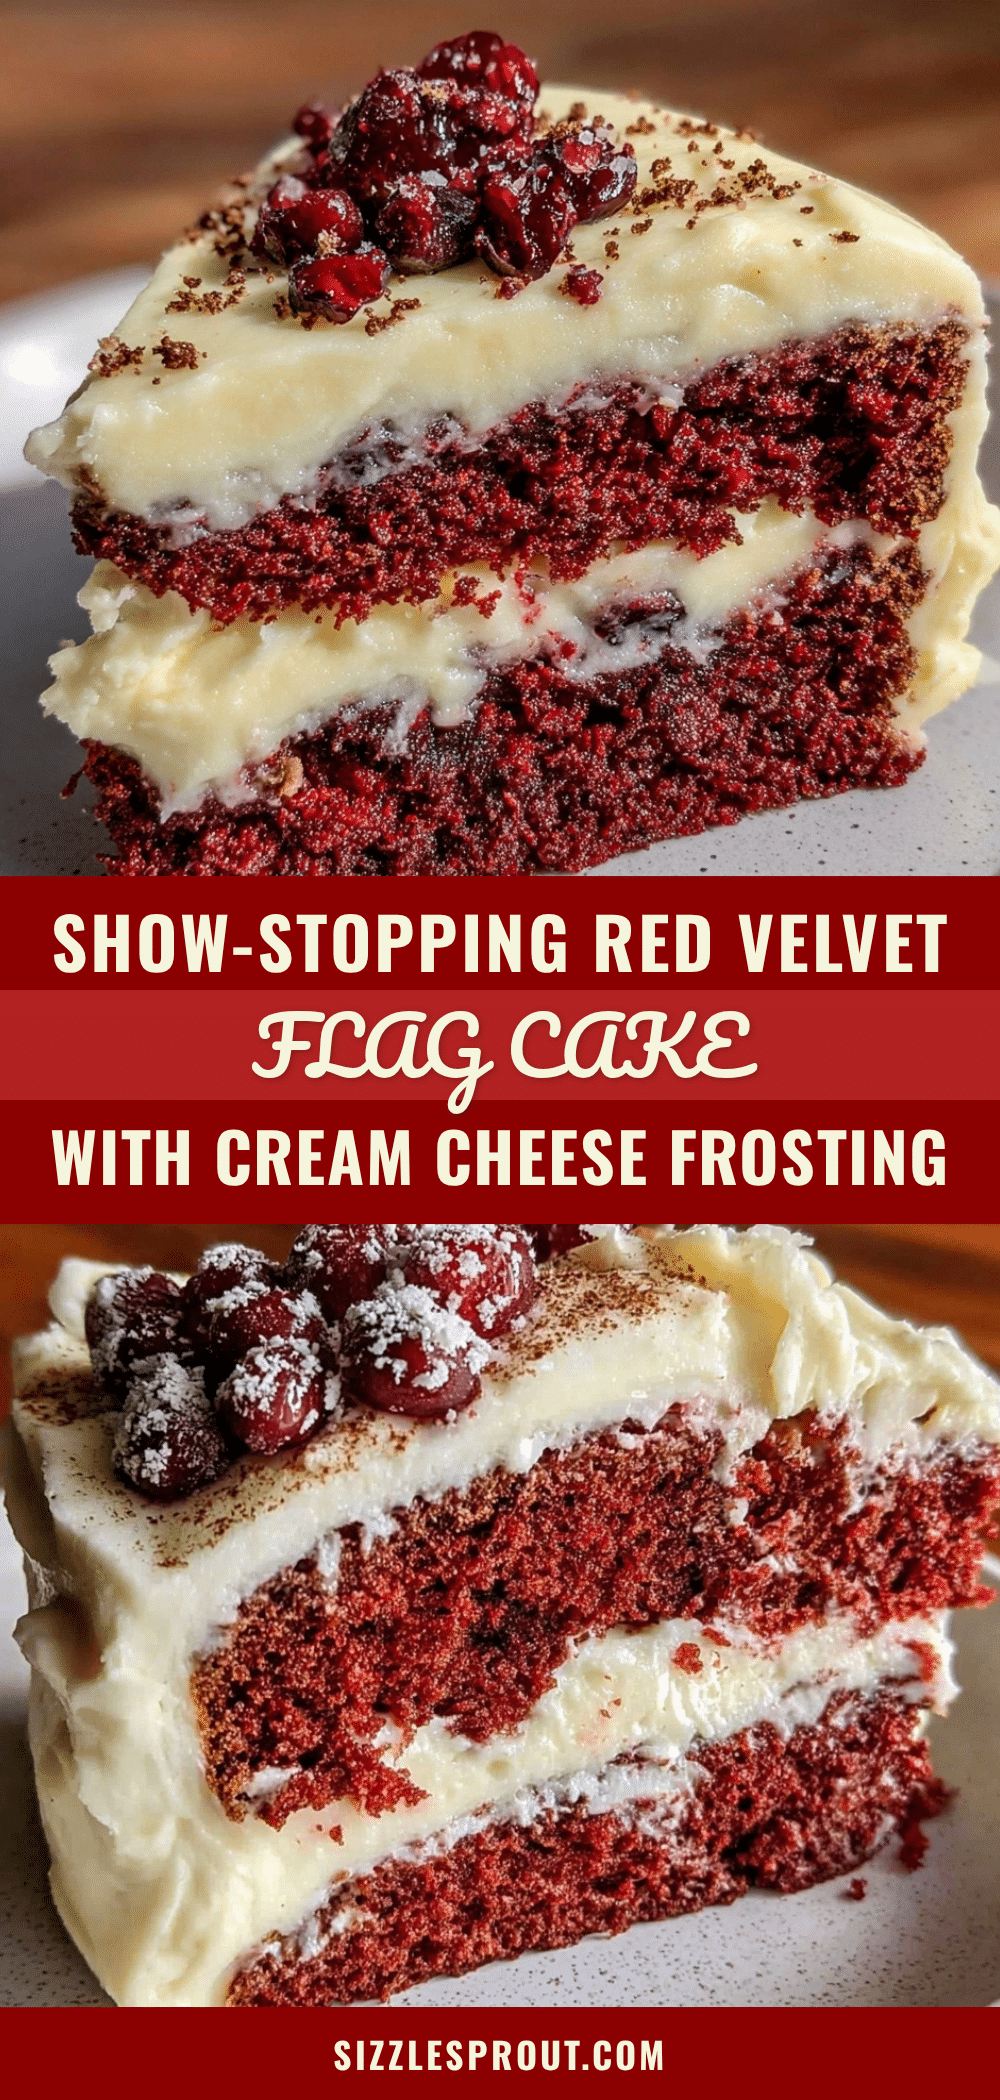
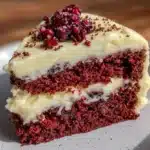
He pulled out a crumpled recipe card, edges worn and stained, and explained how the cake’s layers mimic the American flag—vivid red velvet stripes interrupted by snowy white cream cheese frosting, all stacked high like a proud banner. There was something about the way he described the texture—moist but firm, with just the right hint of cocoa—and the frosting, silky smooth and tangy, that made me want to run home and bake it right away. I forgot to jot down a few ingredients while chatting because I got distracted by the sound of a street musician nearby. Maybe you’ve been there—caught between moments and memories, the recipe slipping through your fingers.
Since that day, the perfect red velvet flag cake with cream cheese frosting has become a staple in my kitchen for holidays, birthdays, and those spontaneous celebrations that sneak up on you. It’s the kind of dessert that makes you pause and smile, the kind that’s worth the little messes and forgotten steps because it tastes like a story told by someone who truly loves what they do. If you’ve ever wanted a cake that’s as much about joy and surprise as it is about flavor, this one’s for you.
Why You’ll Love This Recipe
From my many attempts perfecting this red velvet flag cake, it’s clear why it stands out. It’s not just another dessert; it’s a conversation starter and a crowd-pleaser that wins hearts with each bite. I’ve tested variations to balance flavor and texture, making sure this recipe is as approachable as it is delightful.
- Quick & Easy: Comes together in under 1 hour, perfect for last-minute celebrations or when you want a festive treat without fuss.
- Simple Ingredients: Uses pantry staples like cocoa powder, buttermilk, and cream cheese—you probably have them on hand already.
- Perfect for Patriotic Occasions: Ideal for the Fourth of July, Memorial Day, or any summer gathering that calls for a show-stopping dessert.
- Crowd-Pleaser: Kids, adults, and even picky eaters give it rave reviews, especially with that classic cream cheese frosting.
- Unbelievably Delicious: The moist red velvet layers paired with creamy, tangy frosting offer a texture and flavor combo that feels both nostalgic and fresh.
What really sets this recipe apart is the layering technique that creates the “flag” effect without complicated piping or decorating skills. The cream cheese frosting is whipped just right—not too sweet, not too dense—giving the cake a velvety finish that melts in your mouth. Honestly, it’s the kind of dessert that makes you close your eyes after the first bite and say, “Yep, this is exactly what I needed.” Whether you’re impressing guests or indulging yourself, this red velvet flag cake isn’t just a recipe; it’s a celebration in every slice.
What Ingredients You Will Need
This recipe uses simple, wholesome ingredients to deliver bold flavor and satisfying texture without the fuss. Most are pantry staples, with a few easy swaps if needed.
- For the Cake Layers:
- All-purpose flour – 2 ½ cups (312g), sifted for a light crumb
- Granulated sugar – 1 ½ cups (300g)
- Unsweetened cocoa powder – 2 tablespoons (15g), for subtle chocolate depth
- Baking soda – 1 teaspoon (5g), to help rise
- Salt – ½ teaspoon (3g)
- Buttermilk – 1 cup (240ml), room temperature, adds moisture and tang (use dairy-free milk with 1 tbsp vinegar if needed)
- Vegetable oil – 1 cup (240ml), for moistness (I like using a mild canola oil)
- Large eggs – 2, room temperature, for structure
- White vinegar – 1 tablespoon (15ml), reacts with baking soda for lift
- Vanilla extract – 2 teaspoons (10ml), for warmth
- Red food coloring – 2 tablespoons (30ml), liquid or gel (I recommend gel for vibrant color without thinning batter)
- For the Cream Cheese Frosting:
- Cream cheese – 16 oz (450g), softened (Philadelphia brand works great)
- Unsalted butter – ½ cup (113g), softened (adds richness)
- Powdered sugar – 4 cups (480g), sifted to avoid lumps
- Vanilla extract – 1 teaspoon (5ml), brightens flavor
- Pinch of salt – balances sweetness
If you want a dairy-free version, swap cream cheese and butter with plant-based alternatives, and almond milk-based buttermilk works well for moisture. For gluten-free baking, substitute the all-purpose flour with a cup-for-cup gluten-free blend.
Equipment Needed
- Two 9-inch (23 cm) round cake pans – non-stick or greased and lined with parchment paper
- Mixing bowls – at least two, one for wet ingredients and one for dry
- Electric mixer or stand mixer – to cream the frosting smoothly and mix the batter well
- Measuring cups and spoons – for precise ingredient amounts
- Rubber spatula – for folding ingredients gently and scraping bowls
- Cooling rack – to cool cake layers evenly
- Offset spatula or butter knife – for spreading frosting evenly
If you don’t have an electric mixer, a sturdy whisk and some elbow grease can do the trick, but expect more arm workout! I once tried using disposable aluminum pans in a pinch; they worked fine but required careful greasing to prevent sticking. Budget-friendly cake pans from local stores are perfectly fine, just avoid overly thin pans that warp under heat.
Preparation Method
- Preheat and Prepare Pans: Preheat your oven to 350°F (175°C). Grease two 9-inch cake pans and line the bottoms with parchment paper. This prevents sticking and helps the cakes release easily. (Time: 10 minutes)
- Mix Dry Ingredients: In a large bowl, sift together 2 ½ cups flour, 1 ½ cups sugar, 2 tablespoons cocoa powder, 1 teaspoon baking soda, and ½ teaspoon salt. This step ensures even distribution of leavening agents and prevents cocoa clumps. (Time: 5 minutes)
- Combine Wet Ingredients: In a separate bowl, whisk 1 cup buttermilk, 1 cup vegetable oil, 2 large eggs, 1 tablespoon white vinegar, 2 teaspoons vanilla extract, and 2 tablespoons red food coloring until smooth. Using room temperature eggs helps blend everything seamlessly. (Time: 5 minutes)
- Mix Batter: Slowly pour the wet ingredients into the dry, stirring gently with a rubber spatula. Mix just until combined—overmixing can lead to a dense cake. The batter should be thick but pourable, with a striking red hue. (Time: 3-4 minutes)
- Divide and Bake: Pour batter evenly into the two pans. Bake for 25-30 minutes or until a toothpick inserted into the center comes out clean. Rotate pans halfway through for even baking. When done, cakes will spring back lightly when touched. (Time: 30 minutes)
- Cool Completely: Let the cakes cool in the pans for 10 minutes before transferring to a wire rack. Cooling fully prevents the frosting from melting. (Time: 1 hour)
- Prepare Frosting: Beat 16 oz softened cream cheese and ½ cup softened butter with an electric mixer until smooth and creamy. Gradually add 4 cups powdered sugar, mixing on low speed to avoid sugar clouds. Add 1 teaspoon vanilla extract and a pinch of salt, then beat on high for 2 minutes until fluffy. (Time: 10 minutes)
- Assemble the Flag Cake: Slice each cake horizontally to create four thin layers total. On your serving plate, place one red velvet layer, spread a thin layer of frosting, then the next cake layer, and so on. Arrange the layers to resemble stripes of a flag. Finish with a generous frost all over the outside. (Time: 20 minutes)
- Chill Before Serving: Refrigerate the assembled cake for at least 30 minutes to set the frosting and meld flavors. (Time: 30 minutes)
Pro tip: If your frosting gets too soft while spreading, pop it in the fridge for 10 minutes. Also, when slicing layers, use a serrated knife and a gentle sawing motion to avoid crumbs mixing into the frosting.
Cooking Tips & Techniques
Getting the perfect red velvet flag cake isn’t just about following the recipe but understanding the little details. For example, the right red food coloring is key—gel colors provide a richer red without watering down the batter. I once made mine with liquid coloring and ended up with a muted pink, so lesson learned!
When mixing the batter, fold gently. Overmixing develops gluten and makes the cake tough, which is the opposite of what you want. The batter should be smooth but a little thick, not runny.
For the cream cheese frosting, patience is important. Make sure both butter and cream cheese are softened to room temperature—that way, the frosting will be silky and not lumpy. If it’s too sweet, a pinch of salt or a splash of lemon juice can brighten it up.
Timing matters too. Cooling the cake layers before frosting is a must unless you want a frosting meltdown. And if you’re in a rush, chilling the assembled cake helps it slice cleanly and look tidy.
Multitasking tip: While the cake bakes, prepare your frosting and clean up your prep area. That way, you’re ready to frost as soon as the layers cool.
Variations & Adaptations
- Dietary Variation: Use gluten-free flour blend and dairy-free cream cheese to make a red velvet flag cake suitable for gluten and lactose sensitivities.
- Seasonal Twist: Add fresh strawberries or raspberries between layers for a fruity surprise that complements the tangy frosting.
- Flavor Variation: Swap vanilla extract with a teaspoon of almond extract for a subtle nutty note that pairs beautifully with the cocoa.
- Cooking Method: If you prefer, bake the cake layers in a sheet pan and cut into strips to assemble a rectangular flag cake instead of round layers.
- Personal Favorite: I sometimes sprinkle chopped toasted pecans between layers for a little crunch and extra warmth—just a bit of texture to break the smoothness.
Serving & Storage Suggestions
This red velvet flag cake is best served chilled or at room temperature, allowing the cream cheese frosting to soften slightly and release its full flavor. I like slicing it into generous wedges and serving alongside a cup of strong coffee or a glass of cold milk.
For a festive presentation, add fresh blueberries on top to mimic the stars on the flag, or dust a little cocoa powder around the plate for a finishing touch.
To store, cover the cake tightly with plastic wrap or keep in an airtight container in the refrigerator for up to 4 days. The flavors actually deepen after a day, so leftovers (if any!) taste even better the next day.
To reheat, let the slices come to room temperature for about 30 minutes. Avoid microwaving as it can melt the frosting and make the texture off-putting.
Nutritional Information & Benefits
Each slice of this red velvet flag cake (serving size: 1/12th of the cake) contains approximately:
| Calories | 350 kcal |
|---|---|
| Fat | 18g |
| Carbohydrates | 45g |
| Protein | 4g |
The cream cheese provides a good source of calcium and protein, while the buttermilk adds probiotics that may aid digestion. Although it’s a dessert to enjoy in moderation, this cake can be part of a balanced diet when paired with wholesome meals.
For those watching allergens, this recipe contains dairy, eggs, and gluten, but substitutions are possible as noted earlier. From a wellness perspective, I appreciate how this cake can bring people together—sometimes that joy is just as nourishing as the ingredients.
Conclusion
The perfect red velvet flag cake with cream cheese frosting is much more than a festive dessert—it’s a story, a memory, and a delicious way to celebrate any occasion. I love how simple ingredients come together in a visually stunning and incredibly tasty cake that feels special without being intimidating.
Feel free to make it your own by trying different variations or adding your personal touch. Honestly, the best cakes are the ones made with a little love and a lot of fun. If you give this recipe a try, I’d love to hear how it turns out for you. Share your adaptations or any happy accidents in the comments below—let’s keep the story going!
FAQs
Can I make this red velvet flag cake ahead of time?
Yes! You can bake the layers a day ahead and store them wrapped tightly in the refrigerator. Assemble and frost the day you plan to serve for the freshest result.
What if I don’t have buttermilk?
Simply mix 1 cup of milk with 1 tablespoon of white vinegar or lemon juice. Let it sit for 5 minutes before using as a buttermilk substitute.
How do I get the red color without artificial dyes?
Beet juice or powder can be used as a natural alternative, but it may give a more muted color and slightly earthy flavor.
Can I freeze the cake?
Yes, freeze the unfrosted layers wrapped well for up to 3 months. Thaw in the fridge before frosting and serving.
What’s the best way to slice the cake cleanly?
Use a serrated knife and a gentle sawing motion. Chill the cake for at least 30 minutes beforehand to firm up the frosting and make slicing easier.
Pin This Recipe!
Perfect Red Velvet Flag Cake Recipe with Cream Cheese Frosting
A moist and firm red velvet cake layered and frosted with silky smooth, tangy cream cheese frosting, designed to mimic the American flag. Perfect for patriotic occasions and celebrations.
- Prep Time: 20 minutes
- Cook Time: 30 minutes
- Total Time: 1 hour 50 minutes
- Yield: 12 servings 1x
- Category: Dessert
- Cuisine: American
Ingredients
- 2 ½ cups (312g) all-purpose flour, sifted
- 1 ½ cups (300g) granulated sugar
- 2 tablespoons (15g) unsweetened cocoa powder
- 1 teaspoon (5g) baking soda
- ½ teaspoon (3g) salt
- 1 cup (240ml) buttermilk, room temperature (or dairy-free milk with 1 tbsp vinegar)
- 1 cup (240ml) vegetable oil (mild canola oil recommended)
- 2 large eggs, room temperature
- 1 tablespoon (15ml) white vinegar
- 2 teaspoons (10ml) vanilla extract
- 2 tablespoons (30ml) red food coloring (gel recommended)
- 16 oz (450g) cream cheese, softened
- ½ cup (113g) unsalted butter, softened
- 4 cups (480g) powdered sugar, sifted
- 1 teaspoon (5ml) vanilla extract
- Pinch of salt
Instructions
- Preheat oven to 350°F (175°C). Grease two 9-inch cake pans and line bottoms with parchment paper.
- In a large bowl, sift together flour, sugar, cocoa powder, baking soda, and salt.
- In a separate bowl, whisk together buttermilk, vegetable oil, eggs, white vinegar, vanilla extract, and red food coloring until smooth.
- Slowly pour wet ingredients into dry ingredients, stirring gently with a rubber spatula until just combined. Batter should be thick but pourable.
- Divide batter evenly between the two pans. Bake for 25-30 minutes or until a toothpick inserted in the center comes out clean. Rotate pans halfway through baking.
- Cool cakes in pans for 10 minutes, then transfer to a wire rack to cool completely (about 1 hour).
- Prepare frosting by beating cream cheese and butter with an electric mixer until smooth and creamy. Gradually add powdered sugar on low speed, then add vanilla extract and salt. Beat on high for 2 minutes until fluffy.
- Slice each cake horizontally to create four thin layers total. On a serving plate, layer cake and frosting alternately to resemble stripes of a flag. Finish by frosting the outside of the cake generously.
- Refrigerate assembled cake for at least 30 minutes to set frosting and meld flavors before serving.
Notes
Use gel red food coloring for vibrant color without thinning the batter. Avoid overmixing the batter to keep the cake tender. Soften cream cheese and butter to room temperature for smooth frosting. Chill cake before slicing for clean cuts. For dairy-free or gluten-free versions, substitute ingredients as noted.
Nutrition
- Serving Size: 1 slice (1/12th of c
- Calories: 350
- Fat: 18
- Carbohydrates: 45
- Protein: 4
Keywords: red velvet cake, flag cake, cream cheese frosting, patriotic dessert, Fourth of July cake, easy red velvet, holiday cake