Love this? Save it for later!
Share the inspiration with your friends
The other day, I was unloading groceries from my car when the sharp tang of vinegar mixed with sweet corn hit me — and suddenly I was ten years old standing in the cramped kitchen of Mrs. Carlson’s house on a sticky July afternoon. She was the neighborhood’s unofficial canning queen, and that day she was making her famous sweet corn relish, the air thick with the scent of simmering peppers and onions. I remember the clatter of jars and the occasional pop as lids sealed tight, while a stray kernel escaped onto the cracked linoleum floor. Honestly, I barely understood why that relish was such a big deal back then, but that bright, tangy smell stuck with me for years.
Now, whenever I make this flavorful sweet corn relish for canning, it’s not just about preserving a jar of summer—it’s about capturing that punchy, chunky preserve that feels like a celebration in a jar. Maybe you’ve been there, chasing a childhood taste that lingers like a secret treasure, trying to get it just right. This recipe isn’t fancy, but it’s honest and full of personality—just like Mrs. Carlson’s kitchen was that day. It’s the kind of relish you want to spoon over grilled meats, fold into potato salad, or share at holiday tables to remind you of warm days and good company.
Making this tangy and chunky sweet corn relish is my way of holding onto that moment, the noisy kitchen, and the promise of summer in every bite. And let me tell you—it’s worth every sticky finger and jar you pop open once the season turns cold.
Why You’ll Love This Recipe
Having tested this flavorful sweet corn relish recipe through more than a dozen canning seasons, I can say it stands out because of a few key reasons that made it a staple in my kitchen:
- Quick & Easy: You’ll have this tangy, chunky relish ready to jar in under an hour, perfect for last-minute canning when fresh corn hits the market.
- Simple Ingredients: No need for exotic spices or hard-to-find produce—just fresh corn, peppers, onions, and pantry staples.
- Perfect for Canning: Designed with safe preserving in mind, this recipe gives you a reliable, shelf-stable relish that keeps the summer flavors alive.
- Crowd-Pleaser: Whether you’re serving it at a barbecue or gifting jars to neighbors, the sweet-tart balance always gets rave reviews.
- Unbelievably Delicious: The chunky texture with bursts of sweet corn and sharp vinegar creates a lively flavor that’s anything but boring.
What sets this apart from other sweet corn relishes I’ve tried is the way the vinegar and sugar hit that perfect note—bright but not overpowering. Plus, the inclusion of both red and green bell peppers adds that pop of color and crunch that makes it special. I’ve also found that chopping the veggies by hand instead of blitzing them in a food processor keeps the texture invitingly chunky, just like I remember from that summer afternoon.
This recipe doesn’t just deliver a relish; it delivers a memory in a jar, making it a must-have for anyone who wants a truly flavorful sweet corn relish for canning that’s tangy, chunky, and bursting with character.
What Ingredients You Will Need
This flavorful sweet corn relish uses straightforward ingredients that you can find easily at any farmers’ market or grocery store. They all work together to create a relish that’s balanced in sweetness, tang, and texture without needing fancy or processed additions.
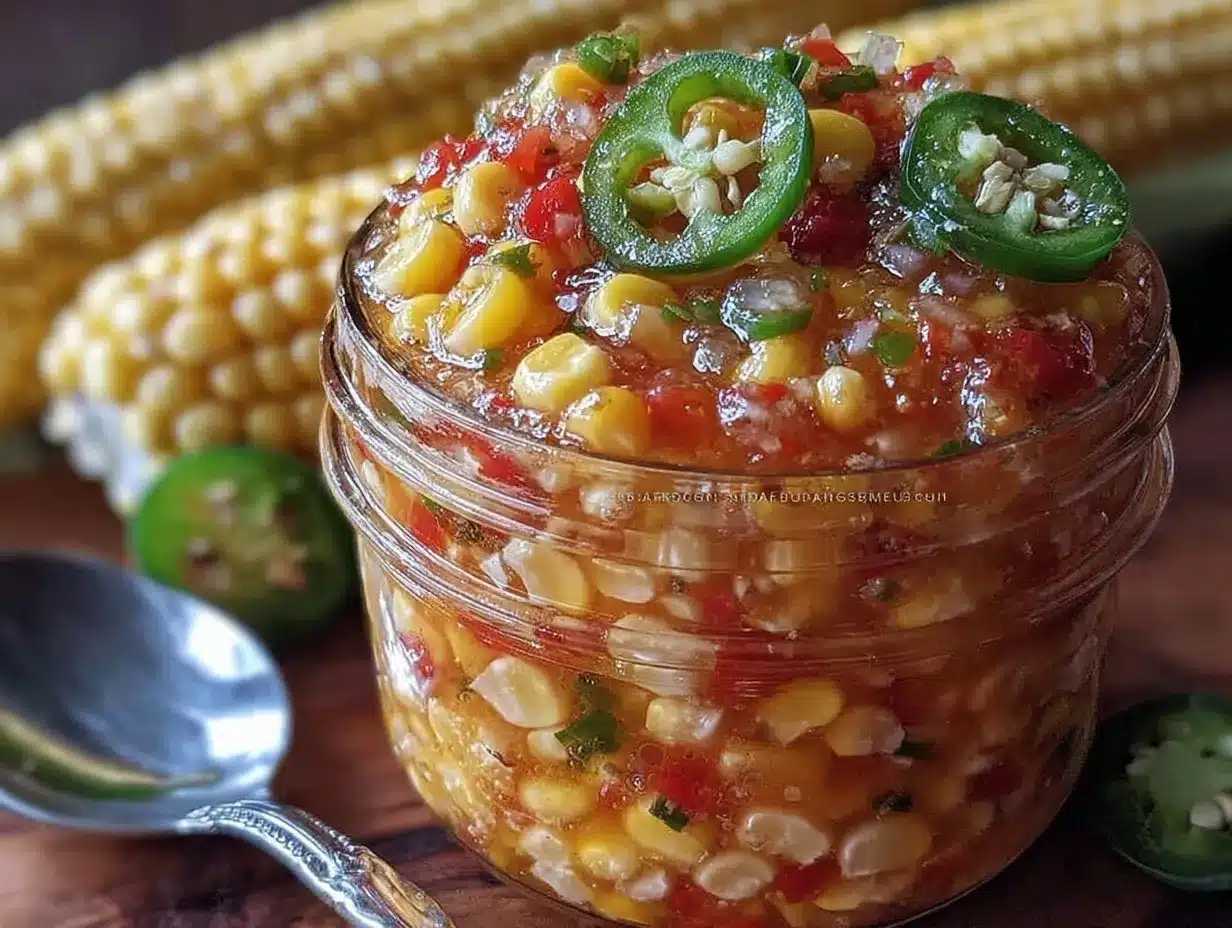
- Fresh Sweet Corn: About 6 cups of corn kernels (from roughly 8-10 ears) – fresh or frozen works, but fresh is best for that authentic summer taste.
- Bell Peppers: 1 cup diced red bell pepper and 1 cup diced green bell pepper – these add crunch, color, and a mild sweetness.
- Onions: 1 cup finely chopped yellow onion – adds a mellow sharpness that rounds out the flavors.
- Vinegar: 1 ½ cups white distilled vinegar (5% acidity) – the key to that tangy punch and safe canning.
- Sugar: 1 ½ cups granulated sugar – balances the vinegar’s acidity and brings out the corn’s natural sweetness.
- Salt: 1 teaspoon kosher salt – enhances all the flavors without overpowering.
- Mustard Seeds: 1 tablespoon – adds a subtle spicy warmth and a classic relish note.
- Celery Seeds: 1 teaspoon – provides a delicate, herbaceous undertone.
- Optional: ¼ teaspoon crushed red pepper flakes for a mild heat kick, if desired.
For the best results, I recommend using organic sweet corn when possible, like what you’d find at a local farm stand. When buying peppers and onions, look for firm, vibrant produce to keep that fresh crunch. If you want a gluten-free option, all these ingredients are naturally free from gluten.
Equipment Needed
To make and can this flavorful sweet corn relish, you’ll want a few key tools on hand:
- Large Saucepan: At least 6-quart capacity for simmering the relish comfortably.
- Canning Jars with Lids and Bands: Pint jars work best for this recipe, and fresh lids are a must for a secure seal.
- Water Bath Canner or Large Stockpot: For processing the jars safely.
- Jar Lifter: A lifesaver for moving hot jars without risking burns.
- Mixing Bowls: For prepping ingredients before cooking.
- Sharp Knife and Cutting Board: Essential for dicing the peppers, onions, and cutting the corn off the cob.
If you don’t have a water bath canner, a large deep pot with a rack works just fine—I’ve canned many batches this way and found it reliable. For budget-friendly jar lifters, simple tongs with rubber tips can substitute in a pinch, but I highly recommend investing in a proper tool for safety. Also, keep your knives sharp; it makes chopping peppers and onions so much less of a chore.
Preparation Method
- Prepare the Corn: Using a sharp knife, carefully cut the kernels off the cobs, aiming for about 6 cups (900 g). If you don’t have fresh corn, thaw frozen kernels and drain excess water. This step usually takes about 10 minutes.
- Chop the Vegetables: Dice 1 cup (150 g) each of red and green bell peppers and finely chop 1 cup (150 g) of yellow onion. Keep them roughly the same size for uniform texture. Set aside in separate bowls.
- Cook the Relish Base: In a large saucepan, combine the vinegar (360 ml), sugar (300 g), and salt (1 teaspoon). Bring to a boil over medium-high heat, stirring to dissolve the sugar and salt, about 3-5 minutes.
- Add the Vegetables and Spices: Stir in the corn kernels, bell peppers, onions, mustard seeds (1 tablespoon), celery seeds (1 teaspoon), and optional crushed red pepper flakes (¼ teaspoon). Reduce heat to medium and simmer uncovered, stirring occasionally, for 10-15 minutes. The mixture should thicken slightly and become glossy.
- Jar the Relish: While the relish simmers, sterilize your pint jars and lids by boiling them in a large pot or running them through a dishwasher cycle. Using a ladle and funnel, fill the hot jars with the relish, leaving about ½ inch (1.3 cm) headspace. Wipe rims clean, apply lids, and screw on bands finger-tight.
- Process the Jars: Place jars in a boiling water bath canner, ensuring water covers the jars by at least 1 inch (2.5 cm). Process for 15 minutes (adjust for altitude if needed). Remove jars carefully and set on a towel to cool without disturbance for 12-24 hours.
- Check the Seal: After cooling, test the jar lids by pressing the center; it should not flex up and down. Store sealed jars in a cool, dark place. Refrigerate any jars that did not seal properly and consume within a week.
One tip I learned the hard way: don’t skip stirring during simmering, or the relish can stick to the bottom and burn. Also, keep a towel handy—you’ll probably drip a little vinegar here and there (I always do) so it’s nothing to stress about.
Cooking Tips & Techniques
Making a great sweet corn relish for canning is partly about technique, and partly about patience. Here are some tips I’ve picked up along the way:
- Use Fresh Corn When Possible: Fresh kernels have that delicate sweetness that frozen just can’t match, though frozen is a fine backup.
- Chop Uniformly: Keeping the veggies similar in size helps the relish cook evenly and gives a nicer bite.
- Don’t Rush the Simmer: The simmer stage thickens the relish and lets the flavors meld—patience pays off here!
- Keep Jars Warm: Filling warm jars with hot relish helps prevent jar breakage and promotes a good seal.
- Seal Properly: Finger-tighten bands, then adjust after processing—too tight can trap air, too loose can leak.
- Altitude Adjustments: If you live above 1,000 feet, increase processing time slightly to maintain safety.
When I first tried making this relish, I accidentally sealed a jar while it was still a little warm inside and ended up with a failed seal. Lesson learned: let the relish cool a few minutes before jarring, but keep everything warm enough to avoid cracking jars. It’s a balancing act, but once you get it down, you’ll feel like a pro preserving the season’s best.
Variations & Adaptations
This sweet corn relish recipe is flexible enough to suit different tastes and dietary needs:
- Spicy Kick: Add 1-2 finely chopped jalapeños or increase crushed red pepper flakes for heat lovers.
- Low-Sugar Version: Reduce sugar by half and add a splash of apple juice for natural sweetness.
- Vinegar Swap: Use apple cider vinegar instead of white for a fruitier, less sharp tang.
- Chunkier or Smoother Texture: Pulse half the peppers and onions in a food processor for a less chunky relish while keeping some texture.
- Allergen-Friendly: This recipe is naturally gluten-free and nut-free; just double-check your mustard seeds if allergies are a concern.
One personal twist I love is folding in fresh chopped basil or dill just before jarring for an herbal note that brightens the relish beautifully—though I usually add that to refrigerated batches rather than canned ones.
Serving & Storage Suggestions
This tangy, chunky sweet corn relish shines as a condiment and a sidekick:
- Serving: Serve chilled or at room temperature alongside grilled chicken, pork, or fish. It also makes a fantastic topping for burgers and hot dogs.
- Pairings: Try it with creamy potato salad or alongside your favorite crispy garlic chicken for a flavorful contrast.
- Storage: Store sealed jars in a cool, dark pantry for up to one year. Once opened, keep refrigerated and use within 3 weeks.
- Reheating: This relish is best served cold or room temperature, but you can gently warm it if adding to cooked dishes.
Flavors deepen over time, so if you can wait a few weeks before opening, you’ll notice the tang and sweet corn notes become more harmonious. Just be sure to give the jar a good shake before serving to redistribute any settled juices.
Nutritional Information & Benefits
This sweet corn relish is a light, flavorful addition that brings some nutritional perks:
- Approximately 50 calories per 2-tablespoon serving, making it a guilt-free condiment.
- Contains dietary fiber from corn and peppers, aiding digestion.
- Rich in vitamin C and antioxidants thanks to the fresh vegetables.
- Low fat and naturally gluten-free.
- Vinegar in the recipe may help with blood sugar regulation and digestion.
Personally, I appreciate that it adds brightness and flavor without loading up on fats or artificial ingredients. It’s a wholesome way to keep summer vibes alive even in the dead of winter.
Conclusion
If you’re looking for a flavorful sweet corn relish recipe that’s tangy, chunky, and perfect for canning, this one truly delivers. It’s a recipe that connects you to a moment in time, a burst of summer preserved in every jar. You can tweak it to your taste, whether you want it spicy, less sweet, or herb-infused. I keep coming back to it because it’s honest, vibrant, and just plain delicious.
Give it a try, take your time, and make it your own. When you open that first jar, you might find yourself transported too—just like I was on that sticky July afternoon. Don’t forget to share your experience or any twists you’ve made in the comments—I love hearing how this recipe finds a place in your kitchen!
Happy canning and savoring every tangy, chunky bite.
Frequently Asked Questions
Can I use frozen corn instead of fresh for this relish?
Yes, frozen corn works well and is a convenient option if fresh corn isn’t available. Just thaw and drain well before using.
How long can I store homemade sweet corn relish?
Unopened jars stored in a cool, dark place will last up to one year. Once opened, keep refrigerated and use within 3 weeks.
Is this relish safe to can at home?
Absolutely, this recipe follows tested water bath canning guidelines. Just be sure to process jars for the full recommended time and adjust for altitude.
Can I make this relish less sweet?
Yes, you can reduce the sugar by half or substitute part of it with apple juice for a milder sweetness.
What dishes pair best with sweet corn relish?
It’s fantastic with grilled meats, sandwiches, burgers, potato salad, or even stirred into creamy dips for extra zing.
Pin This Recipe!
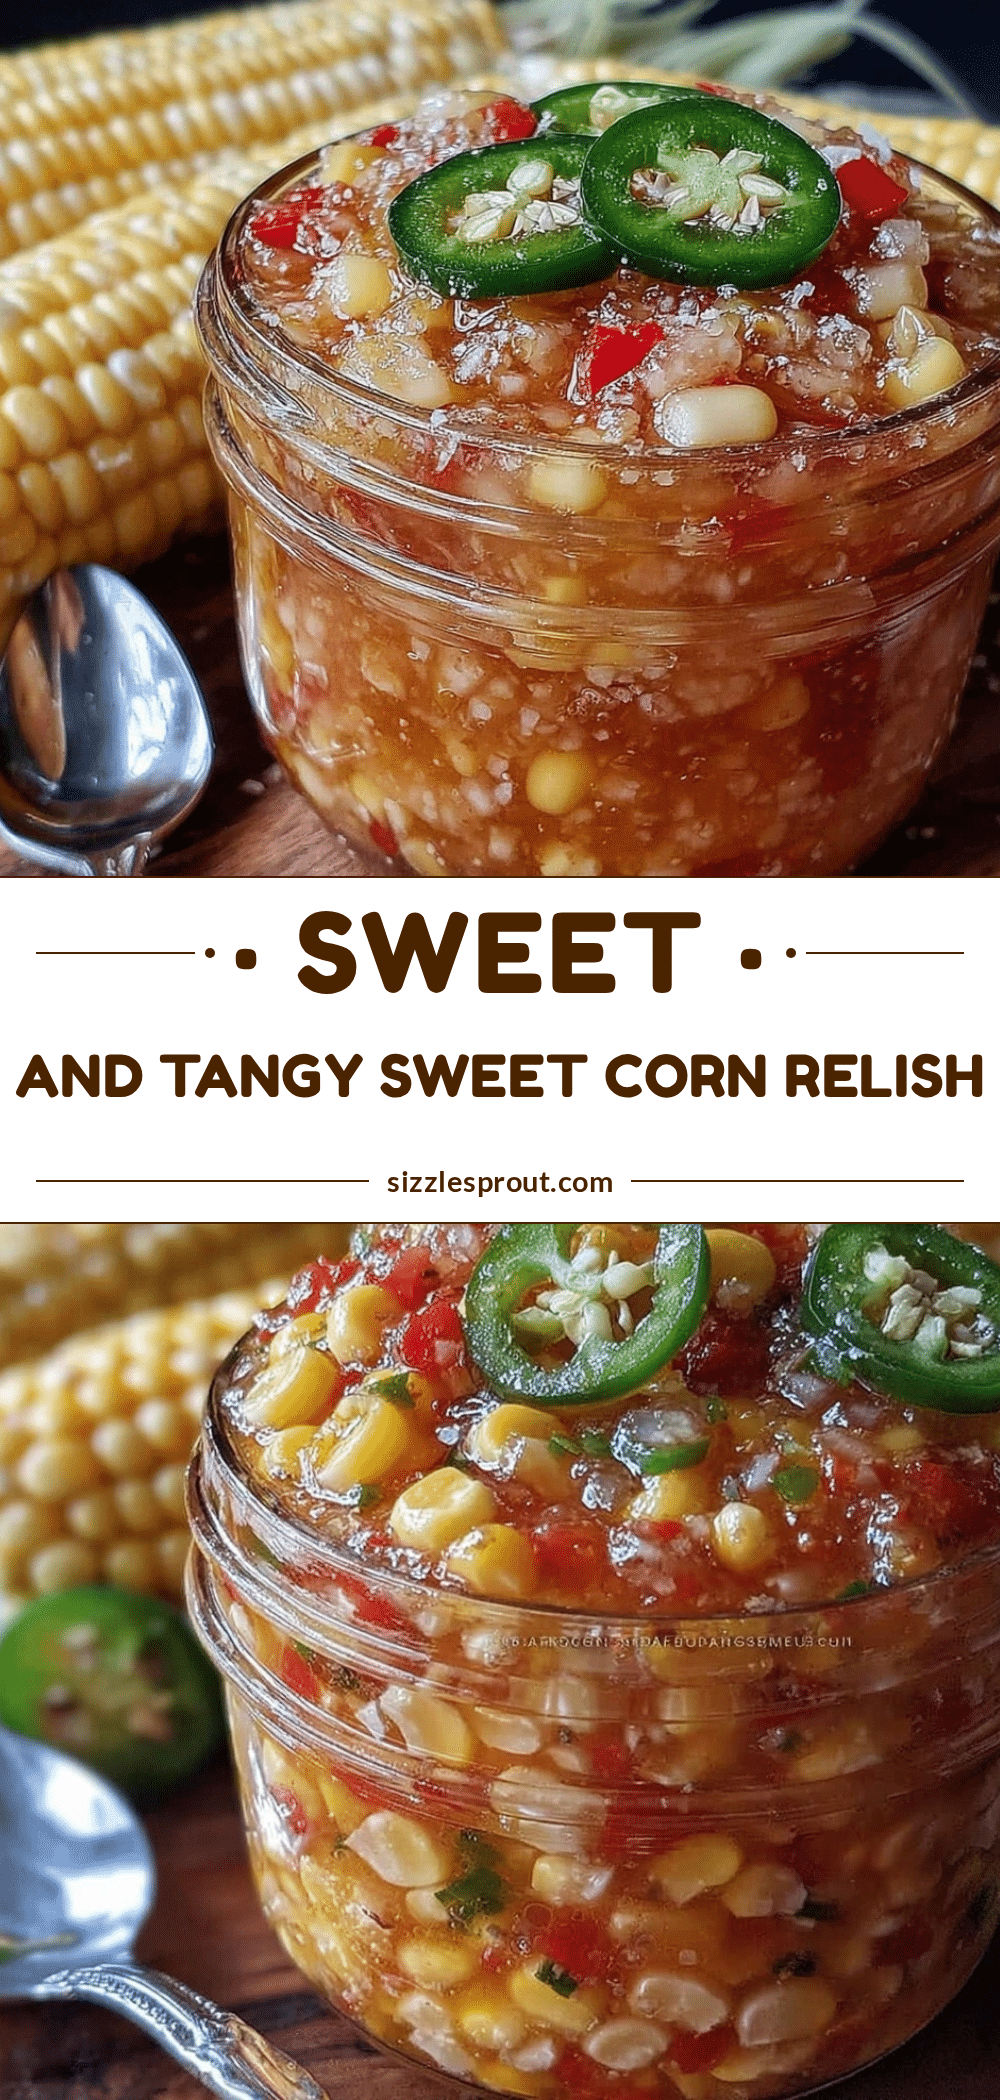
Flavorful Sweet Corn Relish Recipe
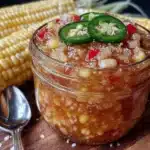
A tangy, chunky sweet corn relish perfect for canning, bursting with summer flavors and ideal as a condiment for grilled meats, potato salad, and more.
- Prep Time: 20 minutes
- Cook Time: 20 minutes
- Total Time: 40 minutes
- Yield: 8 servings 1x
- Category: Condiment
- Cuisine: American
Ingredients
- 6 cups fresh sweet corn kernels (from about 8–10 ears)
- 1 cup diced red bell pepper
- 1 cup diced green bell pepper
- 1 cup finely chopped yellow onion
- 1 ½ cups white distilled vinegar (5% acidity)
- 1 ½ cups granulated sugar
- 1 teaspoon kosher salt
- 1 tablespoon mustard seeds
- 1 teaspoon celery seeds
- ¼ teaspoon crushed red pepper flakes (optional)
Instructions
- Prepare the corn by cutting kernels off the cobs to yield about 6 cups. If using frozen corn, thaw and drain excess water.
- Dice the red and green bell peppers and finely chop the yellow onion, keeping pieces roughly the same size.
- In a large saucepan, combine vinegar, sugar, and salt. Bring to a boil over medium-high heat, stirring until sugar and salt dissolve, about 3-5 minutes.
- Add corn kernels, bell peppers, onions, mustard seeds, celery seeds, and optional crushed red pepper flakes. Reduce heat to medium and simmer uncovered, stirring occasionally, for 10-15 minutes until mixture thickens and becomes glossy.
- Sterilize pint jars and lids. Fill hot jars with hot relish, leaving ½ inch headspace. Wipe rims clean, apply lids, and screw on bands finger-tight.
- Process jars in a boiling water bath canner for 15 minutes, ensuring water covers jars by at least 1 inch. Remove and cool jars undisturbed for 12-24 hours.
- Check seals by pressing jar lids; lids should not flex. Store sealed jars in a cool, dark place. Refrigerate any unsealed jars and consume within one week.
Notes
Stir the relish occasionally during simmering to prevent burning. Keep jars warm before filling to avoid breakage. Adjust processing time for altitude if above 1,000 feet. For a spicier version, add jalapeños or increase crushed red pepper flakes. Reduce sugar by half and add apple juice for a low-sugar variation. Fresh corn is preferred for best flavor, but frozen works as a substitute.
Nutrition
- Serving Size: 2 tablespoons
- Calories: 50
- Sugar: 12
- Sodium: 230
- Carbohydrates: 13
- Fiber: 1
- Protein: 1
Keywords: sweet corn relish, canning recipe, tangy relish, chunky relish, summer preserve, homemade relish, sweet corn, bell peppers, vinegar relish