Love this? Save it for later!
Share the inspiration with your friends
The neighborhood bake sale was in just under two hours, and I’d completely forgotten. Everyone else had clearly spent days perfecting their fancy cupcakes or delicate pastries, while I was staring at a half-empty jar of peanut butter and some oats on my counter. No time to whip up anything complicated, and honestly, I was already picturing myself arriving empty-handed. You know that feeling when the clock’s ticking and your brain’s just scrambling for a quick fix? That was me.
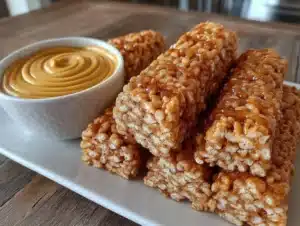
So, I threw together what I had on hand: oats, peanut butter, honey, and a few odds and ends from the pantry. The first attempt was messy (I might’ve spilled half the oats on the floor while trying to measure), but the bars came together surprisingly fast, no baking involved. I wrapped them up just as the doorbell rang. To my utter shock—and quiet relief—they disappeared almost immediately. I mean, who knew that simple, no-bake peanut butter granola bars could steal the show in a room full of elaborate sweets?
Since that frantic afternoon, these bars have become my go-to recipe for lunchboxes, snacks on the run, or anytime I need something quick and satisfying. Maybe you’ve been there too, needing a grab-and-go treat that’s wholesome but still tastes like a little indulgence. Let me tell you, these easy no-bake peanut butter granola bars fit the bill every single time, with zero stress and maximum yum.
Why You’ll Love This Recipe
Honestly, these easy no-bake peanut butter granola bars have become a staple in my kitchen for so many reasons. From my countless tests and tweaks, I can say this recipe checks all the boxes, whether you’re packing school lunches or just need a quick snack fix.
- Quick & Easy: Whips up in about 15 minutes, perfect for last-minute prep or when you’re juggling a hundred things.
- Simple Ingredients: No need for fancy or hard-to-find items—just pantry basics you probably already have around.
- Perfect for Lunchboxes: Portable and mess-free, these bars hold up well and don’t crumble all over the place.
- Crowd-Pleaser: Kids and adults alike reach for seconds, which is always a good sign.
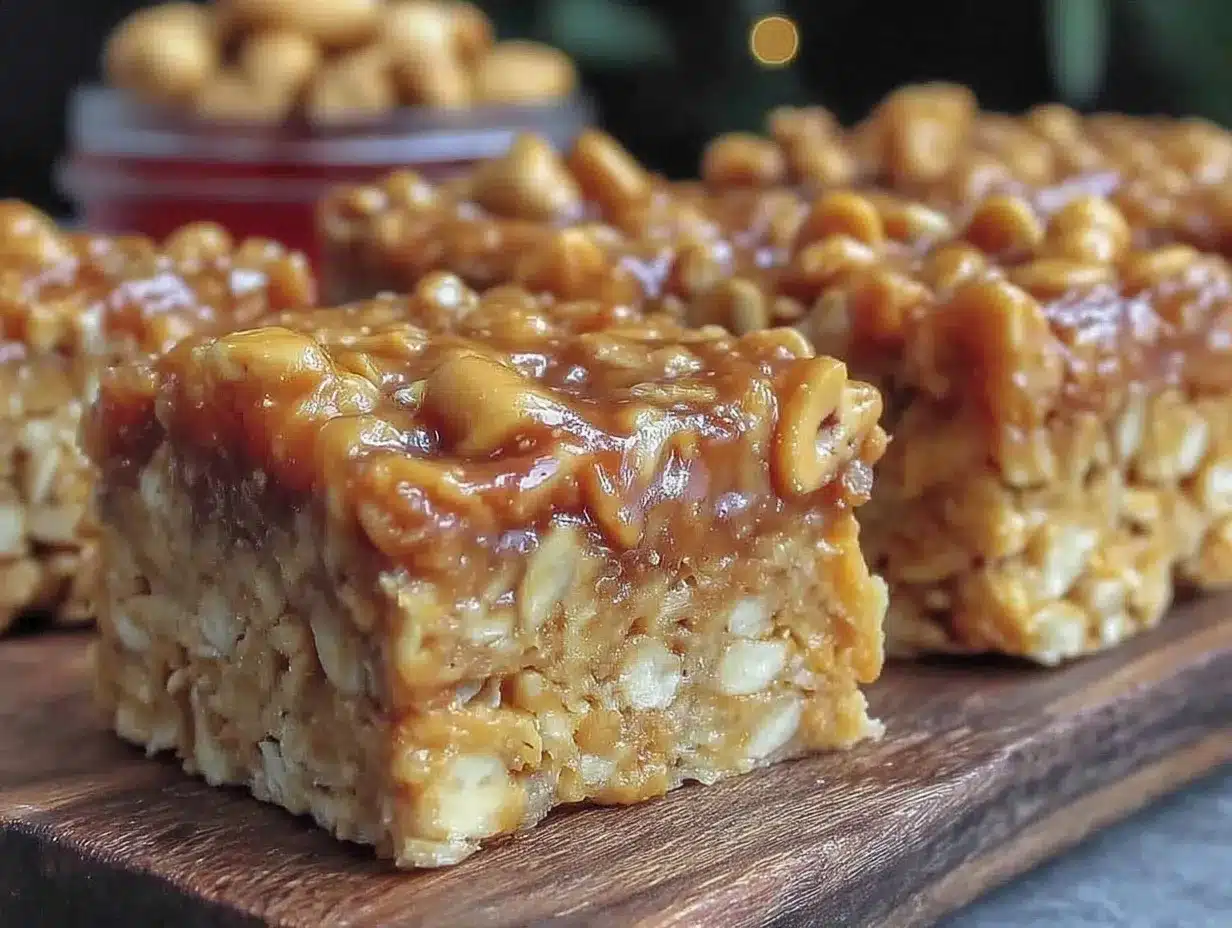
- Unbelievably Delicious: The balance of creamy peanut butter and sweet honey, combined with the satisfying oats, is comfort food that feels wholesome.
What sets this recipe apart is the no-bake method paired with the right ratio of sticky to crunchy. I found that melting the peanut butter just a little helps everything bind perfectly without making it too greasy or crumbly. Plus, I sometimes add a pinch of cinnamon or a handful of mini chocolate chips for an extra twist—because why not? This isn’t just another granola bar recipe; it’s my best version, refined through a few spills and a lot of taste tests.
These bars are more than just a snack. They’re a little moment of calm during busy days, and honestly, I keep coming back because they remind me that good things don’t have to be complicated.
What Ingredients You Will Need
This recipe uses simple, wholesome ingredients to deliver bold flavor and satisfying texture without the fuss. Most of these are pantry staples, and substitutions are easy if you need them.
- Old-fashioned rolled oats (2 cups / 180 g) – the base, for chewiness and fiber
- Natural creamy peanut butter (1 cup / 250 g) – I prefer Smucker’s Natural for its smooth texture and clean flavor
- Honey (⅓ cup / 113 g) – adds natural sweetness and helps bind everything
- Vanilla extract (1 tsp) – for a subtle depth of flavor
- Mini chocolate chips (optional, ½ cup / 90 g) – for a touch of indulgence that kids love
- Salt (a pinch) – balances the sweetness and enhances flavors
- Chopped nuts or seeds (optional, ½ cup / 60 g) – like chopped almonds or sunflower seeds for crunch
Substitutions and tips: Use almond or cashew butter if peanut allergies are a concern. Swap honey with maple syrup or agave for a vegan option. If you want gluten-free bars, make sure to use certified gluten-free oats. In summer, fresh berries might not hold well, but dried fruit like cranberries or raisins can be a great addition for a fruity note.
Equipment Needed
Making these no-bake peanut butter granola bars requires minimal equipment, which is part of why they’re so convenient:
- Mixing bowl – a medium to large size to combine everything comfortably
- Measuring cups and spoons – accuracy helps with the right texture
- Spatula or wooden spoon – for mixing sticky ingredients without losing your patience
- 8×8-inch (20×20 cm) baking pan or similar shallow dish – to press and set the bars
- Parchment paper – handy for lining the pan so bars lift out easily
- Microwave-safe bowl or small saucepan – to gently warm the peanut butter and honey
If you don’t have a baking pan, a loaf pan or even a small square container works fine. I’ve used a glass Pyrex dish and a silicone mold with good results. Pro tip: line the pan with parchment paper overhanging the edges—this makes lifting the bars out a breeze and keeps them intact.
Preparation Method
- Prepare your pan: Line an 8×8-inch (20×20 cm) baking pan with parchment paper, leaving some overhang on the sides for easy removal. This step saves you from sticky situations later.
- Warm peanut butter and honey: In a microwave-safe bowl, combine 1 cup (250 g) peanut butter and ⅓ cup (113 g) honey. Microwave in 20-second bursts, stirring in between, until smooth and pourable (about 1 minute total). Alternatively, melt gently in a small saucepan over low heat. This helps the mixture bind evenly.
- Add vanilla and salt: Stir 1 teaspoon vanilla extract and a pinch of salt into the warm peanut butter and honey mixture. These little extras bring out the flavor and balance sweetness.
- Mix dry ingredients: In a large bowl, combine 2 cups (180 g) old-fashioned oats, optional ½ cup (60 g) chopped nuts or seeds, and optional ½ cup (90 g) mini chocolate chips. Stir to distribute evenly.
- Combine wet and dry: Pour the warm peanut butter mixture over the oats mixture. Use a spatula or sturdy spoon to mix until everything is well coated and sticks together. This step might take a bit of elbow grease—don’t be shy to get in there and press the mixture against the bowl to help it combine.
- Press into pan: Transfer the mixture to your prepared pan. Use the back of a spatula or your hands (cleaned!) to press it down firmly and evenly. Pressing well is key to bars that hold together nicely.
- Chill: Place the pan in the fridge for at least 1 hour to set. If you’re in a rush, 30 minutes in the freezer works too, but the texture will be firmer.
- Cut and serve: Once set, lift the mixture out of the pan using the parchment paper. Place on a cutting board and slice into bars or squares. Store bars in an airtight container in the fridge for up to 1 week or freeze for longer storage.
Tip: If your bars feel crumbly, try melting the peanut butter a little longer next time or adding an extra tablespoon of honey to help bind. If too sticky, add a handful more oats to balance it out.
Cooking Tips & Techniques
Getting these easy no-bake peanut butter granola bars just right is all about balance and timing. Here are some tips I’ve picked up along the way:
- Don’t skip warming the peanut butter and honey: It’s tempting to mix straight from the jar, but warming makes a huge difference in achieving that perfect chewy yet firm texture.
- Press firmly but gently: Pressing the mixture evenly into your pan ensures the bars hold together well and slice cleanly.
- Use parchment paper: This saves so much frustration when removing the bars from the pan; no sticking, no crumbling.
- Mix-ins matter: Adding nuts or seeds not only brings crunch but also boosts nutrition—just don’t overdo it or the bars might fall apart.
- Chill long enough: Rushing this step leads to soft bars that fall apart. Patience here yields a perfect bite.
- Watch your peanut butter brand: Creamy natural peanut butters with little oil separation work best. Some brands are too oily or dry, so test yours for best results.
Once, I underestimated the chilling time and ended up with a sticky mess that my kids happily devoured with spoons. Lesson learned: patience pays off, especially when packing lunchboxes that need to stay neat.
Variations & Adaptations
One of the best things about this recipe is how adaptable it is. Here are some of my favorite ways to switch things up:
- Nut-free version: Swap peanut butter for sunflower seed butter and omit nuts to make these safe for allergies.
- Chocolate lover’s twist: Double the mini chocolate chips and sprinkle a little cocoa powder into the mixture for extra richness.
- Seasonal fruit addition: Stir in dried cranberries, chopped dates, or raisins to bring a chewy sweetness and a pop of color.
- Protein boost: Add a scoop of vanilla protein powder or sprinkle hemp seeds for extra fuel.
- Crunchy granola topping: Press a thin layer of your favorite crunchy granola on top before chilling for a delightful contrast.
I once tried adding shredded coconut and a bit of cinnamon for a tropical vibe, which was a surprising hit with friends at a picnic. Feel free to experiment and find your favorite combo—it’s forgiving and fun!
Serving & Storage Suggestions
These easy no-bake peanut butter granola bars are perfect served chilled straight from the fridge, especially during warm months. If you prefer, let them sit at room temperature for 10 minutes before eating to soften slightly.
They pair wonderfully with fresh fruit, a cold glass of milk, or even a cup of coffee for a quick breakfast or afternoon snack. For lunchboxes, they’re a neat, non-messy option that kids and adults both enjoy.
Store bars in an airtight container in the refrigerator for up to a week. If you want to keep them longer, freeze in a sealed bag or container for up to 3 months. Thaw overnight in the fridge or at room temperature for about 30 minutes before serving.
Interestingly, letting the bars rest a day in the fridge makes the flavors meld and the texture even better. So, if you can make them ahead, it’s worth the wait.
Nutritional Information & Benefits
Each easy no-bake peanut butter granola bar (assuming 12 bars per batch) roughly contains:
| Calories | Protein | Fat | Carbohydrates | Fiber |
|---|---|---|---|---|
| 180-200 kcal | 5-6 g | 9-11 g | 20-22 g | 3-4 g |
The peanut butter provides heart-healthy fats and protein, while oats deliver fiber and sustained energy. Using natural honey adds antioxidants and a natural sweetness, avoiding refined sugars. This recipe is gluten-free when using certified oats and can be made vegan by substituting honey with maple syrup.
From my own wellness perspective, these bars are a great alternative to processed snacks, offering a balanced bite that helps keep energy steady through busy afternoons or school days.
Conclusion
These easy no-bake peanut butter granola bars are proof that quick, simple ingredients can come together to make a snack that’s both satisfying and convenient. Whether you’re scrambling to pack lunches, prepping for a bake sale, or just craving a wholesome treat, this recipe has your back.
I love how customizable they are—you can tweak the mix-ins, the sweetness, or the texture to suit your mood or dietary needs. And honestly, they remind me that sometimes the best recipes come out of a little chaos (and a lot of peanut butter).
Give them a try and let me know how you make them your own! I’m always curious to hear your favorite variations or any clever hacks you discover along the way. Here’s to hassle-free, tasty snacks that make life a little easier and a lot yummier.
FAQs
Can I use crunchy peanut butter instead of creamy?
Yes, you can! Crunchy peanut butter adds extra texture, but keep in mind it might make the bars a bit less smooth and a little more crumbly.
How long do these bars last at room temperature?
They’re best kept refrigerated and can get soft or sticky if left out for more than a few hours, especially in warm weather.
Can I add other nut butters to this recipe?
Absolutely! Almond butter, cashew butter, or sunflower seed butter work well. Just choose natural, creamy versions for the best texture.
Is it possible to make these bars vegan?
Yes, simply swap the honey for maple syrup or agave nectar to keep the recipe vegan-friendly.
What’s the best way to cut the bars without them falling apart?
Use a sharp knife and cut after the bars have chilled completely—at least an hour in the fridge. Pressing the mixture firmly into the pan also helps them hold together better.
Pin This Recipe!
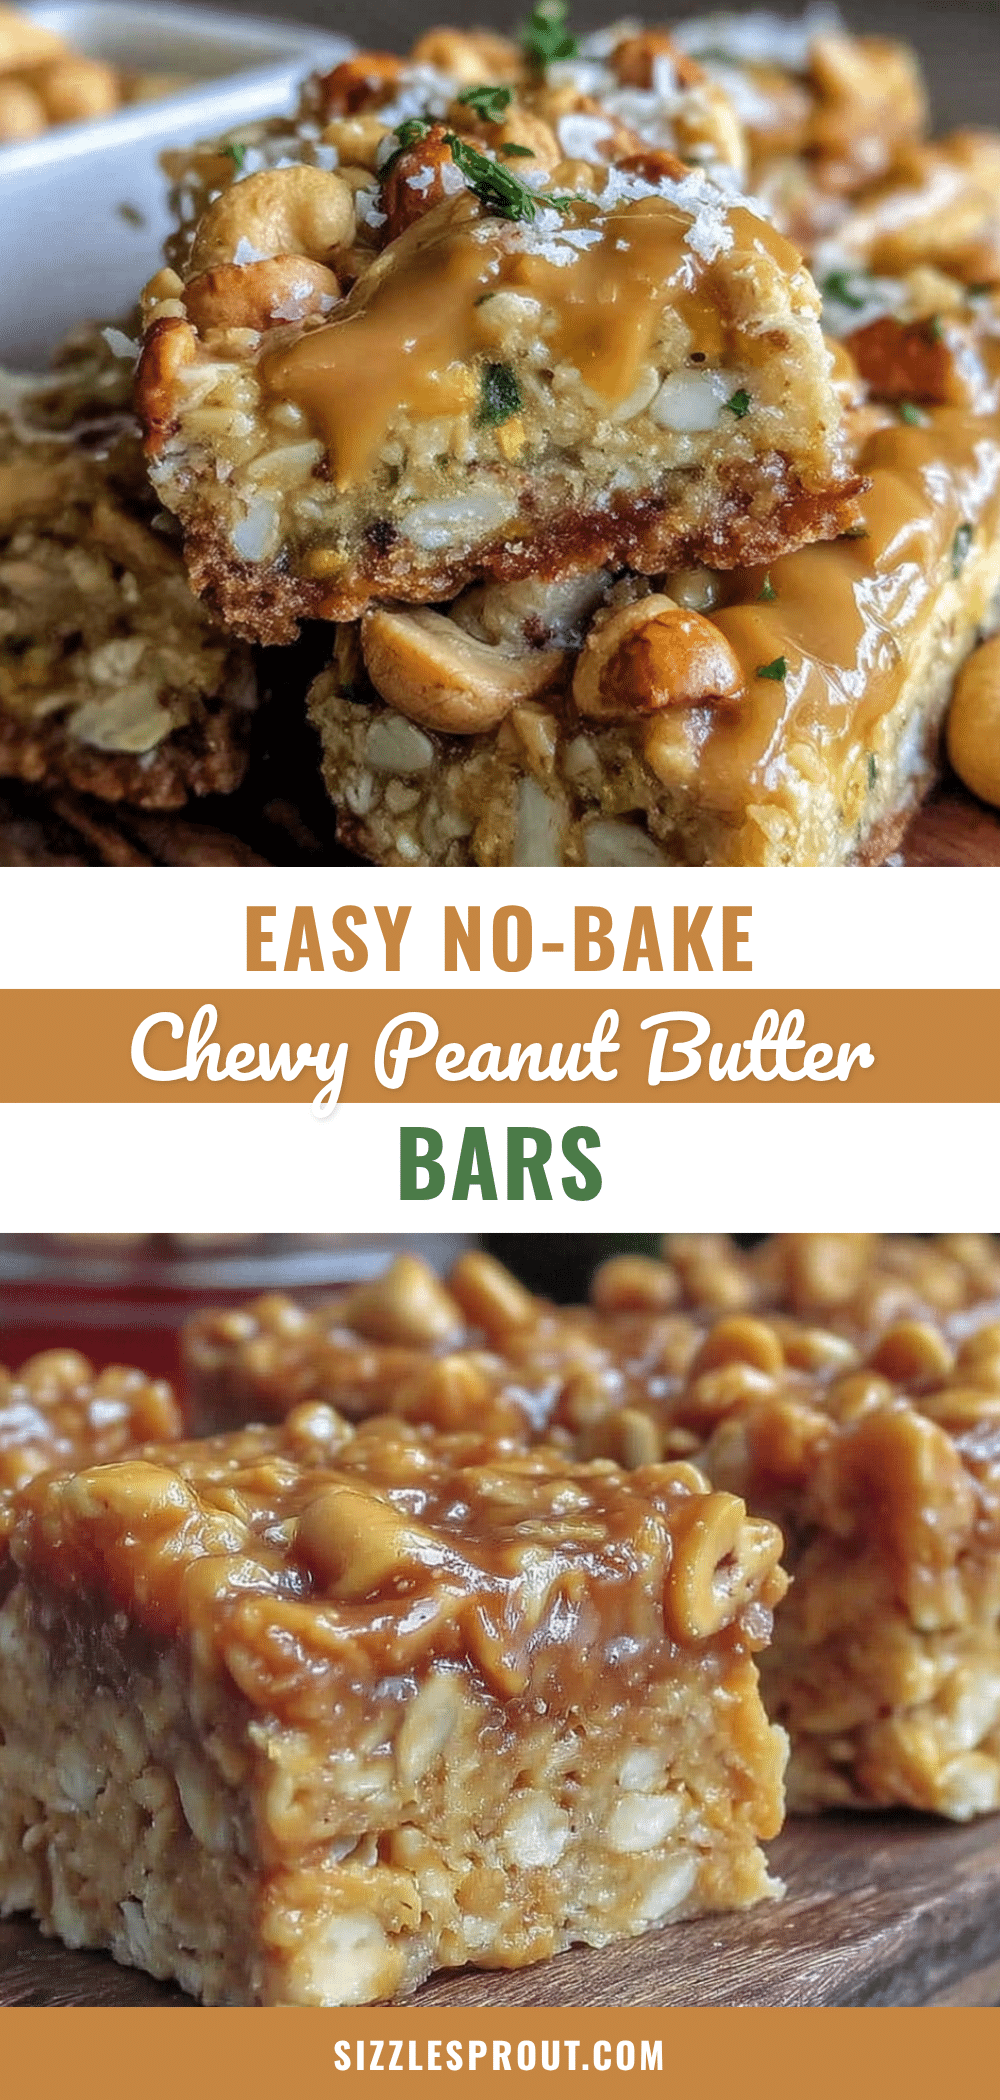
Easy No-Bake Peanut Butter Granola Bars Perfect for Lunchboxes
These easy no-bake peanut butter granola bars are quick to make, require simple pantry ingredients, and are perfect for lunchboxes or snacks on the go. They combine creamy peanut butter, honey, and oats for a wholesome, delicious treat.
- Prep Time: 15 minutes
- Cook Time: 0 minutes
- Total Time: 1 hour 15 minutes
- Yield: 12 bars 1x
- Category: Snack
- Cuisine: American
Ingredients
- 2 cups old-fashioned rolled oats (180 g)
- 1 cup natural creamy peanut butter (250 g)
- ⅓ cup honey (113 g)
- 1 teaspoon vanilla extract
- ½ cup mini chocolate chips (optional, 90 g)
- A pinch of salt
- ½ cup chopped nuts or seeds (optional, 60 g)
Instructions
- Line an 8×8-inch (20×20 cm) baking pan with parchment paper, leaving some overhang on the sides for easy removal.
- In a microwave-safe bowl, combine 1 cup peanut butter and ⅓ cup honey. Microwave in 20-second bursts, stirring in between, until smooth and pourable (about 1 minute total), or melt gently in a small saucepan over low heat.
- Stir 1 teaspoon vanilla extract and a pinch of salt into the warm peanut butter and honey mixture.
- In a large bowl, combine 2 cups old-fashioned oats, optional ½ cup chopped nuts or seeds, and optional ½ cup mini chocolate chips. Stir to distribute evenly.
- Pour the warm peanut butter mixture over the oats mixture. Mix with a spatula or sturdy spoon until everything is well coated and sticks together.
- Transfer the mixture to the prepared pan. Press it down firmly and evenly using the back of a spatula or clean hands.
- Place the pan in the refrigerator for at least 1 hour to set. Alternatively, chill in the freezer for 30 minutes for a firmer texture.
- Once set, lift the mixture out of the pan using the parchment paper. Place on a cutting board and slice into bars or squares.
- Store bars in an airtight container in the refrigerator for up to 1 week or freeze for longer storage.
Notes
Warm the peanut butter and honey mixture to help bind the bars better. Press the mixture firmly into the pan to ensure bars hold together well. Use parchment paper with overhang for easy removal. If bars are crumbly, melt peanut butter longer or add more honey; if too sticky, add more oats. Substitute almond or cashew butter for peanut allergies. Use maple syrup or agave for vegan option. Certified gluten-free oats needed for gluten-free bars.
Nutrition
- Serving Size: 1 bar
- Calories: 190
- Sugar: 10
- Sodium: 70
- Fat: 10
- Saturated Fat: 2
- Carbohydrates: 21
- Fiber: 3.5
- Protein: 5.5
Keywords: no-bake, peanut butter, granola bars, lunchbox snack, easy recipe, healthy snack, quick snack, homemade granola bars