Love this? Save it for later!
Share the inspiration with your friends
“Why can’t we just stack the turkey and cheese on little skewers instead of making a sandwich?” my niece asked one rainy Saturday afternoon while we were prepping snacks. I started to explain why that wouldn’t work—sandwiches keep everything together, they’re neat, and you can pack more in less space—then stopped. Honestly, she was onto something.
I grabbed some toothpicks, sliced the turkey and cheese into bite-sized cubes, and before I knew it, we had these fun little kabobs lined up on a plate. The kids loved them—no mess, just grab-and-go bites that felt like a mini party. I had to admit, this simple twist on classic Lunchables was a game-changer in my snack routine.
Maybe you’ve been there—scrambling to find snacks that are easy, healthy, and kid-approved without the usual sandwich monotony. This recipe for Easy DIY Lunchables with Turkey and Cheese Kabobs stuck with me because it’s exactly that: simple, playful, and surprisingly satisfying. Let me tell you, it’s the kind of snack that gets requested again and again, and honestly, I end up enjoying it just as much as the kids.
Why You’ll Love This Recipe
- Quick & Easy: Comes together in under 15 minutes, perfect for busy school mornings or impromptu playdates.
- Simple Ingredients: No complicated shopping trips—just turkey, cheese, crackers, and a few extras you probably already have.
- Perfect for Kids’ Snacks: Great for lunchboxes, after school, or even a light dinner when you’re in a hurry.
- Crowd-Pleaser: Kids love the interactive, bite-sized kabobs—parents love how little cleanup there is.
- Unbelievably Delicious: The combo of savory turkey and creamy cheese with crunchy crackers hits all the right notes.
- This isn’t just another lunchbox staple. The kabob format makes snacking fun and hands-on, encouraging picky eaters to try new combos.
- It’s a fresh take on a classic, turning a simple turkey and cheese snack into something memorable and enjoyable for everyone.
What Ingredients You Will Need
This recipe uses simple, wholesome ingredients to deliver bold flavor and satisfying texture without the fuss. Most of these are pantry staples, and you can swap in seasonal or allergy-friendly options as needed.
- Deli turkey slices (about 8 oz / 225 g, thinly sliced for easy cutting)
- Cheddar cheese or your favorite cheese block (6 oz / 170 g, cut into 1-inch cubes)
- Whole grain crackers (about 20 pieces; I like the slightly nutty flavor of Triscuit or Wheat Thins)
- Grape tomatoes (optional, about 10 for color and freshness)
- Pickles (small dill pickles or cornichons, sliced into bite-sized pieces)
- Baby carrots (for a crunchy veggie option, about 8-10 pieces)
- Toothpicks or small wooden skewers (enough for assembling kabobs)
Substitution tips: Use turkey breast or chicken slices if you prefer. For a dairy-free option, swap cheese cubes with firm tofu cubes or a plant-based cheese alternative. Gluten-free crackers work perfectly here, too.
Equipment Needed
- Cutting board and sharp knife: For easily slicing turkey, cheese, and veggies into bite-sized pieces.
- Mixing bowls: To organize ingredients before assembly.
- Toothpicks or small skewers: Essential for threading the kabobs; bamboo skewers work well and are budget-friendly.
- Serving plate or bento box: To present your DIY Lunchables in a fun way. Bento boxes with compartments add to the playful feel.
Don’t stress if you don’t have fancy tools—plain toothpicks from your kitchen drawer do the job just fine. I once forgot to buy skewers and used straws cut into small pieces as a last-minute fix—it totally worked for the kids!
Preparation Method
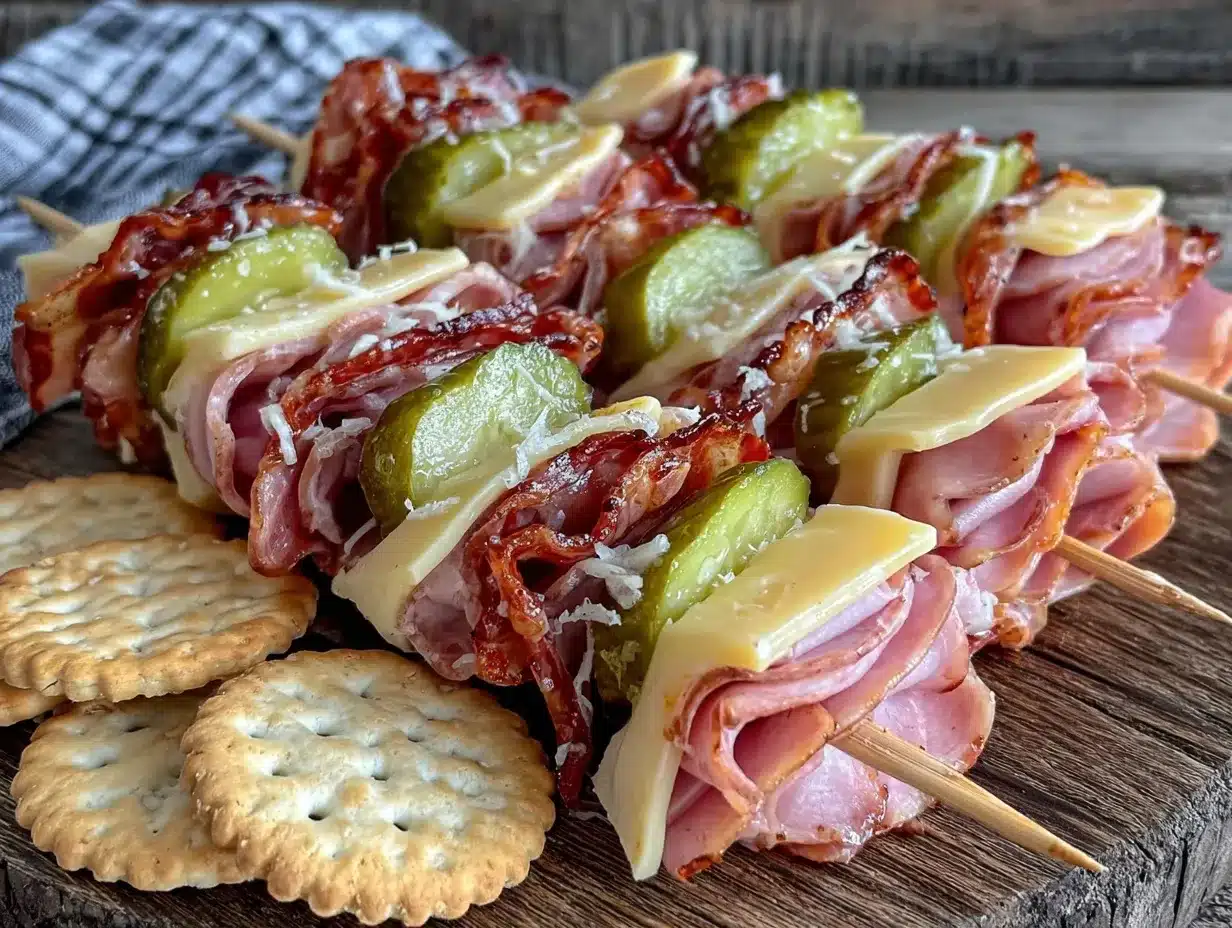
- Prepare the ingredients: On a clean cutting board, slice the deli turkey into 1-inch squares or strips that are easy to fold. Cut the cheddar cheese block into 1-inch cubes (about 6 oz / 170 g). If using, halve the grape tomatoes and slice pickles and baby carrots into bite-sized pieces. (Prep time: 10 minutes)
- Assemble the kabobs: Take a toothpick or small skewer and thread on a cracker first to create a base. Follow with a cube of turkey, then a cheese cube, a grape tomato half, and finish with a pickle slice or carrot piece for color and crunch. You can mix up the order to keep it visually appealing and fun. (Assembly time: 5-7 minutes)
- Arrange on the plate: Once all kabobs are assembled, place them neatly on your serving plate or pack them into a compartmentalized lunchbox. If packing for later, cover with a damp paper towel and seal the container to keep everything fresh. (Packing time: 2 minutes)
- Optional extras: Add a small container of hummus or ranch for dipping on the side. For a sweet touch, include a few grapes or apple slices separately. (Add-on prep time: 5 minutes)
Tip: If the turkey slices are too large or thick, fold them before skewering to keep bites manageable. Watch out for sharp edges on toothpicks—some kids prefer the blunt-ended bamboo skewers for safety.
Common troubleshooting: If cheese cubes crumble too much, chill them before cutting next time. If crackers break, add them last or use sturdier cracker varieties.
Cooking Tips & Techniques
Honestly, there’s no actual cooking here, which is part of the charm—but a few tips help you nail the perfect DIY Lunchables every time.
- Choose firm cheese: Cheddar or Colby jack hold their shape well. Softer cheeses tend to get mushy or fall apart on the kabobs.
- Prep ingredients uniformly: Consistent sizes make for balanced bites and a nicer presentation.
- Keep it fresh: Assemble the kabobs shortly before serving to avoid soggy crackers or dried-out turkey.
- For picky eaters: Let kids customize their kabobs by offering ingredients separately. It’s a great way to get them involved and excited about snack time.
- Timing tip: Prepare ingredients in advance and store them in airtight containers in the fridge for quick assembly later.
Once, I tried freezing the kabobs for an on-the-go snack, but the crackers got soggy—a rookie mistake I learned from. So now, I always assemble fresh or right before packing.
Variations & Adaptations
You can switch up the ingredients to keep this snack interesting or to suit dietary needs.
- Vegetarian version: Replace turkey with marinated tofu cubes or roasted chickpeas and swap cheddar for your favorite cheese or a dairy-free option.
- Seasonal twists: In summer, add fresh cucumber slices or sweet bell pepper pieces. Autumn calls for apple slices paired with sharp cheddar.
- Flavor kick: Add a smear of mustard or a dab of pesto on the turkey before skewering for an extra layer of flavor.
- Allergen-friendly: Use gluten-free crackers and dairy-free cheese to accommodate allergies.
- Personal variation: I once tried these with smoked turkey and pepper jack cheese for a smoky, spicy combo that my husband loved.
Serving & Storage Suggestions
Serve these Easy DIY Lunchables with Turkey and Cheese Kabobs chilled or at room temperature. They’re great as a light lunch, snack, or even party appetizer.
- Pair with fresh fruit like grapes or apple slices for a balanced meal.
- Offer a small container of dipping sauce—ranch, honey mustard, or hummus work perfectly.
- Store any leftovers in an airtight container in the refrigerator for up to 2 days. Keep crackers separate if you want them crisp.
- To reheat, simply bring to room temperature—no microwave needed since it’s mostly cold ingredients.
- Flavors meld nicely if you let the kabobs sit for 20 minutes, but don’t wait too long or crackers will lose their crunch.
Nutritional Information & Benefits
This snack packs protein, calcium, and fiber in a kid-friendly format. Each serving (about 3 kabobs) roughly contains:
| Calories | 250-300 kcal |
|---|---|
| Protein | 15-18 grams |
| Carbohydrates | 20-25 grams |
| Fat | 10-12 grams |
Turkey is lean and high in protein, while cheddar cheese offers calcium and healthy fats. Whole grain crackers contribute fiber, supporting digestion and sustained energy. This snack is naturally gluten-free if you pick appropriate crackers, and low in added sugars.
From a wellness perspective, this recipe balances taste and nutrition, making it a solid choice for growing kids and adults alike looking for a quick, wholesome bite.
Conclusion
This recipe for Easy DIY Lunchables with Turkey and Cheese Kabobs is worth trying because it combines simplicity, nutrition, and fun in a way that turns ordinary snacks into something memorable. You can customize it endlessly based on what you have on hand or your family’s preferences.
I keep coming back to this recipe because it’s one of those rare snacks that kids actually ask for and adults don’t mind sharing. Plus, it’s a nice break from the usual sandwich routine—less mess, more smiles.
If you try making these kabobs, I’d love to hear how you put your own twist on them. Leave a comment or share your favorite ingredient combo. Let’s keep the snack inspiration going—because honestly, snack time should be fun, easy, and delicious!
FAQs
- Can I make these kabobs ahead of time? It’s best to assemble shortly before serving to keep crackers crisp, but you can prep ingredients a day in advance and store separately.
- What if my kids don’t like turkey? Swap turkey for ham, chicken, or even a vegetarian protein like tofu or beans.
- Are these kabobs safe for toddlers? Make sure to cut ingredients small and supervise to avoid choking hazards.
- Can I freeze the kabobs? Freezing isn’t recommended as crackers and veggies lose texture upon thawing.
- What’s a good dipping sauce to serve with these kabobs? Ranch, honey mustard, hummus, or even a light vinaigrette all pair nicely.
Pin This Recipe!
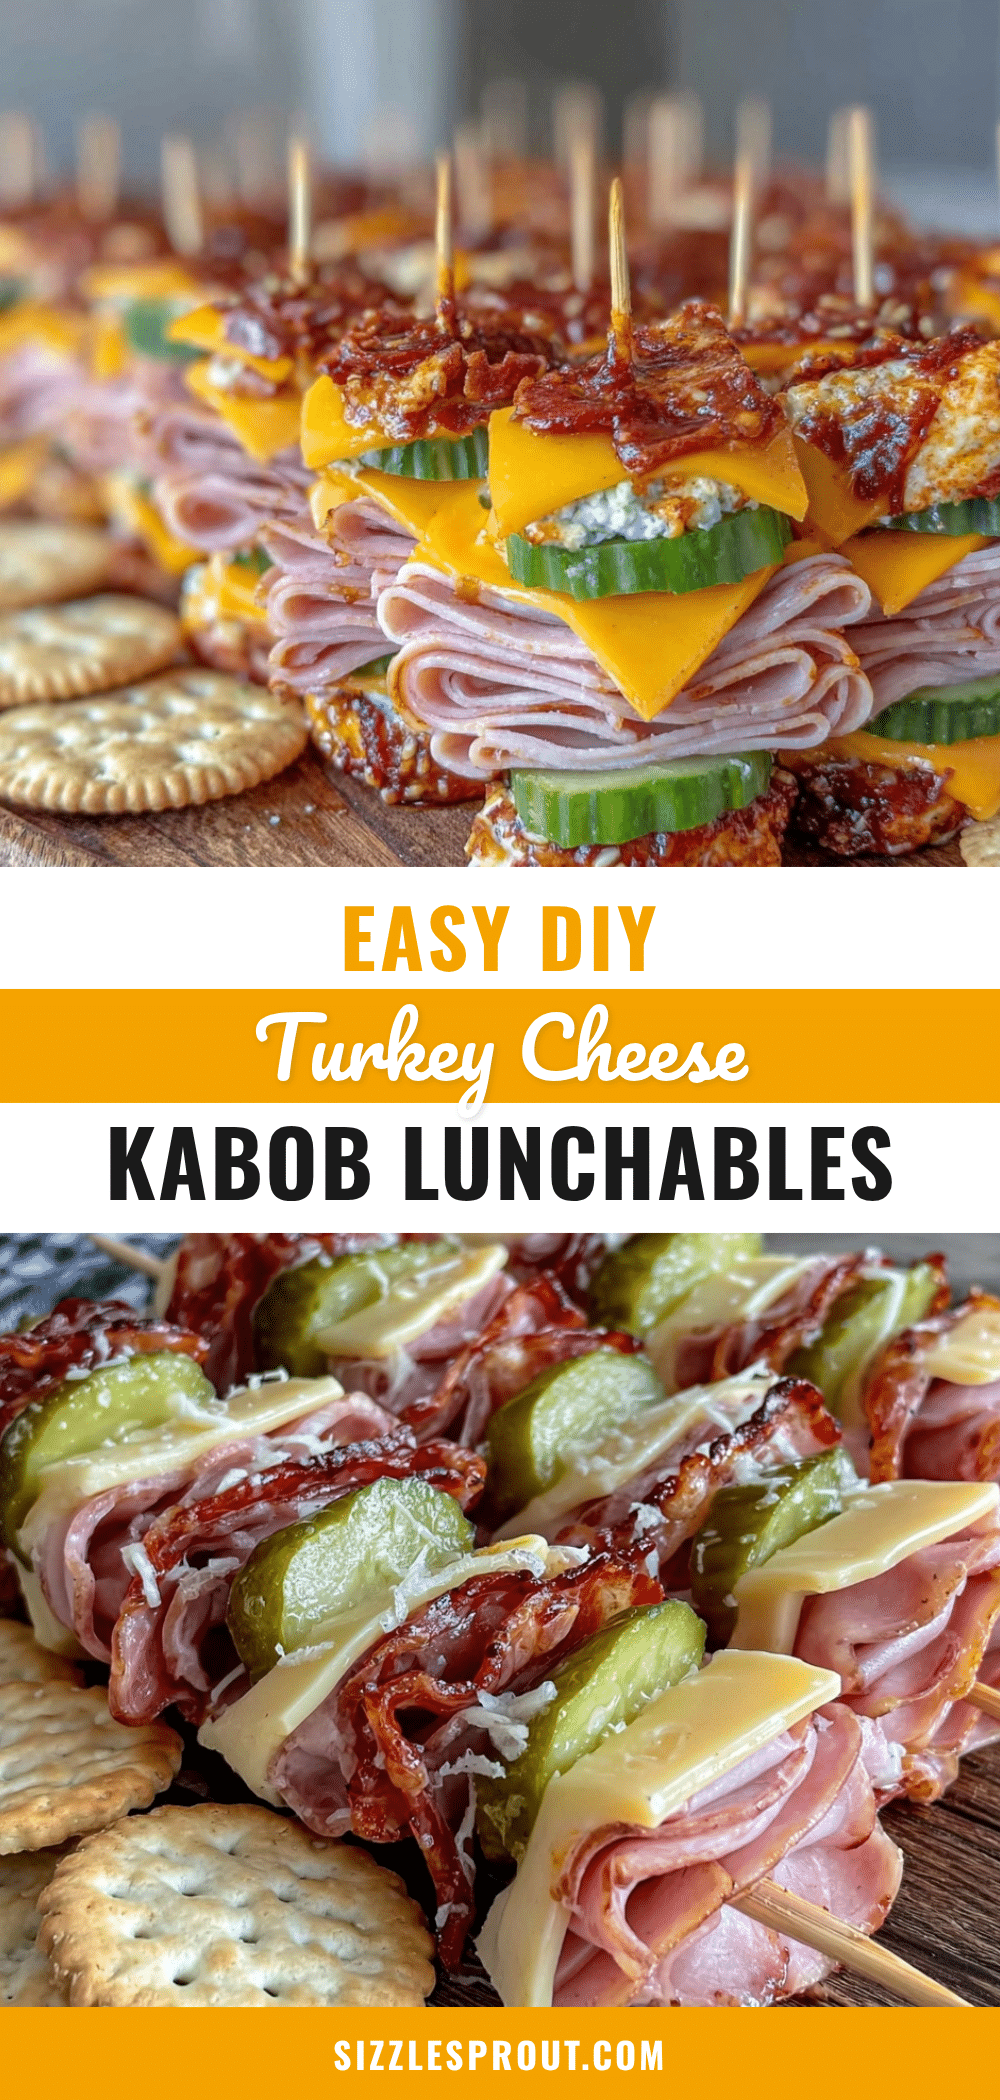
Easy DIY Lunchables with Turkey and Cheese Kabobs

A fun and simple snack idea for kids featuring bite-sized turkey and cheese kabobs with crackers and veggies. Perfect for quick lunches, snacks, or light dinners.
- Prep Time: 10 minutes
- Cook Time: 0 minutes
- Total Time: 15 minutes
- Yield: 4 servings 1x
- Category: Snack
- Cuisine: American
Ingredients
- 8 oz (225 g) deli turkey slices, thinly sliced
- 6 oz (170 g) cheddar cheese, cut into 1-inch cubes
- About 20 whole grain crackers (e.g., Triscuit or Wheat Thins)
- 10 grape tomatoes, halved (optional)
- Small dill pickles or cornichons, sliced into bite-sized pieces
- 8–10 baby carrots, sliced into bite-sized pieces
- Toothpicks or small wooden skewers
Instructions
- Prepare the ingredients: Slice deli turkey into 1-inch squares or strips. Cut cheddar cheese into 1-inch cubes. Halve grape tomatoes and slice pickles and baby carrots into bite-sized pieces.
- Assemble the kabobs: Thread a cracker onto a toothpick or skewer first, followed by a turkey cube, a cheese cube, a grape tomato half, and finish with a pickle slice or carrot piece. Mix the order as desired.
- Arrange the kabobs neatly on a serving plate or pack into a compartmentalized lunchbox. Cover with a damp paper towel and seal if packing for later.
- Optional: Add a small container of hummus or ranch for dipping and include fresh fruit like grapes or apple slices on the side.
Notes
Use firm cheeses like cheddar or Colby jack to prevent crumbling. Assemble kabobs shortly before serving to keep crackers crisp. For safety, use blunt-ended bamboo skewers for kids. Store ingredients separately if prepping ahead. Avoid freezing kabobs as crackers get soggy.
Nutrition
- Serving Size: About 3 kabobs per s
- Calories: 275
- Sugar: 3
- Sodium: 450
- Fat: 11
- Saturated Fat: 4
- Carbohydrates: 22
- Fiber: 3
- Protein: 16
Keywords: turkey kabobs, cheese kabobs, kids snack, lunchables, easy snack, healthy snack, lunchbox ideas, no-cook snack