Love this? Save it for later!
Share the inspiration with your friends
Introduction
“Saturday afternoon, just popping in for a quick chat,” my neighbor called out as I walked up the driveway. Before I even knocked, the unmistakable scent of cocoa and cream cheese frosting wafted through the open door, pulling me inside like a moth to a flame. She wasn’t fussing or making a big deal out of it—just casually assembling layers of this dazzling red velvet cake. Honestly, the way she tossed the frosting on, not a perfect swirl in sight, made it feel like she was doing a magic trick with zero effort.
That cracked mixing bowl sitting on the counter, the splash of red food coloring on the edge of the plate—little details that made the whole scene feel real, unpolished, and utterly inviting. You know that feeling when something looks so simple but tastes like a celebration? That’s exactly what this red velvet flag cake is about. It’s not a fancy showstopper for a party; it’s the kind of cake that turns an ordinary weekend into something memorable, just by being there.
Maybe you’ve been there, standing in a kitchen where someone’s making something extraordinary without even realizing it. This cake stayed with me because it’s so approachable, yet so visually stunning. The cream cheese frosting? Tangy and sweet enough to balance the rich, velvety layers. And the flag design? It’s festive without being fussy—perfect for any summer gathering, especially the Fourth of July. Let me tell you, this recipe is one I keep coming back to, whether I’m hosting or just craving a slice of something special.
Why You’ll Love This Recipe
This red velvet flag cake recipe isn’t just another dessert—it’s a personal favorite that’s been perfected after countless attempts and shared with friends who always ask for seconds. Here’s why it’s bound to become a staple in your baking lineup:
- Quick & Easy: Comes together in about 1.5 hours, including baking and decorating, which makes it ideal for last-minute celebrations or spontaneous bake-offs.
- Simple Ingredients: No need for exotic or hard-to-find components. Most of these are pantry staples — trust me, you probably already have them.
- Perfect for Fourth of July: The patriotic flag design turns this cake into an instant centerpiece for holiday barbecues or neighborhood block parties.
- Crowd-Pleaser: Kids and adults alike rave about the moist texture and the rich cream cheese frosting — it’s a universal hit.
- Unbelievably Delicious: The balance of cocoa, buttermilk, and cream cheese frosting makes this cake melt-in-your-mouth good, with a hint of tang that keeps you coming back.
What sets this red velvet flag cake apart is the way the layers come together — not just for flavor, but for a real visual wow factor. The red layers are bold but not overpowering, and the creamy frosting is spread in a way that’s charmingly imperfect. It’s the kind of recipe that looks like you spent hours on it, but honestly, you didn’t. I’ve tested this cake multiple times, tweaking the frosting and layering technique until it felt just right — and now, I’m sharing that magic with you.
What Ingredients You Will Need
This recipe uses simple, wholesome ingredients that deliver a bold flavor and the perfect texture for your red velvet flag cake. Most are pantry staples, and substitutions are easy if you’re catering to specific dietary needs or just running low.
- For the Cake Layers:
- All-purpose flour – 2 ½ cups (315g), sifted for lightness
- Cocoa powder – 2 tbsp (unsweetened, for that subtle chocolate kick)
- Baking soda – 1 tsp
- Salt – ½ tsp
- Granulated sugar – 1 ¾ cups (350g)
- Buttermilk – 1 cup (240ml), room temperature (adds tenderness and tang)
- Vegetable oil – 1 cup (240ml), neutral flavor
- Large eggs – 2, room temperature
- Red food coloring – 2 tbsp (gel or liquid, gel gives richer color with less mess)
- Vanilla extract – 1 tsp, pure for best flavor
- White vinegar – 1 tsp, helps react with baking soda for fluffiness
- For the Cream Cheese Frosting:
- Cream cheese – 16 oz (450g), softened (Philadelphia brand is my go-to for smoothness)
- Unsalted butter – ½ cup (113g), softened (adds richness)
- Powdered sugar – 4 cups (480g), sifted to avoid lumps
- Vanilla extract – 1 tsp
- Pinch of salt (balances the sweetness)
- For Decoration:
- Blueberries – 1 cup (fresh, for the blue “stars” section)
- Strawberries or raspberries – 1 cup (sliced, for the red stripes)
- White chocolate shavings or mini marshmallows (optional, for extra white stripes texture)
If you’re looking for a gluten-free option, swapping the all-purpose flour for a 1:1 gluten-free baking blend works well, though the texture will be slightly different. For dairy-free needs, consider coconut cream cheese and a dairy-free butter substitute; just note the frosting might be a bit softer.
Equipment Needed
- Two 9-inch (23cm) round cake pans – If you don’t have two, you can bake in batches, but it takes longer.
- Mixing bowls – One large for batter, one medium for frosting.
- Electric mixer or stand mixer – Makes whipping the frosting much easier, but a sturdy whisk works if you’re patient.
- Measuring cups and spoons – Accuracy matters for baking success.
- Rubber spatula – For scraping down the sides of bowls and folding ingredients gently.
- Cooling racks – To let your cakes cool evenly and avoid sogginess.
- Offset spatula or butter knife – For spreading the frosting smoothly.
- Piping bag and small round tip (optional) – If you want to pipe the frosting for a cleaner flag design.
If you don’t own an electric mixer, no worries — just be ready for a workout! Also, using parchment paper to line your pans can help with clean removal of cake layers. For budget-friendly options, simple silicone spatulas and good-quality measuring tools go a long way and can be found at most grocery or kitchen stores.
Preparation Method
- Preheat your oven to 350°F (175°C). Grease and flour your two 9-inch cake pans or line them with parchment paper. This step helps ensure your layers come out clean and intact.
- Mix dry ingredients: In a large bowl, sift together 2 ½ cups (315g) all-purpose flour, 2 tbsp cocoa powder, 1 tsp baking soda, and ½ tsp salt. Set aside.
- Combine wet ingredients: In a separate bowl, whisk 1 ¾ cups (350g) granulated sugar, 1 cup (240ml) vegetable oil, and 2 large eggs until smooth. Add 1 cup (240ml) buttermilk, 2 tbsp red food coloring, 1 tsp vanilla extract, and 1 tsp white vinegar. Mix until fully combined and vibrant red.
- Incorporate dry into wet: Gradually add the dry ingredients into the wet, mixing on low speed or folding gently with a spatula. Stop as soon as the batter is smooth and even — overmixing can make the cake tough.
- Divide and bake: Pour batter evenly into the prepared pans. Tap the pans lightly on the counter to release air bubbles. Bake for 25-30 minutes, or until a toothpick inserted in the center comes out clean. Keep an eye on the last 5 minutes to avoid overbaking.
- Cool completely: Remove cakes from oven and place on cooling racks. Let them cool in pans for 10 minutes, then carefully invert onto racks to cool fully (about 1 hour). Don’t frost warm cake — it’ll melt the frosting and create a mess.
- Prepare frosting: Beat 16 oz (450g) softened cream cheese and ½ cup (113g) softened unsalted butter with an electric mixer until creamy and smooth. Gradually add 4 cups (480g) powdered sugar and 1 tsp vanilla extract, mixing on low then high speed until fluffy. Add a pinch of salt to balance the sweetness.
- Assemble the cake: Place one cake layer on your serving plate. Spread a thick, even layer of cream cheese frosting on top. Add the second cake layer and cover the entire cake with a crumb coat — a thin layer of frosting to lock in crumbs. Chill for 15 minutes.
- Decorate the flag: Apply a final, thicker coat of frosting smoothly all over. Use fresh blueberries to create the blue “star” rectangle on the top left corner. Arrange sliced strawberries or raspberries in stripes alongside and below. If you want, add white chocolate shavings or mini marshmallows for the white stripes to add texture and interest.
- Chill and serve: Refrigerate the cake for at least 30 minutes before serving to let the frosting set. Remove from fridge about 15 minutes before slicing so it’s easier to cut.
Pro tip: If your frosting feels too soft, pop it in the fridge for a few minutes and then whip again before spreading. Also, using an offset spatula makes smoothing frosting a breeze and gives you that semi-professional look without sweating it.
Cooking Tips & Techniques
Making a red velvet flag cake can sound intimidating, but here are some tips I’ve picked up along the way that will make your baking smoother and the results more reliable:
- Don’t skip sifting: It really helps keep the cocoa powder and flour lump-free, resulting in a lighter cake texture. I’ve learned this the hard way after one too many dense cakes.
- Use room temperature ingredients: Eggs, buttermilk, and buttercream components blend more evenly when not cold. It’s a small step that makes a big difference.
- Be gentle with the batter: Overmixing develops gluten, making the cake tougher. Fold in the dry ingredients just until no streaks remain.
- Red food coloring: Gel type is my favorite because it packs a punch without watering down the batter. If you only have liquid, just add a little less liquid elsewhere to compensate.
- Chill your cake layers: This helps prevent crumbs from mixing into your frosting and gives you a cleaner finish.
- For a neat flag design: Place berries carefully with clean hands or use tweezers for precision if you’re feeling fancy.
- Timing multitask: While cakes bake, prep your frosting and decorate your serving plate or table to save time during assembly.
Variations & Adaptations
This recipe is pretty flexible, so feel free to make it your own with these ideas:
- Dietary swaps: Use coconut yogurt and dairy-free cream cheese for a vegan and dairy-free version. The texture will be slightly different but still delicious.
- Seasonal fruits: Instead of blueberries and strawberries, swap in blackberries and cherries during late summer for a fresh twist.
- Alternative frostings: Try whipped mascarpone frosting for a lighter texture or a simple vanilla buttercream if cream cheese isn’t your thing.
- Mini cakes: Make cupcakes and decorate each with a small flag design or individual berries for personal servings.
- My personal twist: I once added a thin layer of homemade raspberry jam between cake layers for an extra fruity surprise. It was a hit at a neighborhood picnic and gave the cake a fun tang.
Serving & Storage Suggestions
Serve your red velvet flag cake chilled or at room temperature — both work wonderfully. I like cutting it into generous slices and pairing it with a cold glass of iced tea or a sparkling lemonade for a festive summer vibe. It’s also a fantastic centerpiece for backyard barbecues or a casual brunch.
To store, cover the cake loosely with plastic wrap or place it in an airtight container and refrigerate. It keeps beautifully for up to 4 days. If you want to save it longer, slice and freeze portions individually, wrapped tightly in plastic and foil; they thaw well in the fridge overnight.
When reheating, let slices come to room temperature before eating to bring back the cake’s softness. The frosting firms up in the fridge, so a few minutes out on the counter really helps. Flavors actually deepen after a day or two, so if you can wait, it tastes even better the next day.
Nutritional Information & Benefits
This red velvet flag cake is a treat, but it also brings a few benefits thanks to its ingredients. Each serving (about 1/12th of the cake) contains roughly 350-400 calories, depending on portion size. The cake includes protein from eggs and calcium from the cream cheese frosting.
Using buttermilk adds a subtle tang and provides probiotics, which are good for digestion. Cocoa powder contributes antioxidants, which have health benefits beyond just flavor. The fresh berries used for decoration add a burst of vitamins and fiber.
This dessert is gluten-containing, so it’s not suitable for those with celiac disease unless you swap in a gluten-free flour blend. It also contains dairy and eggs, which are common allergens, so keep that in mind when sharing.
From my perspective, this cake strikes a nice balance between indulgence and wholesome ingredients, especially when fresh fruit is part of the mix. It’s a festive way to enjoy a slice of summer without going overboard.
Conclusion
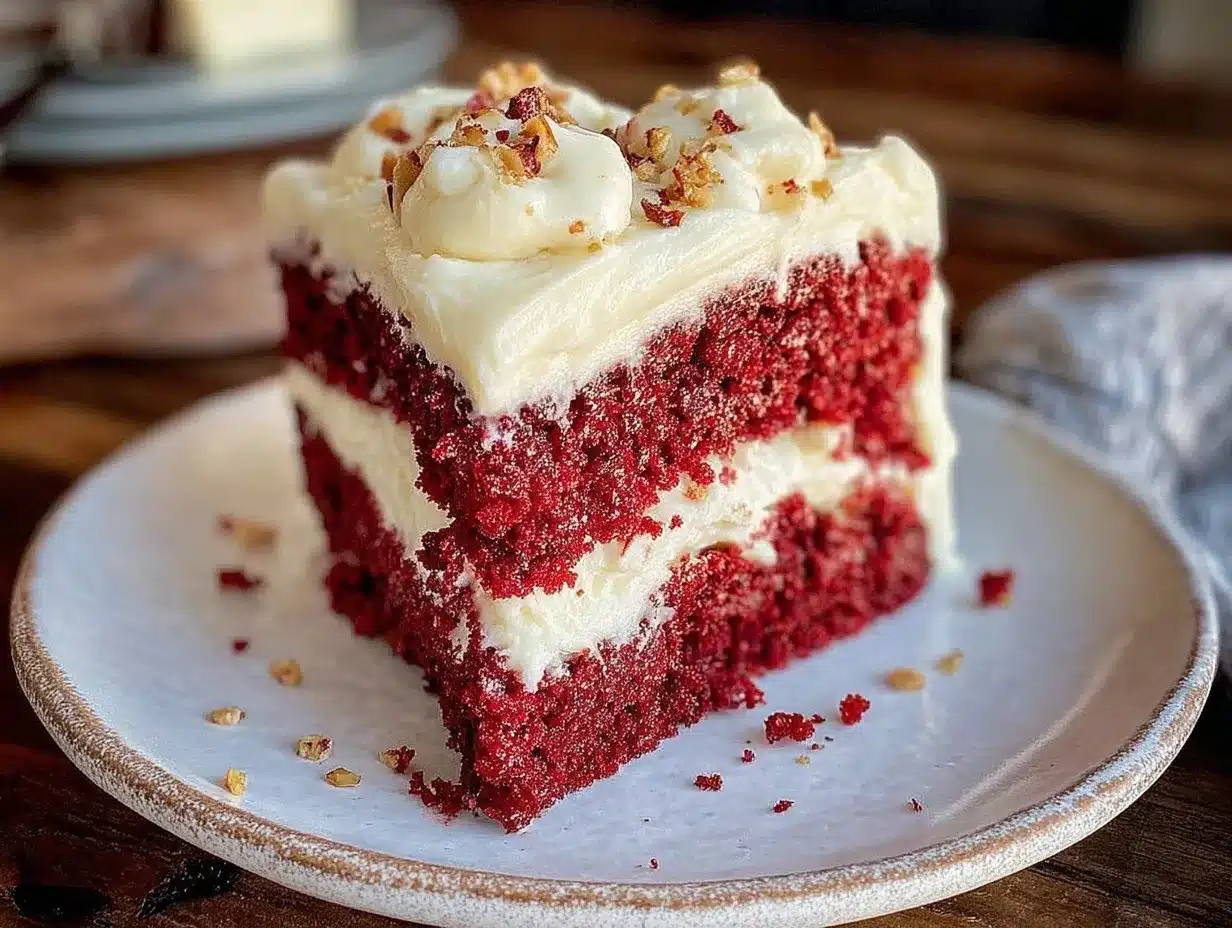
This show-stopping red velvet flag cake with cream cheese frosting is more than just a dessert — it’s a celebration on a plate. Whether you’re marking the Fourth of July or just want to brighten up any day, this cake delivers on flavor, looks, and easy charm. The best part? You don’t need to be a baking pro to make it shine.
Feel free to tweak the decoration or try some of the variations to make it your own. I love this recipe because it’s reliable, festive, and honestly, it brings people together — which is what good food should do. I’m excited to hear how your version turns out, so don’t hesitate to leave a comment sharing your tweaks or questions!
Give this red velvet flag cake a shot and bring a slice of joy to your next get-together. Happy baking!
FAQs
Can I make this red velvet flag cake ahead of time?
Yes! You can bake the cake layers a day in advance and wrap them tightly in plastic wrap. Assemble and decorate the next day for the freshest presentation.
What’s the best way to get vibrant red color in the cake?
Using gel food coloring is your best bet for bold color without adding extra liquid. Also, make sure to mix it thoroughly for an even shade.
Can I use a different frosting if I don’t like cream cheese?
Absolutely! Vanilla buttercream or whipped mascarpone frosting are great alternatives that still complement the red velvet flavor.
How do I store leftover cake?
Store leftover cake in the refrigerator, covered to prevent drying out. It keeps well for up to 4 days. You can also freeze slices for longer storage.
Is it possible to make this cake gluten-free?
Yes, substitute the all-purpose flour with a gluten-free baking blend that measures 1:1. The texture will be slightly different but still delicious.
Pin This Recipe!

Show-Stopping Red Velvet Flag Cake Recipe Perfect for Fourth of July Celebrations
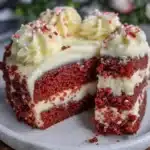
A visually stunning and delicious red velvet cake with cream cheese frosting, decorated as a patriotic flag, perfect for Fourth of July celebrations or any summer gathering.
- Prep Time: 30 minutes
- Cook Time: 30 minutes
- Total Time: 1 hour
- Yield: 12 servings 1x
- Category: Dessert
- Cuisine: American
Ingredients
- 2 ½ cups (315g) all-purpose flour, sifted
- 2 tbsp unsweetened cocoa powder
- 1 tsp baking soda
- ½ tsp salt
- 1 ¾ cups (350g) granulated sugar
- 1 cup (240ml) buttermilk, room temperature
- 1 cup (240ml) vegetable oil
- 2 large eggs, room temperature
- 2 tbsp red food coloring (gel or liquid)
- 1 tsp vanilla extract
- 1 tsp white vinegar
- 16 oz (450g) cream cheese, softened
- ½ cup (113g) unsalted butter, softened
- 4 cups (480g) powdered sugar, sifted
- 1 tsp vanilla extract
- Pinch of salt
- 1 cup fresh blueberries (for decoration)
- 1 cup sliced strawberries or raspberries (for decoration)
- White chocolate shavings or mini marshmallows (optional, for decoration)
Instructions
- Preheat oven to 350°F (175°C). Grease and flour two 9-inch cake pans or line with parchment paper.
- In a large bowl, sift together flour, cocoa powder, baking soda, and salt. Set aside.
- In a separate bowl, whisk granulated sugar, vegetable oil, and eggs until smooth. Add buttermilk, red food coloring, vanilla extract, and white vinegar. Mix until combined and vibrant red.
- Gradually add dry ingredients into wet ingredients, mixing on low speed or folding gently until smooth. Avoid overmixing.
- Divide batter evenly into prepared pans. Tap pans lightly to release air bubbles. Bake 25-30 minutes or until a toothpick inserted in the center comes out clean.
- Cool cakes in pans for 10 minutes, then invert onto cooling racks to cool completely (about 1 hour).
- Beat cream cheese and butter until smooth. Gradually add powdered sugar, vanilla extract, and salt. Mix until fluffy.
- Place one cake layer on serving plate. Spread thick layer of frosting on top. Add second layer and cover entire cake with a thin crumb coat. Chill 15 minutes.
- Apply a final thicker coat of frosting smoothly all over the cake.
- Decorate the top left corner with blueberries for the blue ‘star’ section. Arrange sliced strawberries or raspberries in stripes for the red stripes. Optionally add white chocolate shavings or mini marshmallows for white stripes texture.
- Refrigerate cake for at least 30 minutes before serving. Remove from fridge 15 minutes before slicing.
Notes
Use gel food coloring for vibrant red color without adding extra liquid. Chill cake layers before frosting to prevent crumbs. If frosting is too soft, refrigerate briefly and whip again before spreading. Use an offset spatula for smooth frosting application. For gluten-free, substitute flour with 1:1 gluten-free blend. For dairy-free, use coconut cream cheese and dairy-free butter substitutes.
Nutrition
- Serving Size: 1 slice (1/12th of c
- Calories: 375
- Sugar: 38
- Sodium: 320
- Fat: 18
- Saturated Fat: 7
- Carbohydrates: 52
- Fiber: 2
- Protein: 5
Keywords: red velvet cake, Fourth of July cake, flag cake, cream cheese frosting, patriotic dessert, summer cake, berry decoration