Love this? Save it for later!
Share the inspiration with your friends
It was 11:37 PM on a quiet Thursday, and the craving hit me like a firecracker on the Fourth of July. I didn’t have the usual ingredients for a fancy dessert — no time to bake, no fancy molds, and definitely no patience for a complicated recipe. But what I did have was a half-empty tub of cream cheese, a handful of fresh strawberries, and a box of graham crackers that had seen better days. The idea that arrived in the middle of that late-night kitchen chaos was simple yet a little wild: why not whip up Festive No-Bake Mini American Flag Cheesecake Cups using just what was close at hand?
Honestly, the idea of putting together a dessert this patriotic in the middle of the night felt like a little rebellion against the usual rules — no oven, no fancy tools, just improvisation and that unmistakable late-night kitchen buzz. I even forgot to grab a mixing bowl at first and ended up using a cracked glass bowl that my neighbor had given me last summer (don’t ask how it survived the dishwasher). Maybe you’ve been there — that weird moment when the quiet of the night loosens your grip on the usual and you create something totally delicious with the oddest mix of ingredients.
That first batch of these mini cheesecake cups didn’t look perfect, but the combination of creamy, sweet, and tart with a patriotic twist stuck with me. Since then, I keep coming back to this recipe whenever I want a dessert that’s easy, fun, and just a little unexpected — perfect for summer barbecues, holiday celebrations, or just those nights when the craving strikes hard and fast.
Why You’ll Love This Recipe
Having tested the Festive No-Bake Mini American Flag Cheesecake Cups many times (sometimes under pressure, sometimes with kids helping), I can say this recipe is a reliable crowd-pleaser. Here’s why it’s a go-to for me and might become yours too:
- Quick & Easy: Comes together in under 20 minutes, perfect for when you want something festive without the fuss.
- Simple Ingredients: No fancy grocery trips required — most items are pantry staples or easy to find fresh produce.
- Perfect for Summer Parties: Great for Fourth of July, Memorial Day, or any patriotic celebration where you want to impress with minimal effort.
- Crowd-Pleaser: Kids love the mini size and the vibrant colors, while adults appreciate the balance of sweet and tangy flavors.
- Unbelievably Delicious: The creamy cheesecake filling paired with crunchy graham crackers and fresh berries creates a perfect texture combo.
What makes this recipe stand out is the no-bake twist — honestly, it keeps the kitchen cool on hot summer days and frees up oven space for the main dishes. Plus, using fresh strawberries and blueberries arranged as an American flag adds a fun visual wow-factor that’s hard to beat. I’ve also experimented with blending cottage cheese into the filling for extra smoothness, but the classic cream cheese version always wins for that creamy, rich bite that’s pure comfort food with a patriotic spin.
Whether you’re impressing guests or just sneaking a late-night treat, these mini cheesecake cups bring that celebratory spirit in a way that’s casual, delicious, and totally doable.
What Ingredients You Will Need
This recipe uses simple, wholesome ingredients to deliver bold flavor and satisfying texture without the fuss. Most of these are pantry staples or easy to grab fresh items. Here’s what you’ll need to create your Festive No-Bake Mini American Flag Cheesecake Cups:
- For the Crust:
- Graham cracker crumbs (about 1 ½ cups / 150g) – I recommend using Honey Maid for that perfect crunchy texture.
- Unsalted butter, melted (5 tablespoons / 70g) – adds richness and helps the crumbs stick together.
- Granulated sugar (2 tablespoons / 25g) – balances the buttery flavor.
- For the Cheesecake Filling:
- Cream cheese, softened (8 oz / 225g) – the star of the show, for that smooth, tangy base.
- Powdered sugar (¾ cup / 90g) – helps sweeten without gritty texture.
- Heavy cream (1 cup / 240ml) – whipped to stiff peaks to lighten the filling.
- Pure vanilla extract (1 teaspoon) – adds warmth and depth.
- Fresh lemon juice (1 tablespoon) – a subtle zing that brightens the cheesecake flavor.
- For the Topping (American Flag Decoration):
- Fresh strawberries, sliced (about 1 cup / 150g) – for the red stripes and flag accents.
- Fresh blueberries (½ cup / 75g) – for the blue stars section.
- Whipped cream or extra cheesecake filling (optional) – to create the white stripes between berries.
If you’re looking for a dairy-free option, swapping the cream cheese with a plant-based alternative and using coconut cream instead of heavy cream works well. Also, for a gluten-free crust, almond flour mixed with a bit of coconut oil can replace the graham cracker crumbs. Just keep in mind the texture will be slightly different but still delicious.
Equipment Needed
- Mixing bowls – a medium bowl for the crust and a large one for the filling.
- Electric hand mixer or stand mixer – essential for whipping the cream and blending the cream cheese smoothly.
- Measuring cups and spoons – for precise ingredient amounts.
- Spatula – for folding the whipped cream into the cheesecake filling gently.
- Mini clear cups or ramekins (about 4-ounce / 120ml size) – to assemble individual cheesecake cups.
- Food processor or plastic bag and rolling pin – to crush graham crackers finely.
If you don’t have a food processor, just toss graham crackers in a sturdy plastic bag and crush them with a rolling pin or heavy pan. For whipping cream, a whisk works if you have the patience, but honestly, an electric mixer saves a lot of elbow grease.
Preparation Method
- Prepare the Crust (10 minutes): Crush 1 ½ cups (150g) of graham crackers into fine crumbs using a food processor or rolling pin. In a medium bowl, mix the crumbs with 5 tablespoons (70g) melted unsalted butter and 2 tablespoons (25g) sugar until the mixture resembles wet sand. This helps bind everything together.
- Assemble Crust in Cups (5 minutes): Spoon about 2 tablespoons (30g) of the crust mixture into each mini cup. Press down firmly with the back of a spoon or your fingers to create an even, compact base. Chill the cups in the fridge for at least 10 minutes to set while preparing the filling.
- Make the Cheesecake Filling (15 minutes): In a large mixing bowl, beat 8 oz (225g) softened cream cheese with ¾ cup (90g) powdered sugar until smooth and creamy. Add 1 teaspoon vanilla extract and 1 tablespoon fresh lemon juice, mixing just to combine.
- Whip the Cream (5-7 minutes): In a separate bowl, whip 1 cup (240ml) heavy cream with an electric mixer until stiff peaks form. This means when you lift the whisk, the cream holds its shape without drooping.
- Combine Filling and Cream (3 minutes): Gently fold the whipped cream into the cream cheese mixture using a spatula. Fold carefully to keep the mixture light and airy — overmixing can cause it to deflate.
- Fill the Cups (5 minutes): Spoon or pipe the cheesecake filling on top of the chilled crust in each cup, leaving a little room at the top for the decoration.
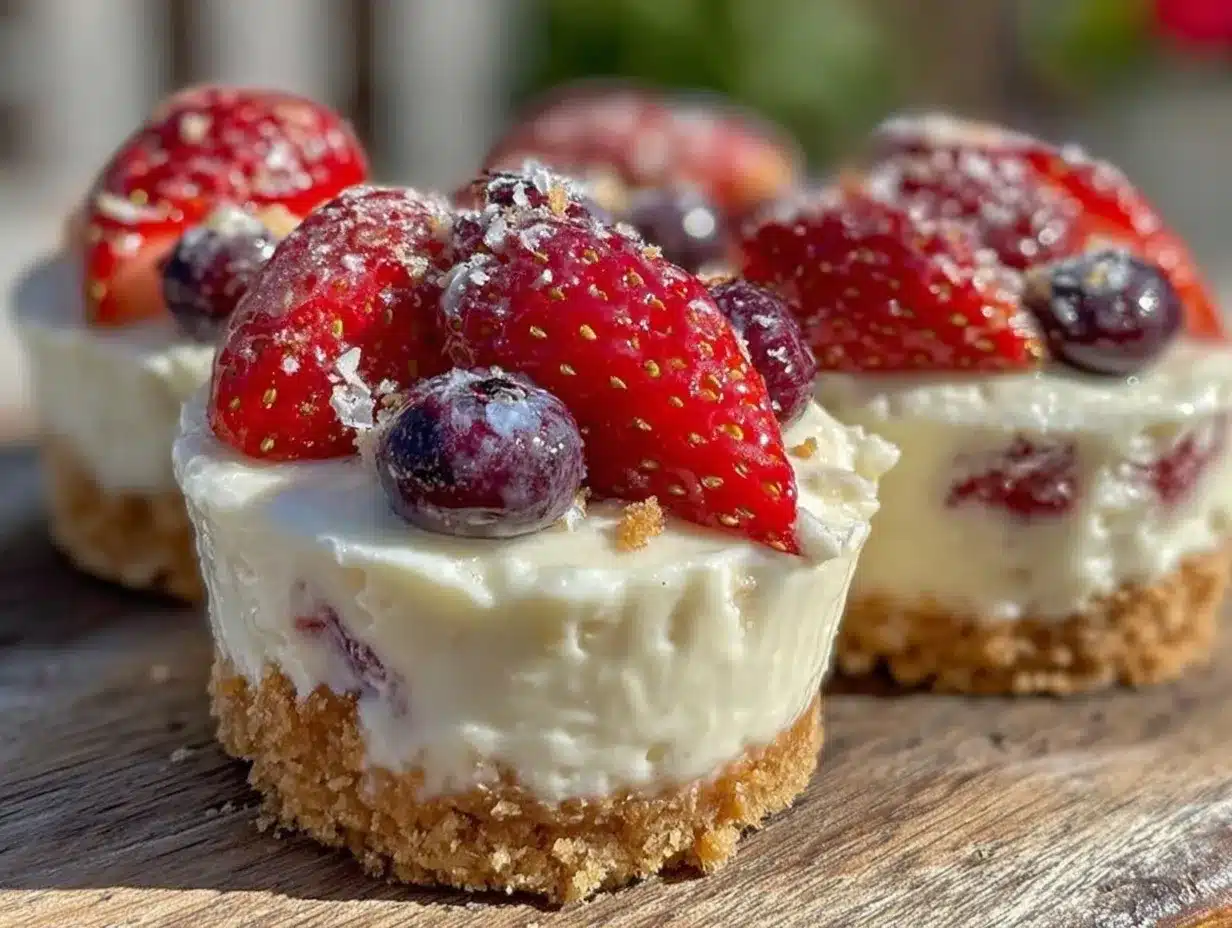
- Decorate with the American Flag (10 minutes): Arrange sliced strawberries horizontally across the top for red stripes. Use dollops or lines of whipped cream (or extra cheesecake filling) for the white stripes. In one corner, place blueberries tightly together to mimic the blue star field of the flag. This part is where the fun and creativity come in — no need for perfection!
- Chill and Set (at least 2 hours): Let the assembled cups chill in the refrigerator for a minimum of 2 hours or overnight to set properly. The flavors meld and the texture firms up beautifully.
Pro tip: If you notice the cream cheese is too cold or lumpy at the start, give it a quick zap in the microwave (5-10 seconds) to soften, but don’t melt it. Also, if the crust feels crumbly, just press it a bit harder or add a tiny splash of melted butter to help bind it.
Cooking Tips & Techniques
One of the simplest ways to get a smooth, creamy filling is to make sure your cream cheese is softened to room temperature — cold cream cheese can make the mixture lumpy and harder to blend. When whipping the cream, start slow and increase speed gradually to avoid over-whipping, which can turn it grainy and separate.
Folding the whipped cream into the cream cheese mixture is a delicate dance — you want to keep as much air in the filling as possible. Use a gentle hand and a spatula to fold, rather than stirring vigorously. This lightness is what makes the cheesecake cups feel almost like a mousse.
One mistake I made early on was rushing the chilling step. Letting the cups set for less than two hours can result in a runny dessert that doesn’t hold its shape. Patience here really pays off for a firm bite that looks just as good as it tastes.
The decoration can be as precise or as freeform as you like — it’s about the festive vibe. If you want to save time, pre-slice strawberries and keep the berries dry so they don’t make the crust soggy. Multitask by prepping the crust and filling simultaneously to speed up the process.
Variations & Adaptations
This recipe is quite flexible and welcomes plenty of tasty twists:
- Dietary Variation: Swap cream cheese for a dairy-free version and use coconut cream whipped for the filling to make it vegan-friendly.
- Seasonal Flavor: In place of strawberries and blueberries, use fresh raspberries and blackberries for a deeper berry flavor and beautiful colors.
- Flavor Twist: Add a teaspoon of almond or lemon extract to the filling for a subtle flavor boost that pairs wonderfully with the berries.
- Alternative Crust: Use crushed vanilla wafers or gluten-free cookies instead of graham crackers to change the base’s flavor and texture.
- Personal Touch: I once added a layer of blueberry jam under the filling for an extra burst of fruity sweetness — it was a hit with my friends!
If you want to change the cooking method, this recipe is strictly no-bake, but you can experiment by baking the crust for 8 minutes at 350°F (175°C) if you prefer a crunchier base. Just let it cool completely before assembling.
Serving & Storage Suggestions
Serve these mini cheesecake cups chilled for the best texture and flavor. They make a perfect handheld dessert at picnics, barbecues, or holiday gatherings. Present them on a festive tray garnished with extra fresh berries or mint leaves for a pop of color.
Store leftovers in an airtight container in the fridge for up to 3 days. The crust might soften slightly over time, but honestly, that just makes it creamier. If freezing, wrap the cups tightly and thaw in the fridge overnight before serving.
Reheat is not recommended since these are best enjoyed cold, but letting them sit out for 10 minutes before eating can soften the filling if it feels too firm from chilling.
Flavors also develop a bit overnight, with the lemon and vanilla notes becoming more pronounced — so making them a day ahead can be a smart move for stress-free entertaining.
Nutritional Information & Benefits
Each mini cheesecake cup contains approximately 250 calories, with about 18g of fat, 20g of carbohydrates, and 4g of protein. The fresh berries add a boost of antioxidants and vitamin C, while the cream cheese provides calcium and vitamin A.
Because this is a no-bake recipe, it avoids the extra fats sometimes added during baking. Using fresh ingredients means fewer preservatives and more natural flavor. For gluten-free or dairy-free diets, simple substitutions make this dessert accessible to many.
From a wellness perspective, this dessert offers a satisfying treat that balances indulgence with fresh fruit nutrition — a nice way to enjoy a festive dessert without feeling weighed down.
Conclusion
The Festive No-Bake Mini American Flag Cheesecake Cups are a delightful celebration of flavor, color, and simplicity all wrapped into one. Whether you’re short on time, avoiding the oven on a hot day, or just want a dessert that looks as good as it tastes, this recipe has you covered.
Feel free to customize the toppings, experiment with flavors, or make it your own with dietary tweaks. I love this dessert because it’s easy, fun, and brings a little sparkle to any patriotic occasion or simple summer night.
Give it a try, and let me know how your version turns out — I’m always happy to hear about your creative spins or helpful hacks. Happy celebrating!
FAQs
Can I make these mini cheesecake cups ahead of time?
Yes! They taste even better after chilling overnight, which helps the flavors meld and the filling firm up nicely.
What can I use if I don’t have graham crackers?
Vanilla wafers, digestive biscuits, or gluten-free cookies all work well as substitutions for the crust.
How do I prevent the crust from getting soggy?
Make sure to press the crust firmly and chill it before adding the filling. Also, use dry berries and avoid juicy fruits that bleed too much.
Is it possible to make a larger, single cheesecake instead of mini cups?
Absolutely! Use a standard 8-inch springform pan and adjust chilling time accordingly. Decorating the flag on top will be a fun challenge!
Can I freeze the mini cheesecake cups?
Yes, you can freeze them for up to one month. Wrap tightly and thaw in the fridge overnight before serving.
Pin This Recipe!
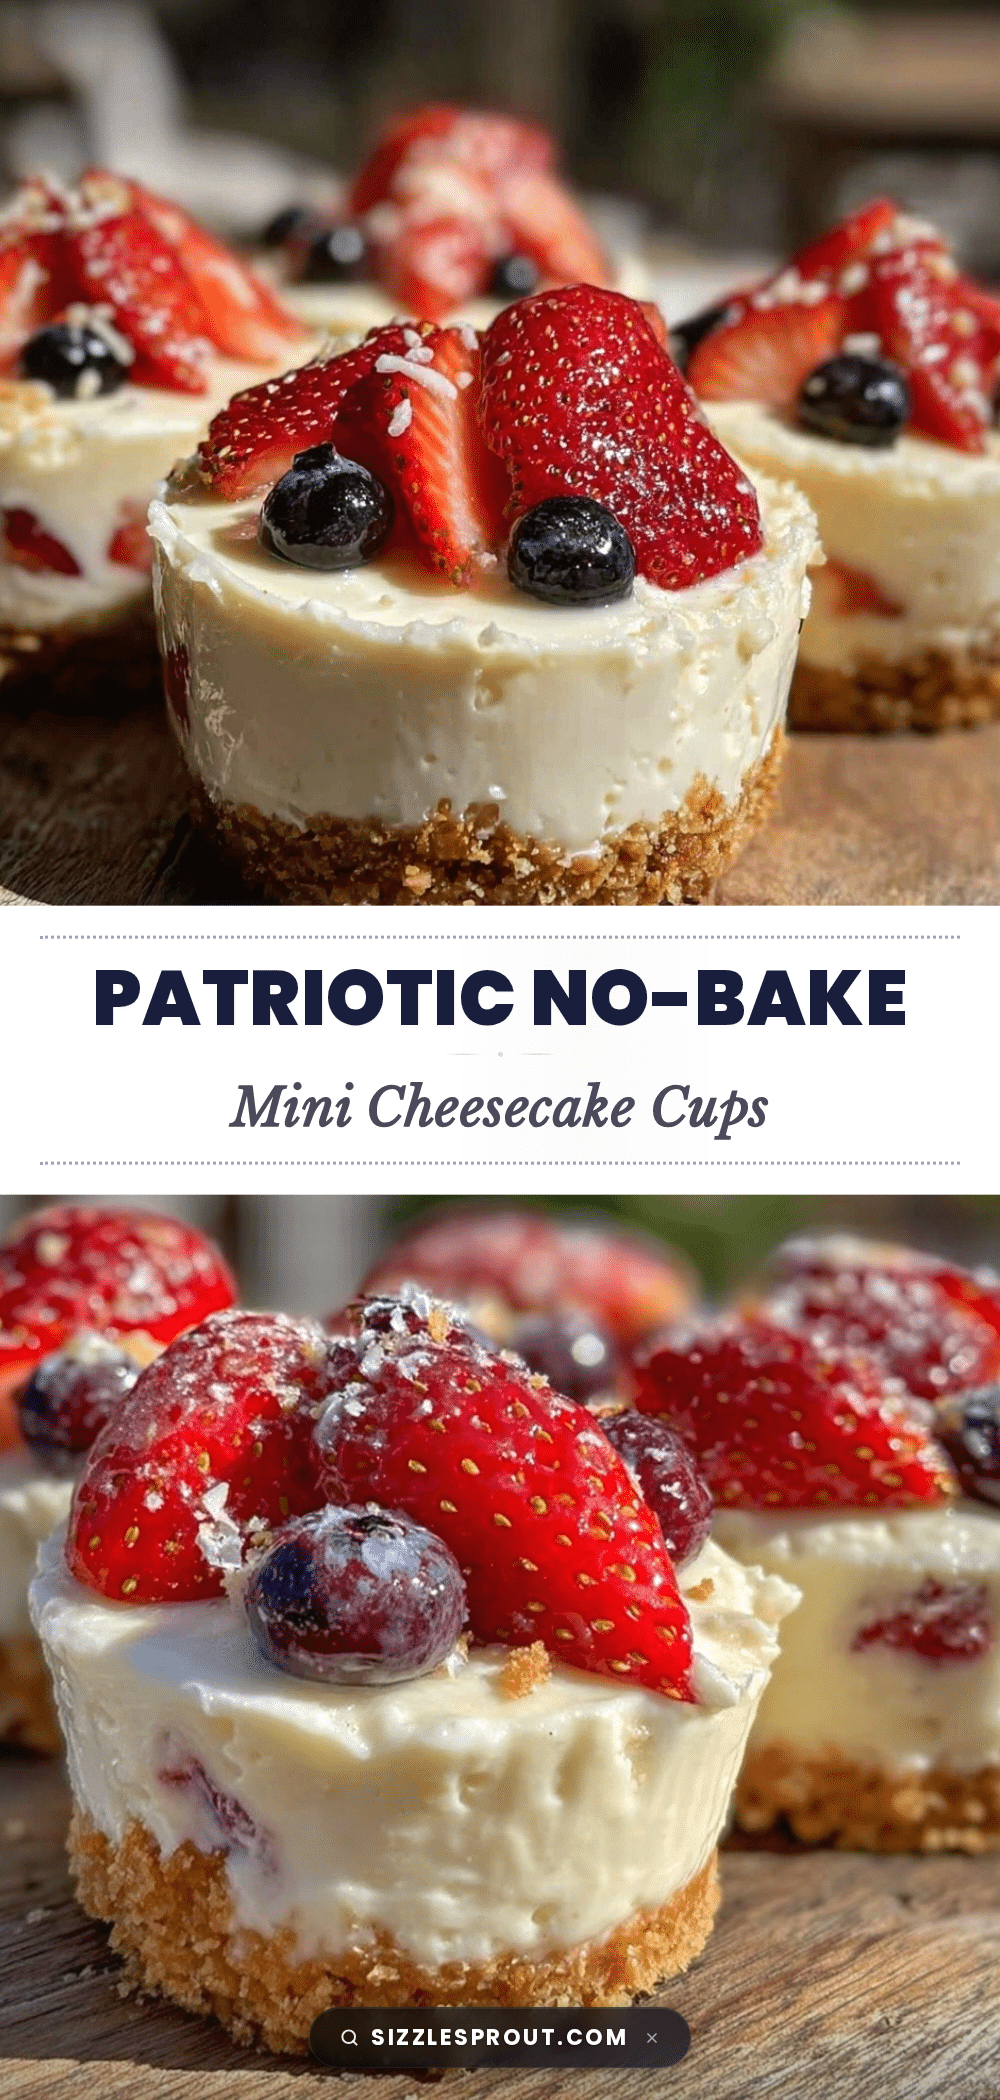
Festive No-Bake Mini American Flag Cheesecake Cups
A quick and easy no-bake dessert featuring creamy cheesecake filling, crunchy graham cracker crust, and fresh berries arranged as an American flag. Perfect for patriotic celebrations and summer parties.
- Prep Time: 20 minutes
- Cook Time: 0 minutes
- Total Time: 2 hours 20 minutes
- Yield: 12 mini cheesecake cups 1x
- Category: Dessert
- Cuisine: American
Ingredients
- 1 ½ cups (150g) graham cracker crumbs
- 5 tablespoons (70g) unsalted butter, melted
- 2 tablespoons (25g) granulated sugar
- 8 oz (225g) cream cheese, softened
- ¾ cup (90g) powdered sugar
- 1 cup (240ml) heavy cream
- 1 teaspoon pure vanilla extract
- 1 tablespoon fresh lemon juice
- 1 cup (150g) fresh strawberries, sliced
- ½ cup (75g) fresh blueberries
- Whipped cream or extra cheesecake filling (optional)
Instructions
- Crush 1 ½ cups (150g) of graham crackers into fine crumbs using a food processor or rolling pin.
- In a medium bowl, mix the graham cracker crumbs with 5 tablespoons (70g) melted unsalted butter and 2 tablespoons (25g) sugar until the mixture resembles wet sand.
- Spoon about 2 tablespoons (30g) of the crust mixture into each mini cup and press down firmly to create an even, compact base.
- Chill the cups in the fridge for at least 10 minutes to set while preparing the filling.
- In a large mixing bowl, beat 8 oz (225g) softened cream cheese with ¾ cup (90g) powdered sugar until smooth and creamy.
- Add 1 teaspoon vanilla extract and 1 tablespoon fresh lemon juice to the cream cheese mixture and mix just to combine.
- In a separate bowl, whip 1 cup (240ml) heavy cream with an electric mixer until stiff peaks form.
- Gently fold the whipped cream into the cream cheese mixture using a spatula, being careful not to overmix.
- Spoon or pipe the cheesecake filling on top of the chilled crust in each cup, leaving room at the top for decoration.
- Arrange sliced strawberries horizontally across the top for red stripes.
- Use dollops or lines of whipped cream or extra cheesecake filling for the white stripes.
- Place blueberries tightly together in one corner to mimic the blue star field of the American flag.
- Chill the assembled cups in the refrigerator for at least 2 hours or overnight to set properly.
Notes
Soften cream cheese to room temperature before mixing to avoid lumps. Fold whipped cream gently into the cream cheese mixture to keep it light and airy. Chill for at least 2 hours for best texture. Press crust firmly to prevent sogginess. Pre-slice strawberries and keep berries dry for easier decoration.
Nutrition
- Serving Size: 1 mini cheesecake cu
- Calories: 250
- Fat: 18
- Carbohydrates: 20
- Protein: 4
Keywords: no-bake cheesecake, mini cheesecake cups, patriotic dessert, American flag dessert, Fourth of July dessert, easy cheesecake, summer dessert