Love this? Save it for later!
Share the inspiration with your friends
“You wouldn’t believe how this little tart saved my summer party,” my friend Jess said, sliding a small jar of honey across the table. It was a scorching Saturday afternoon, and honestly, I was halfway through planning a dessert disaster. You know that feeling when the oven feels more like a sauna and the idea of turning it on is just nope? Well, I was there, desperately needing something cool, sweet, and impressive without the usual fuss.
Jess wasn’t a pastry chef or anything close; she’s a graphic designer who swears by simple, no-fuss recipes that taste like you spent hours in the kitchen. That day, she handed me a tiny tart topped with a glossy drizzle of salted honey and a cloud of mascarpone cream. I took one bite, and the rest of the party faded into the background. The balance of creamy, sweet, and just a hint of salt was unlike anything I’d expected.
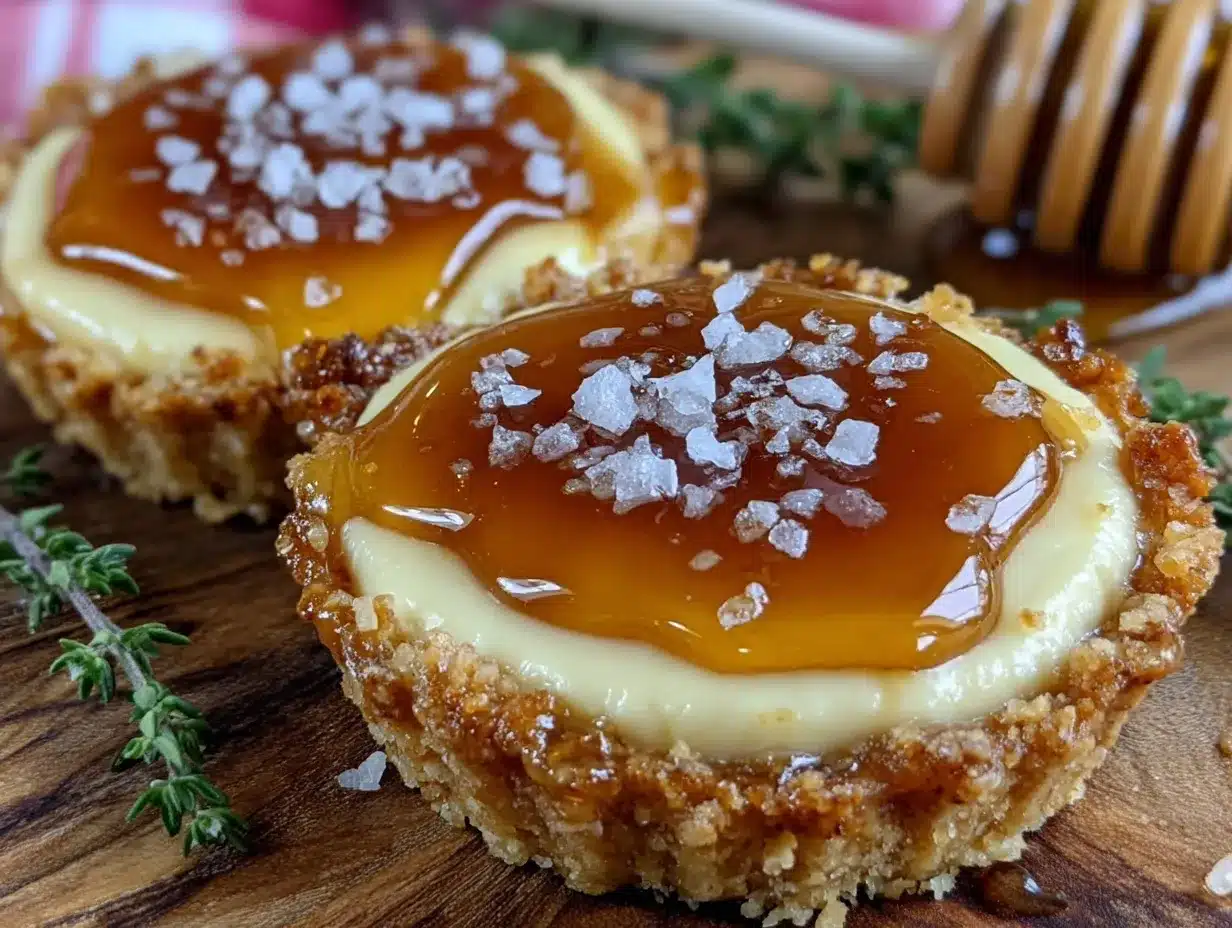
What made these individual no-bake salted honey mascarpone tarts stand out wasn’t just the flavor — it was the way they came together quickly, looked stunning, and felt like a little luxury without the heat or stress. Jess joked that she invented them when the power went out at her apartment, and she refused to surrender to summer dessert disappointment. I mean, maybe you’ve been there too—stuck between wanting something indulgent but refusing to sweat over it.
Since that day, these tarts have become my go-to for warm-weather gatherings, last-minute guests, or even just a quiet night when I want a treat without the hassle. And honestly, they’re one of those recipes that remind me how sometimes the simplest ingredients, combined just right, can feel downright decadent.
Why You’ll Love This Recipe
Having tested this recipe countless times (and yes, taste-tested with many willing volunteers), I can say this no-bake salted honey mascarpone tart has a lot going for it:
- Quick & Easy: Ready in under 30 minutes with no oven required — perfect for those hot summer days or last-minute dessert needs.
- Simple Ingredients: Uses pantry staples like honey, mascarpone, and a few easy-to-find extras; no complicated or exotic items needed.
- Perfect for Summer Entertaining: Individual portions mean less mess and fuss, ideal for outdoor parties or casual get-togethers.
- Crowd-Pleaser: The combination of creamy mascarpone and salted honey appeals to all ages — even skeptics can’t resist.
- Unbelievably Delicious: That perfect mix of sweet, salty, and creamy textures hits all the right notes for a comforting yet sophisticated treat.
What sets this recipe apart? It’s the way the mascarpone is gently whipped to just the right fluffiness, giving the tart a light, airy feel without sacrificing richness. The salted honey drizzle isn’t just a garnish; it’s a flavor game-changer that ties everything together beautifully. I’ve even swapped out the usual crushed cookies for almond and oat bases to add a subtle nutty crunch that keeps you coming back for more.
This tart isn’t just dessert; it’s that moment of bliss when you close your eyes after the first bite—comfort food with a little fancy twist that somehow feels like summer in a bite. Whether you’re aiming to impress friends or just treat yourself, this recipe delivers without the stress.
What Ingredients You Will Need
These no-bake salted honey mascarpone tarts use a handful of straightforward ingredients that work together to create something truly special. Most are pantry staples, with a few fresh touches to keep things vibrant.
- For the Crust:
- 1 cup (100g) almond flour (adds a subtle nutty crunch)
- 1/2 cup (50g) rolled oats (for texture and body)
- 3 tbsp (45g) unsalted butter, melted (use dairy-free butter if preferred)
- 2 tbsp (30g) maple syrup or honey (to bind and add sweetness)
- Pinch of sea salt (balances the sweetness)
- For the Filling:
- 1 cup (240g) mascarpone cheese, room temperature (I recommend BelGioioso for smooth texture)
- 1/2 cup (120ml) heavy cream or coconut cream (for a dairy-free twist)
- 1/4 cup (30g) powdered sugar, sifted (adjust to taste)
- 1 tsp vanilla extract (adds warmth and depth)
- For the Topping:
- 2-3 tbsp salted honey (a drizzle of Maldon or fleur de sel honey works wonders)
- Fresh berries or edible flowers for garnish (optional but adds a pop of color and freshness)
If you want to switch things up, you can swap almond flour for gluten-free all-purpose flour for a different crust texture or use agave syrup instead of honey for a milder sweetness. The mascarpone filling can also be lightened with Greek yogurt if you’re after a tangier flavor.
Equipment Needed
- Mixing bowls – a medium and a large one will do
- Electric hand mixer or stand mixer – for whipping the mascarpone and cream together smoothly
- Measuring cups and spoons – accuracy matters for balance
- Small tart pans or individual serving glasses – I use 4-ounce (120 ml) jars for a rustic look
- Spatula – to fold ingredients gently
- Food processor (optional) – handy for finely grinding oats if you want a finer crust texture
For those without a mixer, a sturdy whisk and some elbow grease will do just fine—just expect a bit more arm workout! If you don’t have tart pans, mason jars or small ramekins work beautifully for these individual servings. I’ve found that using a silicone spatula makes scraping the bowl much easier and less messy.
Preparation Method
- Prepare the crust: In a medium bowl, combine almond flour, rolled oats, and a pinch of sea salt. Pour in the melted butter and maple syrup. Stir until the mixture clumps together like wet sand—if it feels too dry, add a teaspoon of water. This should take about 5 minutes.
- Form the tart bases: Press the crust mixture firmly into the bottoms of your tart pans or jars, about 1/4 inch (0.6 cm) thick. Use the back of a spoon or your fingers to create an even layer. Pop them in the fridge to chill while you prepare the filling (10 minutes).
- Whip the mascarpone filling: In a large mixing bowl, beat the mascarpone cheese until smooth using your mixer. Add heavy cream, powdered sugar, and vanilla extract. Continue whipping on medium speed until soft peaks form and the mixture looks light and fluffy—this will take around 3-4 minutes. Watch carefully; overwhipping can cause it to split.
- Fill the tarts: Spoon or pipe the mascarpone mixture over the chilled crusts, smoothing the tops gently. The filling should hold its shape but still look creamy and inviting.
- Chill again: Refrigerate the filled tarts for at least 1 hour to set. This step is key for that perfect texture—you want the filling firm enough to slice but still soft and airy.
- Finish with the salted honey drizzle: Just before serving, drizzle salted honey generously over each tart. If you like, add a few fresh berries or edible flowers for that extra wow factor. Serve chilled and enjoy immediately.
If your filling looks too thick or grainy, it probably means the mascarpone was too cold or overmixed—letting it sit at room temperature for a few minutes before whipping helps. Also, be careful with the honey drizzle; too much can overpower the delicate creaminess.
Cooking Tips & Techniques
One of the trickiest parts of this no-bake tart is getting the mascarpone filling just right. Here are some tips from my many trial runs:
- Room temperature mascarpone: Letting the mascarpone sit out for 15-20 minutes before whipping makes it blend more smoothly and prevents lumps.
- Whip gently: Use medium speed and keep an eye on the texture. Overwhipping mascarpone can cause it to separate into butter and liquid, which is not what you want.
- Chill the crust: Pressing and chilling the crust before filling helps it hold together and prevents sogginess.
- Salted honey is key: Don’t skip this step! The pinch of salt in the honey drizzle lifts the whole flavor profile and balances the sweetness perfectly.
- Multi-tasking: While the crust chills, whip the filling—that way you save time and keep things efficient.
- Common mistake: Forgetting to chill the tarts before serving. You want the filling firm enough to hold, but still creamy; patience here pays off.
Honestly, I learned the hard way that skipping the chilling step results in a messier tart that just doesn’t cut nicely. Also, I once tried using plain honey without salt—big mistake. The tart tasted too sweet and one-dimensional.
Variations & Adaptations
This recipe is wonderfully flexible, which is why I keep coming back to it:
- Dietary swaps: Use coconut cream instead of heavy cream and dairy-free mascarpone alternatives to make it vegan-friendly. For the crust, swap butter with coconut oil.
- Seasonal flavors: Add lemon zest or a splash of orange liqueur to the filling for a bright twist in spring. In fall, sprinkle some cinnamon or nutmeg into the crust for a cozy vibe.
- Flavor twists: Try mixing in a tablespoon of espresso powder into the filling for a mocha version. Or swirl in some fruit preserves like fig or raspberry for an extra pop of flavor.
- Different crusts: Use crushed graham crackers for a classic touch, or swap in pistachio meal for a nuttier, vibrant base.
- Personal favorite: I once added toasted coconut flakes to the crust and a sprinkle of chili flakes on the honey drizzle for a surprising kick that my guests are still talking about!
Serving & Storage Suggestions
These tarts are best served chilled straight from the fridge, letting the creamy filling and crunchy crust contrast perfectly. They look stunning on a simple white plate with a few fresh berries or mint leaves scattered around.
Pair them with a light sparkling wine or a cup of herbal tea to balance the richness. For summer brunch, they’re a delightful finish after savory dishes like a fresh green salad or crispy garlic chicken.
Store leftover tarts in an airtight container in the refrigerator for up to 3 days. The crust will hold up well, but after a couple of days, it may soften slightly as it absorbs moisture from the filling. You can refresh the crunch by briefly chilling them uncovered before serving again.
Reheat is not recommended, but letting them sit at room temperature for 10 minutes before serving helps bring out the full flavor and creaminess. Flavors actually deepen after resting—so they’re sometimes even better the next day!
Nutritional Information & Benefits
Each individual tart (about 4 ounces/115g) roughly contains:
| Calories | 320 |
|---|---|
| Fat | 24g |
| Carbohydrates | 18g |
| Protein | 5g |
The almond flour crust provides healthy fats and fiber, making it more satisfying than a typical sugar-laden pastry. Mascarpone cheese offers calcium and protein, while the honey adds natural sweetness with antioxidants. For those watching carbs, swapping maple syrup for a low-glycemic sweetener can lighten the sugar load.
From a wellness perspective, this tart is a treat that feels indulgent but also nourishes a bit, thanks to its real ingredients and balanced flavors. Just don’t forget to enjoy it mindfully!
Conclusion
This decadent individual no-bake salted honey mascarpone tart recipe is one of those rare finds that makes you feel like a dessert pro without breaking a sweat. It’s quick, beautiful, and offers that perfect harmony of creamy, sweet, and salty that you’ll want to whip up again and again.
Feel free to tweak the ingredients or toppings to suit your taste, whether you want it lighter, vegan, or with a seasonal twist. I love how versatile and forgiving this recipe is, which means it fits into many different occasions and moods.
If you give this recipe a try, I’d love to hear how you make it your own—drop a comment or share your adaptations. Trust me, once you taste that salted honey magic, you’ll understand why this tart has become one of my summer favorites. Happy baking (or rather, no-baking)!
FAQs
Can I make these tarts ahead of time?
Absolutely! Prepare them up to 24 hours in advance and keep refrigerated. Just add the honey drizzle right before serving for the best texture and flavor.
What if I don’t have mascarpone cheese?
You can substitute with cream cheese softened and whipped with a bit of heavy cream and powdered sugar, though the texture will be slightly denser.
Is there a gluten-free option?
Yes, this recipe is naturally gluten-free when using almond flour and oats labeled gluten-free. Always check your oat packaging if gluten sensitivity is a concern.
How do I store leftover tarts?
Store them in an airtight container in the fridge for up to 3 days. The crust may soften over time but chilling uncovered briefly before serving can help refresh the texture.
Can I freeze these tarts?
Freezing isn’t recommended because the mascarpone filling can change texture once thawed, becoming grainy. It’s best to enjoy them fresh or within a few days refrigerated.
Pin This Recipe!
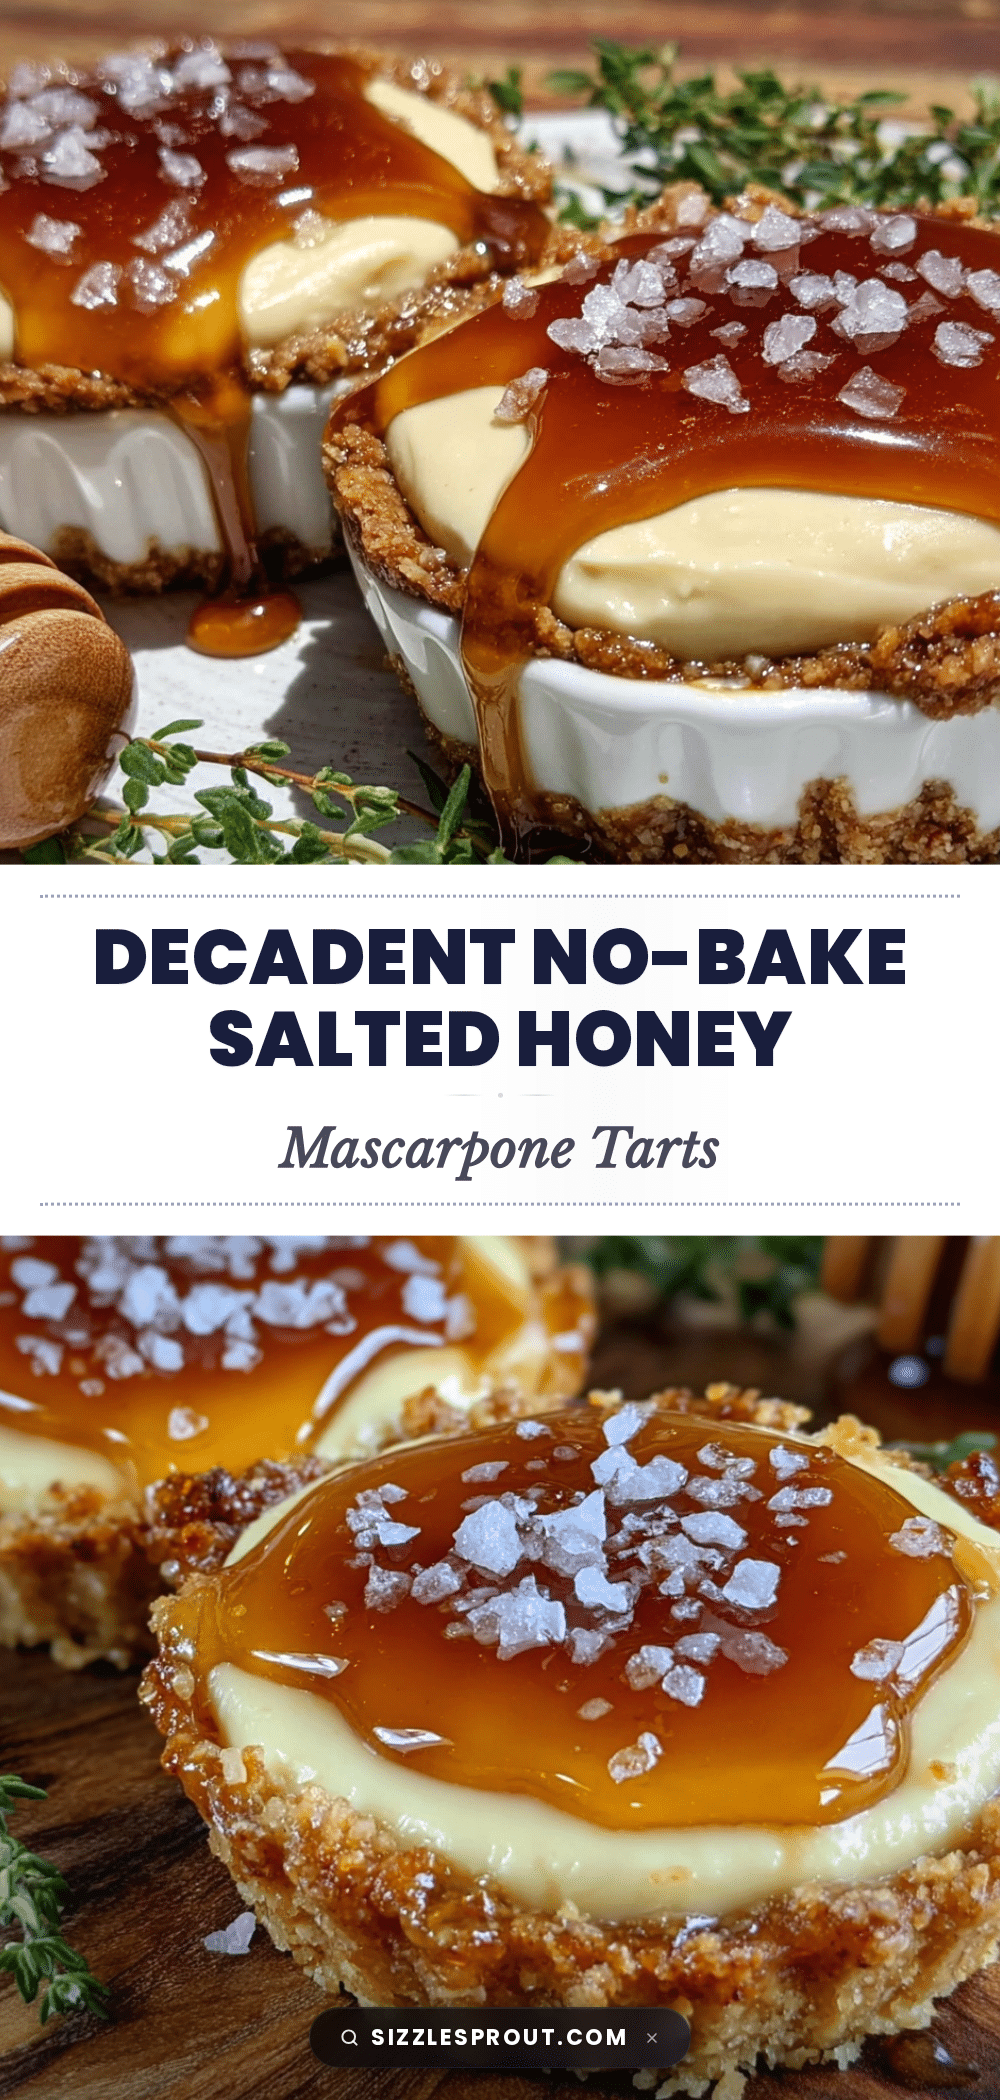
Decadent No-Bake Salted Honey Mascarpone Tarts

These no-bake salted honey mascarpone tarts are quick, easy, and perfect for summer. They combine a creamy mascarpone filling with a nutty almond-oat crust and a drizzle of salted honey for a luxurious yet simple dessert.
- Prep Time: 15 minutes
- Cook Time: 0 minutes
- Total Time: 1 hour 15 minutes
- Yield: 6 servings 1x
- Category: Dessert
- Cuisine: American
Ingredients
- 1 cup (100g) almond flour
- 1/2 cup (50g) rolled oats
- 3 tbsp (45g) unsalted butter, melted
- 2 tbsp (30g) maple syrup or honey
- Pinch of sea salt
- 1 cup (240g) mascarpone cheese, room temperature
- 1/2 cup (120ml) heavy cream or coconut cream
- 1/4 cup (30g) powdered sugar, sifted
- 1 tsp vanilla extract
- 2–3 tbsp salted honey
- Fresh berries or edible flowers for garnish (optional)
Instructions
- Prepare the crust: In a medium bowl, combine almond flour, rolled oats, and a pinch of sea salt. Pour in the melted butter and maple syrup. Stir until the mixture clumps together like wet sand—if it feels too dry, add a teaspoon of water. This should take about 5 minutes.
- Form the tart bases: Press the crust mixture firmly into the bottoms of your tart pans or jars, about 1/4 inch (0.6 cm) thick. Use the back of a spoon or your fingers to create an even layer. Pop them in the fridge to chill while you prepare the filling (10 minutes).
- Whip the mascarpone filling: In a large mixing bowl, beat the mascarpone cheese until smooth using your mixer. Add heavy cream, powdered sugar, and vanilla extract. Continue whipping on medium speed until soft peaks form and the mixture looks light and fluffy—this will take around 3-4 minutes. Watch carefully; overwhipping can cause it to split.
- Fill the tarts: Spoon or pipe the mascarpone mixture over the chilled crusts, smoothing the tops gently. The filling should hold its shape but still look creamy and inviting.
- Chill again: Refrigerate the filled tarts for at least 1 hour to set. This step is key for that perfect texture—you want the filling firm enough to slice but still soft and airy.
- Finish with the salted honey drizzle: Just before serving, drizzle salted honey generously over each tart. If you like, add a few fresh berries or edible flowers for that extra wow factor. Serve chilled and enjoy immediately.
Notes
Let mascarpone sit at room temperature for 15-20 minutes before whipping to avoid lumps. Whip gently to avoid splitting. Chill crust before filling to prevent sogginess. Drizzle salted honey just before serving to balance sweetness. If crust is too dry, add a teaspoon of water. Store leftovers in airtight container in fridge up to 3 days. Not recommended to freeze.
Nutrition
- Serving Size: 1 tart (about 4 ounc
- Calories: 320
- Fat: 24
- Carbohydrates: 18
- Protein: 5
Keywords: no-bake, salted honey, mascarpone, tarts, summer dessert, easy dessert, gluten-free, individual tarts